Introduction

The official InterGenOS documentation
Welcome to the official documentation for InterGenOS. The system is built from source with public recipes, nothing about how it works is hidden, and the user stays in control of their own machine.
This wiki is organized into two tracks:
- End-User Guide — installing with FORGE, the local AI assistant, building from source, GPU compute & AI workloads, the Security Handbook, desktop use, administration, and troubleshooting.
- Developer & Contributor Guide — internals and contribution workflows for packaging, FORGE, the AI assistant, the ROCm-from-source pipeline, security review, and localization.
How this documentation works
- Self-contained. No external CDNs, scripts, or trackers — the same posture as the rest of the system.
- Offline-first, and it ships with the system. The wiki has no external dependencies to render or read, and it is not a website you have to be online to consult: the full documentation is installed on your machine at
/usr/share/doc/intergenos/wiki/and opens in a browser with no network connection at all. - Grounded in curated, verified answers. For common how-tos the local AI assistant serves curated answers pinned at authoring time to a canonical documentation page, so the guidance and the docs cannot drift. Each answer carries a link to the page it came from — your installed local copy first, the online page second — so you can open the source and read it in full. Before citing a page, the assistant checks that page’s bytes against a release-signed, per-page SHA-256 manifest; a page that does not match its pinned hash is not cited at all, rather than cited with a caveat.
- Versioned by release — each release ships the documentation that matches it.
This wiki documents InterGenOS as it ships today, and it is revised alongside the system — so what you read here describes the machine in front of you.
Start Here
Welcome to the InterGenOS End-User Guide. InterGenOS is a Linux distribution built entirely from source, with one purpose behind every default: giving you a machine you understand, can modify, and can trust. Security is not first. It is only.
This guide is written for two kinds of reader, and you can move between them freely:
- End users who want to set up the desktop, manage software, and use the onboard AI assistant.
- Contributors who want to understand how InterGenOS is built and how to work in the source tree.
This page orients you to those tracks and walks you through the first thing you will see on a new install: the Welcome app.
What ships today
Releases are named R001, R002, … for major releases and R001.1, R001.2, … for point releases. This page describes what ships in the current release line; for the current release itself and its date, see the main repository README, or the release notes published beside each installation image at repo.intergenos.org/iso. On an installed system, cat /etc/os-release shows the build identity of the image your system came from.
- Desktop: GNOME 49 on Wayland, with the InterGenOS shell theme.
- Built from source: the whole system is compiled from source across seven package tiers (toolchain, core, base, desktop, ai, compute, extra). The total is 1000+ package templates; tier counts drift between builds, so treat any number you see as a snapshot, not a fixed promise.
- Package manager:
pkm— install, remove, search, verify, and query dependencies. - Installer: Forge — partitions the disk, deploys the system image, and sets up a signed boot chain you own.
- Trust chain: a signed Secure Boot chain (firmware enforcement is off by default — enable it with a one-time MOK enrollment), dm-verity integrity over the read-only system image, and UKI (unified kernel image) signing. You can verify these yourself.
- InterGen — your onboard AI assistant: tiered, hardware-detected, offline-first, local, with zero telemetry (on-device models).
- InterGen Sentinel — a pluggable security scanner. The default is local-only (Local-Rules plus Local-Qwen). Six cloud providers are opt-in: Claude (Anthropic), Gemini (Google), Copilot (Microsoft), ChatGPT (OpenAI), Grok (xAI), and DeepSeek. You choose which, if any, reaches across the network.
The desktop ships with GNOME on Wayland today. Switchable desktop environments such as KDE Plasma are planned, not shipped — this guide describes only what is in your hands now.
Guide tracks
| If you want to… | Go to |
|---|---|
| Install InterGenOS on real hardware | The Forge installer guide |
| Set up the desktop and your first-boot choices | This page, then the Desktop guide |
Manage software with pkm | The package manager guide |
| Meet and configure the InterGen assistant | The InterGen guide |
| Understand how InterGenOS is built | The Developer & Contributor guide |
| Get a quick answer | FAQ |
A visual tour of first boot
The first time you log in to a fresh InterGenOS install, the Welcome app opens. It is a short, skippable walk through the choices that make the machine yours: appearance, layout, extensions, shortcuts, services, terminal prompt, and your AI assistant. Nothing here is permanent — every choice can be changed later in Settings, in the Extensions app, in the InterGen app, or by re-running the Welcome app.
Step 1 — Welcome
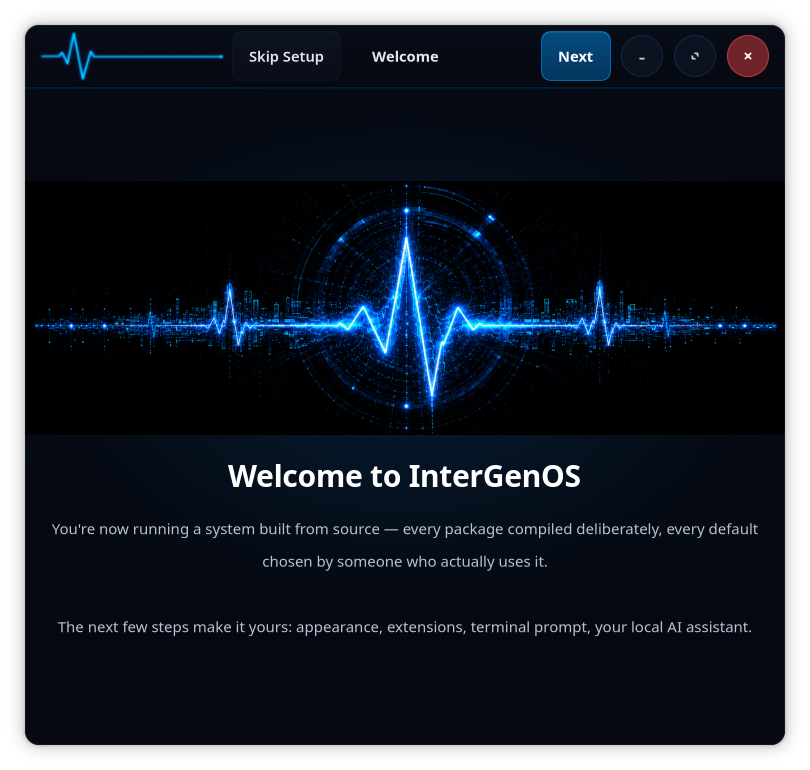
You are now running a system built from source. The next few steps make it yours. A Skip Setup option is available in the top bar if you would rather configure things later.
Step 2 — Choose your look
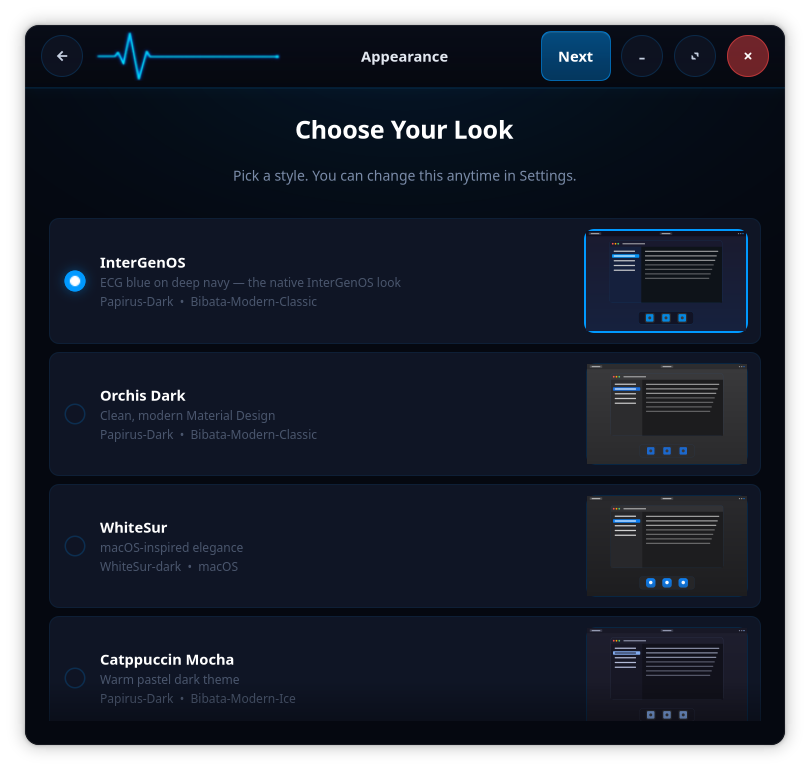
Pick a visual style. The native InterGenOS look (ECG blue on deep navy) is selected by default, with alternates such as Orchis Dark, WhiteSur, and Catppuccin Mocha. Each entry lists the icon and cursor themes it applies. You can change this anytime in Settings.
Step 3 — Choose your layout
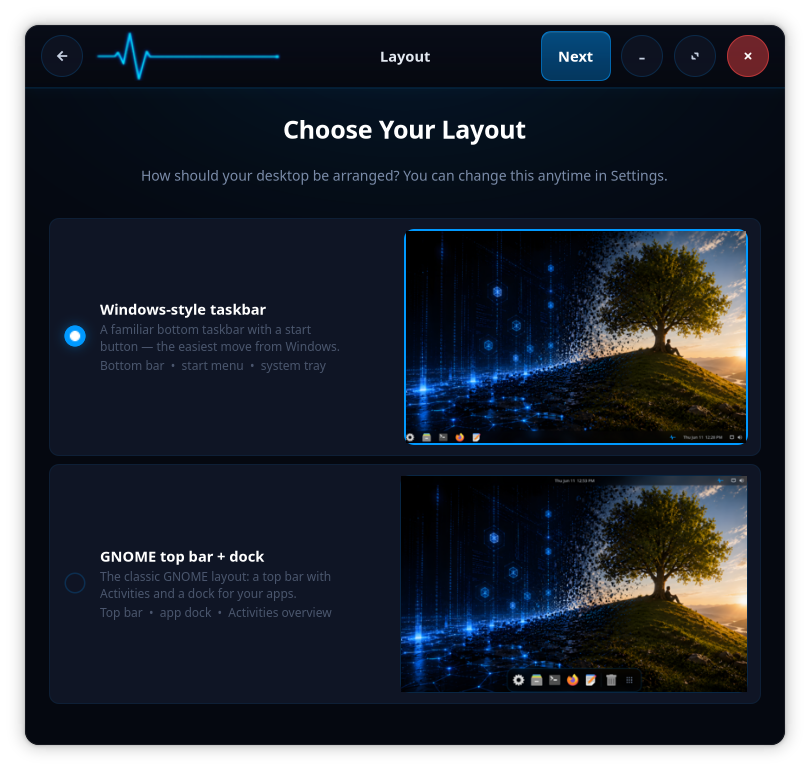
Choose how the desktop is arranged: a Windows-style bottom taskbar with a start menu and system tray, or the classic GNOME top bar plus dock with the Activities overview. This is also changeable later in Settings.
Step 4 — Extensions
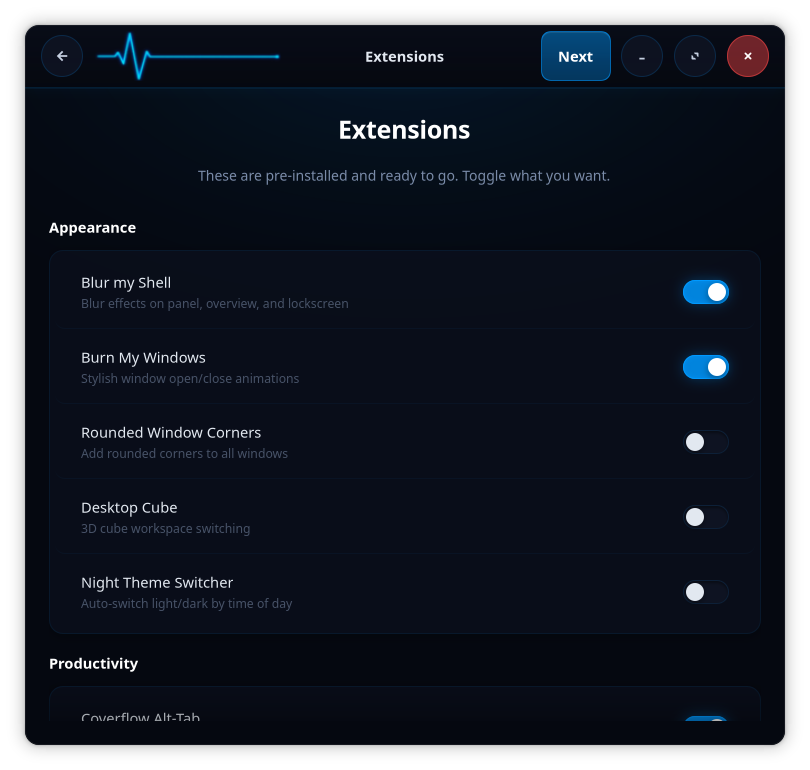
GNOME Shell extensions are pre-installed and ready. Toggle what you want — appearance effects such as Blur my Shell and Burn My Windows, productivity helpers, and more. Everything here is opt-in per toggle.
Step 5 — Keyboard shortcuts
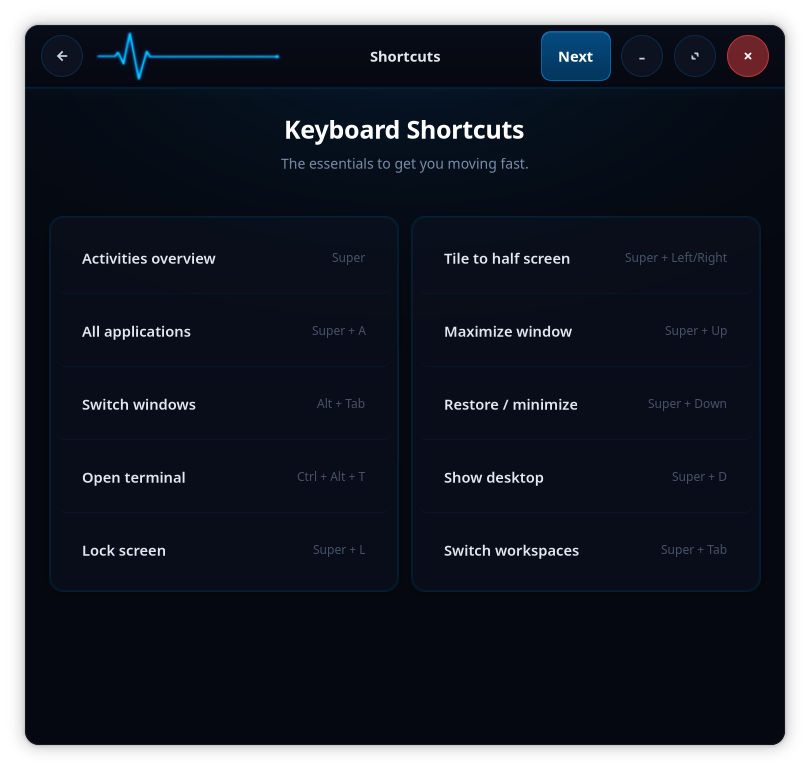
A reference card of the essentials: Activities overview (Super), all applications (Super + A), open terminal (Ctrl + Alt + T), lock screen (Super + L), window tiling, and workspace switching, among others. Worth a glance before you move on.
Step 6 — Enable services
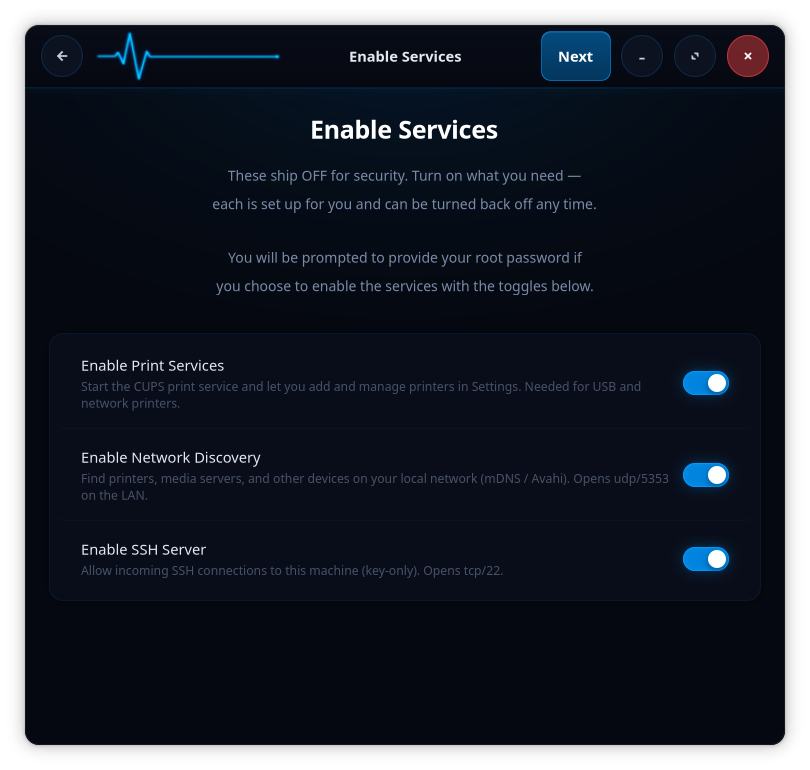
This is the security posture in plain view: these services ship OFF. InterGenOS installs locked down by default. Turn on only what you need — print services (CUPS), local network discovery (mDNS / Avahi, opens udp/5353 on the LAN), and a key-only SSH server (opens tcp/22). You are prompted for your root password when you enable any of them, and each can be turned back off at any time.
Step 7 — Choose your prompt
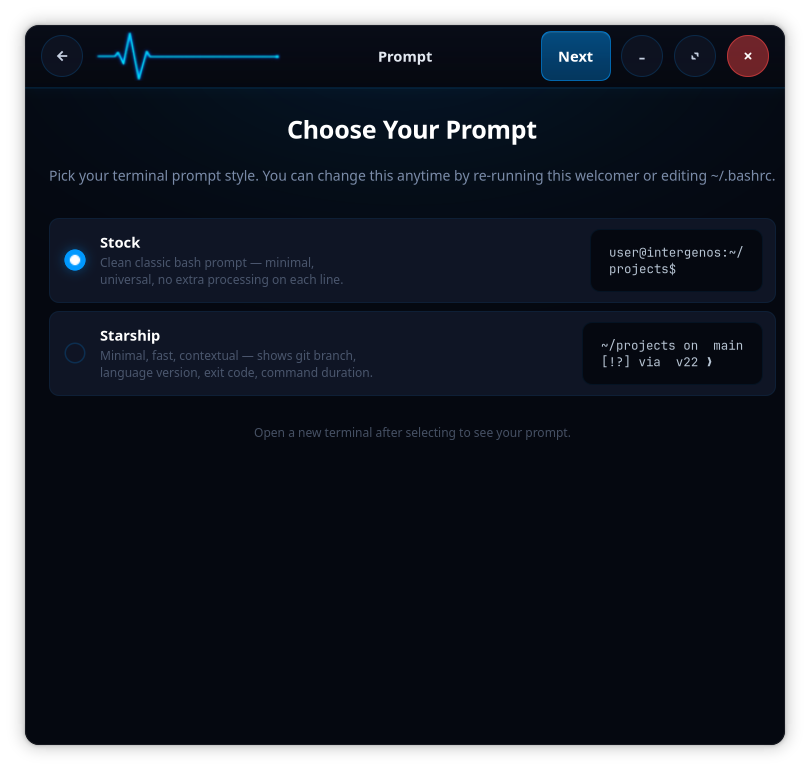
Pick your terminal prompt style: the stock classic bash prompt (minimal, universal, no per-line processing) or Starship (contextual, showing git branch, language version, exit code, and command duration). Open a new terminal after selecting to see it. You can change this later by re-running the Welcome app or editing ~/.bashrc.
Step 8 — Meet InterGen
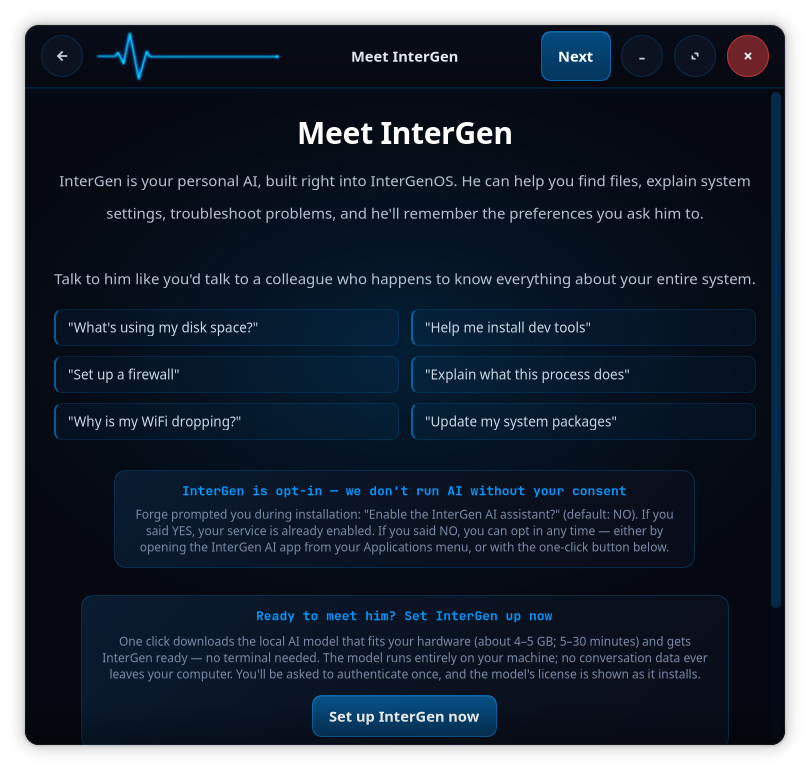
InterGen is your onboard AI assistant, built into InterGenOS. It can help you find files, explain system settings, troubleshoot, and remember the preferences you set. InterGen is opt-in — it does not run without your consent. If you choose Set up InterGen now, Forge downloads the local AI model that fits your hardware (the 2B model that ships today is about a 1.2 GB model file, roughly a 2 GB set on disk; the 9B tier is about 5.5 GB plus its vision projector) and gets it ready. The model runs entirely on your machine; no conversation data leaves the computer, and the model’s license is shown at install. You can also enable it later from the InterGen app in your Applications menu.
For the assistant’s full capabilities, including the permission model and InterGen Sentinel’s pluggable scanners, see the InterGen guide. Cloud review through any of the six opt-in providers is handled through Phone-A-Friend (Frontier/Cloud Escalation), which never reaches the network unless you choose a provider.
Step 9 — You are part of something
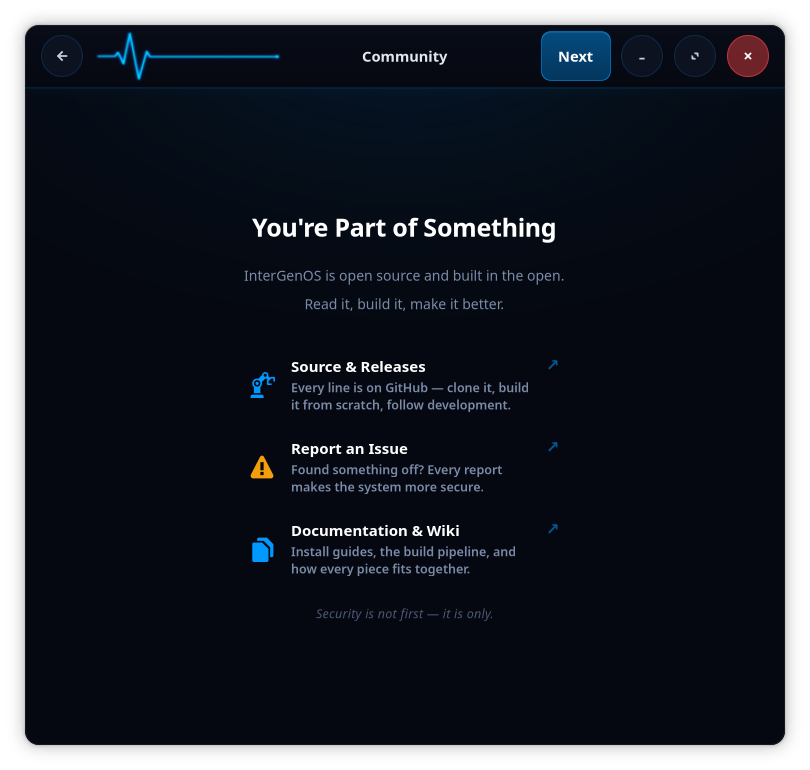
InterGenOS is open source and built in the open: read it, build it, make it better. This step links out to the source and releases, the issue tracker (every report makes the system more secure), and the documentation and wiki.
Step 10 — You are all set
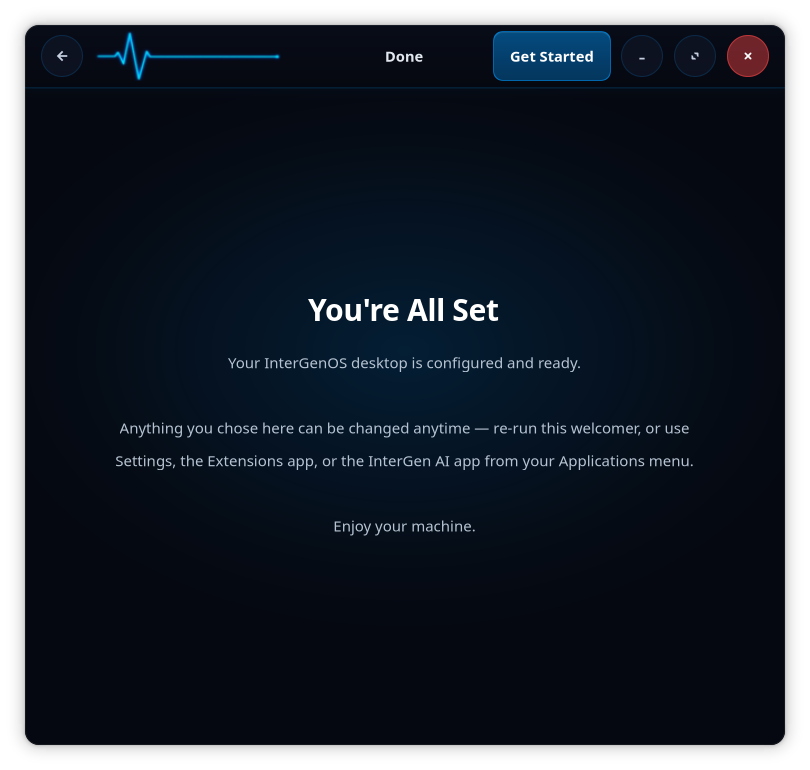
Your desktop is configured and ready. Anything you chose here can be changed anytime — re-run the Welcome app, or use Settings, the Extensions app, or the InterGen AI app from your Applications menu. Choose Get Started and the machine is yours.
Where to go next
- New to the desktop? Continue to the Desktop guide.
- Installing on hardware? Start with the Forge installer guide.
- Want software? See the package manager guide.
- Curious how it is all built? The Developer & Contributor guide covers the from-source lifecycle, signing, and the rules that decide what ships.
A machine you understand, can modify, and can trust. That is the whole point.
InterGenOS in One Page
The fast path. Read the 30-second version to know what InterGenOS is; read the 5-minute version to know whether it is for you. Everything else on this site is detail underneath these two.
The 30-second version
InterGenOS is a built-from-source Linux distribution with one organizing principle: security is not first — it is only. Every default is hardened, the entire boot chain is signed and checkable by you, and it ships a local AI assistant that never sends your data anywhere unless you explicitly opt in. The goal is a machine you understand, can modify, and can trust — where you never have to take a security claim on faith, because you can verify it yourself.
The 5-minute version
What it is. A security-only desktop Linux, assembled from source (Linux From Scratch lineage), shipping GNOME 49 on Wayland. It is not a general-purpose distribution with security added on — security is the lens every decision passes through.
The four pillars:
- Security as the only lens. Hardened kernel (integrity lockdown, enforced module signing), a default-deny firewall, mandatory access control, and a signed boot chain. Features that cannot be made safe are not shipped.
- You control the machine. Built from source and fully transparent: nothing about how it works is hidden. The package manager records a hash of every file it installs, so you can re-verify the whole system at any time.
- Verify, don’t trust. Every security claim is something you run a command and confirm — see Verify It Yourself. A claim you cannot check is just marketing.
- AI that stays local. InterGen is an offline-first assistant with zero telemetry. It is useful out of the box; cloud providers are opt-in and explicit, never on by default.
What ships today, honestly. The wiki is careful to separate enforced today from built and coming — for example, the boot chain is fully signed, Secure Boot has been validated end to end, and the installer stages your own Machine Owner Key and enrollment password so you can enable Secure Boot after installing; a default install still ships with firmware enforcement off. You will never find a reassuring headline here that the shipped configuration does not back up.
How to try it. The lowest-risk way to look is in a virtual machine — see Installing in a Virtual Machine. When you are ready for hardware, the FORGE installer walks you from the live environment to a verified install, and nothing is written to disk until you confirm.
Where to go from here:
- Why InterGenOS Exists — how it compares to Fedora, Arch, NixOS, Qubes, and others, and when one of those is the better fit.
- What InterGenOS Is — the full picture.
- Threat Model & Security Philosophy — who this is built to defend against, and the doctrine behind it.
- Verify It Yourself — prove the claims on your own machine.
What InterGenOS Is
InterGenOS is a Linux distribution built entirely from source, designed around a single conviction: the person sitting at the machine should be in control of it. Not the vendor, not a telemetry pipeline, not an auto-updater that changes the system while you sleep. Every package is compiled from source with a deliberate choice behind it, and every default is there to give you a machine you understand, can modify, and can trust.
This page explains the model that shapes those choices, the user-control vision behind them, and — just as important — what InterGenOS deliberately leaves out. It is philosophy, not a command reference. For setup and day-to-day use, see the FAQ and the Forge install guide.
For the current release and its date, see the main repository README.
Security is not first. It is only.
Most systems treat security as the top item on a list of priorities. InterGenOS does not have that list. Security is not the first concern competing against convenience, speed, or convention. It is the only lens that gets a veto.
We build assuming adversaries have superhuman vulnerability-discovery capability. AI-assisted vulnerability discovery is treated as a foregone conclusion, not a theoretical threat, and that capability will only proliferate. Under that assumption, the things that get a system compromised are rarely dramatic. They are the quiet ones: a masked error, a blanket “ignore failures,” an unverified “known-good” claim, a feature that shipped degraded instead of fixed. Those are exactly what a capable adversary exploits.
So the working question behind every decision is the same: does this eliminate a silent failure and turn an unverified assumption into a checked gate? If an option masks rather than verifies, it is wrong, and no amount of convenience rescues it.
In practice that means the system is hardened from the moment it boots, not by a script you run afterward:
- A signed boot chain. From a Microsoft-signed shim through GRUB to the Linux kernel and Unified Kernel Images. Secure Boot enforcement is optional and off by default on a fresh install; with it enabled, unsigned kernel modules are not trusted.
- dm-verity integrity. A verified-integrity hash tree is generated over the read-only system image, and its root hash is sealed into the signed kernel command line. A tampered system image cannot boot under a validly signed kernel.
- UKI signing on your own machine. The release-signing key never leaves a hardware token under InterGenOS control. The installer generates a Machine Owner Key (MOK) on your machine, and installed systems re-sign each kernel’s UKI with that key at every kernel install or upgrade. The trust anchor is yours.
- A signed package mirror. The package index is the signed manifest of the whole repository; clients verify the entire index against one signature, and every published archive’s hash is checked locally before install.
- Locked by default. A fresh install ships with no remote access enabled and a default-deny firewall. Server packages bind to localhost unless you deliberately open them. There are no default or blank passwords.
A fuller breakdown of the enforced defaults — AppArmor mandatory access control (complain by default on the ISO, enforce for server packages), systemd sandboxing across daemons, and the build-chain supply-chain protections — lives in the hardening baseline.
A machine you understand, can modify, and can trust
The security model and the user-control vision are not two ideas. They are the same idea from two angles: a machine the user cannot trust is a machine they do not control.
Control begins with transparency. InterGenOS is based on Linux From Scratch and Beyond Linux From Scratch, and every component is compiled from source rather than pulled from an opaque binary you cannot inspect. The build is deterministic by construction — pinned, checksum-verified sources and deterministic ordering — so what you run is what the source tree says you run; full byte-identical reproducibility across independent builders is a documented 1.x goal.
That same preference for the transparent path shows up in smaller, visible ways. There is no boot splash hiding the startup. You watch the kernel hand off to systemd and every service report [OK] or [FAILED]; if a mount breaks or a module misbehaves, you see it the moment it happens. Spotting odd boot output is a real practice for catching a compromise or a hardware change, so we give you that surface instead of covering it with a logo.
InterGenOS ships its own tooling to keep the system legible end to end:
pkm— the package manager. Install, remove, search, verify, and inspect dependencies.- Forge — the system installer. It takes you from partitioning through the signed boot chain to a booted desktop. Forge is InterGenOS’s own installer, not a third-party framework bolted on.
- A signed Secure Boot chain, dm-verity integrity, and UKI signing, all described above — verification you can check yourself rather than take on faith.
The rule that gates all of it: bespoke complexity that hides how the system works is not welcome, no matter how conventional it is. When a clever shortcut and the standard, inspectable path disagree, the inspectable path wins.
What ships today
State things by what is real now, not by what is planned. Today, InterGenOS ships:
- A GNOME 49 desktop on Wayland. Dark theme, InterGenOS branding, Wayland-native.
- Seven package tiers — toolchain, core, base, desktop, extra, compute, and ai. That is 1000+ package templates across those seven tiers. These counts drift as packages are added and revised; treat the live tree as the source of truth, not any fixed number.
- A 21-phase from-source build, in fixed order:
validate → verify-sources → setup → toolchain → chroot-prep → chroot-tools → core → config → core-extra → base → kernel → desktop → extra → compute → ai → bootloader → image → manifest → squashfs → ukis-verity → iso, with an optional publish step. The build always runs through the bootloader, ISO, install, and boot chain, because a clean compile is not the same as a known-good system.
InterGen — the local assistant
InterGen is the onboard AI assistant: tiered, hardware-detected, and offline-first. At setup time it probes the hardware and selects a local model and quantization by GPU presence and dedicated VRAM (system RAM is detected and reported, but never decides the tier), from a 4 GB laptop up to a GPU workstation. No cloud, no accounts, no round-trip latency, and zero telemetry. It has no voice interface — you type to it — but its on-device model is vision-capable: with your per-use approval it can capture and analyze a screenshot or webcam frame.
What separates it from a generic local-LLM wrapper is the permission model. Every tool call is treated as privileged; the default mode asks for confirmation before any action that modifies system state, tool signatures are pinned against drift across upgrades, and a separate audit log records every invocation. The assistant is a system component, not a hole in the system.
InterGen Sentinel — pluggable security scanning
InterGen Sentinel is a pluggable security-scanner architecture. It routes a tool call through a scanner of your choice before it executes. The default is local-only: Local-Rules (rule-based and deterministic) and Local-Qwen (your local Qwen model reviewing the call), both fully offline.
For richer review you can opt in — explicitly, never by default — to one of six cloud providers: Claude (Anthropic), Gemini (Google), Copilot (Microsoft), ChatGPT (OpenAI), Grok (xAI), and DeepSeek. This Phone-A-Friend (Frontier/Cloud Escalation) path exists because frontier models routinely surface security-relevant findings at scale, and some users will want that capability through a vendor they trust. The user picks which scanner, if any, reaches across the network. Everything else stays on the box, and the schema-pinning, audit logging, and sandbox enforcement are vendor-neutral local plumbing that apply no matter which scanner is active.
What we deliberately exclude
What a system refuses to do is part of its design. InterGenOS leaves things out on purpose:
- No telemetry, analytics, or crash reporting. Zero. There is nothing to opt out of in a settings menu, because the data never leaves the machine to begin with.
- No auto-updates. The system does not change software behind your back. Updates happen when you explicitly run them.
- No silent failures. Every error surfaces. An unverified assumption is turned into a checked gate or it is not trusted.
- No stubs. Placeholder code that pretends to work does not ship. A stub is a lie.
- No proprietary applications or vendor drivers in the core. The kernel drivers InterGenOS ships are open-source, in-tree drivers. The core does include the redistributable binary firmware blobs real hardware needs to function (amdgpu, iwlwifi, CPU microcode, and similar) — device payloads run by the hardware’s own microcontrollers, not host software. Proprietary vendor drivers and applications are never in the core archive and are installed only on your explicit, opt-in request.
- No fixes that only work on a hand-patched box. A change is done only when it lives in the source tree and a clean build reproduces the corrected behavior with zero manual steps. Live-patching is allowed for diagnosis, never as the finished fix.
What is planned, not shipped
To be precise about the line between today and tomorrow: the following are planned and are not part of the current system.
- Switchable desktop environments. InterGenOS ships GNOME on Wayland only. KDE Plasma (Qt6) and other Wayland-capable desktops are planned and are not shipped; the per-tier architecture already supports the split, but they do not ship today.
- Application campaigns. Additional applications are roadmapped (for example creative and productivity tools), but only what is present in the shipping tiers today is current.
When in doubt, trust the running system and the source tree over any roadmap.
Where to go next
Why InterGenOS Exists
There are a lot of good Linux distributions. This page is the honest answer to a fair question: why build another one?
The short version: InterGenOS occupies a combination that nothing else quite fills — security as the only lens, a machine you genuinely control and can verify, and a capable local AI assistant that never phones home — all on a built-from-source, transparent base. Plenty of systems are excellent on one or two of those axes. InterGenOS is built around all of them at once, and refuses the usual trade-offs between them.
What InterGenOS optimizes for
- Security is not first. It is only. Every package, default, and design decision is a security decision. Features that cannot be made safe are not shipped; convenience never silently wins over safety.
- You control the machine. It is built from source (Linux From Scratch lineage), every claim is checkable (see Verify It Yourself), and nothing about how it works is hidden from you. A machine you understand, can modify, and can trust.
- AI that stays on your machine. InterGen is an offline-first local assistant with zero telemetry — useful out of the box, with optional cloud providers you turn on explicitly, never by default.
- Honesty about what ships today vs. what is planned. The wiki and the system both separate “this is enforced now” from “this is built and coming.” No reassuring headlines that the configuration does not back up.
How it compares
Every system below is a serious, well-engineered project, and for many people one of them is the right answer. The table is about emphasis, not a scoreboard — what each is built to optimize first.
| System | Built to optimize | Where InterGenOS differs |
|---|---|---|
| Fedora | A polished, current, general-purpose desktop; upstream-leading; SELinux on by default | InterGenOS is security-only, not general-purpose; built from source rather than from a corporate binary archive; ships a local AI assistant and a checkable boot chain as first-class. |
| Arch | Maximal user control and a do-it-yourself, rolling system | InterGenOS shares the control-and-transparency ethos but ships an opinionated, secure-by-default posture (signed boot, hardened kernel, default-deny firewall) instead of leaving hardening entirely to you. |
| Debian | Rock-solid stability, software freedom, an enormous package set | InterGenOS trades breadth and conservatism for a tightly curated, security-first set with a hardened default configuration and a per-file-verifiable install. |
| NixOS | Declarative configuration and reproducible builds | InterGenOS shares the reproducibility and verify-it-yourself values, without the Nix language/model as a prerequisite, and adds the security-only posture and local AI. |
| secureblue | Hardened, image-based Fedora Atomic | Closest on security philosophy. InterGenOS differs in being built from source (not a Fedora-derived immutable image) and in shipping a local assistant; the trust model is per-file pkm verification rather than an atomic image. |
| Qubes OS | Security through strict VM compartmentalization | A different and excellent paradigm. InterGenOS hardens a single conventional system you use directly (lighter hardware needs), rather than isolating workloads into Xen domains. |
| openSUSE | A polished general-purpose system with YaST and snapshots | InterGenOS is narrower by design — security-only, built from source, with the local-AI and checkable-boot pillars rather than a broad admin toolkit. |
When something else is the better fit
Honesty cuts both ways:
- You want the widest possible software availability out of the box → Debian or Fedora.
- You want rolling, bleeding-edge, fully hand-assembled → Arch.
- You live in a declarative/reproducible config workflow already → NixOS.
- You need hard workload isolation above all (separate, mutually distrusting compartments) → Qubes OS.
- You want Fedora’s ecosystem with hardening in an immutable image → secureblue.
If those are your priorities, use them — they are good at what they do.
When InterGenOS is the fit
Choose InterGenOS if you want one system that is:
- security-first to the point of being security-only, with a hardened default you do not have to assemble yourself;
- transparent and built from source, where every guarantee is something you can check yourself rather than take on faith;
- shipped with a genuinely useful local AI assistant that does not send your data anywhere;
- honest with you about exactly what it enforces today.
That specific combination is the reason InterGenOS exists. If it is the combination you have been looking for, start here.
Threat Model & Security Philosophy
InterGenOS is a security-only-aligned, built-from-source Linux distribution. This page describes who and what the system is designed to defend against, the assumptions behind that design, and the concrete consequences those assumptions have for how InterGenOS is built and how it behaves on your machine.
The guiding principle is short: Security is not first. It is only. When a security control conflicts with convenience, security wins. The goal of every decision is a machine you understand, can modify, and can trust — because a machine you cannot trust is a machine you do not control.
This page describes InterGenOS as it ships. Where a feature is planned rather than shipped, this page says so explicitly.
The adversary we assume
InterGenOS is built on the working assumption that adversaries have superhuman vulnerability-discovery capability. We do not design only for the casual attacker who needs a known, published exploit. We design for an attacker who can find the silent failure you did not know was there.
That assumption changes what counts as “safe.” A masked error, a blanket “ignore failures,” an unverified “known-good” claim, or a degraded-but-shipped feature is not a minor blemish. It is precisely the seam such an adversary pulls on. So throughout InterGenOS, the question asked of every control is not “is this convenient?” but “does this eliminate a silent failure and turn an unverified assumption into a checked gate?” If an option masks rather than verifies, it is treated as wrong.
This threat model spans several concrete adversaries:
- A tampered or substituted system image — someone swapping the read-only system files underneath a validly signed kernel.
- A tampered boot chain — an attacker trying to run an unsigned kernel, an unsigned bootloader, or an untrusted kernel module.
- A compromised software supply chain — malicious code injected upstream into a language ecosystem package or a build dependency.
- A tampered package mirror or man-in-the-middle on install — corrupted or substituted packages delivered when you install or update software.
- A compromised system service — a daemon that gets exploited at runtime and tries to escalate or move laterally.
- A coerced on-device AI assistant — an attacker using prompt injection to talk the local assistant into weakening the system’s own protections.
- Silent data exfiltration — software phoning home with telemetry, analytics, or usage data you never agreed to send.
The rest of this page describes the design consequences of defending against each of these.
Defending the boot and integrity chain
InterGenOS builds a signed trust chain from the bootloader through the Unified Kernel Images, so the artifacts that boot your machine are present and cryptographically verifiable. When Secure Boot is enabled, that chain is enforced from power-on and a tampered system cannot quietly boot. On the current default — Secure Boot off — the same signatures are present and verifiable, but the firmware does not yet gate on them; enforcement begins once you enable Secure Boot and enroll your key.
- Signed boot chain. A Microsoft-signed shim (the pre-signed shim from Fedora) validates the InterGenOS GRUB bootloader, which in turn verifies the Linux kernel and the Unified Kernel Images (UKIs). The signatures are always present; Secure Boot enforcement is optional and off by default on a fresh install, and with it enabled, unsigned kernel modules are not trusted.
- Integrity-verified live image. dm-verity seals the live ISO and install media, not the installed root filesystem. The read-only system image (a squashfs) is built with a verified-integrity hash tree (dm-verity) generated over it, and each signed Unified Kernel Image carries that image’s root hash on its command line — and because the command line sits inside the signed envelope, the root hash is itself signed, so a tampered live image cannot present a valid signature. There is no unauthenticated boot fallback: a release UKI always seals the root hash, and if one is absent the init code refuses to boot the unverifiable image (the only unverified route is an explicit developer marker, which a sealed, signed UKI cannot carry). A whole-file
filesystem.sha256still ships, but purely as a user-facing media diagnostic — it is no longer a boot-trust input. Once you install to disk, Forge lays down a conventionalext4root; the installed root is not a dm-verity device, and its integrity rests on the signed UKI (when Secure Boot is enforced) and onpkm’s recorded per-file SHA-256 hashes, whichpkm verifycan re-check at any time. - Signed end to end. One hardware-token signing step covers the bootloader and all of the unified kernel images. Signing only appends a signature; it never alters the payload. Inputs are re-staged and re-checked against the freshly built system image before every signing, and the signed outputs are verified afterward.
- Your own keys for your own kernels. The InterGenOS release-signing key never leaves a hardware token under InterGenOS control. If you need out-of-tree modules such as proprietary drivers, the Forge installer walks you through enrolling a Machine Owner Key (MOK) on first boot. Installed systems regenerate and sign each kernel’s UKI with your machine’s local MOK at every kernel install or upgrade, so the same boot-time signature verification keeps applying to kernels you add after the original ISO.
This is the trust chain referenced elsewhere on this site as “the trust chain that keeps this machine yours.” For a deeper walkthrough, see the verified-boot pages under the installation guide.
Defending the supply chain and the mirror
A from-source distribution lives or dies by what goes into the compiler and what comes off the mirror.
- Built from source in an isolated, deterministic environment. Every source is pinned and checksum-verified before it is used. Builds are deterministic by construction (a fixed source date, pinned checksum-verified sources, deterministic ordering); full byte-identical output across independent builders is a documented 1.x goal.
- Reduced exposure to language-ecosystem attacks. Every upstream source — including the Python packages fetched from PyPI’s own content host — is pinned to a specific artifact URL and verified against a recorded SHA-256 hash before the build, rather than being resolved dynamically from a live package index at build time. Rust and Go dependencies are fetched, verified, and vendored ahead of an offline build. This removes the live-dependency-resolution window during compilation — a yanked or silently substituted version cannot slip in — and reduces exposure to an upstream compromise during the build. It does not, by itself, prove that a pinned dependency was benign at the moment it was selected.
- A signed binary mirror. Software installs pull from
repo.intergenos.org. The package index is the signed manifest of the whole repository. Everypkm synccryptographically verifies theInterGenOS.dbindex signature against a release-signing subkey held on a hardware token and certified by the offline InterGenOS master key, and on downloadpkmvalidates each file’s SHA-256 hash locally before installation. Publishing regenerates and re-signs the complete index every time — incremental data transfer, never a partial signature — and the live repository is promoted by an atomic swap so clients never see a half-published state. - A Software Bill of Materials for the boot trust anchor. InterGenOS ships a deterministic SPDX 2.3 JSON SBOM for the Secure Boot shim — the Microsoft-signed binary every other boot component is verified through — attesting its exact build inputs and source hashes: the pinned upstream shim source, the base build image, the embedded InterGenOS Secure Boot CA certificate, and the SBAT entry. It is a real, machine-readable provenance record for the most security-critical binary in the chain, not a claim you take on faith.
InterGenOS uses an index-only signature trust model: a centralized, verifiable source of truth.
Defending the running system
Once booted, the system limits the blast radius of any single compromised component.
- AppArmor mandatory access control. On the default ISO the two InterGenOS-authored profiles (
intergen-mcp,pkm) ship in complain (learning) mode — logged, not blocked — graduating to enforce per-profile; server packages on the mirror ship enforce-mode profiles that activate when the server is installed. - Aggressive systemd hardening. System services run under layered sandboxing that shrinks the filesystem, devices, kernel interfaces, namespaces, address families, and system-call surface a daemon can reach if it is compromised. Baseline directives applied across system daemons include
NoNewPrivileges=true,ProtectSystem=strict,ProtectHome=true,PrivateTmp=true,PrivateDevices=true, theProtectKernel*family,ProtectControlGroups=true,RestrictAddressFamilieslimited toAF_UNIX AF_INET AF_INET6,RestrictNamespaces=true,MemoryDenyWriteExecute=true(except for packages that explicitly require a JIT),SystemCallArchitectures=native, and a@system-servicesystem-call filter with@privileged @resources @mount @swap @rebootdenied. - Safe network binds. InterGenOS configures the network-server packages it ships to bind the loopback interface (
127.0.0.1) by default; no shipped service is intended to listen on a non-loopback interface without explicit user configuration. A package that ever bound a public interface by default would be a bug to fix, not the design. - No default passwords. InterGenOS does not ship databases or services with blank or default “admin” credentials. Initial credentials are randomly generated or require manual setup during installation.
- Locked by default. A freshly installed system ships locked: no remote access enabled and a default-deny firewall.
Defending the privacy boundary
InterGenOS treats your data leaving the machine as a security event, not a settings preference.
- No telemetry. Zero analytics, crash reports, or usage statistics are collected.
- No auto-updates. The system does not change software behind your back. Upgrades happen only when you explicitly run
pkm upgrade. - No opt-out privacy. There are no toggles to stop your OS from exfiltrating usage data, because it collects and sends none. The network is used only for things you initiate — package syncs, the one-time model download, a browser, a service you start, or an opt-in Phone-A-Friend request — never to report on you.
- No proprietary applications forced into the core. The kernel drivers InterGenOS ships are open-source, in-tree drivers. The core does include the redistributable binary firmware blobs that real hardware needs to function — for example amdgpu, iwlwifi, and CPU microcode — but these are device payloads run by the hardware’s own microcontrollers, not host software. Proprietary vendor drivers and applications (NVIDIA’s userspace driver, Chrome, and the like) are kept out of the core archive entirely and installed only on your explicit, opt-in request. Nothing proprietary is forced on you.
Defending against a coerced AI assistant
InterGenOS ships an on-device assistant called InterGen: a tiered, hardware-detected, offline-first local assistant (built on an on-device model) with zero telemetry. Its permission model is part of the threat model, not an afterthought.
Two ideas drive its design.
Inherit the OS’s gate; do not invent a new one. InterGen mirrors the privilege model you already understand: you can freely touch your own things, and you need sudo/PolicyKit for system things. Every action is classified by zone and operation and resolved to one of three outcomes:
- FREE — done immediately, no prompt: all reads of non-secret data, and actions confined to your own user space. Note that “your own user space” is not a synonym for “harmless” — it includes your dotfiles, your shell startup, your autostart entries, and your SSH keys. What makes an action free is who owns the target, not how sensitive it is; the consent gate covers system-level state, not everything with impact.
- AUTH-PROMPT — InterGen triggers the OS’s real authorization (pkexec/PolicyKit), phrased plainly (“InterGen wants to restart Bluetooth. That needs admin rights. Authorize?”). Your password is the gate; the kernel enforces it. This covers writing or state-changing system configuration, and reading secrets such as the shadow file — because you yourself could do that with
sudo, so InterGen does not pretend to be stricter than the OS. - FORBIDDEN — InterGen will not do it, and says so transparently, handing control back to you. It states plainly what it will not do and why, and confirms you can do it yourself.
InterGen is not authorized to modify its own substrate. InterGen’s own code, model pins and signature, daemon units, PolicyKit policy, verified model store, signing/provenance state, and its own settings under ~/.config/intergen are classified as system-critical (zone Z3) — the same protected class as the boot keys and the integrity hashes — so writing or modifying them is FORBIDDEN to InterGen, and the gate refuses such an action before it ever offers an authorization prompt. How many layers hold that line depends on where the file lives. For the system-side substrate — the code, the units, the policy, the model store under /var/lib/intergen, the logs under /var/log/intergen — two independent layers hold it: the permission gate denies the write, and InterGen runs as an unprivileged user-session daemon (NoNewPrivileges, never root) that lacks the OS permission to write root-owned files in the first place. For your own settings under ~/.config/intergen only the first layer applies: those files belong to your account, so the OS would let the daemon write them, and what refuses is a never-write list inside InterGen’s own code — one that refuses the path even when the code is running as root. This closes the most direct attack — a capable adversary’s whole game is to talk the assistant into rewriting its own gate, manifest, or guardrails, and that direct self-modification path is blocked. It does not make prompt injection harmless: authorization gating, the content-trust scanning layer (ingress and egress, including InterGen Sentinel), the audit log, and the OS privilege boundary each remain an independent defense. This is defense in depth, not one control that solves injection. Only you, acting manually and outside the assistant, can change those files.
A deliberate separation underpins this. Two orthogonal axes are evaluated by two independent mechanisms and are never conflated:
- The privilege axis asks “would a human need
sudofor this, and what does it touch?” On this axis an ordinary, non-secret read is free; a read that would itself require elevation — a secret such as the shadow file or key material — escalates to the same authorization prompt a human would hit, because InterGen never pretends to be stricter or looser than the OS. - The content-trust axis independently watches what crosses the boundary: injection on the way in, secrets on the way out. This is the job of the scanner and provenance layer, including InterGen Sentinel, a pluggable security scanner whose default configuration is local-only (Local-Rules plus a local Qwen model). Sentinel supports six opt-in cloud providers — Claude (Anthropic), Gemini (Google), Copilot (Microsoft), ChatGPT (OpenAI), Grok (xAI), and DeepSeek — none of which are engaged unless you choose to enable them.
Escalating a hard question to a frontier cloud model is called Phone-A-Friend (Frontier/Cloud Escalation). Like the Sentinel cloud providers, it is opt-in and never the default path. The default assistant stays on the device with zero telemetry.
Design consequences for the build itself
The threat model is not only a set of runtime controls; it shapes how a release is allowed to come into existence. The reasoning is simple: a build whose packages all compiled is not a build that is known-good. The expensive failures of a from-source distribution compile fine, package fine, and only manifest when the artifact is installed and booted on real hardware — a service locked down with no writable path, a directory omitted from a package’s file list, a hardware-detection heuristic wrong for a specific GPU, a first-boot race.
Several rules follow, and they are non-negotiable:
- No silent failures. Every error surfaces; an unverified assumption becomes a checked gate or it is not trusted.
- No stubs. Placeholder code that pretends to work does not ship — “a stub is a lie.”
- No cheating around a build failure. A failing package is fixed in the source tree, never worked around by moving it to another tier, disabling a feature to dodge a missing dependency, or silently skipping a step.
- Only a clean build counts. A fix is done when it lives in the source tree and a clean from-scratch build reproduces the corrected behavior with zero manual intervention. A fix that only works because of a hand-edit on the running target is a note about a fix, not a fix.
- Validate on real hardware. The candidate loop always runs through the full bootloader → ISO → install → boot chain, and race-class issues must clear several consecutive cold boots on representative lower-end hardware.
A candidate becomes a stable release only when a complete from-scratch cycle runs end to end with zero triggers — nothing required a fix — with the hardware-token signing step as the only sanctioned human action.
The build runs as an ordered, reproducible lifecycle whose phases are defined in the build script and carry a candidate from source validation through toolchain, the package tiers, and image assembly to a signed, installable ISO, with publishing to the mirror as an optional final step. Packages are organized across seven tiers (toolchain, core, base, desktop, extra, compute, and ai). The exact phase list and the package count are derived live from the source tree and drift between builds, so this page deliberately pins neither number — for the current phase list, see The Build & Release Pipeline.
Assumptions, boundaries, and non-goals
A threat model is only honest if it also says what it takes for granted and what it does not try to defeat.
What the model assumes:
- The hardware is functioning and behaves as specified.
- The platform firmware below the verified-boot boundary — the UEFI/SMM layer beneath the shim — is not already compromised. Verified boot anchors trust at the signed shim; it cannot vouch for what runs before it.
- The project’s own signing infrastructure — the offline master key and the hardware-token release subkey — stays under project control and uncompromised.
What it does not claim to defeat:
- An authorized administrator who deliberately disables controls. The machine is yours: if you turn Secure Boot off, unlock the gate with your password, or remove a protection, InterGenOS does what you told it to. Control of your own machine is the goal, not a threat to guard against.
- Hardware implants or malicious firmware living below the boot-trust boundary.
- Denial of service. This model is about integrity, confidentiality, and containment — not keeping a service available under active disruption.
- Unknown defects in the kernel or the rest of the trusted computing base. No system can claim immunity to a flaw it has not found.
Where a class of failure cannot be prevented outright, the design does not paper over it. It favors visible failure over silent trust, verifiable state over asserted state, a reduced blast radius over a single hard shell, and recoverability over irreversibility — so that when something does go wrong, you can see it, check it, and get back to a known-good state.
Assets and trust boundaries
The assets this model protects, roughly in order of blast radius:
- Boot-chain integrity — the shim, GRUB, kernel, and UKI signatures.
- OS integrity — the live image’s dm-verity seal and the installed system’s
pkm verifyrecords. - Package provenance — the signed mirror index and per-file hashes.
- Signing keys — the offline master key and the hardware-token release subkey.
- User data and credentials — your files, secrets, and SSH/MOK keys.
- Authorization boundaries — the
sudo/PolicyKit gate InterGen inherits rather than replaces. - InterGen’s control policy — its gate, model pins, and guardrails.
- Privacy — the default that nothing leaves the machine unless you initiate it.
Trust flows outward along a single chain, each stage verified by the one before it; a compromise is contained by the next gate outward.
flowchart LR
    A[Platform firmware] --> B[shim / GRUB / UKI]
    B --> C[Kernel]
    C --> D[System services]
    D --> E[User session]
    E --> F[InterGen authorization broker]
    F --> G[Local model / opt-in cloud escalation]
What ships today versus what is planned
This page describes the system as it exists today. To keep the threat model honest, the line between shipped and planned is drawn explicitly.
Shipped today:
pkm, the package manager, against the signed mirror.- Forge, the InterGenOS installer.
- A signed Secure Boot chain, dm-verity integrity verification, and UKI signing.
- The GNOME 49 desktop on Wayland.
- The InterGen local assistant and InterGen Sentinel as described above.
Planned, not shipped (do not treat as current):
- KDE/Plasma (Qt6) and switchable desktops.
- The application campaigns (for example Kdenlive, OBS, Krita, Blender, FreeCAD, GnuCash, and Boxes).
Further reading
Switching to InterGenOS
If you are coming from Debian, Ubuntu, Fedora, Arch, or another mainstream Linux distribution, this page maps what you already know onto how InterGenOS does things. The goal is not to convince you that everything is different. Most of it is not. The differences that matter are deliberate, and they all serve the same purpose: a machine you understand, can modify, and can trust.
Security is not first. It is only. Every default on this page exists because of that posture.
What is the same
InterGenOS is a Linux distribution. The kernel, the shell, the GNU coreutils, systemd, OpenSSH, and the GNOME desktop all behave the way you expect. Your shell scripts, your dotfiles, your editor, your terminal habits, and the standard command-line tools carry over without translation.
The desktop that ships today is GNOME 49 on Wayland. If you have used recent GNOME on any other distribution, the Activities overview, the app grid, Quick Settings, and the Settings app are all where you left them. The default icon theme is InterGenOS’s own first-party theme; alternates (Papirus, WhiteSur, Tela, Fluent, and others) are one click away in the first-boot Welcome app.
InterGenOS is built from source on the Linux From Scratch (LFS 13.0) and Beyond Linux From Scratch (BLFS 13.0) foundation. That is a build-time fact, not something you have to think about while using the system day to day.
What is different, and why
Package management uses pkm, not apt/dnf/pacman
InterGenOS ships its own package manager, pkm. It covers the operations you already do under other names, and it accepts the command names you would naturally reach for. The dispatch resolves aliases to a canonical command, so behavior is identical regardless of which name you type.
| You are used to (apt / dnf / pacman) | On InterGenOS |
|---|---|
apt update / dnf check-update / pacman -Sy | sudo pkm sync (also update, refresh) |
apt upgrade / dnf upgrade / pacman -Su | sudo pkm upgrade |
apt install <pkg> / pacman -S <pkg> | sudo pkm install <pkg> |
apt remove <pkg> / pacman -R <pkg> | sudo pkm remove <pkg> (also uninstall) |
apt search / dnf search / pacman -Ss | pkm search <term> (also find) |
apt show / dnf info / pacman -Si | pkm info <pkg> (also show) |
dpkg -l / pacman -Q | pkm list installed (also ls) |
dpkg -S <file> / pacman -Qo <file> | pkm provides <file> |
debsums / rpm -V | sudo pkm verify <pkg> (or pkm verify --all) |
One important distinction from apt: pkm sync only refreshes the local index. It does not change anything on disk. pkm upgrade is the command that actually installs newer versions. Nothing upgrades on a timer — though a daily check does notify you when upgrades are available (it installs nothing, and you can disable it; see below).
For the full command surface, see The Package Manager.
Proprietary and third-party apps come through pkm install
Software that other distributions reach for via a vendor .deb, a third-party repository, or the AUR is installed through the same pkm install command as everything else. InterGenOS ships a small download-helper for each, and pkm routes to it automatically — there is no separate command to remember:
sudo pkm install chrome       # Fetches from Google, installs via pkm
sudo pkm install vscode       # Fetches from Microsoft, installs via pkm
sudo pkm install claude-code  # Fetches from Anthropic, installs via pkm
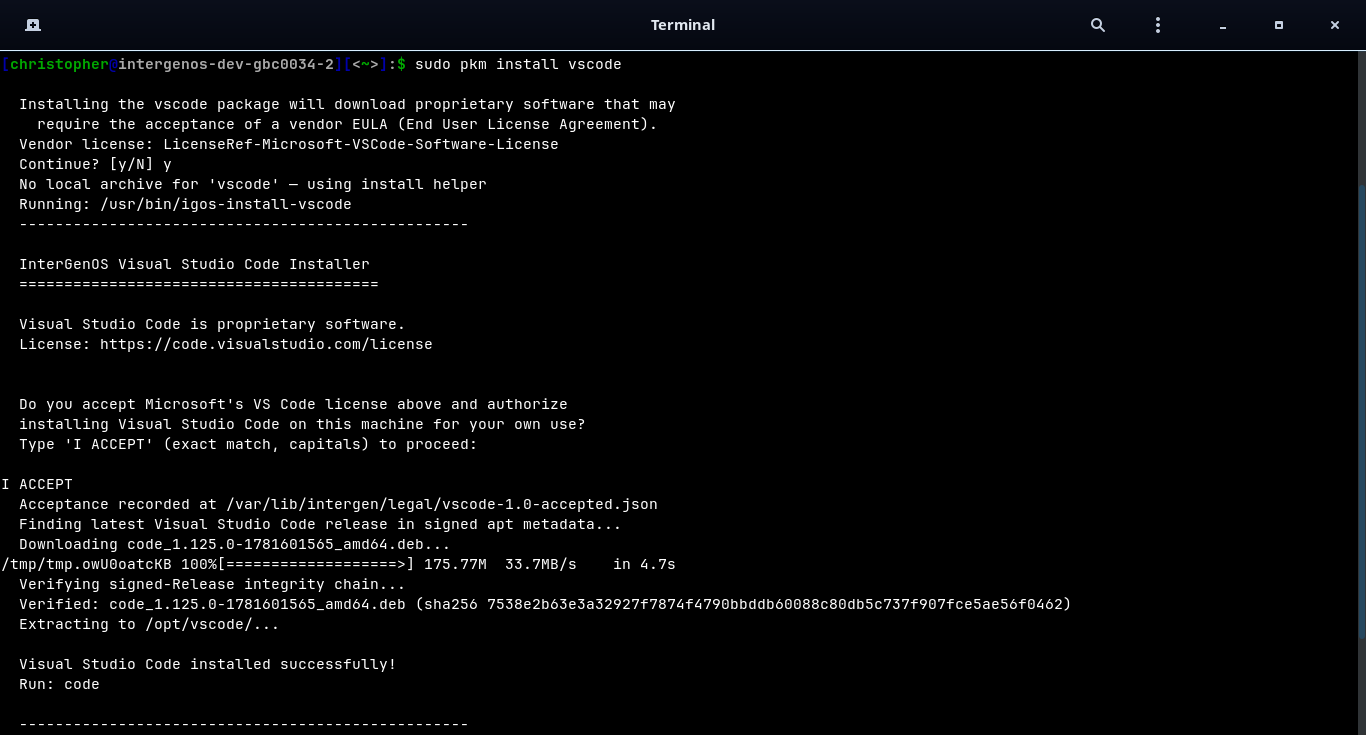
Because these are proprietary, pkm will not install one silently. The install stops for an explicit, interactive license acceptance — you cannot complete it by accident:
pkmfirst names the vendor license and asksContinue? [y/N].- The vendor’s own installer then prints its license and requires you to type
I ACCEPT(exact match, capitals) to proceed. Anything else aborts the install.
Only after you accept does the helper download from the vendor, verify the download against the vendor’s signed metadata (a SHA-256 integrity check), and install. Your acceptance is recorded under /var/lib/intergen/legal/, so a later reinstall of the same version does not prompt again.
No background network activity
This is the largest behavioral change for most people switching:
- No background refresh. The system does not reach out to the network until you explicitly run
pkm syncorpkm install. - No telemetry. There is no popcon, no countme equivalent, no usage analytics.
- No unattended upgrades. The system stays exactly as it is until you command a change.
- A daily update check, opt-out. One timer (
pkm-check-updates.timer) compares your installed packages against the index you last synced and shows a count of available upgrades (a tray indicator and a login message). It downloads and installs nothing, reaches no further than your local index, and turns off withsudo systemctl disable --now pkm-check-updates.timer.
If a package ships under a non-OSI license, pkm halts and shows a banner requiring your explicit consent before downloading.
How that compares to the package managers you may know:
| Feature | pkm (InterGenOS) | apt (Debian/Ubuntu) | pacman (Arch) | dnf (Fedora) |
|---|---|---|---|---|
| Trust model | Signed index | Signed index (InRelease) | Signed index / per-package sigs | Signed metadata / per-package sigs |
| Auto-updates | Never | Configurable | Configurable | Configurable |
| Telemetry | None | Popcon (opt-in) | None | countme (opt-out/opt-in) |
| Non-OSI license | Halts for consent | Relies on repo separation | AUR / user discretion | Relies on repo separation |
A signed boot chain you own (Secure Boot optional)
On other distributions, Secure Boot is often something you disable to get work done, or a chain you do not control. InterGenOS ships a signed boot chain where the trust anchor is your own MOK key, generated per machine by the installer, Forge: signed shim, MOK-signed GRUB, and a MOK-signed Unified Kernel Image. Secure Boot enforcement is optional — a fresh install ships with it off, and you can enable it (and enroll your MOK) on hardware that supports it. dm-verity seals the live install image.
If you plan to enable Secure Boot, you set the MOK enrollment password during install and confirm the enrollment once at first boot; either way the machine boots through a chain you can audit. See the Forge installer guide.
Transparent boot, no splash
There is no Plymouth splash screen hiding the boot. You watch the kernel hand off to systemd and every service report [OK] or [FAILED]. If a mount breaks or a module misbehaves, you see it the moment it happens. Reading boot output is a real practice for noticing a compromise or a hardware change, so the system gives you that surface rather than covering it.
A local AI assistant, fully offline
InterGenOS ships InterGen, a tiered, hardware-detected local assistant. At setup time it probes the hardware and picks the model by GPU presence and dedicated VRAM (system RAM is reported but never decides the tier): a compact InternVL floor (about 1.2 GB) runs on every machine, down to a 4 GB laptop, and a machine with a capable discrete GPU runs a larger Qwen tier — the 9B. It runs fully offline with zero telemetry, no accounts, and no cloud round-trip. Every tool call is permission-gated; the default mode requires confirmation before anything changes system state.
Paired with it is InterGen Sentinel, a pluggable security scanner that reviews MCP tool calls before they execute. The default is local only: a deterministic rule-based scanner plus a local-Qwen-backed reviewer. Six cloud providers are strictly opt-in, and you choose which (if any) ever reaches the network: Claude (Anthropic), Gemini (Google), Copilot (Microsoft), ChatGPT (OpenAI), Grok (xAI), and DeepSeek. This opt-in cloud routing is called Phone-A-Friend (Frontier/Cloud Escalation). Schema-pinning, audit logging, and sandbox enforcement are local plumbing that applies no matter which scanner is active.
What you should know before switching
A few expectations to set (for the current release and its notes, see the main repository README):
- GNOME on Wayland is the only desktop today. Switchable desktop environments such as KDE Plasma and XFCE are on the roadmap and are not part of the current system. If you require a non-GNOME desktop right now, this is not yet the system for you.
- The package set is from-source and curated, not exhaustive. The build comprises 1000+ package templates across seven tiers (toolchain, core, base, desktop, extra, compute, ai). These counts drift as packages are added and consolidated. If a piece of software you rely on is not yet packaged, you can build it yourself in the meantime.
- The public binary mirror is live.
repo.intergenos.orgserves the signed package index and the package archives for the current release;pkminstalls and upgrades from it, and verifies the index signature on every sync.
Migrating your data and habits
Because the userland is standard, the practical migration is the ordinary one:
- Copy your home directory, dotfiles, and project files as you would between any two Linux machines (
rsync, an external drive, or your usual backup). - Reinstall applications with
pkm install <pkg>— the same command covers proprietary or third-party apps (e.g.pkm install vscode), which prompt for vendor-license acceptance the first time. - Your shell configuration, SSH keys, and Git setup carry over unchanged.
There is no in-place upgrade path from another distribution. InterGenOS is a fresh install through Forge.
Where to go next
FAQ
Common questions about InterGenOS. Answers here describe what ships today, not what is planned. Where the answer differs for planned work, it says so explicitly.
What is InterGenOS?
InterGenOS is a Linux distribution built entirely from source, based on Linux From Scratch 13.0 and Beyond Linux From Scratch 13.0. Every package is compiled from source with deliberate choices. It ships a custom package manager (pkm), a from-source build system (igos-build), a native installer (Forge), a signed Secure Boot chain, and a tiered local AI assistant. The goal behind every default is a machine you understand, can modify, and can trust.
What does “security-only alignment” mean?
It is the project’s governing doctrine. Where a security control conflicts with convenience, security wins. The phrasing the project uses is direct: security is not first, it is only. In practice that means a fully signed boot chain (with optional Secure Boot enforcement), AppArmor mandatory access control (complain-mode profiles on the default ISO, enforce-mode profiles for server packages), aggressive systemd sandboxing, localhost-only network binds by default, and zero telemetry. See Hardening Baseline and Threat Model & Security Philosophy for the full picture.
What version is this?
Releases are named R001, R002, … for major releases, and R001.1, R001.2, … for point releases that carry fixes and minor package additions. R001.x is the first public release line; the project is in active development. The current release is always stated at https://intergenos.org/news.html; its release notes are published beside the installation image at repo.intergenos.org/iso. The public binary mirror is live — pkm installs and upgrades from repo.intergenos.org. An installed system reports the release its image was built from in /etc/os-release (for example, an R001.2 image reports InterGenOS R001.2 (Revival); the original R001 image reported InterGenOS 1.0-dev (Revival)); the release an image came from is stated in the release notes published beside it.
What desktop does it use?
InterGenOS ships GNOME 49 on Wayland with a dark theme and InterGenOS branding. There is no Plymouth splash: you watch the kernel hand off to systemd and every service report [OK] or [FAILED] at boot. That visibility is deliberate. Spotting unusual boot output is a real practice for catching a compromise or a hardware change.
Switchable desktop environments such as KDE Plasma and others are on the roadmap. They are not shipped today.
How do I install software?
With pkm, the InterGenOS package manager. The common commands:
sudo pkm sync          # refresh the local index, verify its signature
pkm search audio       # search the local index (no network needed)
sudo pkm install htop  # download, verify, and install a package
sudo pkm upgrade       # install newer versions of installed packages
sudo pkm remove htop   # uninstall, and clean orphaned dependencies
pkm list installed     # list everything installed
pkm info openssh       # show metadata for a package
pkm verify openssl     # check installed files against recorded hashes
pkm also accepts familiar aliases from other distributions: update accepts sync/refresh, remove accepts uninstall, search accepts find, and so on. See The Transparent Package Manager for the full reference.
Does pkm phone home or auto-update?
pkm does not phone home, and it never installs or upgrades software on its own — your system changes only when you explicitly run pkm install, pkm upgrade, or pkm remove. There is no telemetry of any kind. It does ship one opt-out convenience: a daily timer that checks whether upgrades are available and shows a count (a GNOME tray indicator and a login message), installing nothing and reaching no further than the index you last synced. Turn it off with sudo systemctl disable --now pkm-check-updates.timer if you would rather it not run. The project’s phrasing is that silence is golden.
How is software trust verified?
pkm fetches the InterGenOS.db index from the official mirror and verifies its signature against a release-signing subkey — held on a hardware token and certified by the offline InterGenOS master key — whose fingerprints are pinned locally. When you install a package, its SHA-256 hash is checked against the verified index before extraction. A signature failure or hash mismatch is a hard rejection. InterGenOS uses an index-only signature trust model.
What about proprietary software?
InterGenOS does not ship proprietary binaries in its archive set. Instead, you install them with the ordinary pkm install <name> command (e.g. pkm install vscode); pkm recognizes these as proprietary and routes to a small download-helper that fetches the payload from the vendor. The install stops for an explicit, interactive vendor-EULA acceptance the first time — you confirm a Continue? [y/N] prompt and then type I ACCEPT to proceed, and the acceptance is recorded so a later reinstall does not re-prompt. Helpers cover software such as Brave, Chrome, Edge, Spotify, Discord, VS Code, and Claude Code. The core operating system itself ships open-source, in-tree kernel drivers together with the redistributable binary firmware blobs (amdgpu, iwlwifi, CPU microcode, and similar) that hardware needs to run; proprietary vendor drivers and applications are never in the core archive and are installed only when you opt in.
How many packages are there?
The package set is organized into seven tiers and drifts as the system grows. It is 1000+ templates across the seven tiers (toolchain, core, base, desktop, ai, compute, and extra). Treat these as a live count rather than a fixed number; query your synced index for the current state.
| Tier | Purpose |
|---|---|
| toolchain | Cross-compilation (LFS Ch. 5-7) |
| core | Full system: kernel, shell, coreutils, systemd, GCC, SSH |
| base | CLI tools: htop, rsync, strace, screen |
| desktop | GNOME on Wayland: GTK, Mesa, GStreamer, GNOME Shell |
| ai | Local AI assistant: InterGen (which includes Sentinel) and llama.cpp |
| compute | Opt-in GPU-compute SDKs (ROCm stack) and HIP-accelerated llama.cpp, mirror-only |
| extra | User applications: Node.js, Chrome, VS Code, Claude Code |
What is InterGen?
InterGen is the onboard AI assistant: a tiered, hardware-detected, offline-first local assistant built on an on-device model with zero telemetry. At setup time it probes the hardware and selects a model and quantization by GPU presence and dedicated VRAM (system RAM is detected and reported, but never decides the tier), from a 4 GB laptop up to a GPU workstation. No cloud, no accounts, no round-trip latency. It has no voice interface — you type to it — but its on-device model is vision-capable: with your per-use approval it can capture and analyze a screenshot or webcam frame.
InterGen classifies every action by what it touches and whether a human would need sudo for it. Reads of non-secret data and actions inside your own user space run freely; an action that changes system-level state triggers the operating system’s real authorization (a pkexec/PolicyKit password prompt); and actions against the boot and security trust chain — or against InterGen’s own code and guardrails — are refused outright. Tool signatures are pinned against drift across upgrades, and a separate audit log records every invocation. The assistant is a system component, not a hole in it. See the Threat Model for the full permission matrix.
What is InterGen Sentinel?
InterGen Sentinel is a pluggable security-scanner architecture. It routes MCP tool calls through a scanner of your choice before they execute. The default is local-only: Local-Rules (rule-based, deterministic) and Local-Qwen (your local Qwen model reviewing the call), both fully offline.
For richer review you can opt into any of six cloud providers: Claude (Anthropic), Gemini (Google), Copilot (Microsoft), ChatGPT (OpenAI), Grok (xAI), and DeepSeek. This escalation path is called Phone-A-Friend (Frontier/Cloud Escalation). It is entirely opt-in. You pick which scanner (if any) reaches across the network; everything else stays on the machine. Schema-pinning, audit logging, and sandbox enforcement are vendor-neutral local plumbing that apply regardless of which scanner is active.
How does Secure Boot work here?
The boot chain is fully signed: a Microsoft-signed shim to a signed GRUB to a signed kernel and Unified Kernel Image. Secure Boot enforcement is optional and off by default on a fresh install — the signatures are present and verifiable, ready to enforce on hardware where you enable Secure Boot and enroll your Machine Owner Key (MOK). The Forge installer generates that MOK per machine. Installed systems sign each kernel’s UKI with your machine’s local MOK at every kernel install or upgrade. The InterGenOS release-signing key never leaves a hardware token under project control; only your machine-local MOK signs the kernels you install. See Verified Boot & Secure Boot.
What integrity protections ship by default?
A signed Secure Boot chain, dm-verity integrity, and UKI signing. System daemons run under extensive systemd isolation directives (NoNewPrivileges, ProtectSystem=strict, PrivateTmp, syscall filtering, and more), and AppArmor profiles ship active — complain (learning) mode on the default ISO (intergen-mcp, pkm), enforce mode for server packages once installed. Server packages bind to localhost by default. No service ships with a blank or default password.
What hardware does it run on?
Bare-metal installs have been validated across widely varying hardware, from current laptops back to a roughly 2012 2nd/3rd-generation Intel Core i5, each through the full signed boot chain and the end-to-end ISO-installer path.
How is the OS built?
A single build runs 21 phases:
validate -> verify-sources -> setup -> toolchain -> chroot-prep ->
chroot-tools -> core -> config -> core-extra -> base -> kernel ->
desktop -> extra -> compute -> ai -> bootloader -> image -> manifest ->
squashfs -> ukis-verity -> iso
Publishing to the mirror is an optional follow-on step. The build can resume from any phase with --start-at and stop with --stop-after; checkpoints are saved after the toolchain, core, and desktop phases.
What is on the roadmap but not yet shipped?
Switchable desktop environments (KDE Plasma and others) are not present in the current release. Curated application campaigns (for example Kdenlive, OBS, Krita, Blender, FreeCAD, GnuCash, Boxes) are planned and not current. None of these are guaranteed in the current release.
Two things that used to be listed here have since shipped. The large (~35B) AI tier ships: the model is pinned in the signed manifest and a machine with roughly 22 GB or more of dedicated video memory runs it — what is not shipped at that tier is native tool-calling, which the 9B tier alone carries. NVIDIA’s open kernel modules are packaged and available from the mirror as an explicit opt-in on hardware with an NVIDIA GPU (pkm install nvidia); they are not on the installation image and are never installed without your action.
Where can I learn more?
- The Transparent Package Manager
- Hardening Baseline
- FORGE Installation Guide
- Threat Model & Security Philosophy
Install with FORGE
FORGE is the InterGenOS installer. It takes you from the live environment to a deployed, bootable, user-configured system on a target disk. Every install runs through a verification gate that checks the cryptographic integrity of each package against the signed release manifest before any disk write occurs, so the system you boot is the system that was actually published.
This section covers what to expect during installation, how the installer is structured, and the device- and security-specific notes that matter once you commit to writing a disk.
Getting the image
The current release’s installation image, the SHA-256 checksum file beside it, the signature over that checksum, and the release public key are published together on the project mirror at repo.intergenos.org/iso and linked from the main repository README. Verify the checksum signature and then the image before you write it to a USB stick: the release notes published beside the image give the commands in order.
What FORGE installs
FORGE deploys the current InterGenOS release. The shipped desktop is GNOME 49 on Wayland. The installer also lays down the components that make the system trustable end to end:
- pkm, the transparent package manager.
- A signed boot chain (shim → GRUB → UKI) with a per-machine Machine Owner Key (MOK) generated during install. Secure Boot enforcement is optional and off by default on a fresh install; the signatures are present and ready for hardware where you turn it on.
- dm-verity integrity sealing the live ISO image. (The installed root is an ordinary
ext4filesystem, verified per-file bypkm.) - UKI signing for the boot image.
- InterGen, the tiered, hardware-detected, offline-first local assistant (on-device models, zero telemetry), which includes a built-in security scanner, InterGen Sentinel (default Local-Rules plus Local-Qwen, with opt-in cloud providers).
Packages are organized into seven tiers (toolchain, core, base, desktop, extra, compute, and ai). The total count drifts as the distribution evolves; derive the live figure from the release manifest rather than treating any single number as fixed. The installable set is 1000+ packages across those tiers.
How FORGE works
FORGE uses a split frontend/backend architecture joined by a declarative state model. A frontend collects your choices and emits a serialized YAML description of the system you want. The backend consumes that YAML and the credentials you supply, then executes the install.
Two frontends are available, and both drive the same backend identically:
- GUI — a GTK4 / libadwaita wizard with a multi-screen flow (welcome, keyboard and locale, disk, user, packages, confirm, progress, done). Use this for a standard desktop install.
- TUI — a
dialog-based text interface suited to SSH sessions, headless servers, or keyboard-only navigation.
The backend runs a linear, phased pipeline. The first phase after configuration validation is the integrity gate: FORGE computes the SHA-256 of every package archive it intends to deploy and verifies it against the signed archive manifest. A mismatch halts the install before partitioning begins, unless you provide explicit, typed confirmation to override. That override phrase must be typed in full; the installer disables paste, drag-and-drop, and the right-click menu on the field so the consent is deliberate.
If a phase fails, FORGE halts the pipeline, performs best-effort unmounts scoped to how far the install progressed, and surfaces the exact point of failure on the final screen. Non-fatal warnings, such as a trust-chain audit-log copy failure, are reported there too so you always know the true state of the deployment.
Security posture
The install path is built so the result is a machine you understand, can modify, and can trust: the integrity gate proves what was written, the on-machine MOK keeps the boot chain under your control, the signed UKI protects the boot path (enforced once you enable Secure Boot), and pkm’s per-file hashes let you verify the installed system at any time.
In this section
- FORGE Installation Guide — step-by-step walkthrough of an install from boot to first login.
- Disk Encryption & LUKS — encrypting the target disk.
- Verified Boot & Secure Boot — the MOK, signed GRUB, dm-verity, and UKI signing.
- Per-Device Install Notes — hardware-specific guidance.
- Installing in a Virtual Machine — trying InterGenOS as a guest in VirtualBox or VMware.
- Recovery & Reinstall — repairing or reinstalling an existing system.
If you run into trouble during or after install, see the Troubleshooting section and the FAQ.
FORGE Installation Guide
FORGE is the InterGenOS installer. It takes you from the live environment to a deployed, bootable, configured system on your target disk. This page walks through the graphical installer screen by screen, in the order you encounter them.
Before any data is written to disk, FORGE runs a verification gate that checks the cryptographic integrity of every package archive against the signed release manifest. If anything fails to match, the install halts before partitioning. Nothing is committed to your disk until you reach the confirmation screen and click Install.
InterGenOS is a built-from-source Linux distribution where security is not first. It is only. The installer is part of that: a machine you understand, can modify, and can trust starts with an install flow that tells you exactly what it is doing.
FORGE also ships a text-based (TUI) frontend for headless and SSH installs. It collects the same choices and runs the same backend. This guide documents the GTK4 graphical wizard.
Step 0 — Boot menu
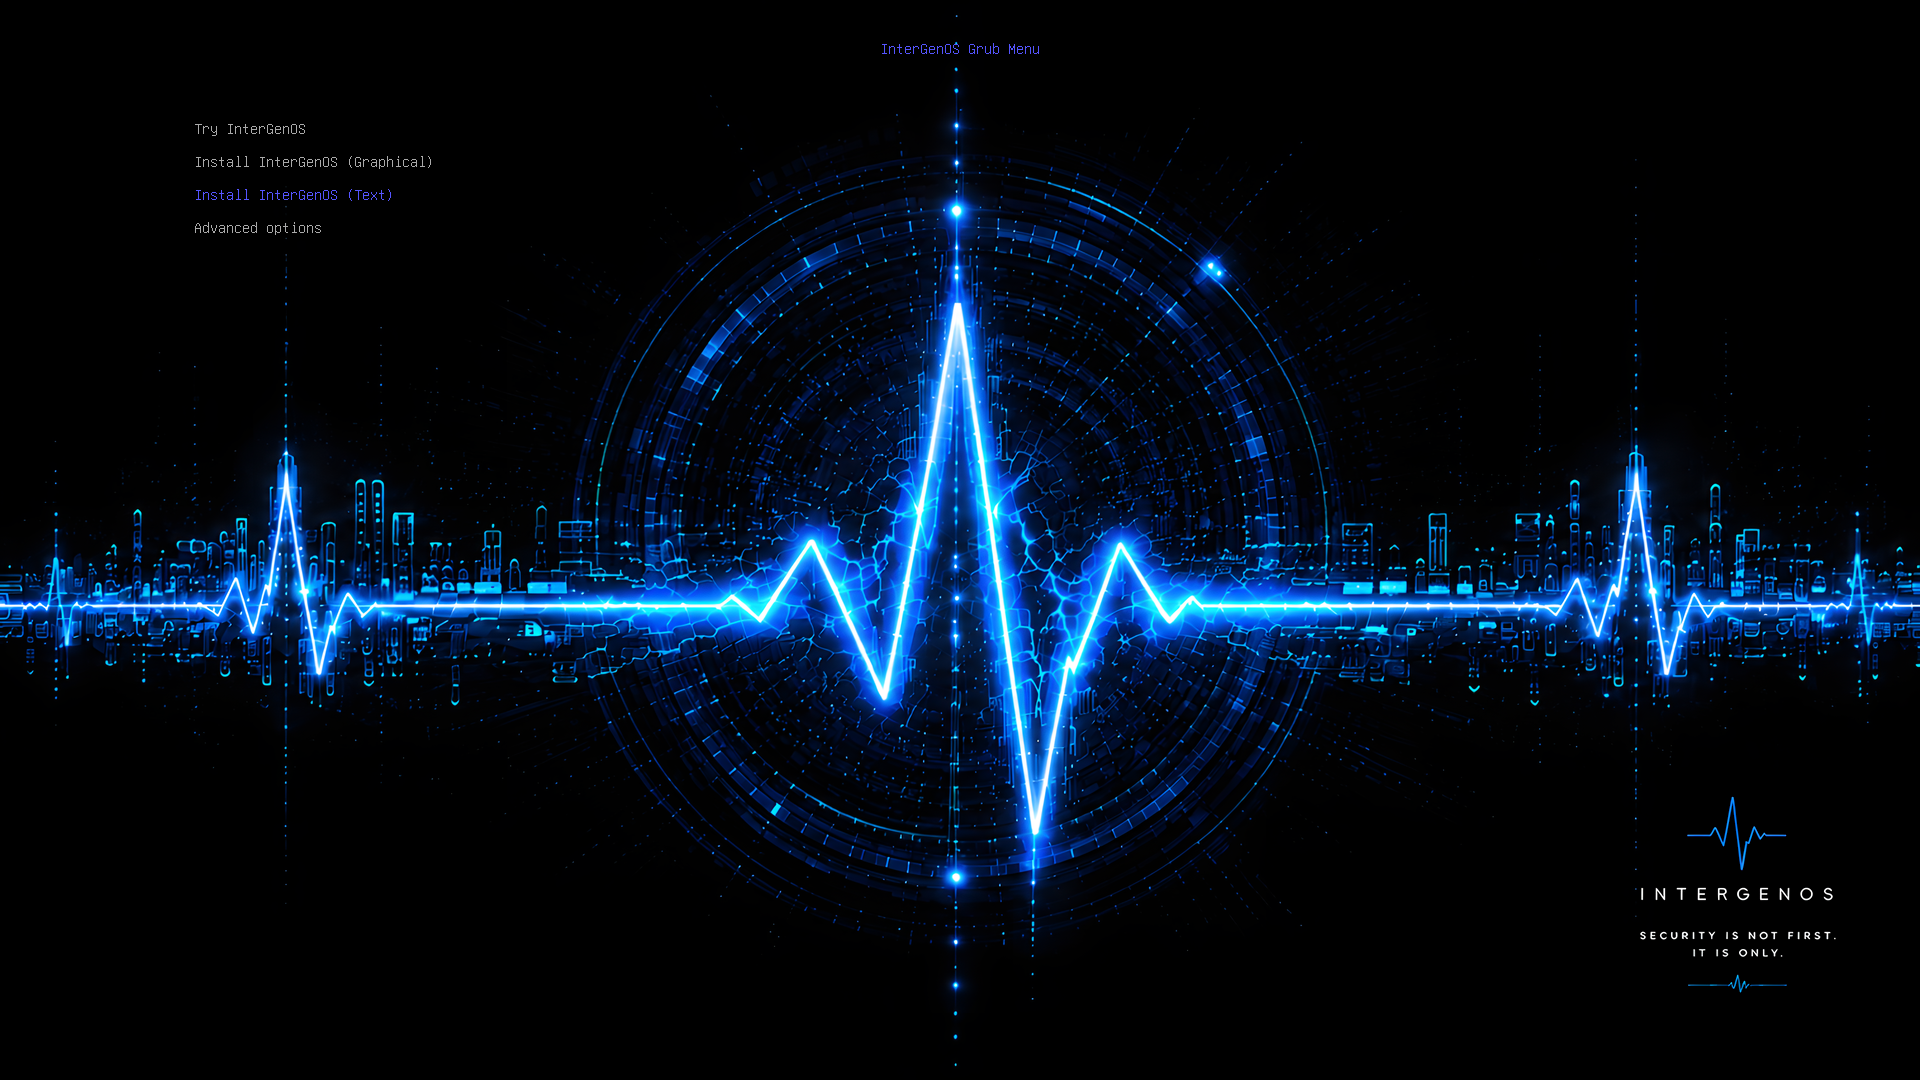
The boot menu, the first screen after you boot the install media. Select “Install InterGenOS (Graphical)” to follow this guide.
When you boot the InterGenOS media you land here first. The menu is served by a signed GRUB, and selecting an entry hands off to a signed Unified Kernel Image (UKI) — the boot path is verified end to end. Try InterGenOS boots the live GNOME session (you can also launch FORGE from there); the two Install entries start the installer directly. Advanced options holds “Boot from first hard disk” and “UEFI firmware setup”. This guide follows Install InterGenOS (Graphical).
The live GNOME session and, after installation, your first login both land on the InterGenOS greeter:
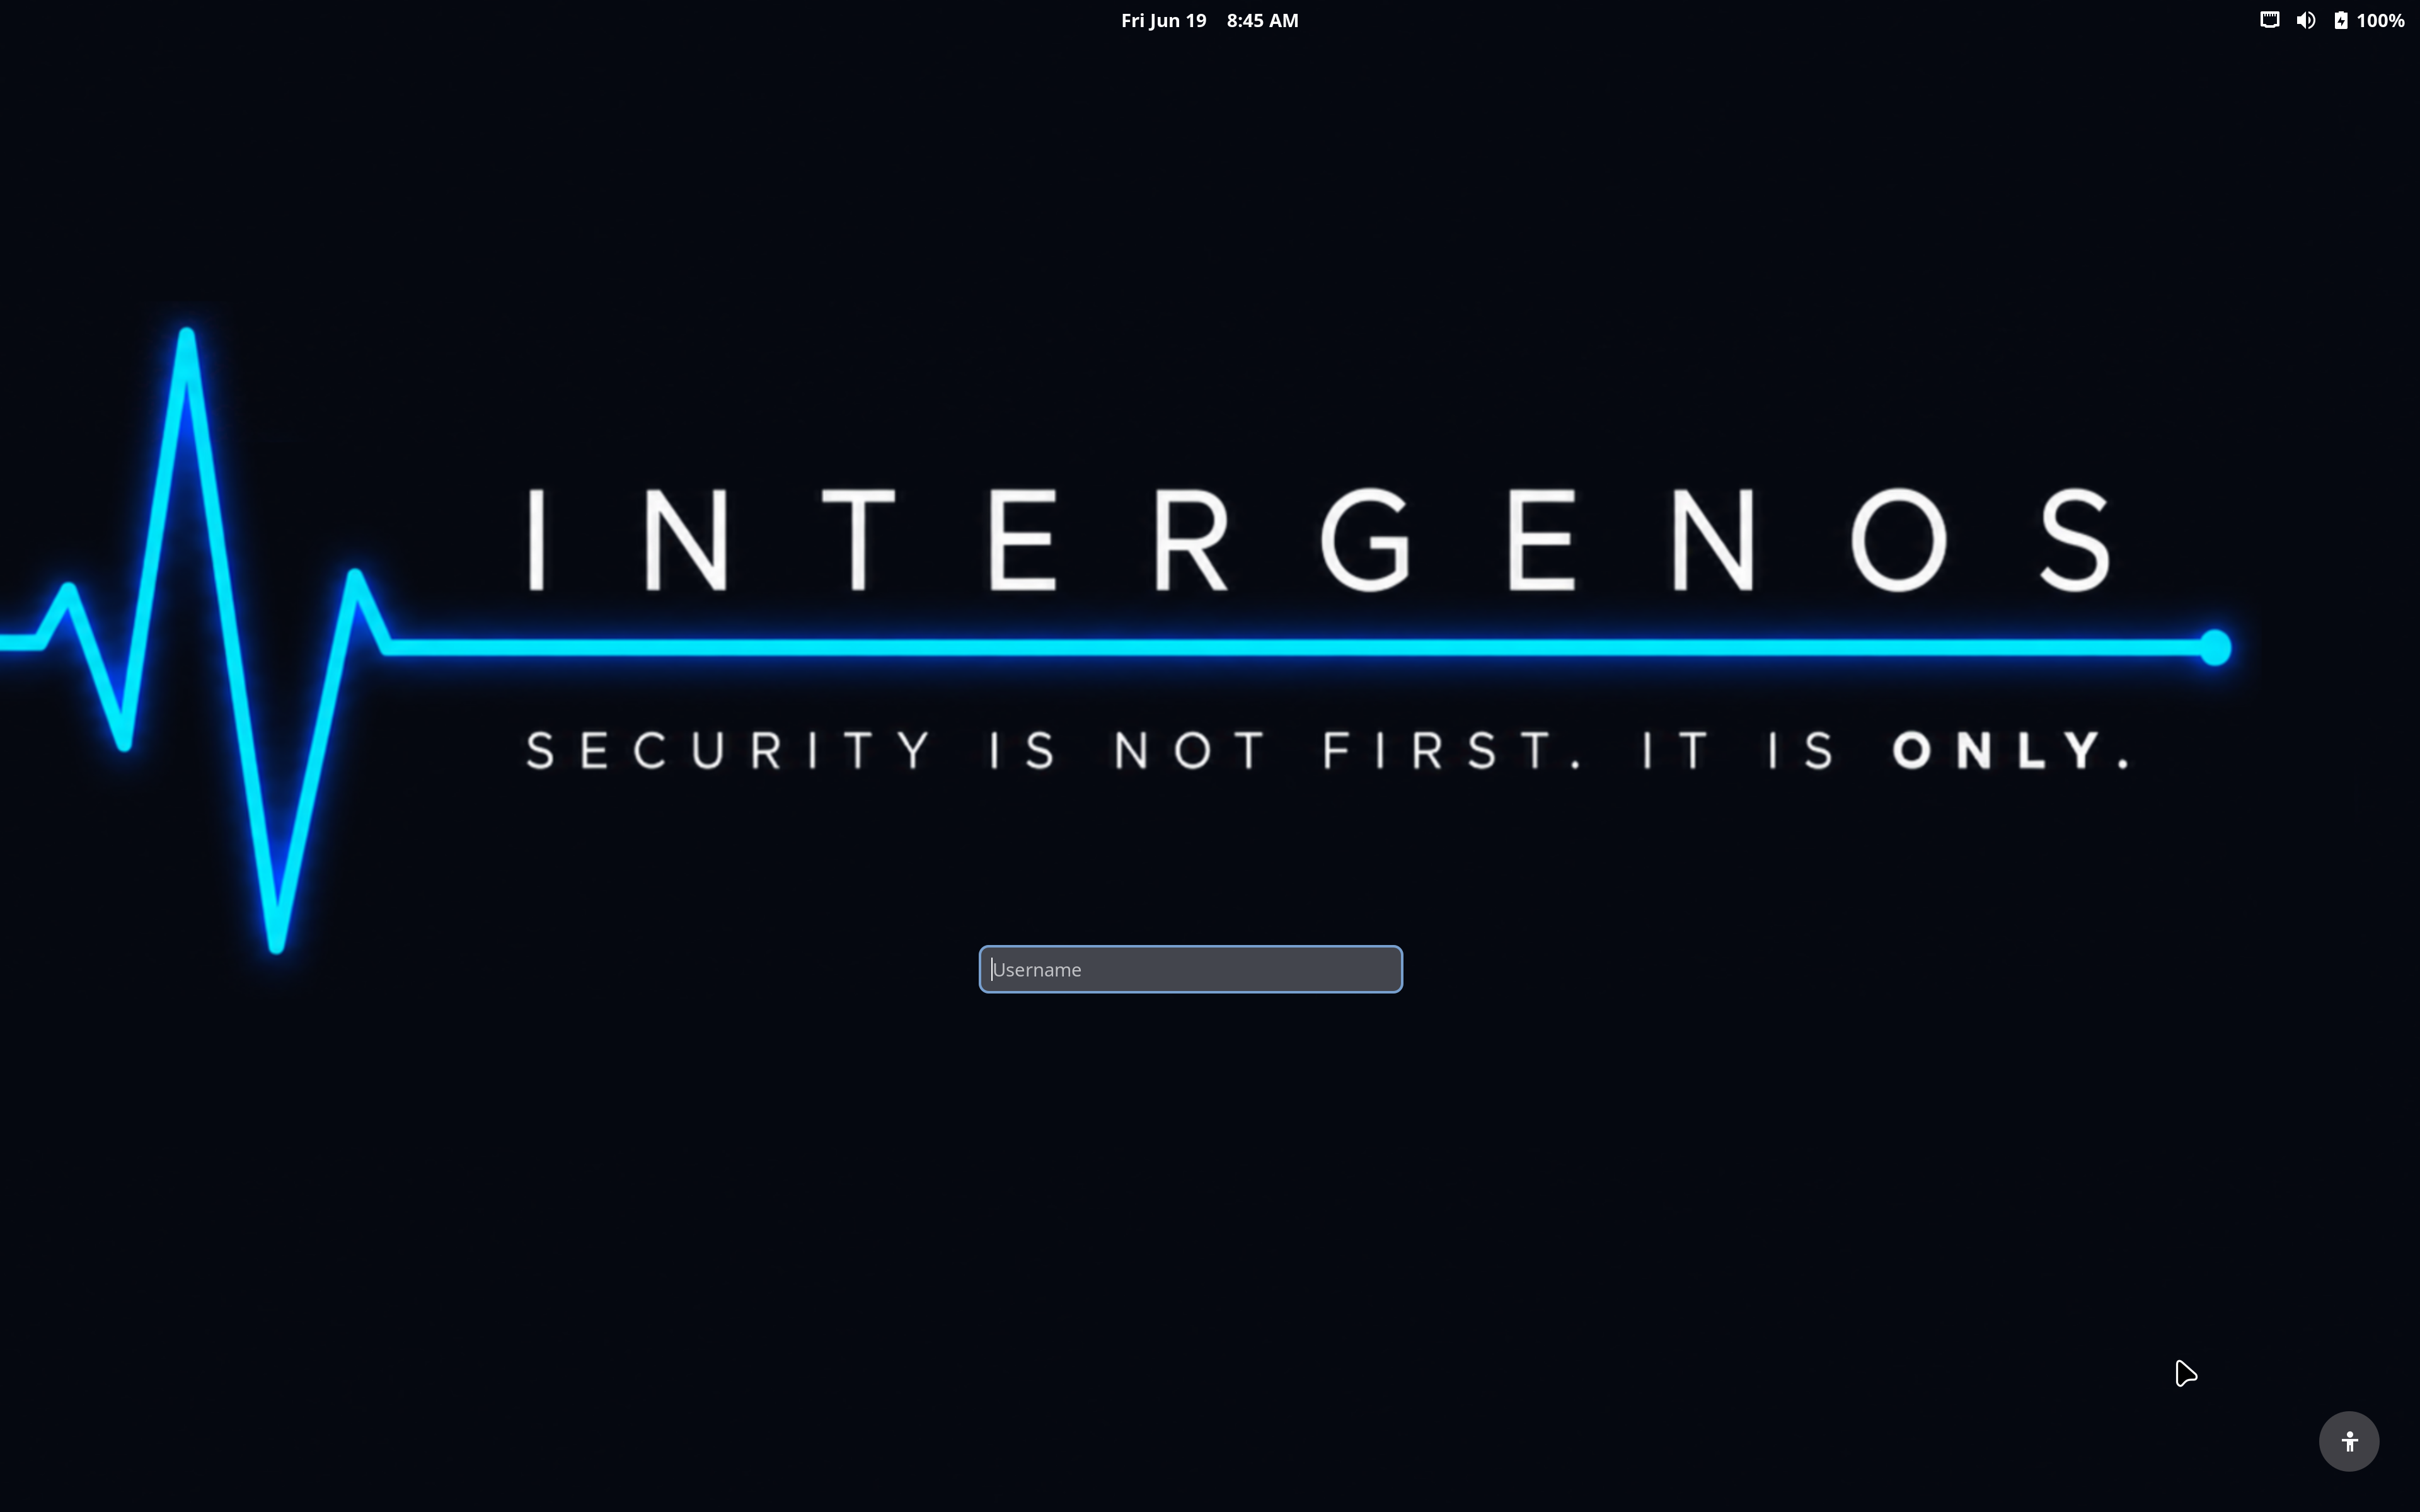
The InterGenOS greeter — the themed GNOME login screen, carrying the project creed.
Step 1 — Welcome
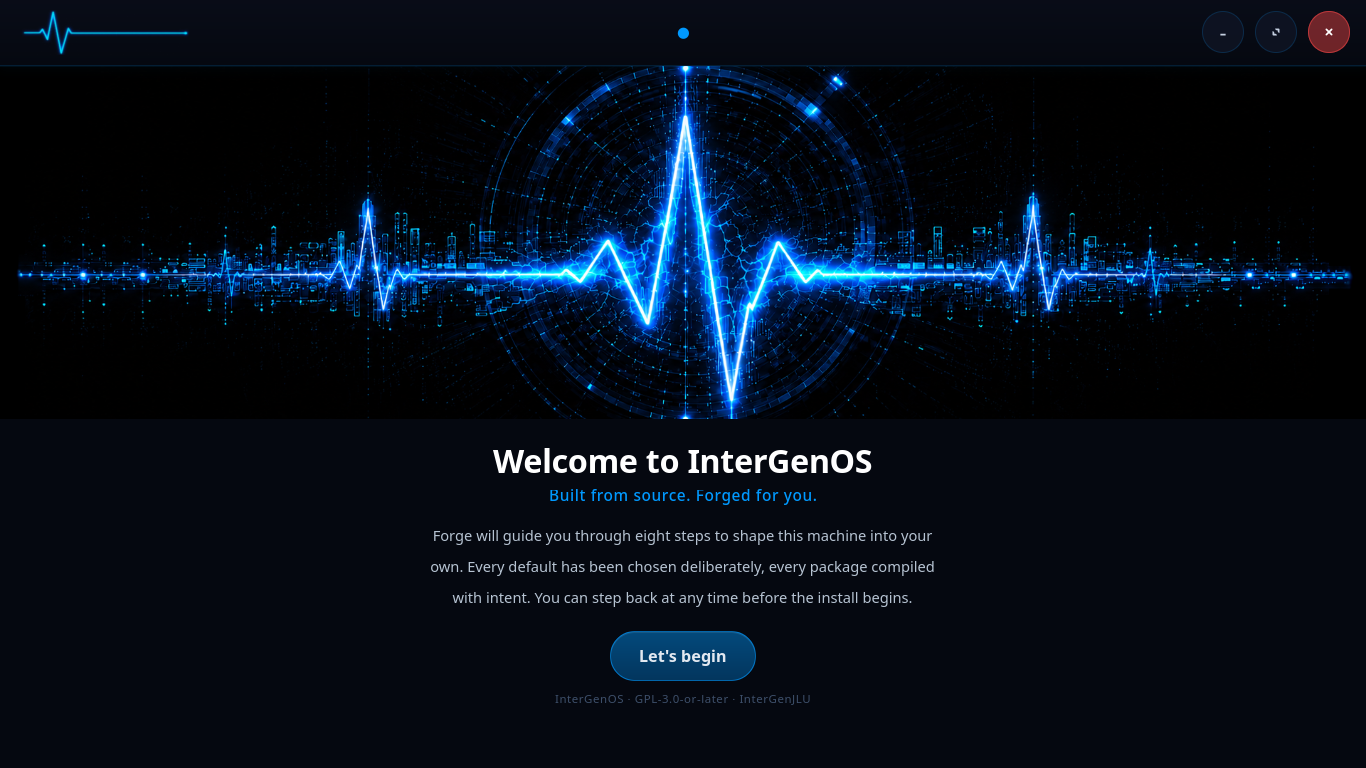
The FORGE welcome screen. Click “Let’s begin” to start the wizard.
The first screen introduces the installer and confirms what you are about to do: build a machine from source, with every default verified before install. Click Let’s begin to start.
Step 2 — Language and keyboard
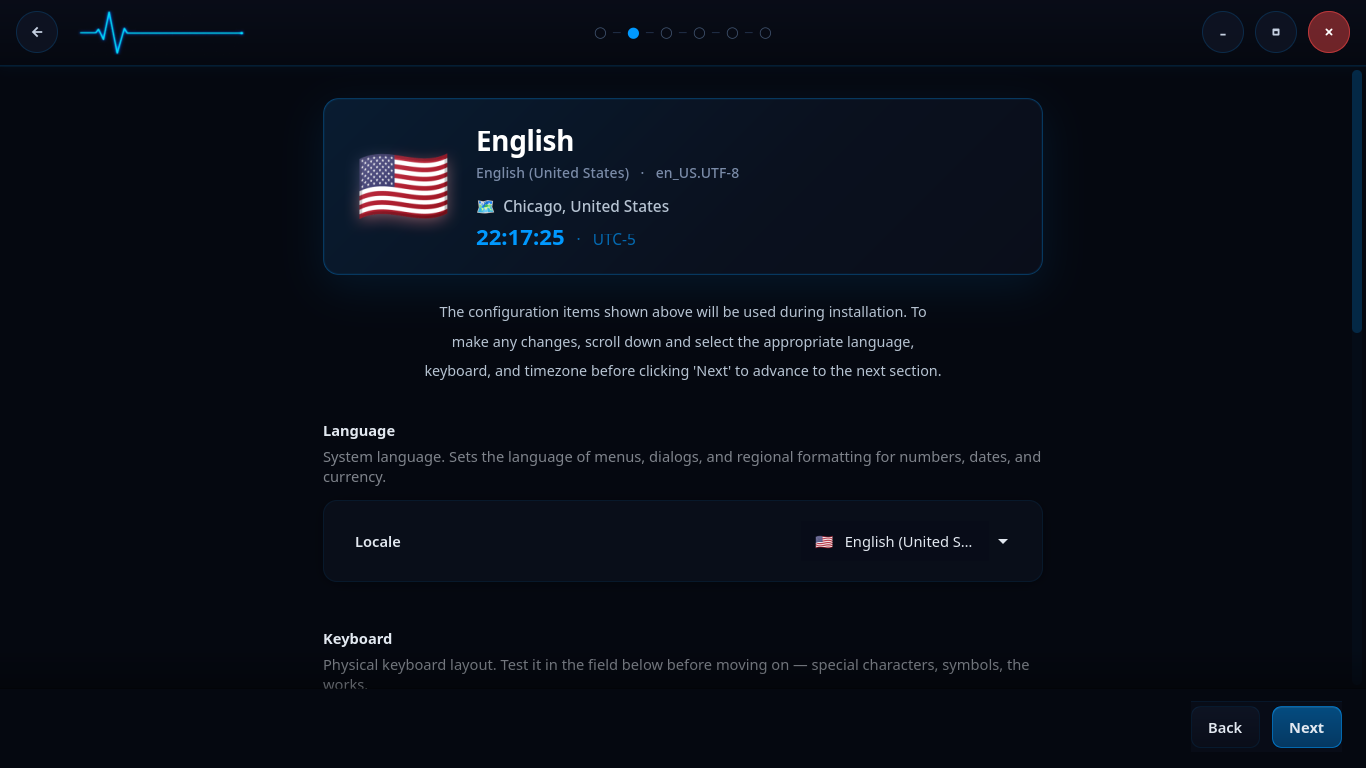
Language, locale, and keyboard selection. The summary card at the top reflects your current choices.
This screen sets your system language, locale, and keyboard layout. The card at the top summarizes the active configuration (for example, English (United States), en_US.UTF-8).
- Language sets the language of menus, dialogs, and regional formatting for numbers, dates, and currency.
- Keyboard sets the physical keyboard layout. A test field lets you confirm that special characters and symbols type the way you expect before moving on.
Scroll down to change any item, then continue on the same screen to set your timezone.
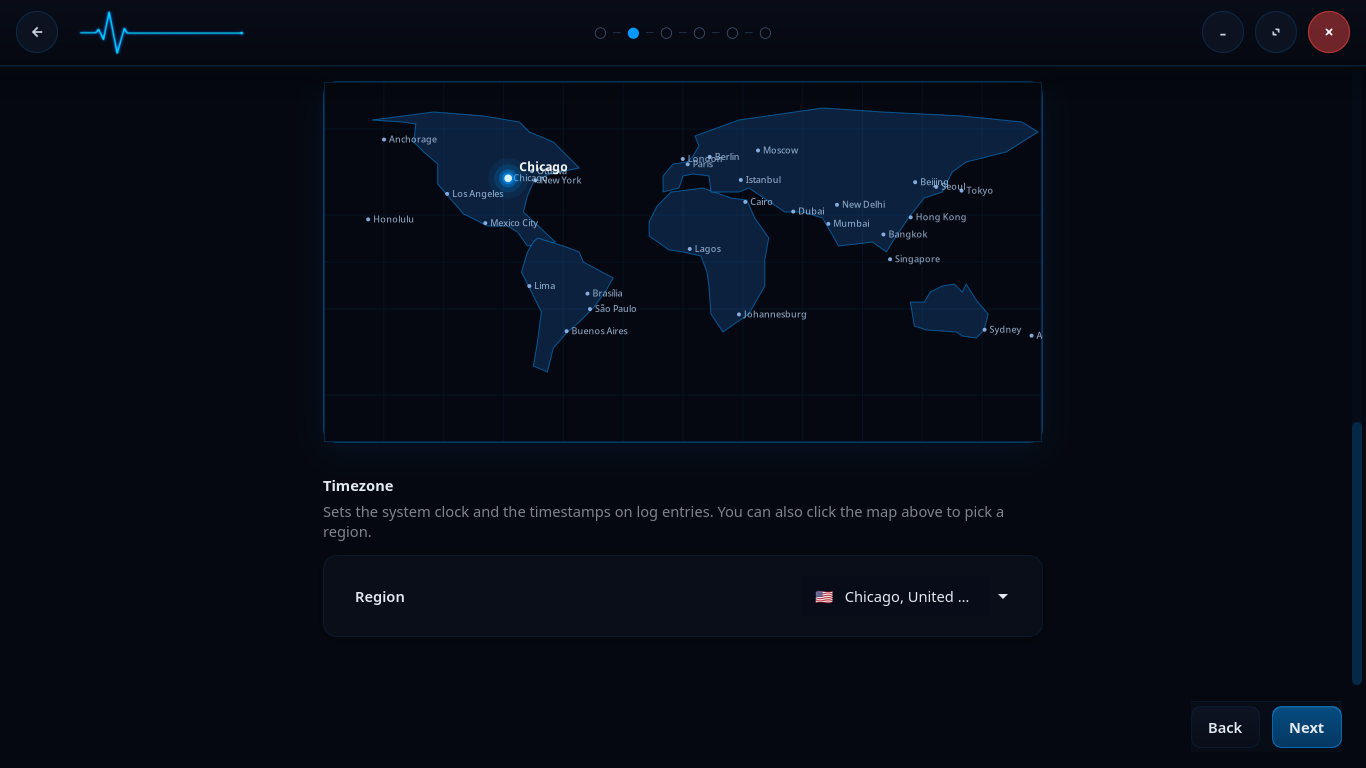
Timezone selection. Click the map or use the Region dropdown to set the system clock.
The timezone you pick sets the system clock and the timestamps on log entries. Click a region on the map or choose it from the Region dropdown. When the language, keyboard, and timezone are correct, click Next.
Step 3 — Disk and encryption
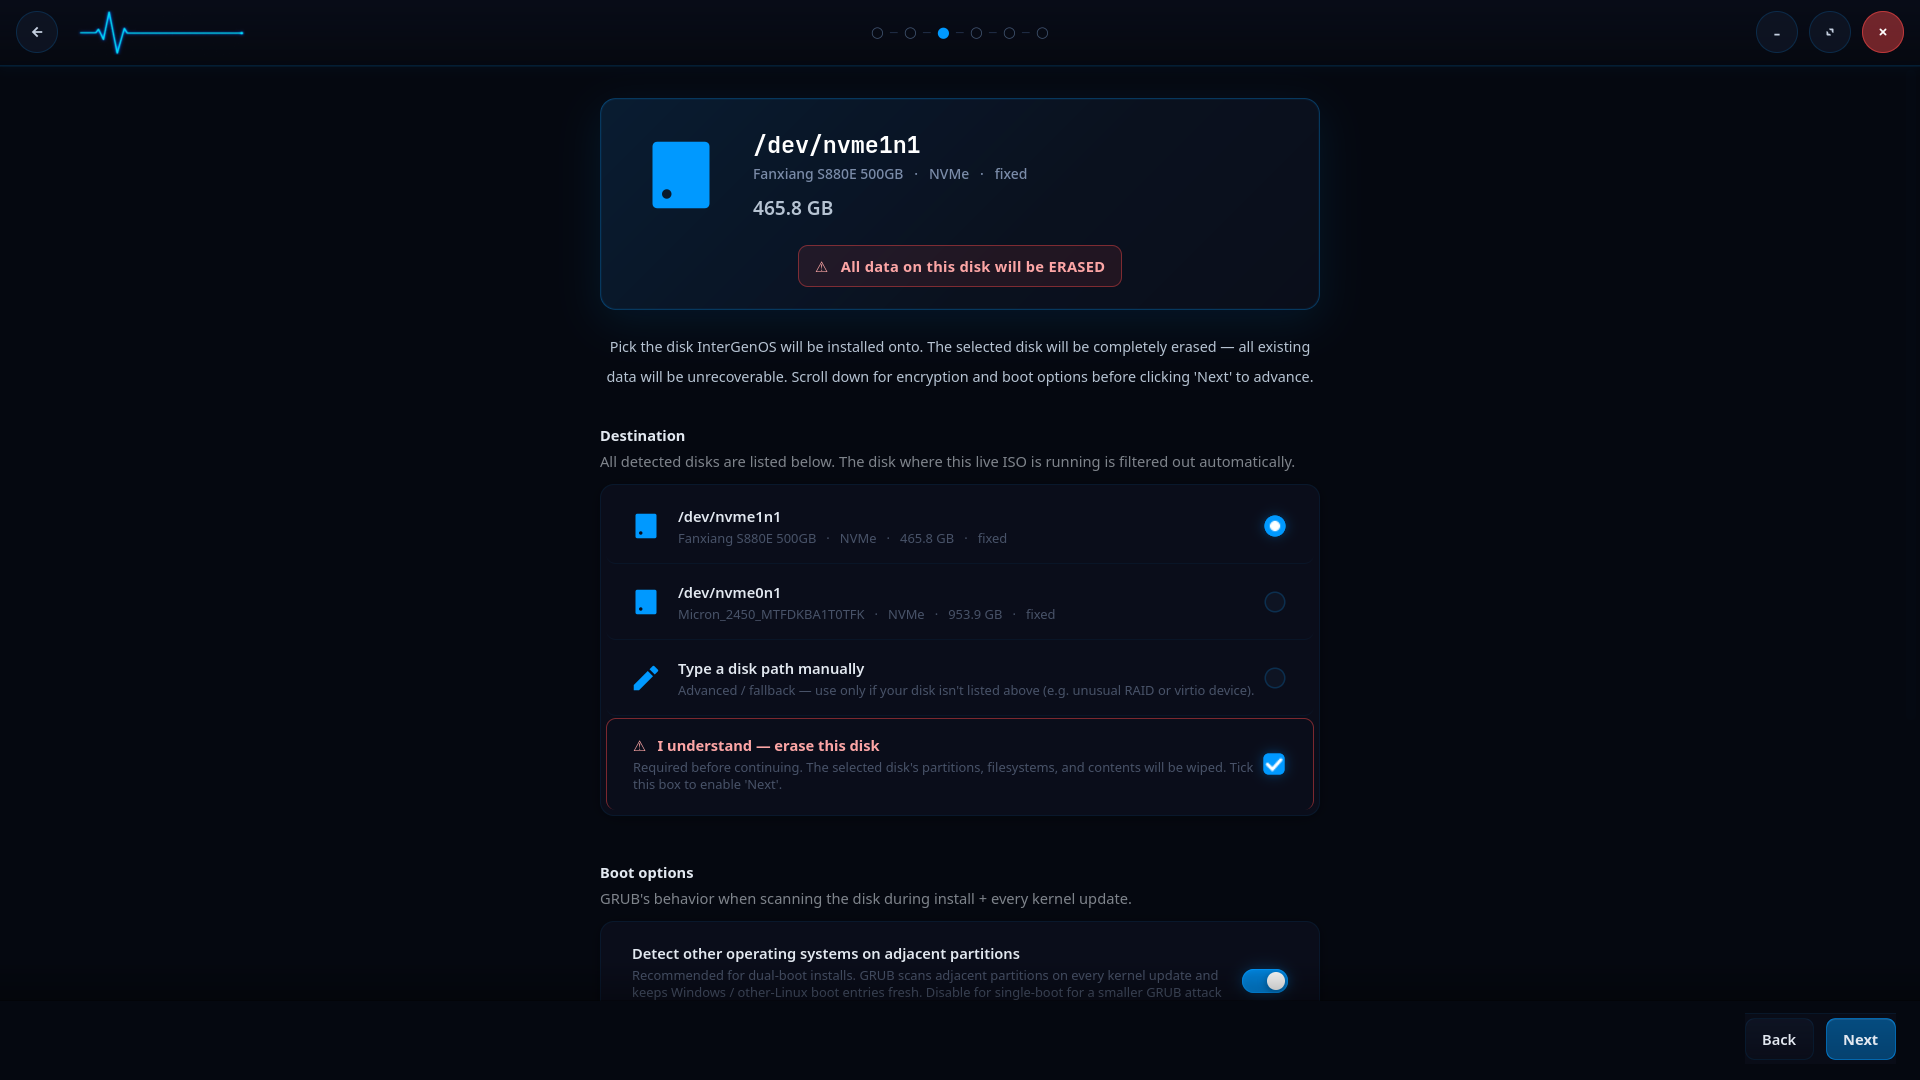
Disk selection. The selected disk will be completely erased. The disk hosting the live ISO is filtered out automatically.
Pick the disk InterGenOS will be installed onto. The selected disk is completely erased — all existing data on it becomes unrecoverable. A red warning banner states this plainly, and you must tick I understand — erase this disk before you can continue.
- All detected disks are listed under Destination. The disk the live ISO is running from is filtered out automatically.
- If no disks are auto-detected, you can tick Type a disk path manually and enter a path such as
/dev/sda. A manual entry stays marked “unverified until ‘Next’” until the installer validates it.
Full-disk encryption (optional)
Scrolling down on this screen reveals the encryption and boot options. Full-disk encryption is opt-in, not the default — FORGE asks, and you choose. Ticking Encrypt the root filesystem with LUKS2 turns it on.
If you enable encryption:
- FORGE prompts for a passphrase with a confirmation field. A live strength label appears as you type. The guidance is a soft warning, not a hard block: 8 characters is the floor below which the warning fires, and 12 characters with at least two character classes is the recommended baseline. You can accept a passphrase that fires the warning after confirming.
- The target partition is formatted with LUKS2 using
cryptsetup. Forge explicitly forces the memory-hardargon2idkey-derivation function (resistant to GPU and ASIC brute force); the cipher is cryptsetup’s default of AES-256 in XTS mode, which Forge does not override. - Your passphrase is never written to disk outside the LUKS header slot itself, never logged, and never sent anywhere. There is no recovery-key escrow and no master key. If you forget the passphrase, the data is gone. This is by design.
Two further unlock methods — TPM2-sealed unlock and FIDO2-token unlock — are designed as EXPERIMENTAL sub-options that compose with the passphrase, but they are not offered by the installer in this release (see the status note on Disk Encryption & LUKS), so the encryption step asks only for a passphrase. For the full encryption model, boot-time unlock flow, and recovery procedures, see the full-disk encryption documentation.
When the disk and encryption choices are set, click Next.
Step 4 — User accounts and Secure Boot
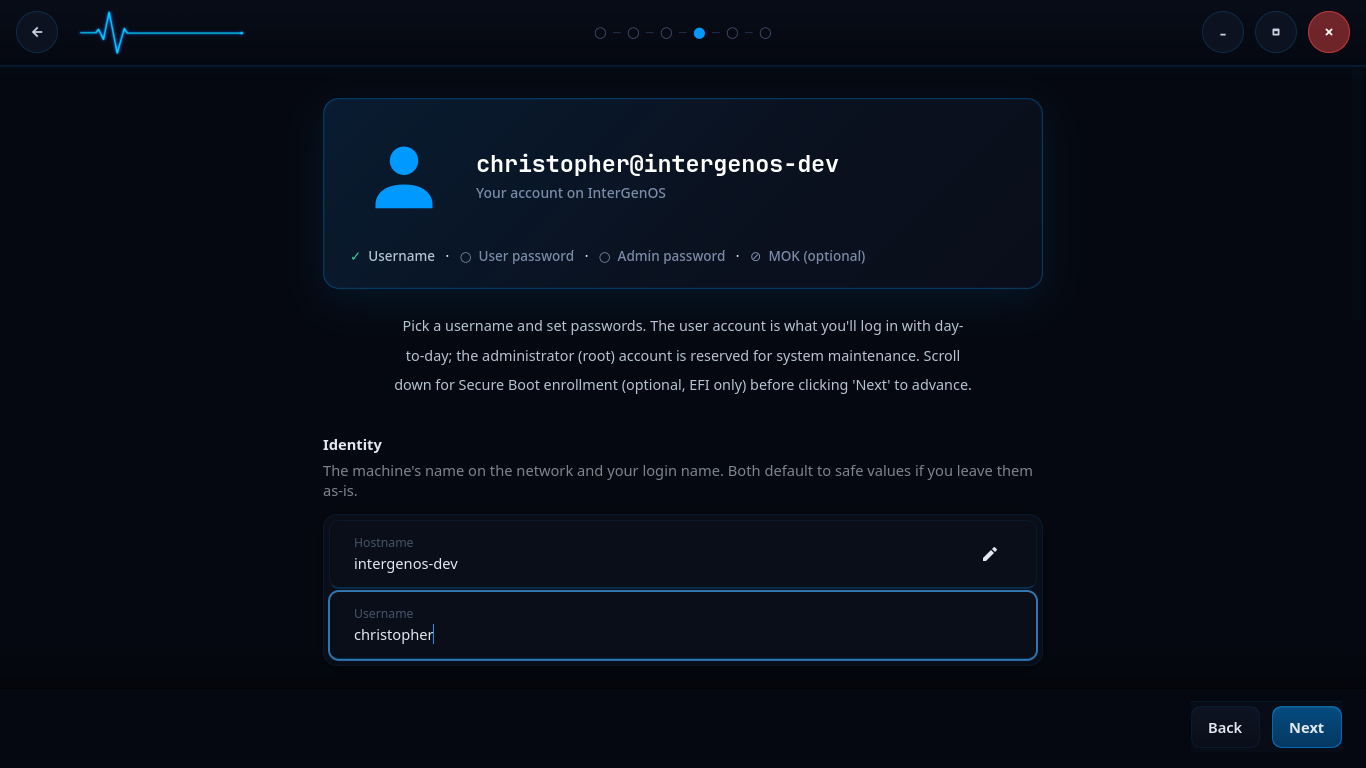
Identity setup. Pick a hostname and username; both default to safe values if left as-is.
This screen sets up your accounts. The card at the top tracks four items: Username, User password, Admin password, and the optional MOK enrollment password.
Under Identity you set:
- Hostname — the machine’s name on the network.
- Username — the unprivileged account you log in with day to day.
Both default to safe values if you leave them as-is.
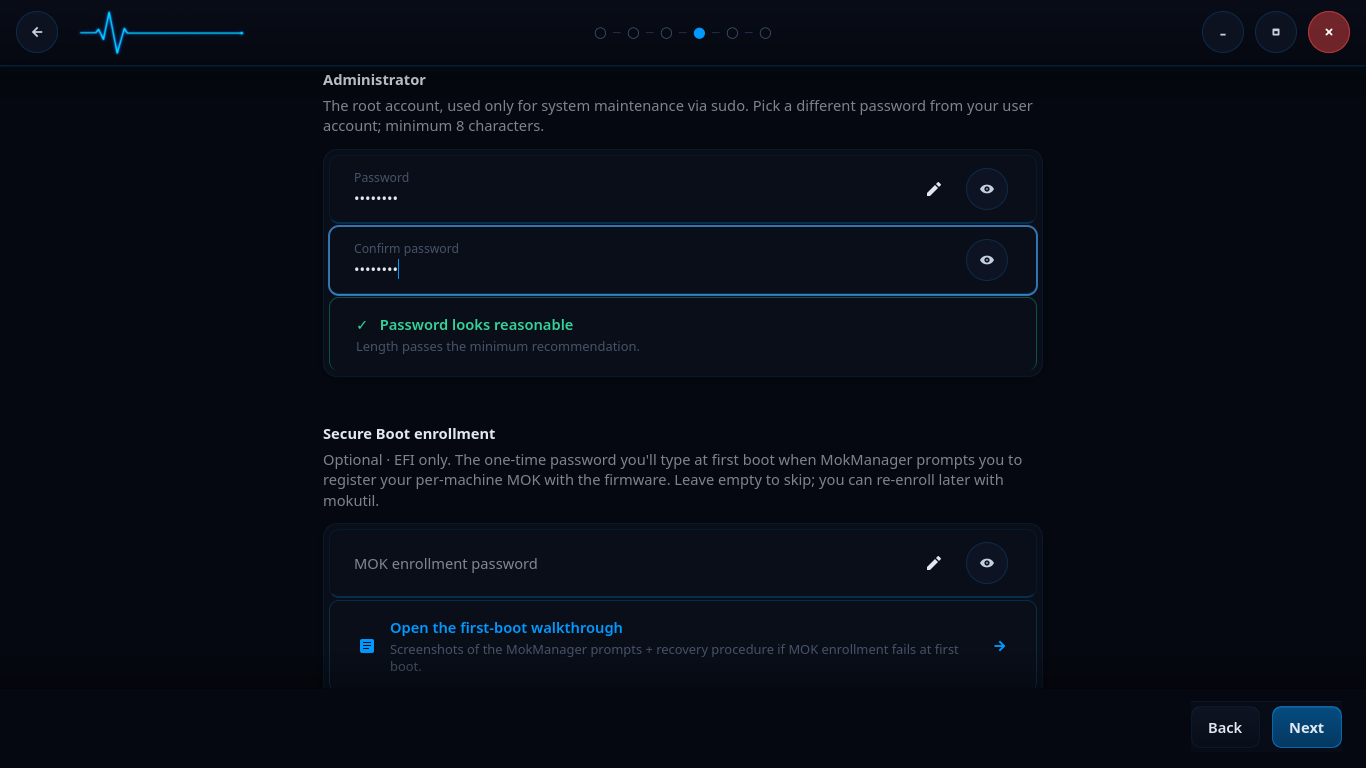
Administrator password and optional Secure Boot (MOK) enrollment.
Scrolling down reveals the password and Secure Boot fields.
- Administrator sets the root password, used for administrative prompts (such as enabling services later) and recovery — day-to-day
sudoasks for your own user password. Pick a different password from your user account; minimum 8 characters. A strength indicator confirms when the password passes the minimum recommendation. - Secure Boot enrollment is optional and applies to EFI systems only. The MOK enrollment password is a one-time password you type at first boot when MokManager prompts you to register your per-machine Machine Owner Key (MOK) with the firmware. Leave it empty to skip; you can re-enroll later with
mokutil. A link to the first-boot walkthrough explains the MokManager prompts and the recovery procedure if enrollment fails.
When your accounts are set, click Next.
Step 5 — Package groups
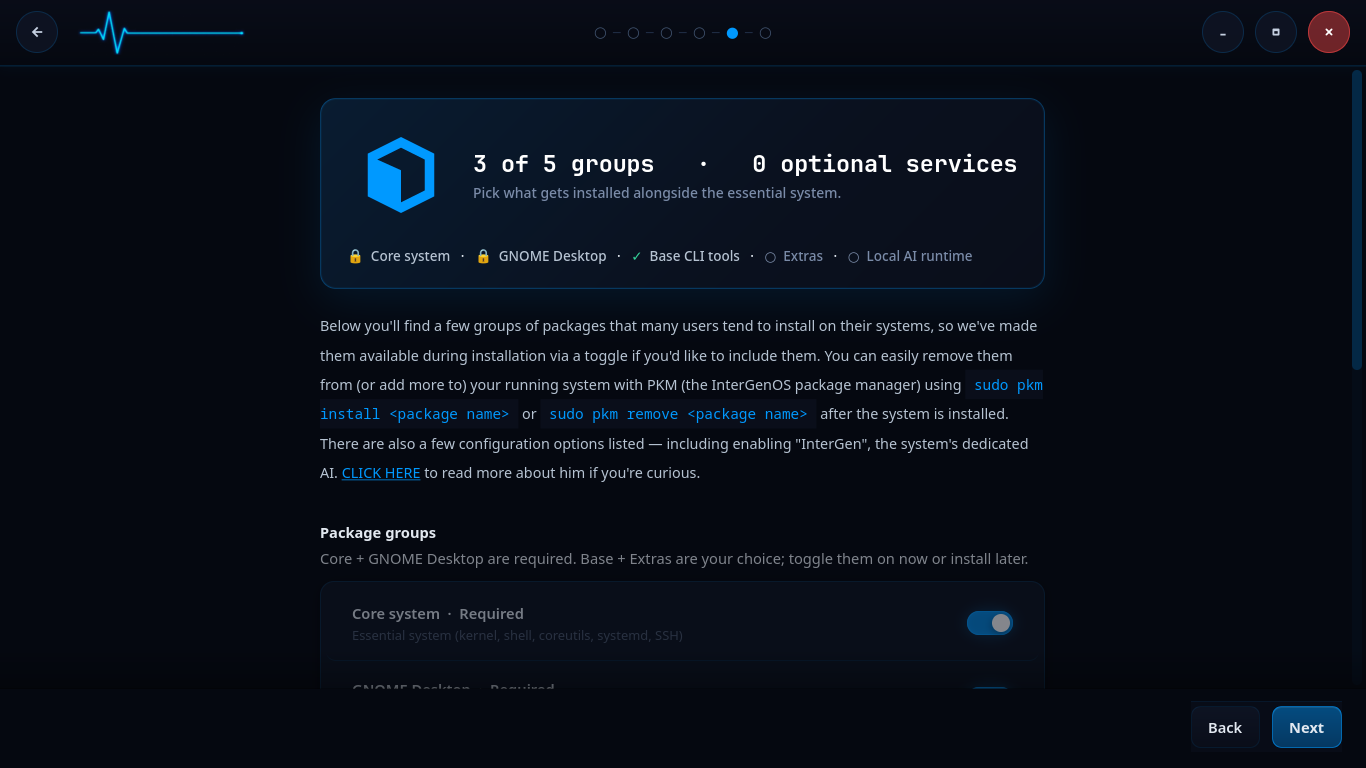
Package group selection. Core and GNOME Desktop are required; Base, Extras, and the local AI runtime are optional.
Here you pick what gets installed alongside the essential system. The packages are organized into groups. InterGenOS spans 1000+ packages across seven tiers (toolchain, core, base, desktop, extra, compute, and ai); these counts drift between builds, so derive the live numbers from the manifest rather than relying on a fixed figure.
The groups shown on this screen:
- Core system — Required. The essential system: kernel, shell, coreutils, systemd, SSH. Locked on.
- GNOME Desktop — Required. The desktop environment. InterGenOS ships GNOME 49 on Wayland. Locked on.
- Base CLI tools — optional command-line utilities.
- Extras — optional additional packages.
- Local AI runtime — optional. This enables InterGen, the system’s tiered, hardware-detected, offline-first local assistant (on-device models, zero telemetry). The screen links to more detail about it.
You can toggle the optional groups on now or install them later. Everything is also available afterward on the running system through pkm, the InterGenOS package manager, with sudo pkm install <package name> or sudo pkm remove <package name>. When your selection is set, click Next.
Step 6 — Review and confirm
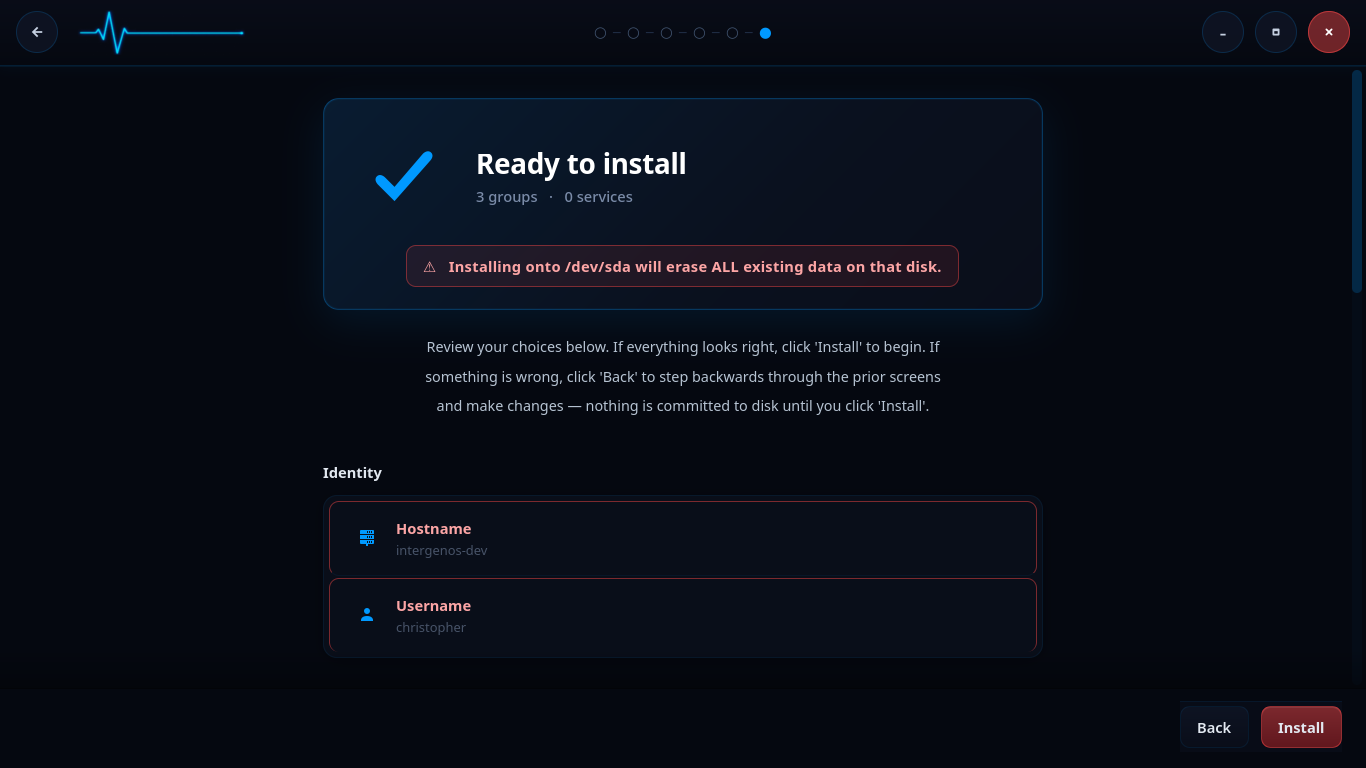
The confirmation screen. Nothing is committed to disk until you click “Install”.
This is the last screen before any disk writes. A Ready to install summary lists your choices: the package groups and services selected, your hostname, and your username. A red banner repeats the disk-erase warning, naming the target disk explicitly (for example, Installing onto /dev/sda will erase ALL existing data on that disk.).
Review everything. If something is wrong, click Back to step backwards through the prior screens and change it. Nothing is committed to disk until you click Install. When you are ready, click Install to begin.
Step 7 — Installing
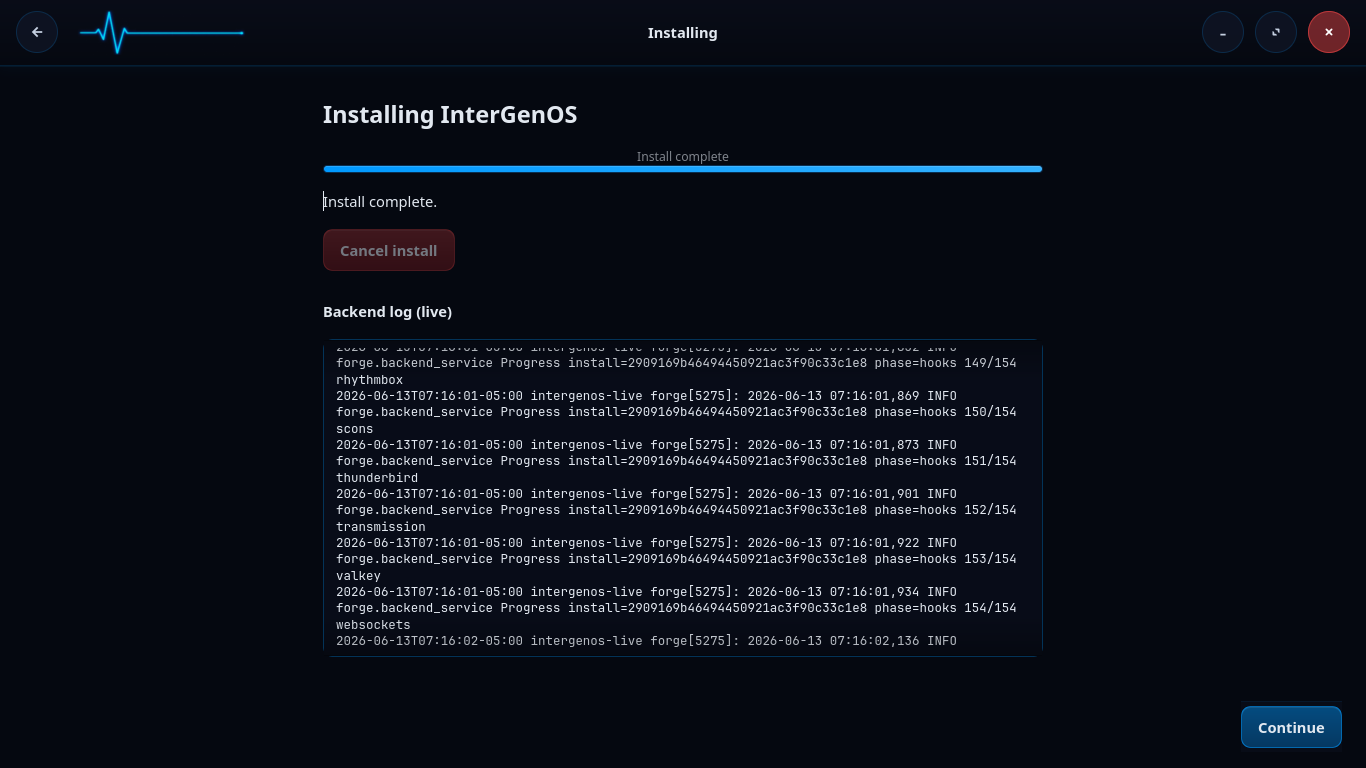
The install runs through its phased pipeline, with a live backend log you can watch.
The install now runs through its pipeline: verifying package integrity, partitioning and formatting the disk, mounting the target, extracting and registering packages, generating configuration, creating accounts, generating the Machine Owner Key and signing the bootloader on EFI systems, running post-install hooks, enabling services, and cleaning up. A failure halts the pipeline, performs best-effort unmounts, and surfaces the exact point of failure rather than leaving you guessing.
A progress bar tracks overall completion, and a Backend log (live) panel streams the install as it happens, including the per-package hook progress (for example, phase=hooks 150/154). If you need to abort, Cancel install is available. When the log reads Install complete, click Continue.
Step 8 — Install complete
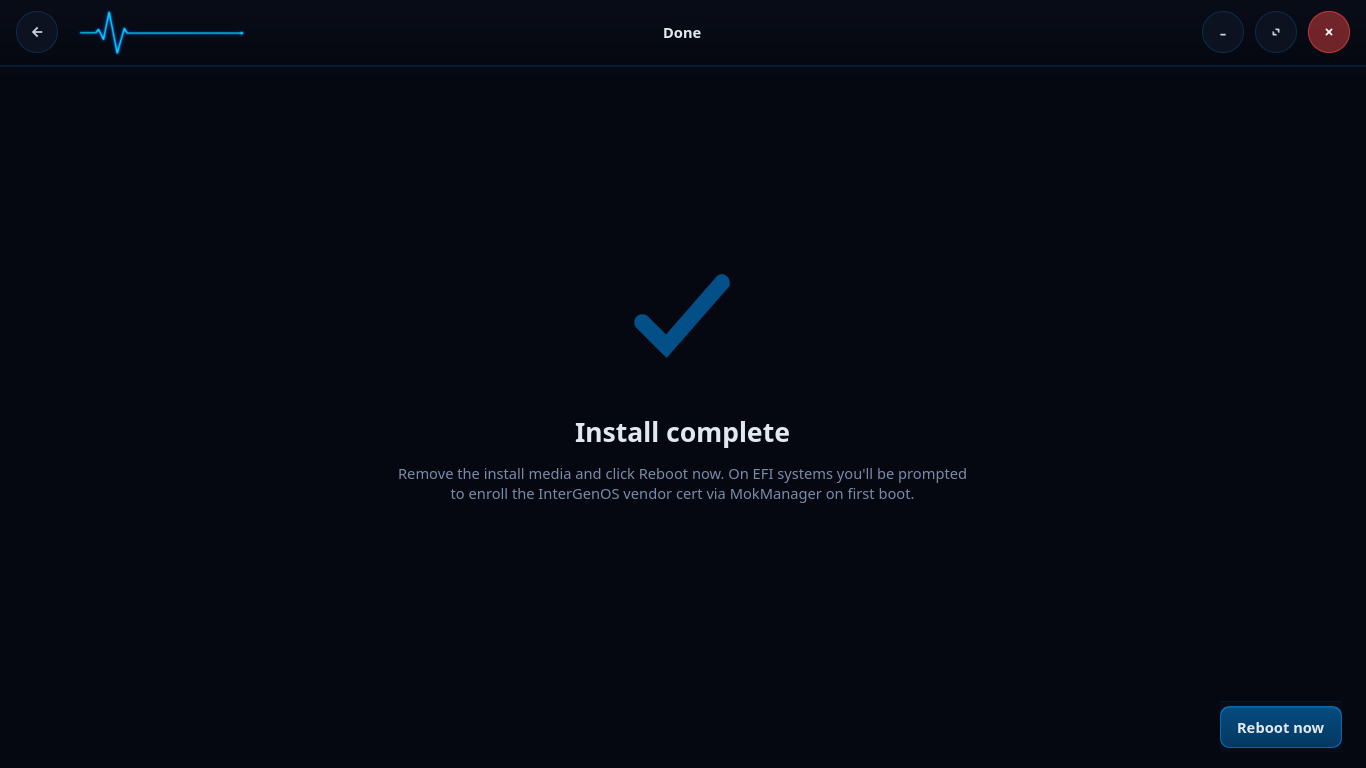
Installation finished. Click Reboot now, and remove the install media as the system restarts.
InterGenOS is installed. Click Reboot now, and remove the install media as the system restarts — in that order. (Pulling the live medium while the session is still running removes the filesystem the live session itself is standing on.)
On EFI systems, you are prompted to enroll your per-machine Machine Owner Key (the certificate Forge generated during this install — its subject reads CN=InterGenOS Machine Owner Key) via MokManager on the first boot. This is where the MOK enrollment password you set in Step 4 is used. If you set one, have it ready; if you skipped it, you can enroll later with mokutil. For the MokManager prompts and the recovery procedure, see the first-boot walkthrough.
What FORGE installs
R001.x is the first public release line; the project is in active development. The current release is always stated at https://intergenos.org/news.html. A completed install gives you:
- pkm, the package manager, for adding and removing software afterward.
- GNOME 49 on Wayland as the desktop. (KDE/Plasma and switchable desktops are planned, not shipped today.)
- A signed boot chain and UKI signing (Secure Boot enforcement is optional and off by default on a fresh install), plus dm-verity sealing the live install image — the boot-chain protections.
- Optionally, InterGen, the local offline-first assistant, and InterGen Sentinel, a pluggable security scanner that defaults to Local-Rules plus a local Qwen model. Sentinel can be extended with six opt-in cloud providers (Claude (Anthropic), Gemini (Google), Copilot (Microsoft), ChatGPT (OpenAI), Grok (xAI), DeepSeek) through “Phone-A-Friend” (Frontier/Cloud Escalation).
Further reading
Disk Encryption & LUKS
InterGenOS offers first-class full-disk encryption at install time. This page explains the encryption model, what you choose during installation, what the boot prompt looks like, and how to recover when something goes wrong.
Encryption-at-rest is one of the controls that makes InterGenOS a machine you understand, can modify, and can trust: your disk is yours, and its contents stay unreadable to anyone who has the disk but does not have you.
For the signed-boot story that runs around the encrypted volume, see Verified Boot.
Status note (decided 2026-08-11): the two EXPERIMENTAL unlock methods described below — TPM2-sealed unlock and FIDO2-token unlock — are not offered by the installer in this release. A functionality review (2026-08-08) found defects in both: FIDO2 enrollment can abort an install that opts in, and the TPM2 sealed key’s parent context does not survive a reboot, so automatic unlock could never outlast the first power cycle. Passphrase encryption is unaffected and fully supported. The sections below are retained as design documentation for when the corrected methods return after dedicated hardware verification.
The short version
- Full disk encryption is opt-in, not default. The Forge installer asks; you choose.
- The format is LUKS2 with a passphrase. TPM2-sealed unlock and FIDO2-token unlock are designed as EXPERIMENTAL sub-options that compose with the passphrase, but they are not offered in this release (see the status note above); the passphrase slot is always the unconditional fallback.
- Your passphrase is never written to disk outside the LUKS header slot itself, never logged, and never sent anywhere. There is no recovery-key escrow.
- The encrypted volume holds the entire root filesystem. The ESP (the small boot partition) is not encrypted, because the firmware needs to read it before any operating system is running. Secure Boot signature verification on the UKI protects that surface.
- At boot, a small InterGenOS-branded prompt asks for your passphrase. Three attempts, then a recovery shell.
- If you forget your passphrase, your data is gone. This is by design. There is no master key.
Why encrypt
Encryption-at-rest protects the data on the disk from anyone who has the disk but does not have you: a stolen laptop, a discarded SSD, a seized device, a borrowed loaner. It does not protect the data from someone who has both the disk and your passphrase, and it does not protect a running system once you have unlocked it.
The trade-off is small. You type a passphrase once per boot. In exchange, the contents of the disk are an unreadable cryptographic blob to anyone without your passphrase. Encryption is left opt-in rather than default so that users who do not want the boot prompt are not forced into it, but it is recommended for any portable device.
The encryption model
InterGenOS uses LUKS2 (Linux Unified Key Setup, version 2) as the on-disk encryption format. LUKS2 is the standard Linux full-disk-encryption format. The tooling is cryptsetup, the algorithm defaults are modern (AES-256 in XTS mode), and the key-derivation function is argon2id (memory-hard, resistant to GPU/ASIC brute-force).
A LUKS2 volume has:
- A header, at the start of the encrypted partition, holding the encryption metadata: the cipher choice, the master-key wrapping, and up to eight key slots.
- Key slots, each independently holding a wrapping of the master key by one passphrase (or by a TPM-sealed key, or by a FIDO2-derived key). You can have several unlock methods active at once; deleting one slot does not affect the others.
- The encrypted payload, which is your root filesystem.
The master key never leaves the LUKS header. Your passphrase unwraps a key slot, which yields the master key, which decrypts the payload. The passphrase itself is held only in volatile memory during the unlock, and the unlock prompt zeroes the buffer when it finishes. There is no on-disk copy of your passphrase.
The Forge install flow
When you run the Forge installer (TUI or GUI), the partitioning stage offers an Encrypt the root filesystem with LUKS2 checkbox under the “Full-disk encryption (LUKS)” heading. If you tick it:
- Forge prompts for a passphrase with a confirmation field. Both frontends enforce a non-empty value and a matching confirm field, and both surface length-and-diversity guidance, but the exact wording differs between them. The GUI shows a live strength label as you type and warns when a passphrase is under 12 characters and uses only a single character class — its baseline is roughly 12 characters with at least two character classes. The TUI presents the NIST 800-63B style guidance up front: 12+ characters with at least three character classes, or 4+ unrelated dictionary words (the diceware pattern). The guidance is a soft warning in either case: you can accept a passphrase that fires it. The installer asks you to confirm, but does not block. You can paste, but most users type. A passphrase you cannot recall under stress is not a passphrase, it is a paperweight.
- Forge formats the target partition with LUKS2 using
cryptsetup luksFormat. The argon2id KDF parameters (1 GB memory cost, 4 iterations, 4 threads of parallelism) are forced by Forge per RFC 9106’s recommendations for memory-hard KDFs, rather than relying on whatever defaults the host’scryptsetuphappens to ship. The cipher — AES-256 in XTS mode — is not forced: it is cryptsetup’s own default, which Forge leaves in place. They sit between RFC 9106’s first-recommended (t=1, m=2 GB) and second-recommended (t=3, m=64 MB) profiles, calibrated to defeat GPU-accelerated brute-force without risking out-of-memory on 4 GB systems. - Forge writes
/etc/crypttabon the target system so the boot-time FDE initramfs knows what to unlock. The entry is namedcryptrootand references the partition byUUID=. - Forge writes
/etc/fstabwith the unlocked device-mapper node (/dev/mapper/cryptroot) as the root mount source, not the raw partition. - The kernel post-install hook bundles the FDE initramfs into the UKI. Because of the composition with Secure Boot (see below), the unlock prompt lives inside the same signed envelope as the kernel.
The passphrase you type is held only in memory while the install runs. It is piped to cryptsetup via stdin (never on the command line, never in argv), zeroized after use, and cleared from the installer’s state on both the success and failure paths. No copy is written to disk except in the LUKS header slot itself.
Before it writes anything, Forge shows you a summary of what it is about to do — the encryption choice and the queued MOK enrollment among them:
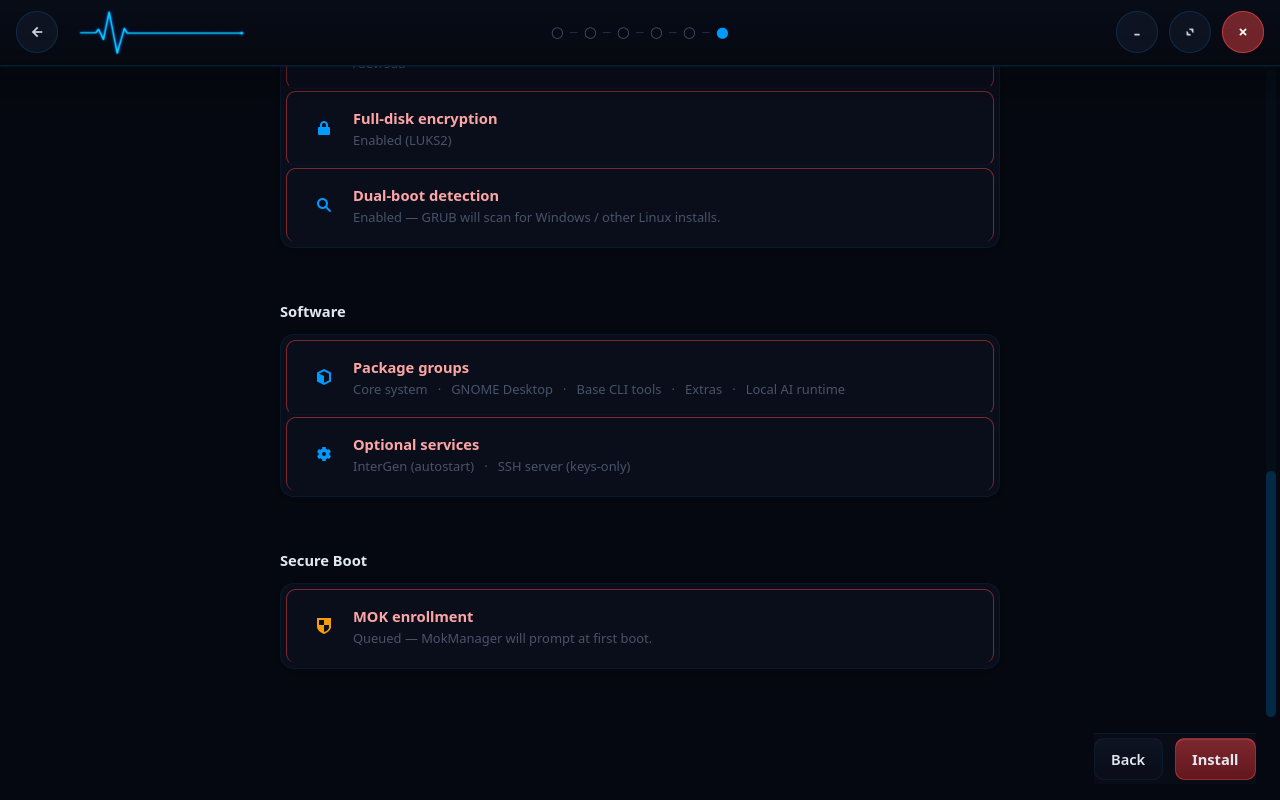
The two sections that follow describe unlock methods that are not offered in this release (see the status note at the top of this page); they are retained as design documentation. As designed, two EXPERIMENTAL unlock methods compose with the passphrase: TPM2-sealed unlock (a sub-checkbox under the encryption opt-in) and FIDO2-token unlock (a separate sub-checkbox). Both add an additional LUKS key slot at install time alongside the passphrase slot; the passphrase is never replaced, only augmented. The TPM2 sub-checkbox is greyed out with a tooltip if your hardware does not expose a TPM (/dev/tpmrm0 absent) or if the live ISO is missing the static TPM2 tools. The FIDO2 sub-checkbox is always visible when LUKS is selected; the token does not need to be plugged in when the checkbox appears, only when enrollment runs (you will be prompted to plug it in and touch it).
EXPERIMENTAL: TPM2-sealed unlock
If you tick Unlock with TPM2 (EXPERIMENTAL), Forge seals a fresh 32-byte random key against the current measured-boot state, adds that key as an additional LUKS slot, and writes the sealed-blob triplet (primary.ctx, secret.pub, secret.priv) to the ESP under /intergen/tpm2/. The seal is bound to a PCR0 + PCR7 policy: PCR0 tracks the firmware (BIOS/UEFI code), and PCR7 tracks Secure Boot policy state (the db/dbx/KEK/MOK enrollment status). On normal boots the system unlocks automatically without prompting for a passphrase.
This is flagged EXPERIMENTAL because the failure modes are subtle. A firmware update changes PCR0; a signed kernel update that touches your shim/MOK state can change PCR7; a Secure Boot reconfiguration changes PCR7. Any of these invalidates the seal, and the boot falls through to the next configured method (FIDO2, if enrolled) and ultimately to the passphrase prompt. The cost of thinking you are TPM-unlocked and then suddenly being prompted is real, so this is held back from a general recommendation until it has more field validation.
The sealed blob written to the ESP is not a secret: without the specific TPM that performed the seal (and the same PCR0/PCR7 state), the blob is useless. You can copy it for backup if you want, but it cannot be unsealed on any other machine. The passphrase slot remains untouched; if the TPM rejects the unseal, the boot prompt asks for the passphrase exactly as in the passphrase-only flow.
EXPERIMENTAL: FIDO2-token unlock
If you tick Unlock with FIDO2 token (EXPERIMENTAL), Forge enrolls a credential on a FIDO2 security token (YubiKey, Solo, Nitrokey, and similar) plugged in during the install. Enrollment runs in two interactive steps:
- Generate credential:
fido2-cred -Mcreates a new credential on the token. You will be prompted to touch the token when it blinks. - Derive unlock key: a fresh 32-byte random nonce is generated,
fido2-assert -G --hmac-secretis invoked with that nonce as salt, and the token returns an HMAC output bound to the credential and the nonce. You will be prompted to touch the token a second time. The HMAC is added as an additional LUKS slot.
Forge writes cred_id and stored_nonce to the ESP under /intergen/fido2/. Neither file is a secret: without the physical token, the credential ID and the salt are useless. The relying-party ID is intergenos. At boot, the same fido2-assert call against the same nonce yields the same HMAC bytes, which unlock the slot.
This is flagged EXPERIMENTAL for the same family of reasons as the TPM2 path: a lost token, a firmware update on the token that rotates the underlying credential storage, or a token swap all invalidate the slot. The passphrase slot stays in the LUKS header for fallback.
The boot-time flow
When an encrypted InterGenOS system boots, the path looks like this:
   Firmware (UEFI)
        |
        |  Secure Boot signature verification on the UKI
        v
   Signed UKI                       (kernel + FDE initramfs + cmdline,
        |                            bundled and signed by your local MOK)
        |
        v
   Kernel hands off to /init
        |
        v
   InterGenOS - encrypted root unlock
        |
        |  read /etc/crypttab options for "tpm2" / "fido2"
        |  mount ESP read-only (by IGOS_ESP label, fallback scan)
        v
   Try TPM2 unlock (if enrolled + /dev/tpmrm0 present)
        |  unseal against PCR0+PCR7 policy
        |  -> pipe unsealed bytes to cryptsetup --key-file=-
        |  on any failure: fall through
        v
   Try FIDO2 unlock (if enrolled + tools available)
        |  wait up to 30s for the token to enumerate
        |  fido2-assert -G --hmac-secret against stored nonce
        |  -> pipe HMAC to cryptsetup --key-file=-
        |  on any failure: fall through
        v
   Passphrase prompt (always the final fallback)
   Enter passphrase: _              (three attempts; the prompt runs
        |                            inside the signed UKI envelope)
        |  cryptsetup open
        v
   /dev/mapper/cryptroot mounted
        |
        |  switch_root
        v
   systemd PID 1 - normal boot continues
If neither TPM2 nor FIDO2 was enrolled, the chain skips straight to the passphrase prompt; the unlock path is identical to a passphrase-only install. The prompt you see in that case is plain text:
  InterGenOS - encrypted root unlock

Enter passphrase for /dev/disk/by-uuid/<uuid>:
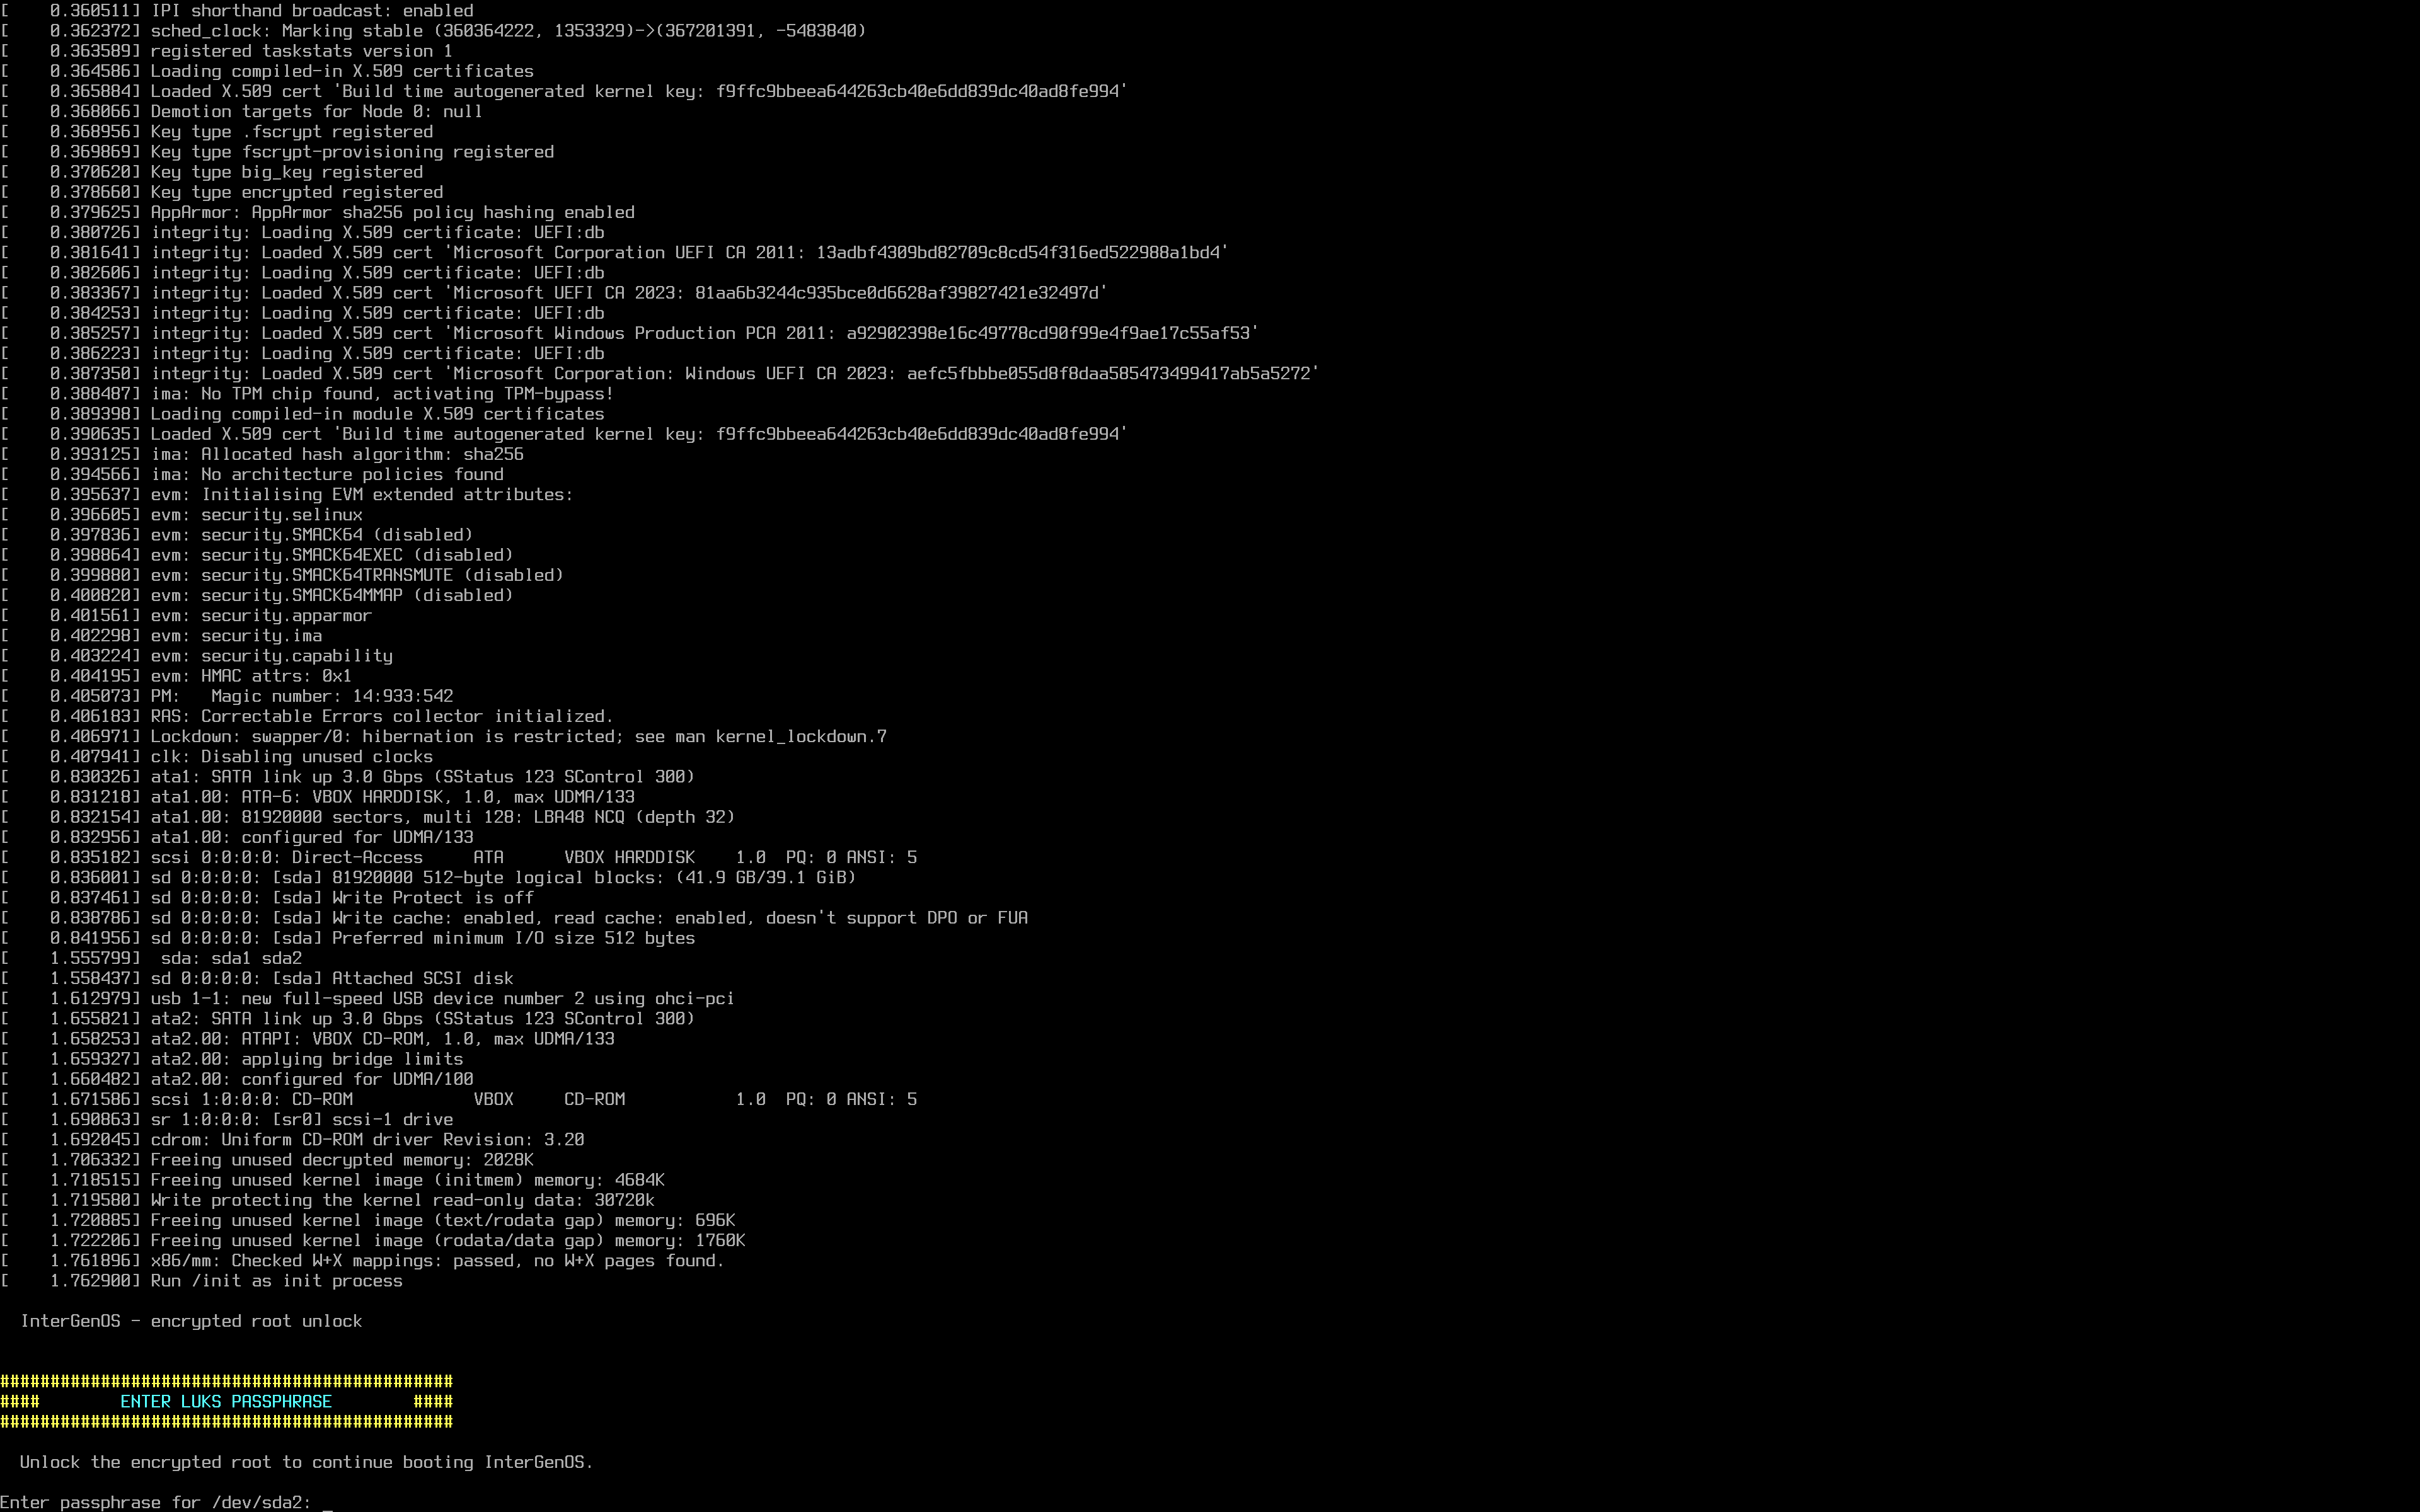
The prompt is set off by a bordered banner deliberately, so it is unmistakable in the wall of early-boot kernel messages rather than scrolling past unnoticed. Three wrong attempts drops you into a recovery shell with cryptsetup available. From there you can retry the unlock manually, inspect /etc/crypttab, or reboot.
The FDE initramfs is tiny: a static cryptsetup binary, a static busybox, the dm_crypt and ext4 kernel modules, and the storage drivers needed to see your disk. When TPM2 or FIDO2 unlock is enrolled, the initramfs also carries the static TPM2 / FIDO2 tools and the corresponding kernel modules (tpm/tpm_tis/tpm_crb for TPM2; usbhid/hid_generic for FIDO2). It does no logging to disk, no telemetry, and no network. Its only job is to attempt the unlock chain, mount the root filesystem, and hand off to systemd.
Debugging the unlock chain
The FDE init script emits journal-grep-friendly prefixes when running EXPERIMENTAL methods. From a recovery shell or after boot, you can correlate each attempt by searching for the prefix:
| Prefix | What it means |
|---|---|
[fde-init][EXPERIMENTAL TPM2] | TPM2 unlock attempt. Outcomes include skipping (no /dev/tpmrm0, no tools, or no sealed blob on ESP), attempting unlock via sealed key (PCR0+PCR7), tpm2_load failed, a tpm2_unseal | cryptsetup failure (PCR drift or broken seal), or unlock succeeded. |
[fde-init][EXPERIMENTAL FIDO2] | FIDO2 unlock attempt. Outcomes include skipping (no tools or no metadata), attempting unlock - plug your security token + touch when it blinks, no FIDO2 token detected within 30s, a specific diagnostic from the unlock pipeline, or unlock succeeded. |
[fde-init] (no EXPERIMENTAL suffix) | Passphrase prompt path, the recovery-shell drop, and root-mount errors. |
These messages appear on the console during early boot only — the FDE initramfs runs before systemd-journald exists, and its messages are not kernel messages, so they are not retrievable from the journal afterwards. Watch the screen during boot for them. What the journal does retain from the unlock is the kernel’s own record: journalctl -b -k | grep -i 'device-mapper\|dm-crypt'.
Composition with Secure Boot
The encrypted-root and signed-boot stories are designed to compose. They do not interact at runtime except through the FDE initramfs being part of the signed UKI.
A UKI is a single signed file that bundles the kernel, the initramfs, and the kernel command-line. On a non-encrypted install, the UKI’s bundled initramfs is minimal or empty: the kernel-builtin storage drivers, a PARTUUID= rootspec, and rootwait are sufficient. On an encrypted install, the UKI’s bundled initramfs is the FDE initramfs: the same script that prompts you for the passphrase is part of the same signed envelope as the kernel.
The practical consequences:
- With Secure Boot enforcement enabled, an attacker cannot substitute a fake unlock prompt that captures your passphrase: the prompt code is inside the signed UKI, and tampering with it means the firmware refuses to load it. This protection is exactly as strong as that enforcement — with Secure Boot off, nothing at the firmware level rejects a tampered image, so the signature is verifiable but not enforced.
- A kernel upgrade rebuilds the UKI with the new kernel and the same FDE initramfs, signed with your machine’s MOK. The unlock experience is identical across kernel upgrades.
- If UKI signing fails on a kernel upgrade (ESP full, MOK missing, signing-key error), the system falls back to GRUB loading the bare vmlinuz directly. On an encrypted install you would need to supply an initramfs to that recovery path manually; see Recovery below.
For the full signed-boot model, see Verified Boot.
Validated together
This composition is not just designed, it is validated. InterGenOS has been installed onto a LUKS2-encrypted target and booted to the desktop under enforced Secure Boot — the encrypted-root unlock prompt itself appearing under Secure Boot enforcement, the strictest combination of the two controls. The encrypted install runs every installer phase to completion, including the bootloader stage:
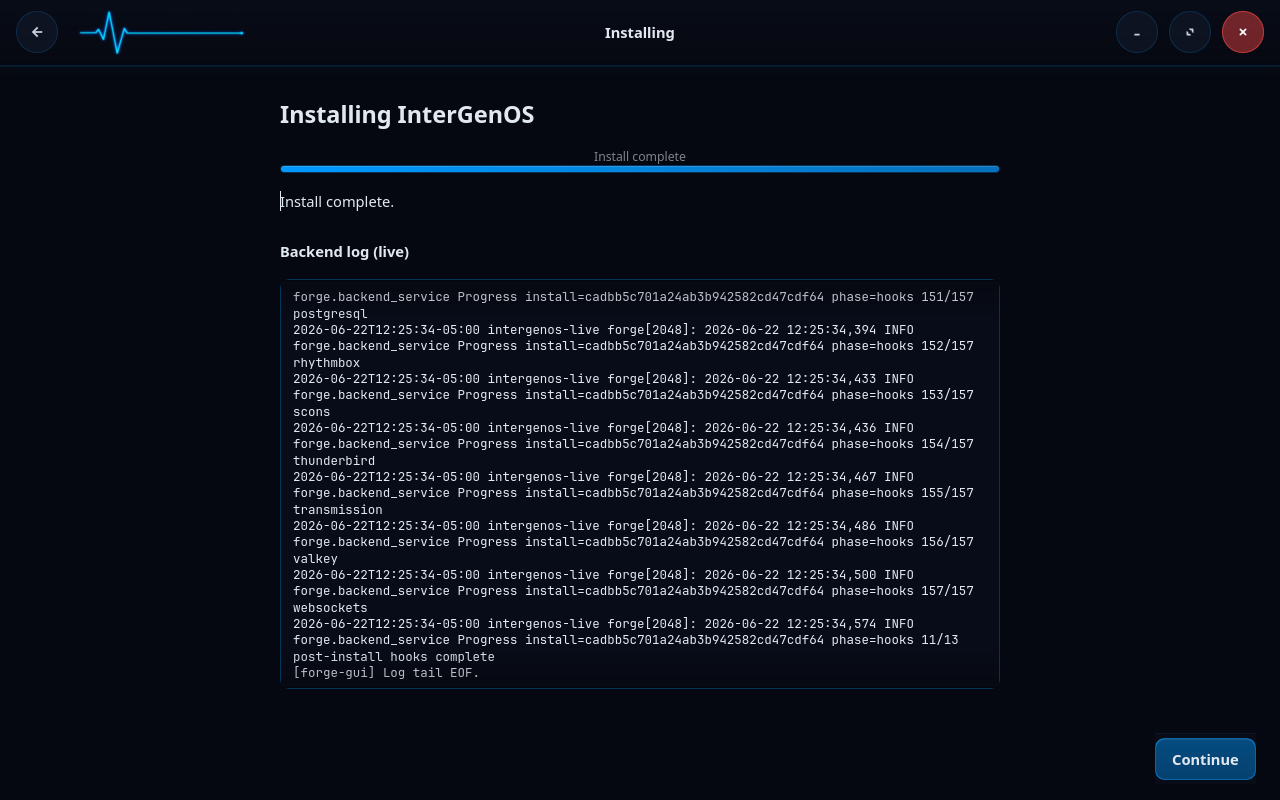
…and at boot, the signature gate and the encryption gate run in series with no conflict: the firmware verifies the signed chain (shim → GRUB → UKI), the signed UKI’s FDE initramfs prompts for your passphrase, and only then does the encrypted root mount.
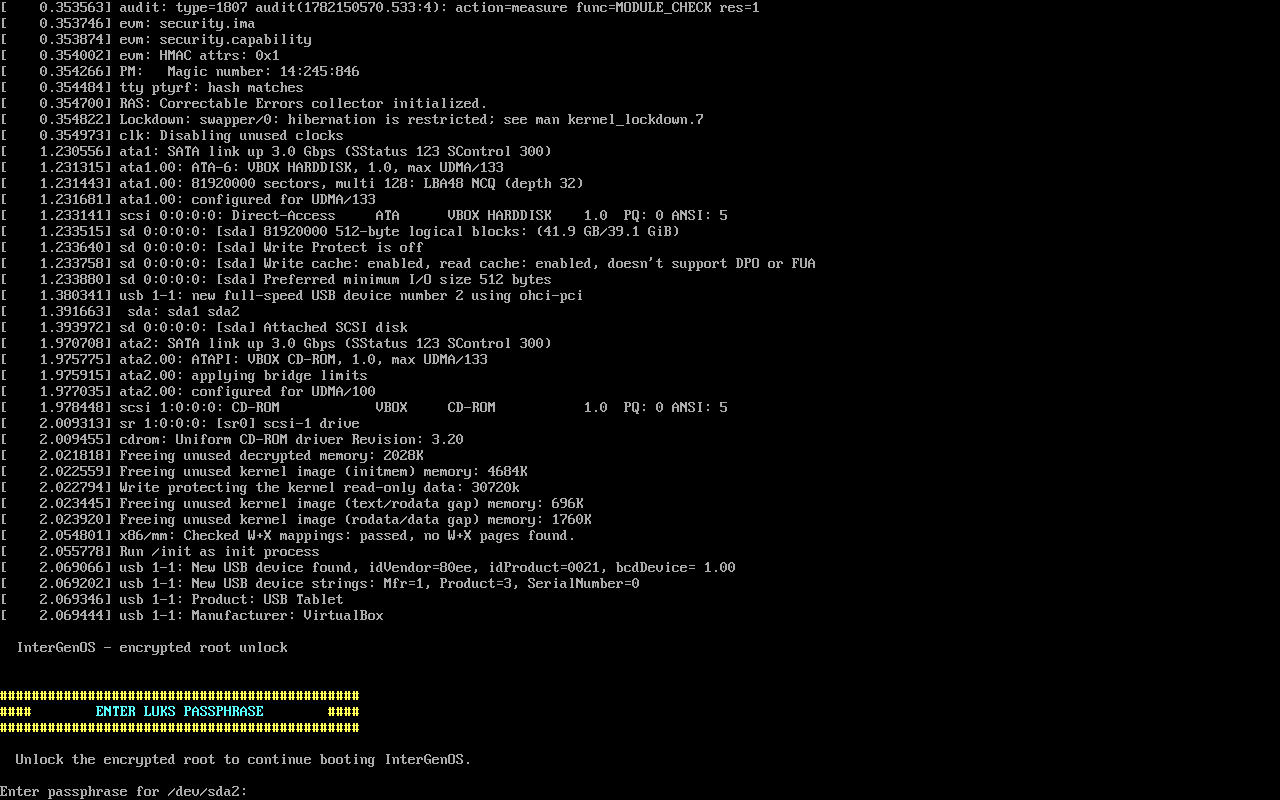
You can confirm the full matrix yourself — mokutil --sb-state: enabled, the enrolled CN=InterGenOS Machine Owner Key, the LUKS2 argon2id root over an unencrypted ESP, sig_enforce=Y — on the Security Verification page.
What is and is not protected
Encrypted at rest:
- The entire root filesystem, including
/home,/var,/etc,/root, swap (if you put it on the encrypted volume), and any other partition you place inside the LUKS container. - Anything written to disk by any program once the system is running and the volume is unlocked.
Not encrypted:
- The ESP (the small
/boot/efipartition). The firmware reads this before any operating system runs, so it cannot be encrypted. Its integrity is protected by Secure Boot signature verification on the UKI, not by encryption. - The LUKS header itself is on disk and visible. It tells an observer that the partition is LUKS-encrypted and what cipher is in use. It does not reveal anything about the payload.
- A running system. Once you have entered your passphrase and the volume is unlocked, the master key lives in kernel memory and the filesystem is readable to any process with the right permissions. Encryption-at-rest does not replace the operating system’s process isolation, user permissions, or AppArmor confinement.
If your threat model includes someone with physical access to your machine while it is running, full disk encryption is not the control you are looking for. You want a screen lock or a powered-off machine.
Recovery
Most of the time you will never think about any of this. When something goes wrong, you have several recovery paths.
I forgot my passphrase
Your data is gone. There is no master key, no recovery-key escrow, no back door, and no service that will recover it. This is intentional: a recovery channel that could be used by you is a channel that could be used by an attacker.
If this happens, boot a live ISO and reinstall. Back up early and often is the only mitigation.
I want to add a second passphrase
LUKS2 supports up to eight key slots. From a running system, as root:
cryptsetup luksAddKey /dev/disk/by-uuid/<uuid>
You will be prompted for an existing passphrase (to unwrap the master key) and then for the new one. The new passphrase will work on the next boot.
I want to remove a key slot
cryptsetup luksRemoveKey /dev/disk/by-uuid/<uuid>
You will be prompted for the passphrase belonging to the slot you want to remove. The other slots are untouched.
I want to back up the LUKS header
The LUKS header is a small region at the start of the encrypted partition. If it is corrupted (disk-level damage at exactly the wrong offset, or an accidental dd to the wrong device), the payload becomes unrecoverable even with the correct passphrase, because the encryption metadata lives in the header.
Back it up to a separate medium:
cryptsetup luksHeaderBackup /dev/disk/by-uuid/<uuid> \
    --header-backup-file /path/to/external/header.bin
Store the backup offline. Anyone with the backup file and your passphrase can decrypt your disk; treat it accordingly.
To restore:
cryptsetup luksHeaderRestore /dev/disk/by-uuid/<uuid> \
    --header-backup-file /path/to/external/header.bin
UKI signing failed on a kernel upgrade and I cannot boot the encrypted root
The kernel post-install hook preserves the GRUB-loads-vmlinuz path as a recovery fallback. From the GRUB recovery entry, you can boot the bare vmlinuz, supply the FDE initramfs as an initrd= argument, and unlock as normal. Check /var/log/intergen-kernel-postinstall.log (and the troubleshooting table below) for the underlying signing-failure messages before retrying the post-install hook.
Boot drops me to the FDE recovery shell
Three failed passphrase attempts (or a missing /etc/crypttab, or a missing LUKS volume) drop you to a small busybox shell with cryptsetup available. From there you can:
- Retry the unlock manually:
cryptsetup open /dev/disk/by-uuid/<uuid> cryptroot, thenmount /dev/mapper/cryptroot /newroot, thenexec switch_root /newroot /sbin/init. - Reboot: type
reboot -f(the standardrebootcommand is not available pre-systemd). - Inspect the partition table:
ls /dev/disk/by-uuid/.
The recovery shell has no network access and no logs. It is intentionally minimal.
Troubleshooting
| Symptom | Likely cause | Fix |
|---|---|---|
| Boot prompt asks for passphrase but every attempt fails | Wrong passphrase, or keyboard layout differs at boot from inside the OS | Confirm the layout. The FDE initramfs uses the US-QWERTY layout by default; if your passphrase contains layout-sensitive characters, type the QWERTY equivalents. |
| Boot drops straight to the FDE recovery shell with “no LUKS volume specified” | /etc/crypttab was not written, or the install did not complete the encryption stage | From the recovery shell, inspect /etc/crypttab with cat /etc/crypttab. If empty, the install did not enable encryption; boot a live ISO and reinstall. |
| Boot drops to the FDE recovery shell with “LUKS volume not found after 30s wait” | The disk did not enumerate in time (failing drive, USB-attached storage, slow RAID controller init) | From the recovery shell, run ls /dev/disk/by-uuid/ to see what is visible. If the volume appears, retry cryptsetup open manually. If not, the disk is the problem. |
| TPM2-sealed unlock falls through to passphrase | PCR0 or PCR7 has changed (firmware update, Secure Boot reconfiguration, shim/MOK update) | Enter the passphrase to boot. The system continues to unlock normally with the passphrase slot; re-enrolling TPM2 against the new PCR state restores automatic unlock. The specific outcome appears in the [EXPERIMENTAL TPM2] line on the boot console (console-only — it does not reach the journal). |
| FIDO2 unlock does not detect the token | Token not plugged in early enough, or token battery dead | The FDE initramfs waits up to 30 seconds for the device to enumerate. Plug the token in before boot. For battery-dead tokens, fall back to the passphrase. The outcome appears in the [EXPERIMENTAL FIDO2] line on the boot console (console-only). |
cryptsetup luksAddKey says “No key available with this passphrase” | The passphrase you entered does not match any existing slot | Try other passphrases you have set. If none work, you are in the forgot-passphrase case. |
| The ESP filled up on a kernel upgrade and the new UKI was not written | UKI generation logs ESP-full and skips; the previous kernel’s UKI remains the default | Use pkm to remove the old kernel package to free space, then re-run the post-install hook for the current kernel. See /var/log/intergen-kernel-postinstall.log for the underlying messages. |
Further reading
- Verified Boot — the signed-boot story that wraps the encrypted-unlock story.
- Forge Installer Guide — the install walkthrough that reaches the encryption opt-in step in context.
- Recovery — broader recovery procedures for an installed system.
- FAQ — common questions, including encryption.
Verified Boot & Secure Boot
InterGenOS builds a fully signed boot chain and signs every kernel image it produces. Being precise about what that buys you matters more than a reassuring headline, so this page is exact about what is signed versus what is enforced on the hardware InterGenOS ships on today.
Security is not first. It is only — and “only” includes being honest about the current enforcement posture rather than implying a guarantee the shipped configuration does not yet provide.
The 30-second version
- InterGenOS produces a signed boot chain: a Microsoft-signed shim (Fedora’s pre-signed shim) → InterGenOS GRUB → a signed Unified Kernel Image (UKI). Those artifacts are built, signed, and shipped.
- On the current target hardware, UEFI Secure Boot is left disabled by default, and no Machine Owner Key (MOK) is enrolled. The signatures are present and verifiable, but firmware does not enforce them on a default install today. Secure Boot has been validated end to end — now on real hardware (an ASUS ROG laptop with a GeForce RTX 3070 Ti), not just in an enforcing UEFI VM — with an enrolled MOK the chain boots under enforced Secure Boot, including with full-disk encryption active (a LUKS2-encrypted root and enforced Secure Boot together, the strictest combination). Now that GRUB carries its SBAT revocation record, the chain Secure-Boots with no hand-patching. The default install still ships it off — signed, not yet firmware-enforced — and turning it on is the one-time MOK enrollment described below.
- The release signing key never leaves InterGenOS hardware. The live ISO and install-mode images are signed offline by a release subkey on a hardware token; that key never touches your machine.
- The live ISO’s read-only system image is sealed with dm-verity. The installed root filesystem is an ordinary
ext4volume (referenced byPARTUUID, or unlocked as/dev/mapper/cryptrooton an encrypted install), not a dm-verity device. - Every kernel you install after the original ISO is rebuilt into a UKI and signed with a per-machine MOK, so the signing machinery is in place for when Secure Boot is enabled.
- If a kernel signing step fails, GRUB still offers a known-good fallback so you never end up with a system that cannot boot.
What is signed, and what is enforced
It is worth separating two things that are easy to conflate:
- Signed — the artifact carries a cryptographic signature you (or the firmware) can verify. InterGenOS signs the shim chain, GRUB, and every kernel UKI.
- Enforced — the firmware refuses to run anything whose signature does not validate. Enforcement requires UEFI Secure Boot to be on and the relevant key (Microsoft’s CA via shim, plus your MOK) to be trusted.
On a default install, the chain is signed but not firmware-enforced, because Secure Boot is disabled and no MOK is enrolled. What that gives you today:
- Verifiable install media. The live ISO and install images are signed offline; you can verify them before you ever install.
- A sealed live image. dm-verity over the live ISO’s read-only squashfs means a tampered install medium cannot present itself as genuine.
- A signing path that is ready to enforce. Because every installed kernel is already built into a signed UKI, enabling Secure Boot on capable hardware (and enrolling the MOK) turns the existing signatures into enforced ones without re-architecting anything.
What it does not give you on a default install is a hardware-rooted guarantee that only signed code boots — that is what enabling Secure Boot adds.
The boot chain
flowchart TB
FW["Firmware (UEFI)"] -->|" trusts Microsoft 3rd-party CA <br/> (only when Secure Boot is ON) "| SHIM["Microsoft-signed shim<br/>the live ISO reuses Fedora's pre-signed shim"]
SHIM -->|" trusts the InterGenOS vendor cert <br/> loaded as your MOK "| GRUB["InterGenOS GRUB<br/>release-key-signed on the ISO + install media,<br/>MOK-signed for the GRUB written to your disk"]
GRUB -->|" verifies the UKI signature "| UKI["InterGenOS UKI<br/>vmlinuz + initramfs + cmdline, signed as one Authenticode binary"]
UKI -->|" kernel handoff "| US["InterGenOS userspace"]
A Unified Kernel Image (UKI) is a single signed file that bundles the kernel, the initramfs, and the kernel command line. Signing the UKI envelope signs all three at once; nothing inside can be swapped without breaking the signature. The chain above is enforced from the firmware downward only when Secure Boot is enabled; with it disabled, the same artifacts are present but the firmware does not gate on them.
The live ISO and install media use UKIs signed by the InterGenOS release subkey on an offline signing workstation. Once you install to disk, every kernel you install or upgrade is rebuilt into a UKI on your machine and signed with your machine’s MOK.
The GRUB menu
At boot, GRUB presents the default kernel entry; the recovery entry — and any older kernels retained after later kernel upgrades — lives under the Advanced options submenu rather than on the top-level menu (a fresh install has exactly one kernel, so there are no older entries yet). GRUB is itself signed and is configured to verify the UKIs it loads.
How the live system image is sealed (dm-verity)
dm-verity applies to the live ISO, not to the installed root filesystem. Keeping that distinction straight matters.
When a release is assembled, the read-only system image (a squashfs) is built and a verified-integrity hash tree (dm-verity) is generated over it. The root hash of that tree is written into the signed kernel command line carried inside the live image’s UKI. Because the UKI signature covers the command line, the root hash is itself signed. The result is that the live medium cannot be tampered with and still present a valid signature.
When you install to disk, Forge lays down a conventional ext4 root filesystem, and the installed system boots with root=PARTUUID=… (or root=/dev/mapper/cryptroot on an encrypted install, unlocked by the FDE initramfs first). The installed root is not a dm-verity device; its integrity rests on the signed UKI (when Secure Boot is enforced) and on pkm’s per-file SHA-256 records, which pkm verify can re-check at any time.
Signing only appends a signature; it never alters the payload. Before each signing, the inputs are re-staged and their root hashes are re-checked against the freshly built system image, and the signed outputs are verified afterward.
What is a MOK?
A Machine Owner Key is a per-machine signing key, generated on your own machine, that firmware can be made to trust by enrolling it via MokManager. On a default (Secure-Boot-off) install it is generated and used to sign your UKIs; enrolling it via MokManager is what makes the firmware enforce it — see Enabling Secure Boot for the validated enrollment flow.
It exists for two reasons:
- Your machine signs the kernels you install. When you install a new kernel, InterGenOS rebuilds the UKI and signs it with your MOK. The InterGenOS release key never sees the kernels you install; it only signs the live ISO and install media that ship from InterGenOS.
- You can trust your own third-party drivers. If you build out-of-tree modules (for example, proprietary GPU drivers via DKMS), they can be signed by your MOK so that, on a Secure Boot system, they load without disabling enforcement.
The MOK is yours. It lives under /var/lib/intergen/mok/ on the installed system (mok.key, mok.crt, and mok.der). If you reinstall, Forge generates a fresh MOK.
The Forge install flow
When you run the Forge installer (TUI or GUI), the bootloader stage does the following without asking further questions:
- Generates a per-machine MOK keypair (RSA-2048, matching the kernel module-signing default):
/var/lib/intergen/mok/mok.key— the private key/var/lib/intergen/mok/mok.crt— a PEM-format X.509 cert, used bysbsignfor UKI signing/var/lib/intergen/mok/mok.der— a DER-format X.509 cert, the binary form MokManager wants for enrollment
- Ensures the UKI tooling is present —
ukify(from the systemd tooling) andsbsign(fromsbsigntool) are ordinary installed packages, so the kernel package’s post-install hook can build and sign UKIs at install or upgrade time. - Installs an initial UKI built from the kernel the installer just dropped on the system, signed with the freshly generated MOK, at
/boot/efi/EFI/Linux/intergenos-<kernel-version>.efi. - Configures a recovery boot entry that loads the bare vmlinuz with no UKI envelope, as a fallback path if a UKI ever fails to sign or boot.
On hardware where you intend to run with Secure Boot enabled, you additionally enroll the MOK via MokManager (below). On the default configuration, Secure Boot is left off and that enrollment step is skipped.
For the full installer walkthrough, see the Forge installer guide.
Enabling Secure Boot
Secure Boot has been validated on InterGenOS end to end — on real hardware (an ASUS ROG laptop with a GeForce RTX 3070 Ti) as well as in an enforcing UEFI virtual machine: with the boot chain complete, the system boots under enforced Secure Boot, anchored to your own Machine Owner Key, with the kernel in integrity lockdown and refusing unsigned modules. It has been validated in the strictest configuration as well — with full-disk encryption active, so the LUKS unlock prompt itself appears under enforced Secure Boot, the encrypted root and the signature gate working together. You can see that proof — mokutil --sb-state: enabled, the enrolled CN=InterGenOS Machine Owner Key, sig_enforce=Y, a LUKS2-encrypted root — on the Security Verification page.
Two practical notes on availability:
- The chain Secure-Boots natively. The Microsoft-signed shim InterGenOS reuses requires every component it loads to carry an SBAT revocation record. The UKI already carried one; GRUB now carries its SBAT record too, so the signed chain boots under enforced Secure Boot with no hand-patching. That SBAT gate is exactly what makes Secure Boot mean something: a GRUB that predates the record is refused at the shim stage rather than silently allowed — fail-closed enforcement you can watch happen, not just a checkbox. (Some firmware, especially on OEM laptops, makes the Secure Boot toggle read-only outside Setup Mode; InterGenOS runs fine with it off, and enabling it is optional.)
- Enabling it is a one-time enrollment. Forge stages your MOK and a one-time enrollment password during install (with Secure Boot off). On the next boot the firmware runs MokManager so you can enroll that key; once enrolled, you turn Secure Boot on in firmware and the chain validates.
Enrolling your key with MokManager
MokManager is a small blue-on-black firmware utility. The sequence:
-
Perform MOK management → Enroll MOK.
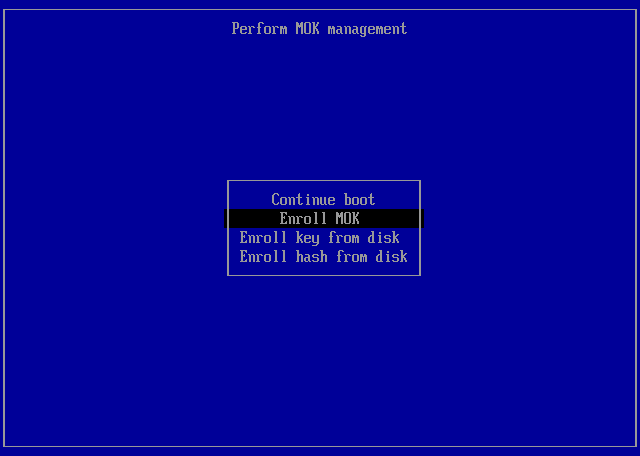
-
View the key, then Continue — review the certificate about to be trusted; its subject reads
CN=InterGenOS Machine Owner Key.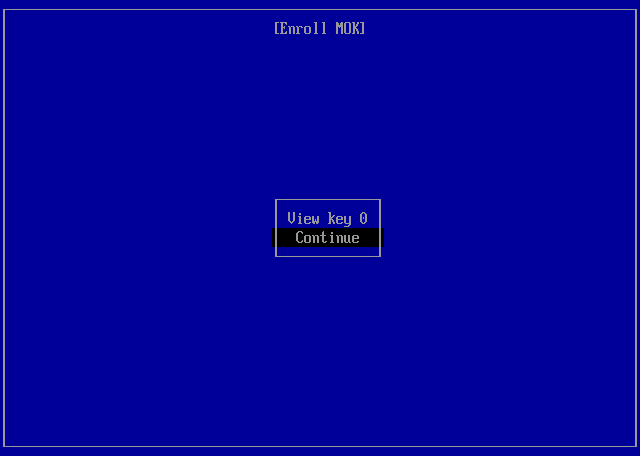
-
Enroll the key(s)? → Yes, then enter the one-time password Forge set during install.
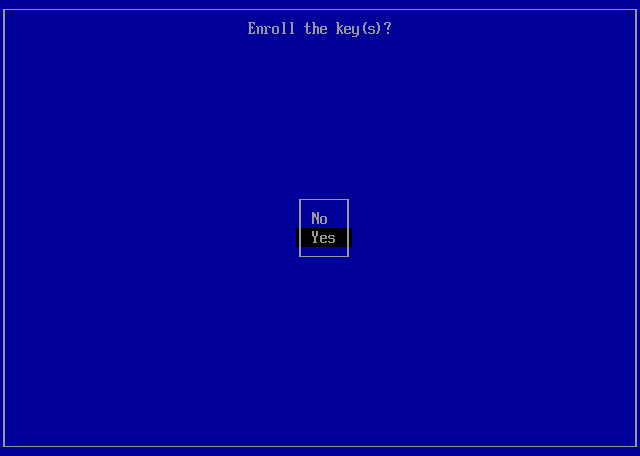
-
Reboot. The menu returns with your key enrolled — choose Reboot.
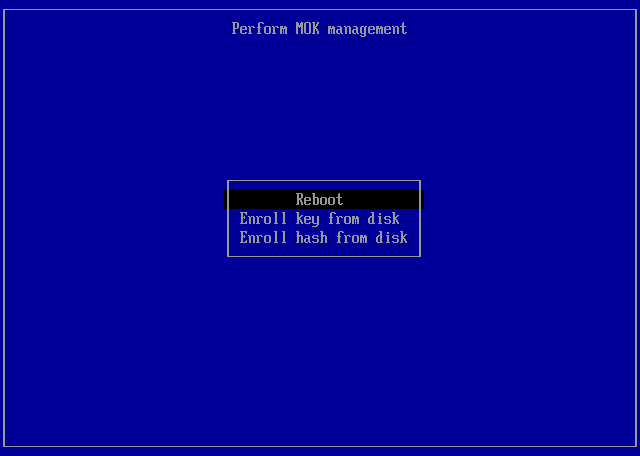
After enrollment, with Secure Boot enabled in firmware, UKIs signed with your key load without further prompts, and unsigned or wrong-key images are refused. Until you enroll and enable Secure Boot, the system boots the signed UKI without firmware enforcement.
Proof: booted under enforced Secure Boot
This is the whole chain working under enforced Secure Boot — the branded login, reached only after the shim verified GRUB, GRUB verified the signed UKI, and (on an encrypted install) the LUKS prompt unlocked the root, with the firmware refusing anything unsigned at every step:
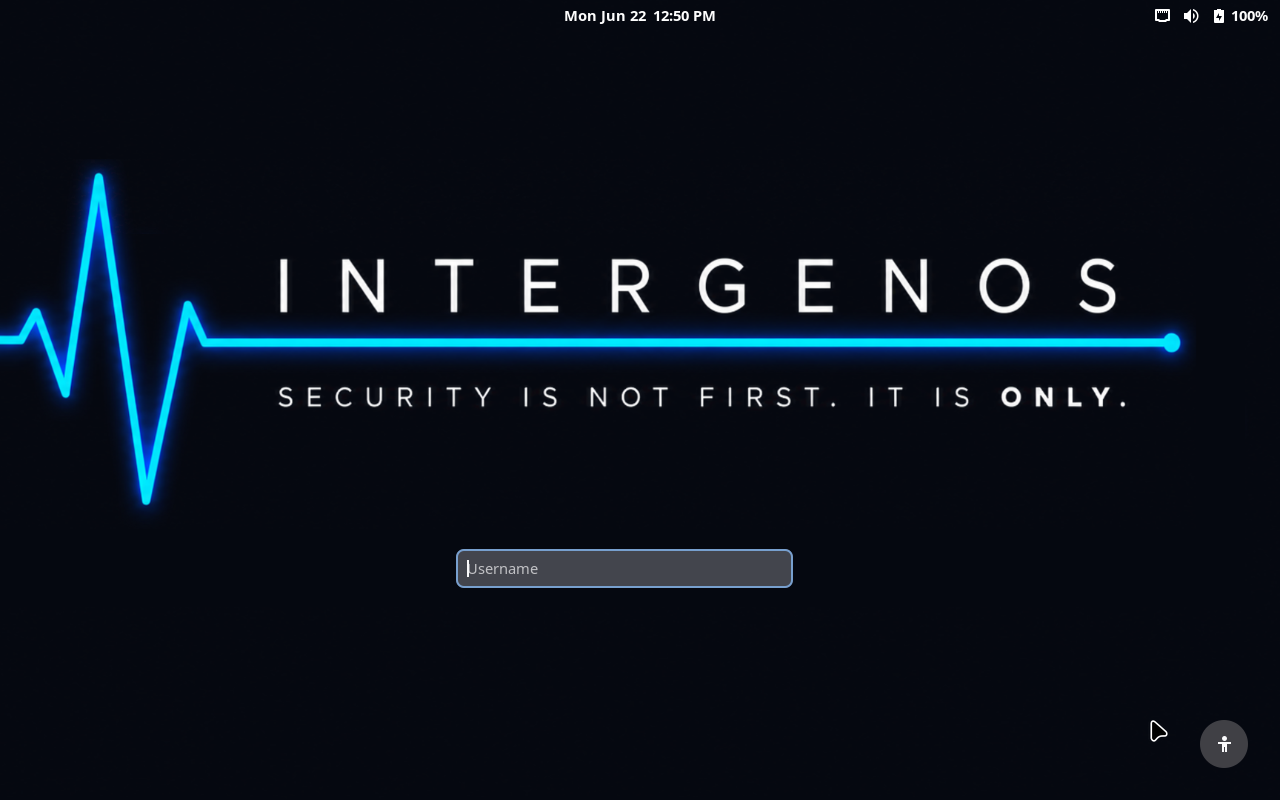
Enforcement here is real, not nominal. A GRUB that predates the SBAT record is rejected by the shim under enforced Secure Boot — the firmware refuses to run it rather than booting it anyway:
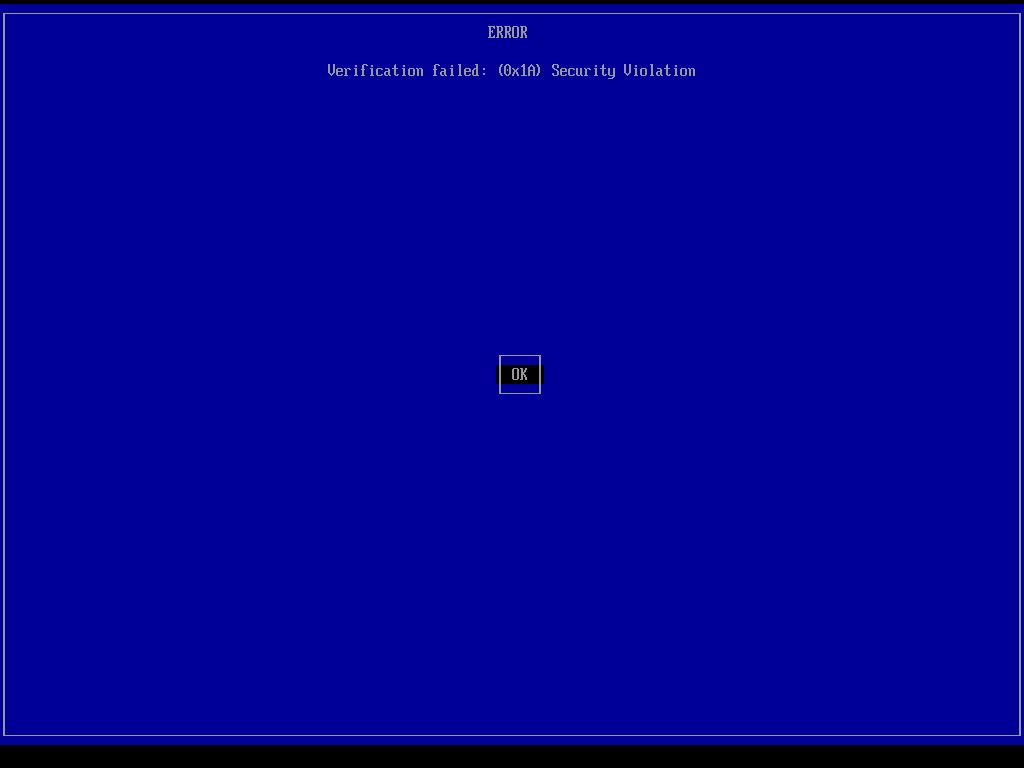
Same firmware, same enforcement, two outcomes: an earlier GRUB without the SBAT record is correctly refused (a 0x1A Security Violation); the current chain, with GRUB carrying its SBAT record and signed by your MOK, is trusted and boots. That difference is what a working Secure Boot looks like — it has to be able to say no.
The same chain boots encrypted or plain
Secure Boot was validated on both install types, because the signed boot path is the same either way: GRUB reads its MOK-signed, SBAT-carrying image from the unencrypted ESP regardless of what the root filesystem is. The only difference is the disk topology — an encrypted install unlocks a LUKS2 root behind the passphrase prompt; a plain install mounts an ordinary ext4 root directly. Both reach the desktop under enforced Secure Boot with the identical green matrix (sig_enforce=Y, integrity lockdown, a clean pkm verify --all).
A plain (unencrypted) install reaching its first-run welcome under enforced Secure Boot — captured in a VM so you can reproduce it yourself. The encrypted leg is identical at this point; only the root volume differs.
Kernel install and upgrade
When you install or upgrade a kernel via the package manager (or any package whose post-install hook touches the kernel), the kernel package’s post_install hook does the following on your machine, with no key material from the InterGenOS release infrastructure:
- Reads the kernel, the standard initramfs (and an additional full-disk-encryption initramfs if your system is LUKS-encrypted — see below), and the canonical command line for your system.
- Runs
ukify buildto bundle them into a single UKI in the systemd-stub envelope. - Runs
sbsign --key /var/lib/intergen/mok/mok.key --cert /var/lib/intergen/mok/mok.crtto sign the UKI. (sbsignreads PEM-format certificates; the.derform generated alongside is for MokManager enrollment only, not signing.) - Writes the signed UKI to
/boot/efi/EFI/Linux/intergenos-<kernel-version>.efi. - Updates the GRUB menu so the new kernel is the default boot entry.
- Retains a configurable number of old kernels (default: 2) and their UKIs as fallback entries.
The InterGenOS release signing key, used on the offline workstation, is never asked. It physically does not exist on your machine.
If signing fails (corrupt key file, full ESP, and so on), the hook falls back to writing the kernel and initramfs out separately for GRUB to load directly. You do not end up with a system that has a half-installed kernel.
ESP sizing
Because every kernel you install becomes a UKI in /boot/efi, the ESP needs headroom for several generations of kernel. A typical UKI is 80–150 MB depending on the initramfs payload. Forge creates a fixed 1 GiB EFI System Partition during partitioning, which leaves room for several kernels plus their fallbacks.
If your ESP fills up, kernel install fails. The hook prints a clear message; you can clean up old kernels by removing the older kernel package with the package manager to free space.
Composition with LUKS encryption
If you choose the encrypted-install option, Forge installs a small full-disk-encryption initramfs alongside the kernel: busybox plus cryptsetup, just enough to prompt for your LUKS passphrase and unlock the root volume before the kernel hands off to userspace.
That FDE initramfs is bundled into the same UKI as the kernel. The UKI signature covers it, just as it covers the kernel and the command line. There is one signature; verifying the UKI signature verifies the entire boot path including the LUKS unlock prompt.
If you opt for TPM2-sealed unlock (an experimental feature not offered by the installer in this release — see Disk Encryption & LUKS), the same UKI envelope holds the additional bits that talk to your TPM. The unlock path is still inside the signed envelope.
For non-encrypted installs, the UKI’s bundled initramfs is minimal — typically only CPU microcode — because all storage and filesystem drivers are built into the kernel.
See Disk encryption for the full LUKS setup walkthrough.
Recovery
Most of the time you will never think about any of this. When something goes wrong, you have several recovery paths.
“A new kernel won’t boot”
GRUB retains the previous kernels and a bare-vmlinuz recovery entry. Pick a known-good entry from the GRUB menu to get back into a working system, then reinstall or roll back the kernel package with pkm.
“I need to regenerate the MOK”
The MOK material lives under /var/lib/intergen/mok/. Reinstalling with Forge generates a fresh MOK; a subsequent kernel install or upgrade rebuilds the UKIs with it. (There is no separate recovery wrapper command — UKI signing is handled entirely by the kernel package’s post-install hook.)
“I want to run an unsigned kernel for testing”
On a default install (Secure Boot off) nothing stops you, but the supported path is to build your kernel, sign it with your MOK using sbsign, and install it through the package manager like everything else, so the machinery stays consistent for the day you enable Secure Boot.
See Recovery for the broader recovery toolkit.
Troubleshooting
| Symptom | Likely cause | Fix |
|---|---|---|
| New kernel installs but won’t boot | UKI signing failed, or (with Secure Boot on) the MOK is not enrolled | Boot the previous kernel or recovery entry from the GRUB menu; inspect /var/log/intergen-kernel-postinstall.log. |
| GRUB menu shows only the recovery entry, no UKI entries | UKI signing has been failing silently | Inspect /var/log/intergen-kernel-postinstall.log. A full ESP and a missing MOK key file are the two common causes. |
ukify or sbsign is missing | The UKI tooling packages were removed | Reinstall the systemd tooling and sbsigntool with the package manager and re-run the kernel post-install hook for the current kernel. |
| Secure Boot toggle in firmware is greyed out | Some firmware (especially OEM laptops) makes Secure Boot read-only outside Setup Mode | See your hardware vendor’s documentation. InterGenOS runs fine with Secure Boot off; enabling it is optional. |
Where this fits in the build
The signed boot chain is not bolted on at the end. The candidate build runs its phases with the boot-chain artifacts produced and sealed in the late stages: the bootloader phase, the image and squashfs phases, and the UKI/verity phase that bundles and integrity-seals the kernel images before the ISO is assembled. The build halts twice for operator hardware-token signing: once to sign the install-integrity archive manifest (before the system image is built), and once — after the squashfs is assembled — to sign GRUB and all three unified kernel images (the live UKI plus the graphical and text installer UKIs) in a single token session.
A candidate is never trusted on the strength of a clean build alone. Pre-install evaluation boots the ISO on real hardware and examines the signed chain and the live image’s integrity before any install is attempted. Verification you can check yourself is the standard the boot chain is held to.
This is the InterGenOS boot model. The desktop that ships today is GNOME 49 on Wayland.
Per-Device Install Notes
This page collects hardware-specific notes for installing InterGenOS on named devices and common device classes. It exists because firmware behavior, not InterGenOS itself, is the usual source of install friction: how a given board exposes Secure Boot, how it stages a Machine Owner Key (MOK), and what its UEFI menus call things vary by vendor.
InterGenOS builds a fully signed boot chain, but it does not require UEFI Secure Boot — the default install runs with Secure Boot off. The notes below help you get a specific machine installed, and, if you want firmware-enforced verification, into a state where MOK enrollment works.
If your exact device is not listed, the general flow in Verified Boot & Secure Boot and the FORGE Installation Guide applies unchanged. The device-class notes here are additions, not replacements.
Before you start: what every device needs
Regardless of make and model, a successful install needs the firmware in this state:
- UEFI mode, not legacy/CSM/BIOS-compatibility boot. This is the one hard requirement.
- The signed shim boots either way. InterGenOS boots through a Microsoft-signed shim — Fedora’s pre-signed shim, which the firmware trusts via the Microsoft third-party CA — so most off-the-shelf machines boot the live ISO without any firmware change — whether Secure Boot is on or off.
- (Optional) the ability to enroll a MOK, only if you want Secure Boot enforcement. FORGE generates a per-machine MOK during install; on hardware where you enable Secure Boot, MokManager enrolls it at the next reboot using a single-use password. The default install leaves Secure Boot off and skips this step.
You do not need Setup Mode for normal operation.
OEM laptops with a greyed-out Secure Boot toggle
Some firmware, especially on OEM laptops, makes the Secure Boot setting read-only unless the machine is in Setup Mode. This shows up as a greyed-out Secure Boot toggle in the firmware menu.
You generally do not need to change anything: InterGenOS installs and runs whether Secure Boot is on or off, so a greyed-out toggle in either state is fine. If you want Secure Boot enforcement and the toggle is greyed out in a disabled state, consult your hardware vendor’s documentation for entering Setup Mode. InterGenOS does not require Setup Mode itself.
Machines where MokManager does not appear
On the first boot after install, the firmware should detect the pending MOK enrollment request and run MokManager (a small blue-text-on-black utility) before continuing. If MokManager never appears and a freshly installed kernel will not boot, the system falls through to a recovery boot entry that loads the bare kernel directly. From there you can re-enroll or regenerate the MOK. The full symptom-to-fix walkthrough is in Verified Boot & Secure Boot.
The recovery boot entry exists precisely so that a missed enrollment never leaves you with an unbootable machine.
UEFI System Partition (ESP) sizing
This is hardware-adjacent rather than device-specific, and it matters most on machines with small or pre-partitioned ESPs. Every kernel you install becomes a Unified Kernel Image (UKI) in the ESP, and a typical UKI is 80–150 MB. FORGE creates a fixed 1 GiB ESP during partitioning, leaving room for several kernel generations.
If you are installing alongside an existing OS and reusing its small ESP, expect kernel installs to fail once it fills. The cleaner path is to let FORGE create an ESP at its minimum size or larger.
Encrypted installs
The encrypted-install option works the same across devices: FORGE folds a small full-disk-encryption initramfs (the LUKS unlock prompt) into the same signed UKI as the kernel, so one signature covers the entire boot path including the unlock step. See Disk Encryption & LUKS for the full flow.
TPM2-sealed unlock is an experimental feature that is not offered by the installer in this release (see the status note on Disk Encryption & LUKS). As designed, if your device has a TPM2 and you opt into sealed unlock, the bits that talk to the TPM live inside the same signed UKI envelope. The TPM is not a way to skip Secure Boot verification.
Graphics and out-of-tree drivers
InterGenOS ships GNOME 49 on Wayland today. Open-source graphics drivers built into the signed kernel need no extra steps.
If your device needs out-of-tree modules (for example, proprietary GPU drivers via DKMS) and you are running with Secure Boot enabled, the firmware will not load them unsigned. Sign them with your own MOK and install them through the standard package-manager flow, the same mechanism that signs your kernels. See the out-of-tree-module discussion in Verified Boot & Secure Boot and the Per-GPU Driver Notes.
Reporting a device
If you install InterGenOS on a device not covered here and hit a firmware-specific snag (or confirm a clean install), that information is worth capturing so the next person with the same hardware has a head start. See the FAQ for where to take questions and reports.
See also
- Verified Boot & Secure Boot — the full boot-chain model, MOK enrollment screens, kernel signing, and recovery paths.
- FORGE Installation Guide — the end-to-end installer flow.
- Disk Encryption & LUKS — encrypted-install details.
- Recovery & Reinstall — recovering a machine that will not boot.
- FAQ — common install questions.
Installing in a Virtual Machine
A virtual machine is the fastest way to try InterGenOS — to see the boot chain, the FORGE installer, and the desktop — without touching your hardware. The install is the same verified FORGE flow you would run on bare metal: the integrity gate still checks every package against the signed release manifest before anything is written to the virtual disk. A VM changes where the disk lives, not whether the system is trustable.
InterGenOS is a built-from-source Linux distribution where security is not first. It is only. That holds in a VM exactly as it does on metal — a machine you understand, can modify, and can trust.
The one setting people miss: InterGenOS is UEFI-only. It boots through a signed
systemd-stubUnified Kernel Image, and there is no legacy-BIOS path. You must enable EFI in the VM’s firmware settings or it will not boot. The per-hypervisor sections below call out exactly where.
This guide covers QEMU/KVM, VirtualBox, and VMware. QEMU/KVM is the path that can give the guest the complete trust chain — enforced Secure Boot (via OVMF firmware) and a TPM for measured boot (via swtpm) — which VirtualBox and VMware do not provide by default; a full FORGE install is verified on all three.
QEMU/KVM (libvirt / virt-manager)
On a Linux host, QEMU/KVM driven through libvirt and virt-manager is the recommended way to exercise InterGenOS’s full boot chain in a VM. Unlike the desktop hypervisors below, a libvirt guest can be given both UEFI Secure Boot (via OVMF, the EDK2 UEFI firmware) and an emulated TPM 2.0 (via swtpm) — so you can enroll a MOK, enforce Secure Boot, and see measured boot end to end, exactly as on bare metal.
Create the VM
In virt-manager → New VM, install from the InterGenOS ISO, then before finishing tick “Customize configuration before install” and set:
- Firmware — UEFI is required. Choose an OVMF Secure-Boot firmware image (for example
OVMF_CODE.secboot.fd). InterGenOS is UEFI-only; there is no legacy-BIOS path. - TPM: add a TPM 2.0 device backed by swtpm (emulated, CRB or TIS). This is what makes measured boot testable. (TPM2-sealed disk encryption is not offered by the installer in this release — see Disk Encryption & LUKS.)
- Memory: at least 4 GB; 8 GB recommended.
- CPUs: 2 or more; leave the CPU model as host-passthrough for KVM acceleration.
- Disk: 35 GB or larger. The installer requires at least 32 GiB and refuses to partition a smaller disk. (For reference, the live squashfs is about 12.8 GB and the ISO about 19.3 GB.)
- Display: the default virtio-gpu display works and auto-resizes to the viewer window.
Secure Boot and measured boot
With an OVMF Secure-Boot firmware and a swtpm TPM attached, the guest runs the same one-time MOK enrollment at first boot as bare metal (walked through in Verified Boot & Secure Boot), then boots under enforced Secure Boot through the signed shim → GRUB → UKI chain. The guest also has a TPM available for measured boot, which is what the emulated device provides; the LUKS-with-TPM2 unlock path is not offered by the installer in this release (see Disk Encryption & LUKS). This is the only one of the three hypervisors here that gives the guest both Secure Boot and a TPM by default.
The other direction — InterGenOS as the host
InterGenOS also ships this stack — QEMU, libvirt, virt-manager, OVMF, and swtpm — so an installed system can host its own VMs, including the kind of build environment InterGenOS is itself assembled in. Running VMs on an installed InterGenOS is covered in Virtualization & Containers.
VirtualBox
Verified on VirtualBox 7.x. The InterGenOS live ISO boots, the graphical FORGE installer renders, and a full install completes out of the box with the settings below.
Create the VM
In the VirtualBox New wizard and the machine’s Settings:
- Type / Version: Linux / Other Linux (64-bit).
- Firmware — EFI is required. Open Settings → System → Motherboard and tick Enable EFI (special OSes only). InterGenOS will not boot in legacy BIOS/CSM mode — the boot chain is a signed UKI with no BIOS fallback.
- Memory: at least 4 GB; 8 GB recommended for a comfortable live GNOME session and installer.
- Processors: 2 cores or more.
- Disk: a 35 GB or larger VDI. The installer floor is 32 GiB; below it, Forge will not partition. (The live squashfs is about 12.8 GB.) A SATA-attached disk works fine.
- Optical drive: attach the InterGenOS ISO as the virtual optical drive, and set the boot order optical first so the installer media boots.
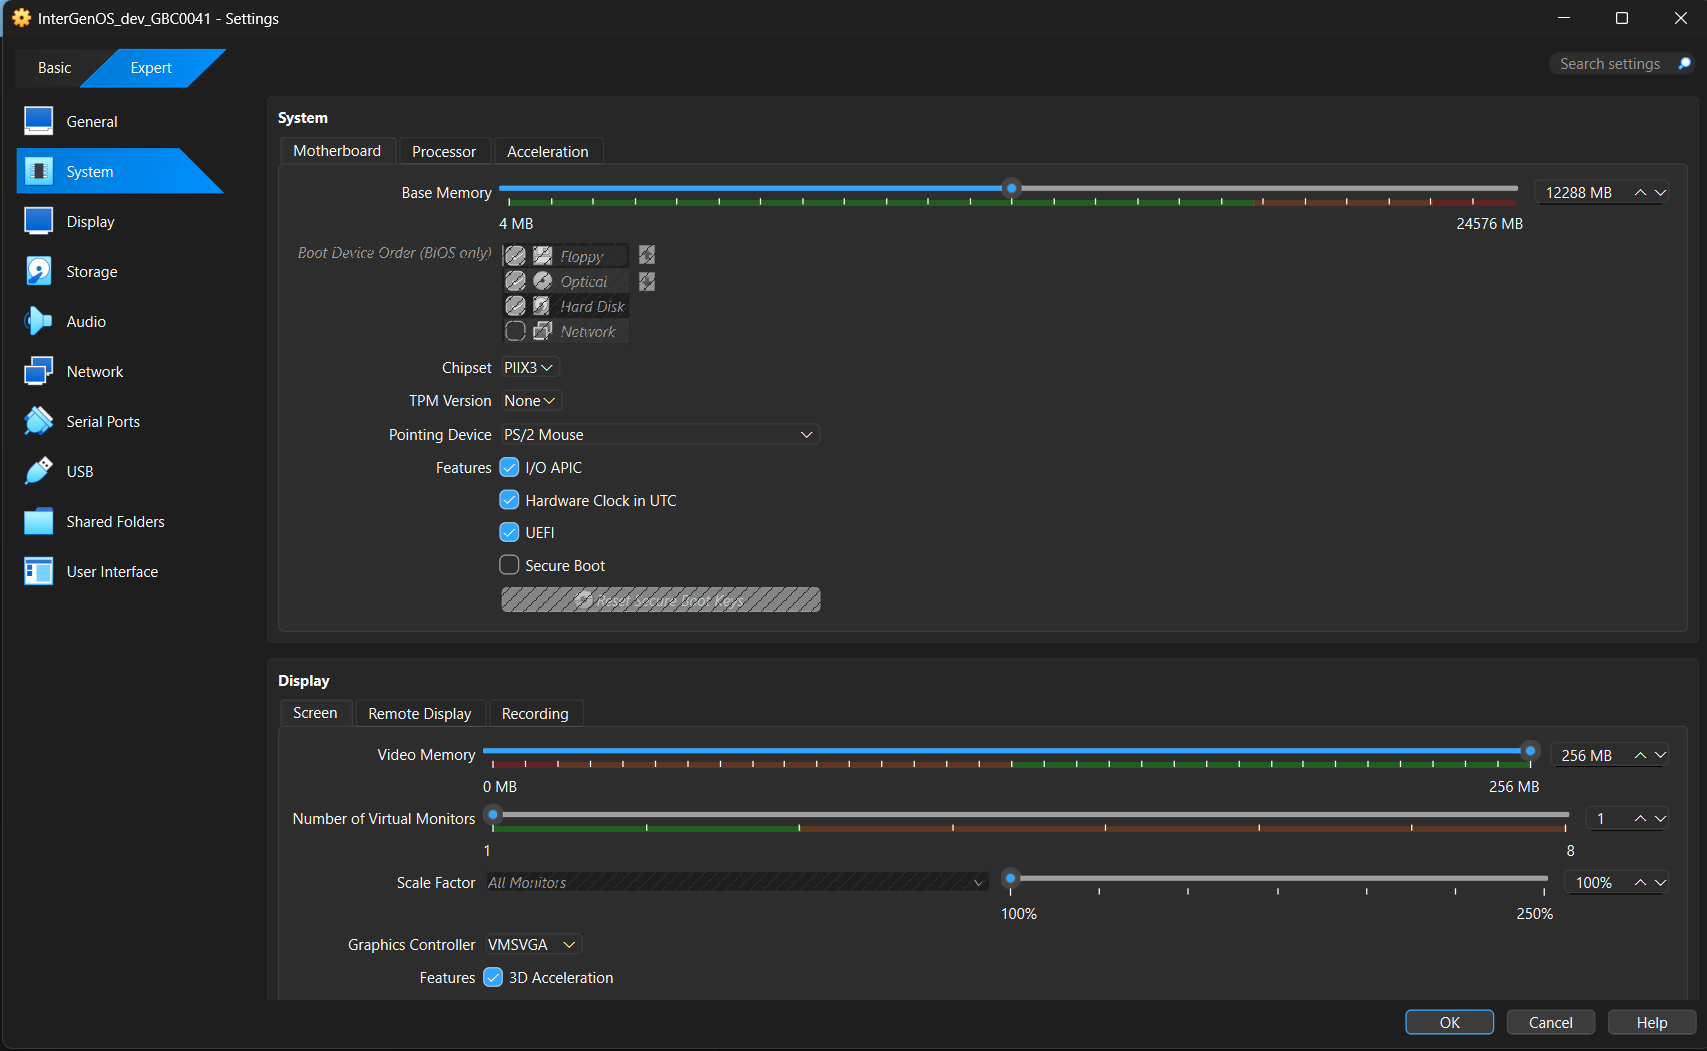
A known-good VirtualBox display configuration — System → Motherboard: UEFI enabled (Secure Boot off); Display → Screen: VMSVGA controller, 256 MB video memory, 3D Acceleration on. This is the VMSVGA alternative; for the native auto-resizing path, pick the VBoxSVGA controller instead — see Graphics, below.
Graphics — important
VirtualBox offers two display controllers, and InterGenOS now ships in-tree kernel drivers for both. Pick one of these:
- VBoxSVGA +
vboxvideo— the native path. InterGenOS compiles VirtualBox’s own native display drivervboxvideo(CONFIG_DRM_VBOXVIDEO=y) directly into the kernel. Select the VBoxSVGA graphics controller under Settings → Display → Screen and the guest bindsvboxvideo: it exposes a proper EDID and auto-resizes to the VirtualBox window with no manual resolution step — and with nothing out-of-tree. This is the native VirtualBox path; if you want resize-to-window behaviour, use it. - VMSVGA +
vmwgfx— the alternative. VirtualBox’s default controller is VMSVGA, which the kernel’svmwgfxdriver binds. That combination works — the installer and desktop render — butvmwgfxis VMware’s driver, not VirtualBox’s: on VirtualBox it produces journal noise and does not auto-resize (on a 4K host the guest can render at full 4K, so the window shows only the top-left corner). If you stay on VMSVGA, configure it deliberately:- Video Memory: raise VRAM to at least 128 MB (256 MB on a 4K host) under Settings → Display → Screen. The 16 MB default is too low.
- 3D Acceleration: turn it ON — it cuts the
vmwgfxlog noise by roughly two orders of magnitude and gives a smoother session. - Set the resolution in the guest: because VMSVGA does not auto-resize, after first boot open GNOME Settings → Displays and pick a fixed resolution such as 1920×1080. The choice persists per user, and it avoids the oversized-render / clipped-window effect on a 4K monitor.
Known issue on the
vboxvideopath: a compositor mode transition — locking the screen, logging out — can occasionally leave the display frozen on a sheared, partially-drawn frame, withgnome-shell: Cursor update failed: drmModeAtomicCommit: Invalid argumentas the only journal error. The system underneath is fully alive; this is a display-commit wedge, not a hang. Recovery is a VT switch and back — press Ctrl+Alt+F3, then Ctrl+Alt+F2 — which forces a fresh modeset and restores the session completely, with nothing lost. The trigger is not yet fully isolated; the recovery has been reliable every time it has been needed.
Do not install Oracle’s VirtualBox Guest Additions. They are a proprietary vendor blob that builds out-of-tree kernel modules, and InterGenOS’s locked-down kernel enforces module signatures — it rejects unsigned out-of-tree modules by design. You do not need them: the in-tree drivers — vboxvideo (display), plus vboxguest and vboxsf (shared folders), all compiled in — provide guest integration with nothing out-of-tree.
(The settings screenshot under “Create the VM,” above, shows the VMSVGA alternative — VMSVGA, 256 MB, 3D Acceleration on. For the native path, simply pick the VBoxSVGA controller instead; vboxvideo handles auto-resize.)
Secure Boot in VirtualBox
VirtualBox’s EFI firmware boots InterGenOS with Secure Boot disabled (Setup Mode) out of the box, and the install works fully without it — kernel integrity lockdown stays engaged regardless of Secure Boot state, so you are not running an unprotected kernel.
The full signed-boot chain (shim → GRUB → UKI) is provisioned at install regardless of the firmware’s Secure Boot state. Turning Secure Boot enforcement on is a one-time Machine Owner Key (MOK) enrollment performed at first boot — that flow is now validated end to end and walked through in Verified Boot & Secure Boot. It is not required for a working install, and measured boot additionally relies on a TPM, which VirtualBox does not provide by default.
Networking
The VirtualBox default NAT adapter works out of the box. The live installer and pkm have outbound network access — DNS resolution and a default route are present with no extra configuration. You do not need to change networking to install.
What you see when it boots
- The themed GRUB boot menu appears — Try InterGenOS, Install InterGenOS (Graphical), Install InterGenOS (Text), and Advanced options.
- The default entry boots the graphical FORGE installer: a GNOME greeter, then the FORGE wizard (Identity, Region, Disk, packages, and so on).
- You reach the “Review your choices” screen before anything is committed. Nothing is written to the virtual disk until you click Install.
The boot menu is identical in a VM. Select “Install InterGenOS (Graphical)” to follow the installer guide.
From here, the wizard is the same screen-by-screen flow documented in the FORGE Installation Guide — follow it through to first login.
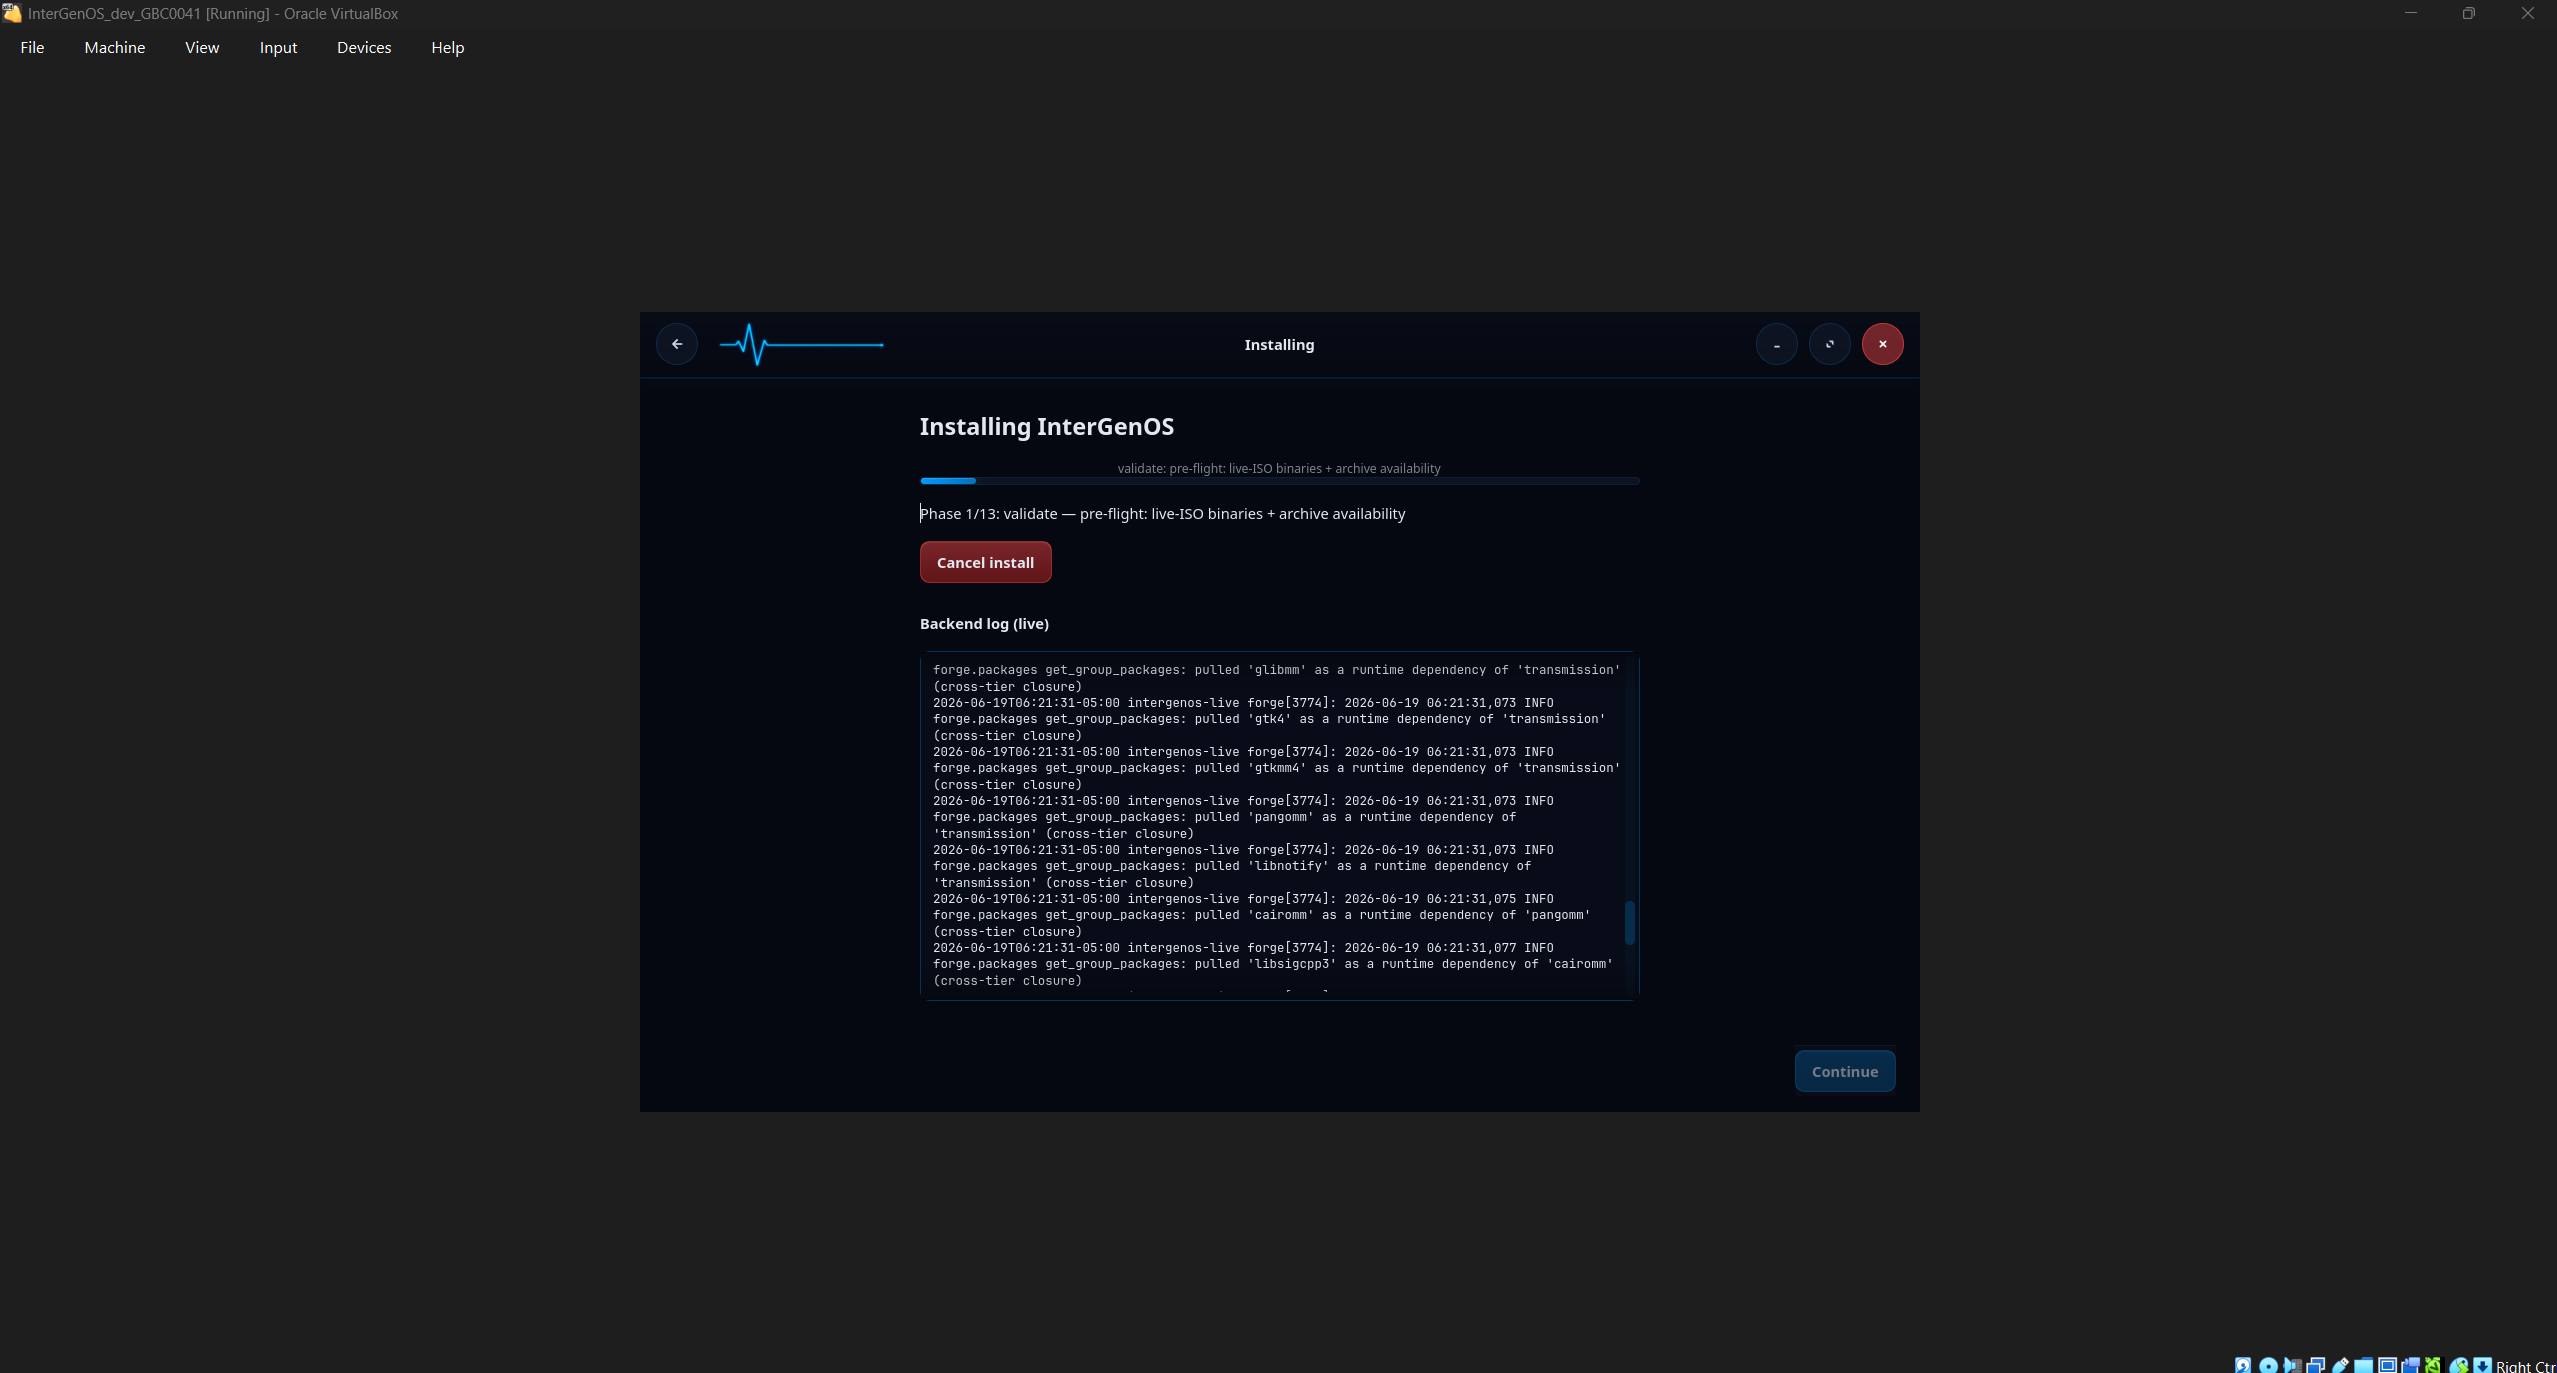
FORGE running inside VirtualBox — the VirtualBox window frame is visible around it. Here it is at Phase 1 of 13 (validate), the configuration and pre-flight phase; the SHA-256 integrity gate that checks every package against the signed manifest runs next, as Phase 2 (verify), before any disk write.
A note on journal warnings
In a VM’s live (“Try InterGenOS”) session, vmwgfx can flood the system journal with a cosmetic framebuffer error — failed to create vmw_framebuffer: -22. The display works regardless — the desktop renders fully; this is log noise, not a boot or display failure. It appears in the live session on both VirtualBox and VMware (it is not specific to either), and it has not been observed on an installed system — even when the installed desktop is driven to 4K. The trigger of the live-session flood is still being investigated; the display is unaffected either way. On VirtualBox you may also see “unsupported hypervisor” messages — those are VirtualBox-specific, because vmwgfx is VMware’s driver and VirtualBox’s SVGA emulation is not its native target. Enabling 3D Acceleration reduces the VirtualBox volume, and the in-tree vboxvideo driver — now shipping; select the VBoxSVGA controller — removes it on VirtualBox entirely (it does not use vmwgfx).
VMware
InterGenOS ships the VMware paravirtual guest drivers built into the kernel — vmwgfx (display), VMWARE_PVSCSI (paravirtual disk), and VMXNET3 (paravirtual network), all compiled in (=y). A full FORGE install on VMware Workstation Pro is verified end to end: InterGenOS boots, the graphical installer deploys every package, the signed boot chain is provisioned (MOK-signed UKI, shim/GRUB, UEFI boot entry), and you reach a healthy GNOME desktop with the local assistant running. Create the VM with EFI firmware enabled, the VMware SVGA display, and a NAT network adapter. (VMware Workstation Pro is the current product and is free for personal use; the older Workstation Player has been discontinued.)
Secure Boot has been validated end to end: with the MOK enrolled, InterGenOS boots under enforced Secure Boot through the signed shim → GRUB → UKI chain, with the kernel in integrity lockdown and refusing unsigned modules — the single-frame proof is on the Security Verification page. The installed GRUB now carries the SBAT record the signed shim requires, so the chain Secure-Boots natively — the earlier 0x1A Security Violation when enabling Secure Boot is resolved. Enabling enforcement is a one-time Machine Owner Key (MOK) enrollment at first boot (walked through in Verified Boot & Secure Boot); it is not required for a working install, and measured boot additionally relies on a TPM, which VMware does not provide by default.
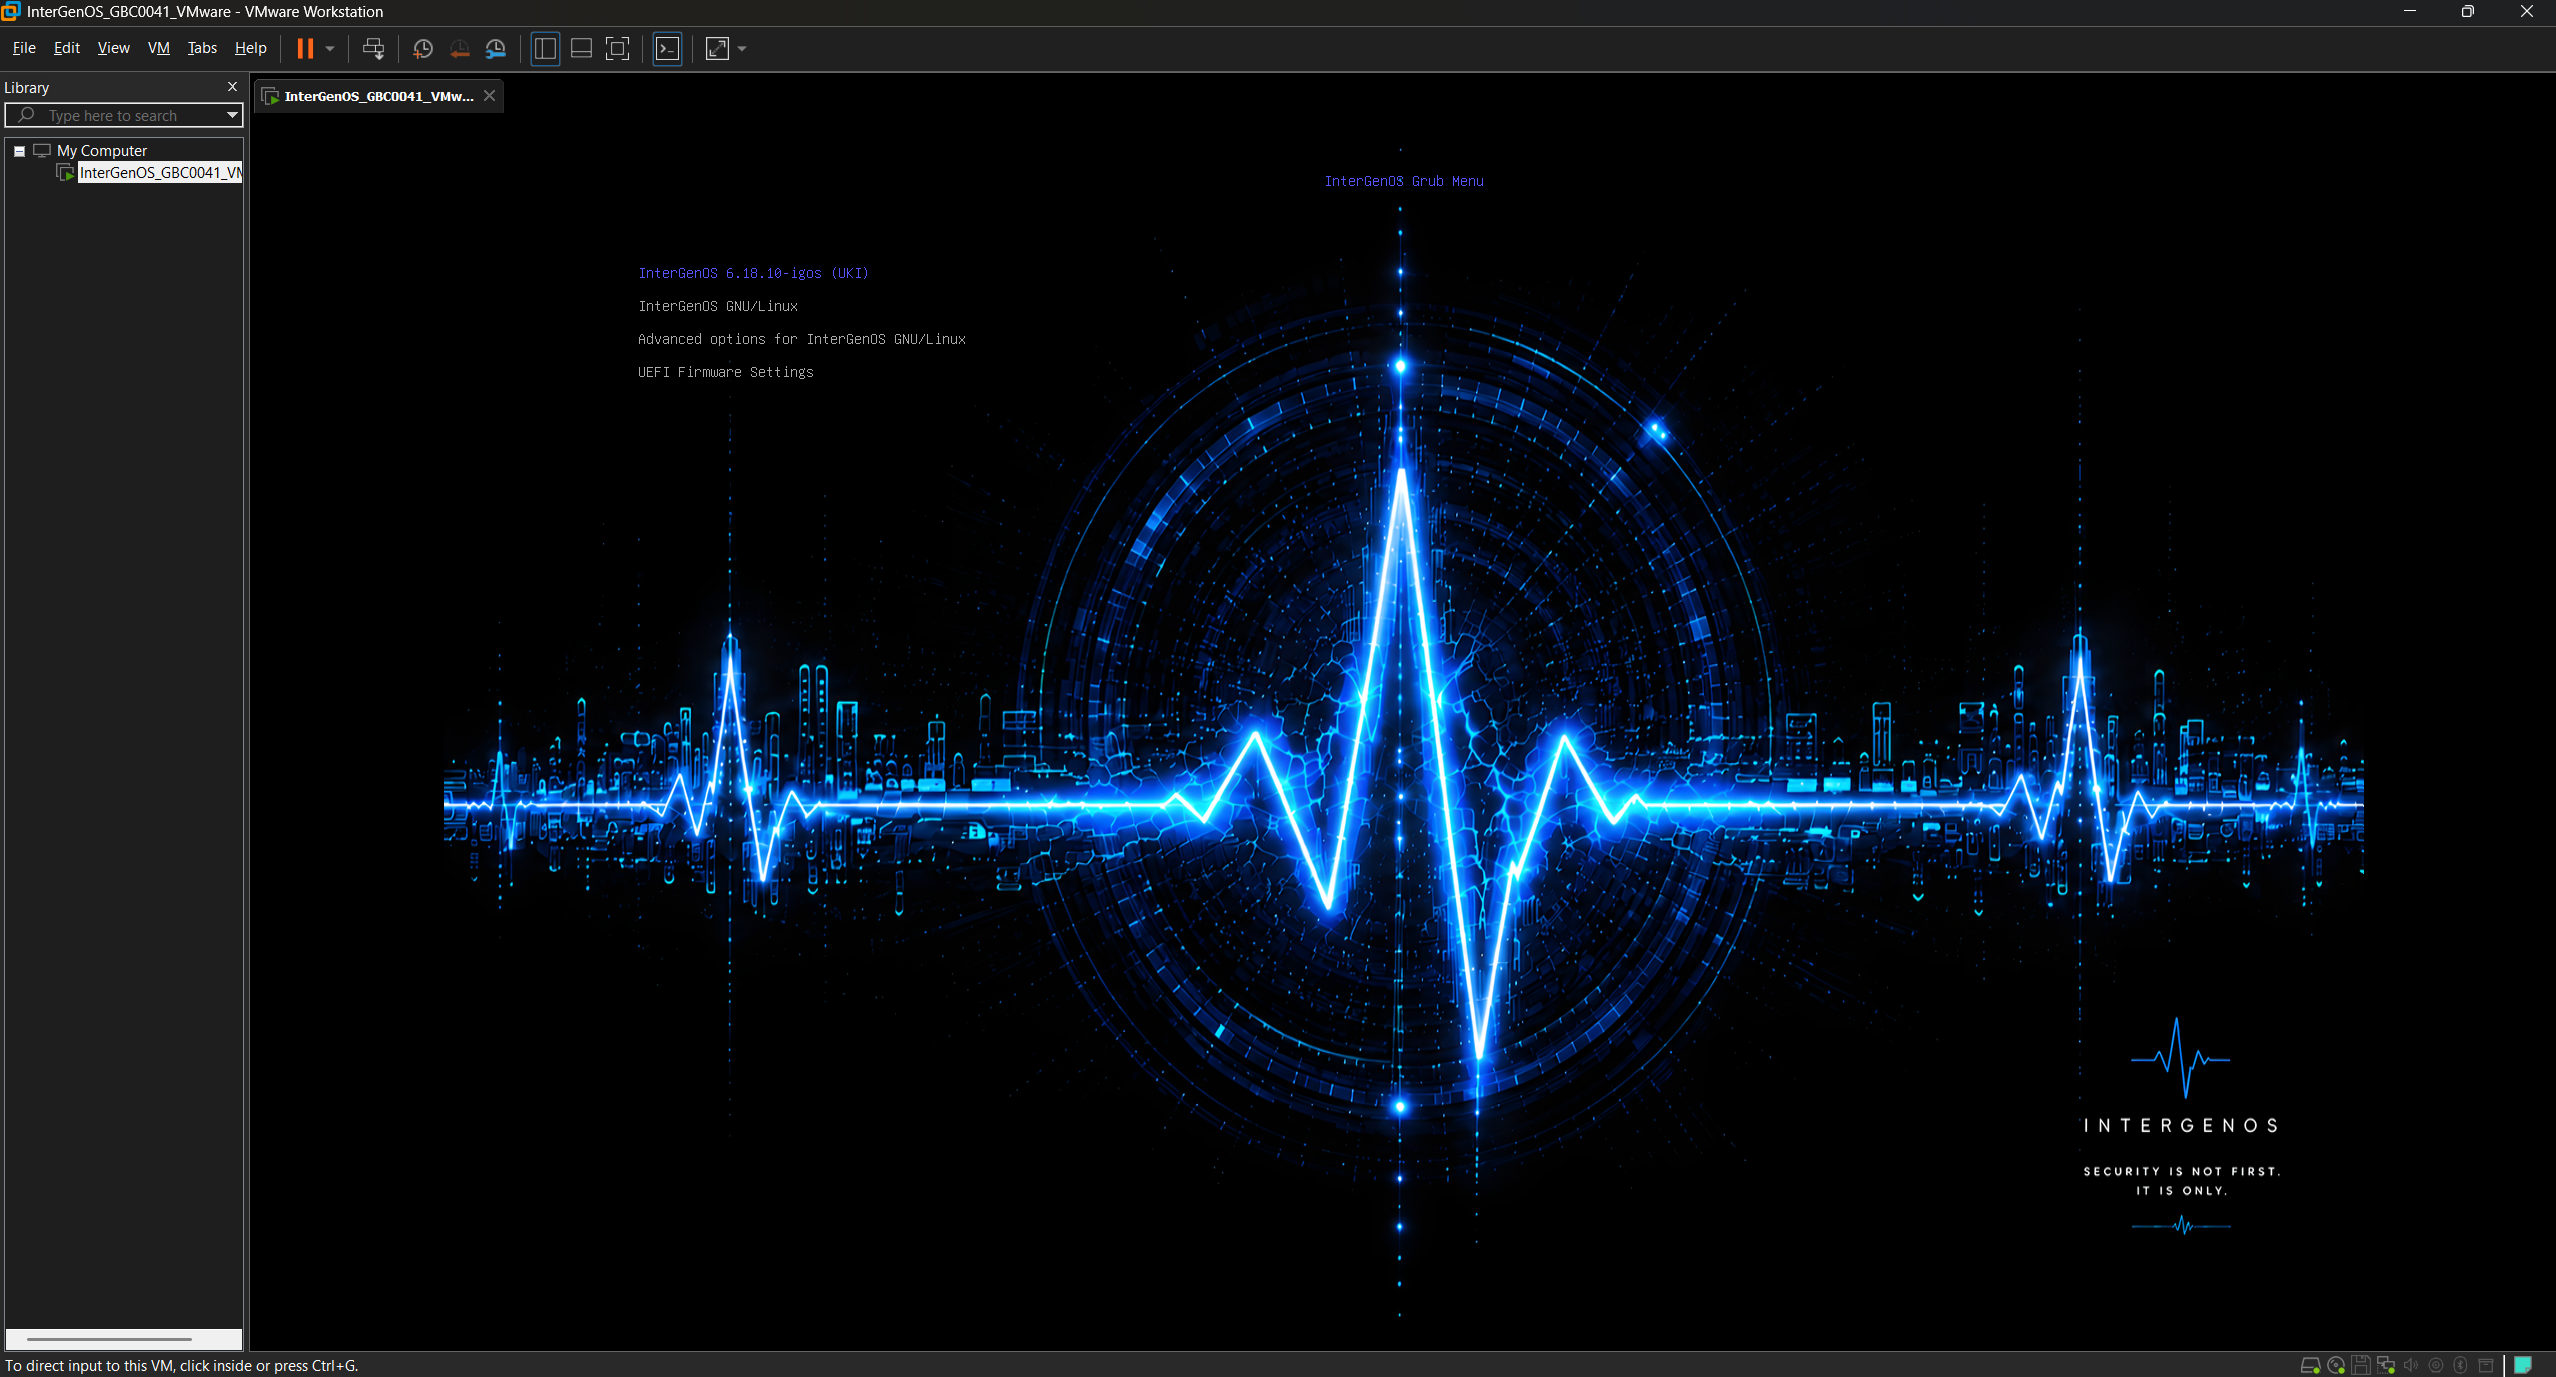
The branded boot menu inside VMware Workstation Pro — the VMware window frame confirms it is running as a guest.
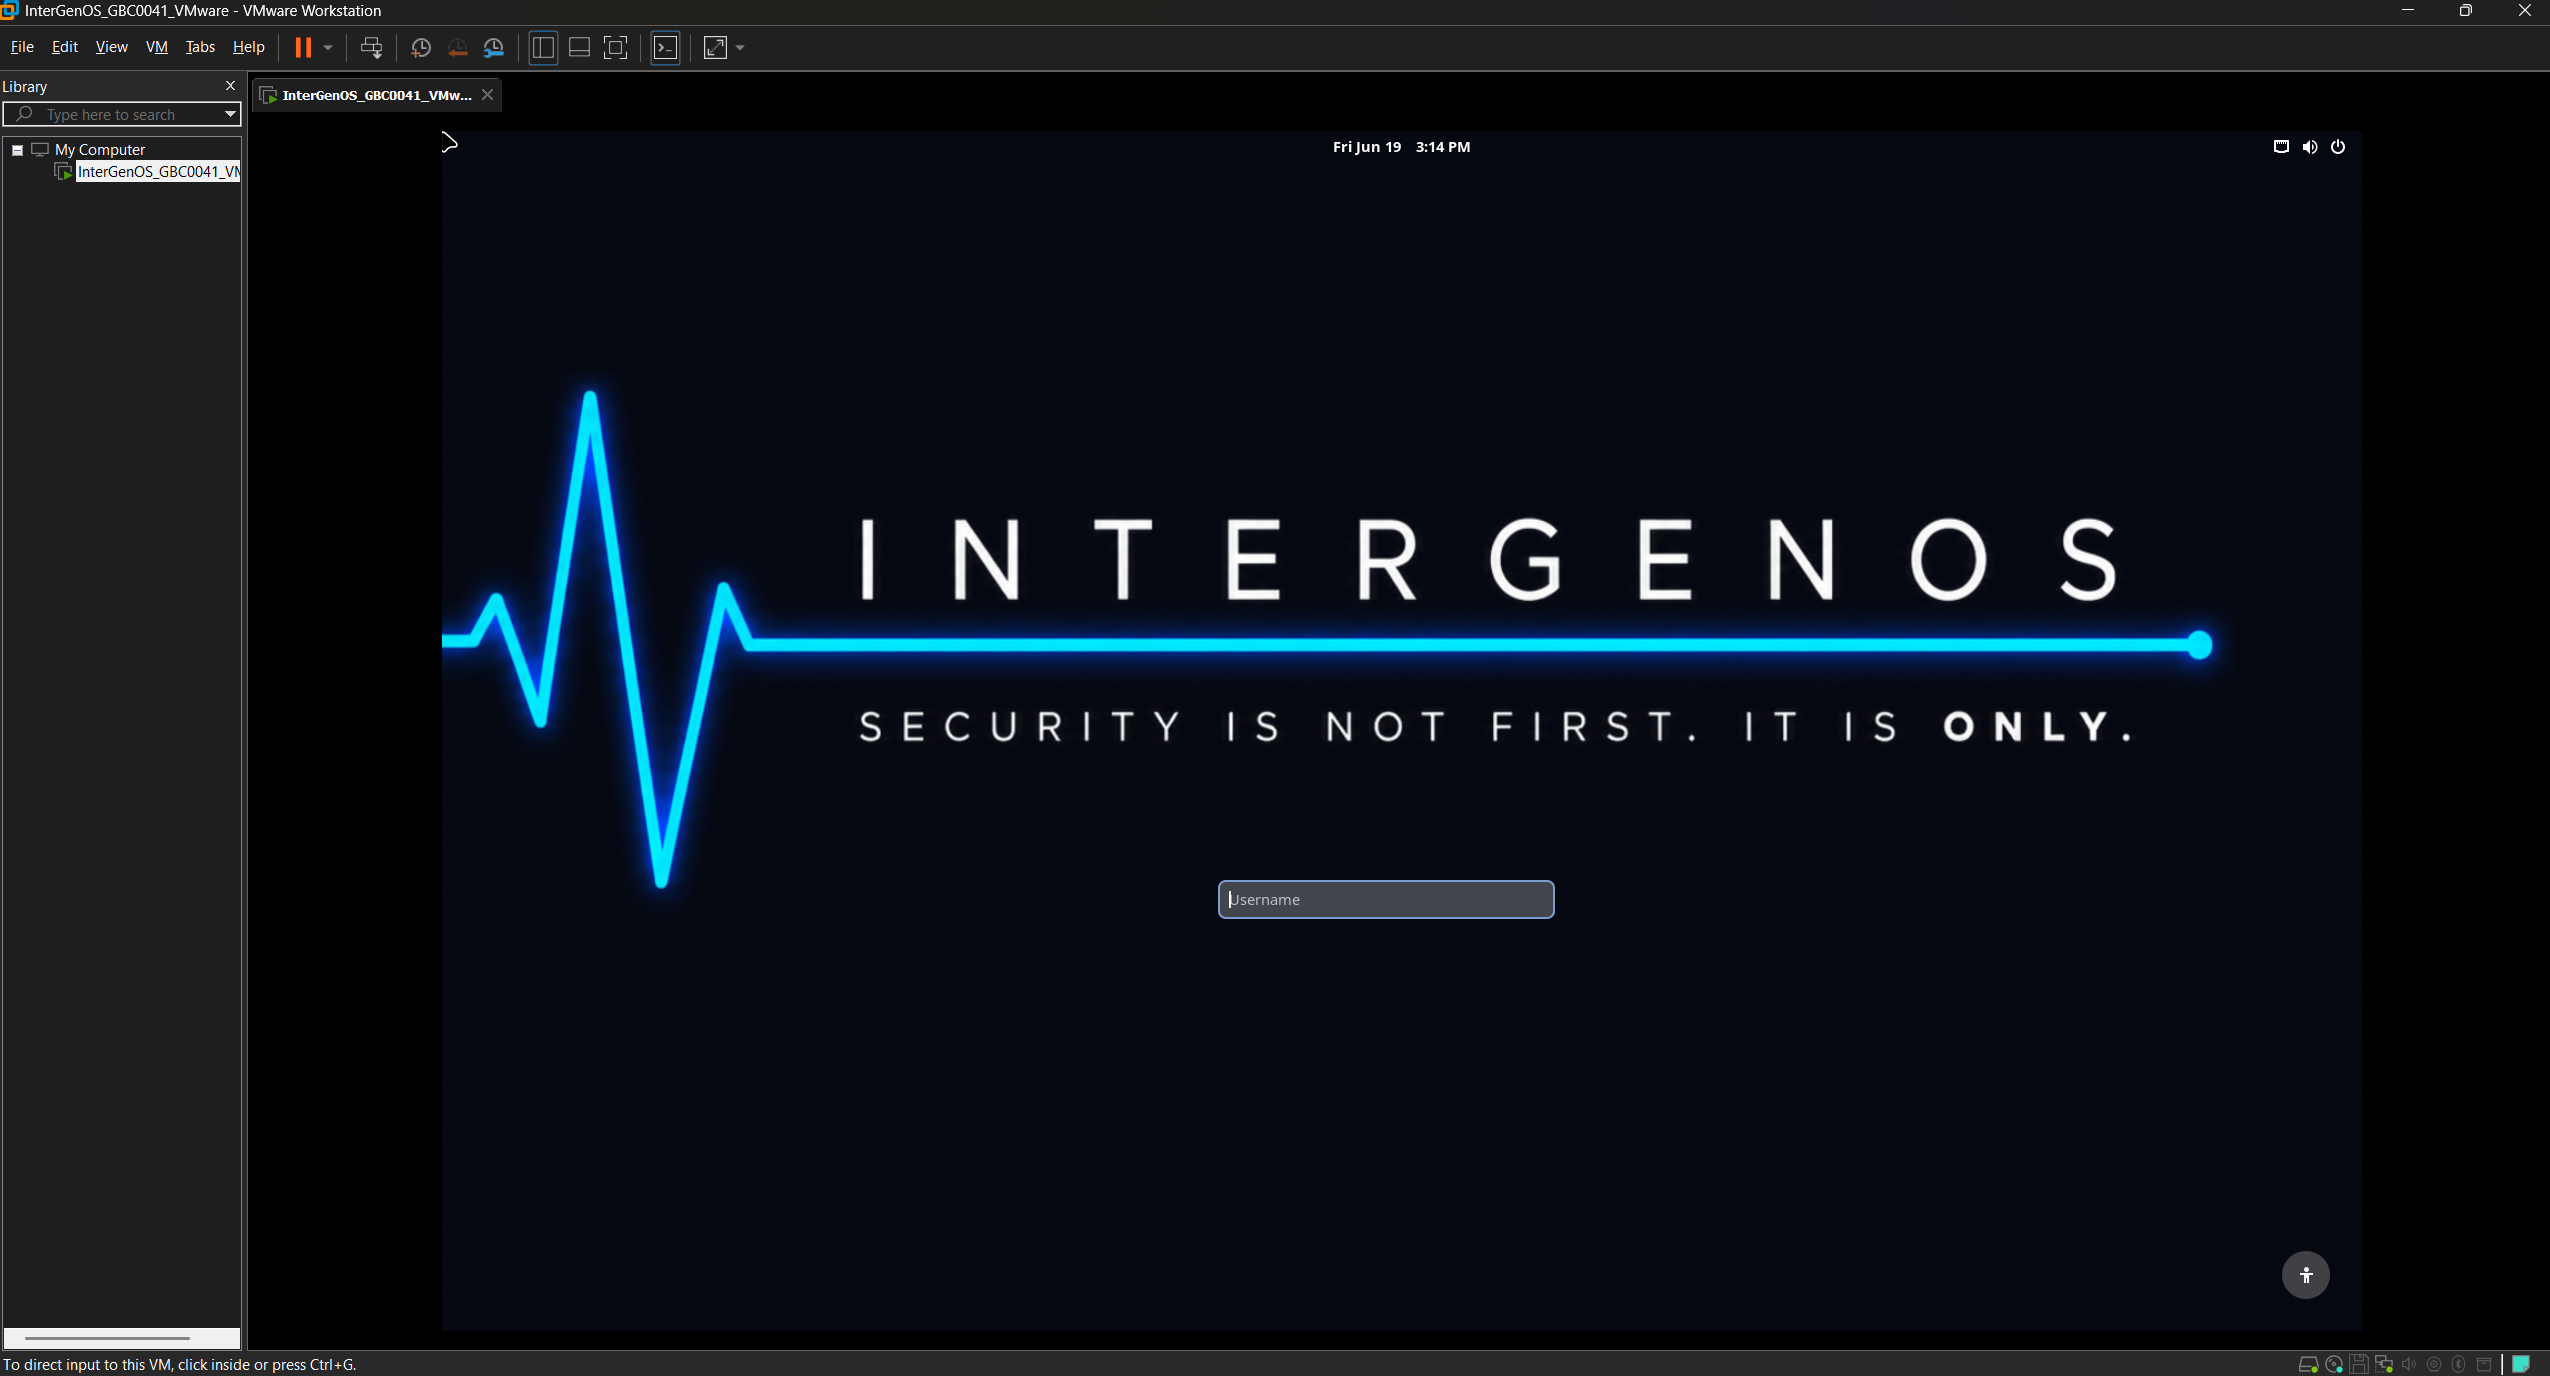
The greeter inside VMware, correctly scaled out of the box. VMware’s SVGA exposes a proper EDID, so GNOME derives the display DPI and scales the session on its own — no manual resolution step, unlike the VirtualBox case above.
For guest integration (dynamic resize, time sync, graceful shutdown), the InterGenOS path is open-vm-tools — the open-source VMware guest tools (vmtoolsd), built from source — not the bundled “VMware Tools” installer. That bundled installer is a vendor package that builds out-of-tree modules the locked-down kernel rejects (the VMware analog of VirtualBox’s Guest Additions).
On the display log, see the note above: the cosmetic vmwgfx -22 flood appears in the live session (on both hypervisors), was not observed on the installed system, and does not affect the display.
See also
- FORGE Installation Guide — the screen-by-screen installer walkthrough the VM boots into.
- Verified Boot & Secure Boot — the MOK and signed-boot model, including enrolling Secure Boot.
- Per-Device Install Notes — bare-metal hardware guidance.
- Troubleshooting: Boot & Graphical Issues — if the VM does not reach the installer.
Recovery & Reinstall
This page covers the paths back to a working system when something goes wrong: a boot that drops to a recovery shell, a kernel upgrade that breaks the signed-boot chain, a corrupted LUKS header, or a forgotten passphrase. It also covers when the right answer is simply to reinstall.
InterGenOS is built to be a machine you understand, can modify, and can trust. That extends to recovery: the paths are deliberately minimal, transparent, and free of any hidden back channel.
Most of the time you will never need this page. When you do, work top to bottom — the paths are ordered roughly from “least invasive” to “reinstall.”
Before you start: back up
The single most important recovery measure is a backup you made before the failure. InterGenOS holds no escrow, no master key, and no remote recovery service. If your system uses full-disk encryption and you lose the passphrase, the data is unrecoverable by design. Back up early and often.
If you use full-disk encryption, also back up the LUKS header to a separate, offline medium. A damaged header makes the payload unrecoverable even with the correct passphrase. See Back up and restore the LUKS header below.
Reinstall with Forge
A clean reinstall is the most reliable recovery path when the installed system is too damaged to repair in place, or when you have decided to start fresh.
Boot the InterGenOS live ISO and run Forge, the installer. Forge offers two frontends that behave identically:
- A GTK4 / libadwaita GUI, a multi-screen wizard (welcome, keyboard and locale, disk, user, packages, confirm, progress, done).
- A
dialog-based TUI, suited to SSH-based installs, headless machines, or keyboard-driven setups.
Before any disk write, Forge runs a supply-chain integrity gate: it computes the SHA-256 hash of every package archive to be deployed and verifies each against the cryptographically signed release manifest. A mismatch halts the install before partitioning begins. Overriding that halt requires typing an override phrase in full — paste, drag-and-drop, and the right-click menu are disabled on that field, so the override is a deliberate, conscious act.
A reinstall wipes the target disk. Anything not backed up is lost. For the full walkthrough, see the FORGE Installation Guide.
Recovering an encrypted system
If your system uses LUKS2 full-disk encryption, the recovery paths below apply. For the full encryption model, see Disk Encryption & LUKS.
Boot drops to the FDE recovery shell
Three failed passphrase attempts — or a missing /etc/crypttab, or a LUKS volume that does not appear — drop you into a minimal busybox recovery shell with cryptsetup available. This shell has no network and writes no logs; it is intentionally bare.
From the recovery shell you can:
-
Retry the unlock manually, then continue the boot:
cryptsetup open /dev/disk/by-uuid/<uuid> cryptroot mount /dev/mapper/cryptroot /newroot exec switch_root /newroot /sbin/init -
Inspect what the disk exposes:
ls /dev/disk/by-uuid/ -
Inspect the unlock config:
cat /etc/crypttab -
Reboot:
reboot -f(the standardrebootis not available this early in boot)
If /etc/crypttab is empty, encryption was never enabled on this install and the recovery shell is a symptom of a different problem — boot a live ISO and reinstall.
Every passphrase attempt fails
The most common cause is a keyboard-layout mismatch. The FDE unlock prompt uses the US-QWERTY layout by default. If your passphrase contains layout-sensitive characters, type the QWERTY-position equivalents. If the layout is correct and the passphrase still fails, see the forgot-passphrase path.
“LUKS volume not found after 30s wait”
The disk did not enumerate in time. Causes include a failing drive, USB-attached storage, or a slow-initializing RAID controller. From the recovery shell, run ls /dev/disk/by-uuid/ to see what is visible. If the volume appears, retry cryptsetup open manually. If it does not appear, the disk itself is the problem.
EXPERIMENTAL unlock fell through to the passphrase prompt
TPM2-sealed unlock and FIDO2-token unlock are EXPERIMENTAL sub-options that are not offered by the installer in this release (see the status note on Disk Encryption & LUKS), so a system installed from this release has neither enrolled and this section does not apply to it. It is retained for systems enrolled by an earlier build. Both methods compose alongside the passphrase slot — the passphrase is never replaced, so it is always the fallback.
-
TPM2 fell through: a measured-boot value changed — typically PCR0 (firmware update) or PCR7 (Secure Boot reconfiguration, or a shim/MOK update). Enter the passphrase to boot. Re-enrolling TPM2 against the new state restores automatic unlock. The specific outcome is printed in the
[EXPERIMENTAL TPM2]line on the boot console as it happens. -
FIDO2 did not detect the token: plug the token in before boot — the initramfs waits up to 30 seconds for it to enumerate. A dead token battery means falling back to the passphrase. The outcome is printed in the
[EXPERIMENTAL FIDO2]line on the boot console.
All FDE-unlock messages carry a [fde-init] prefix and appear on the console during early boot only — the FDE initramfs runs before the journal exists and its messages are not kernel messages, so journalctl cannot retrieve them afterwards. Watch the screen during the unlock; what the journal retains is the kernel’s own dm-crypt record (journalctl -b -k).
I forgot my passphrase
Your data is gone. There is no master key, no recovery-key escrow, and no back door. This is intentional: a recovery channel that the project could use is a channel an attacker could use.
Boot a live ISO and reinstall. A backup made earlier is the only mitigation.
Add or remove a key slot
LUKS2 supports up to eight key slots. From a running, unlocked system, as root:
# Add a second passphrase (prompts for an existing one first)
cryptsetup luksAddKey /dev/disk/by-uuid/<uuid>

# Remove a slot (prompts for the passphrase belonging to that slot)
cryptsetup luksRemoveKey /dev/disk/by-uuid/<uuid>
Adding or removing one slot never affects the others. If luksAddKey reports “No key available with this passphrase,” the passphrase you entered matches no existing slot — try others, and if none work, you are in the forgot-passphrase case above.
Back up and restore the LUKS header
The LUKS header holds the encryption metadata. If it is corrupted — disk damage at the wrong offset, or an accidental dd to the wrong device — the payload is unrecoverable even with the correct passphrase. Back it up to offline media:
cryptsetup luksHeaderBackup /dev/disk/by-uuid/<uuid> \
    --header-backup-file /path/to/external/header.bin
To restore:
cryptsetup luksHeaderRestore /dev/disk/by-uuid/<uuid> \
    --header-backup-file /path/to/external/header.bin
Anyone with the header backup and your passphrase can decrypt the disk. Treat the backup with the same care as the disk itself.
Recovering a broken signed-boot chain
InterGenOS boots a signed UKI: a single file bundling the kernel, the initramfs, and the kernel command line, signed with your machine’s Machine Owner Key (MOK). On an encrypted install, that bundled initramfs is the FDE initramfs, so the unlock prompt lives inside the signed envelope and cannot be substituted by an attacker.
A kernel upgrade rebuilds and re-signs the UKI. If that signing step fails, you can be left unable to boot the normal path.
UKI signing failed on a kernel upgrade
The kernel post-install hook preserves a GRUB-loads-vmlinuz path as a recovery fallback. From the GRUB recovery entry you can boot the bare vmlinuz, supply the FDE initramfs with an initrd= argument, and unlock as normal.
Before retrying the post-install hook, check the underlying signing-failure messages:
cat /var/log/intergen-kernel-postinstall.log
The ESP filled up and the new UKI was not written
When the ESP runs out of space during a kernel upgrade, UKI generation logs the condition and skips writing the new UKI; the previous kernel’s UKI remains the default, so the system still boots. Ordinarily this resolves itself: the kernel post-install hook runs a keep-2 retention prune (/usr/lib/intergen/prune-old-kernels.sh) that removes UKIs and module trees older than the two newest. If the ESP is still full — for example on an undersized, pre-existing ESP — remove an older UKI from the ESP by hand, then re-run the kernel’s post-install hook. The same log file records the underlying messages.
For the full signed-boot model and MOK enrollment, see Verified Boot & Secure Boot.
What recovery never includes
InterGenOS recovery has hard boundaries by design:
- No remote recovery service and no escrowed key. The project cannot decrypt your disk for you.
- No telemetry in the recovery paths. The FDE recovery shell has no network and writes no logs.
- No silent overrides. The Forge integrity gate cannot be bypassed by accident; the override phrase must be typed in full, with paste disabled.
These are not limitations to work around. They are the point: a recovery channel that exists for your convenience also exists for an attacker’s.
When in doubt, reinstall from a known-good ISO
If you cannot trace a failure to one of the paths above, the safest move is to back up what you can, verify your live ISO, and reinstall with Forge. The integrity gate ensures the packages deployed match the signed manifest, so a reinstall returns you to a known-good state.
See also
- FORGE Installation Guide — the full install walkthrough.
- Disk Encryption & LUKS — the complete encryption and unlock model.
- Verified Boot & Secure Boot — the signed-boot chain that wraps the encrypted root.
- FAQ — common install and boot questions.
The AI Assistant
InterGenOS ships with InterGen, a local AI assistant that runs entirely on your own machine. It answers questions about your system, helps with shell, configuration, and code tasks, and never sends your data off the box by default. There is no cloud account, no API key, and no telemetry.
InterGen is a system assistant. Its strength is knowing your machine, not the
whole world. You open it from the Applications menu or from any terminal with
the intergen command.
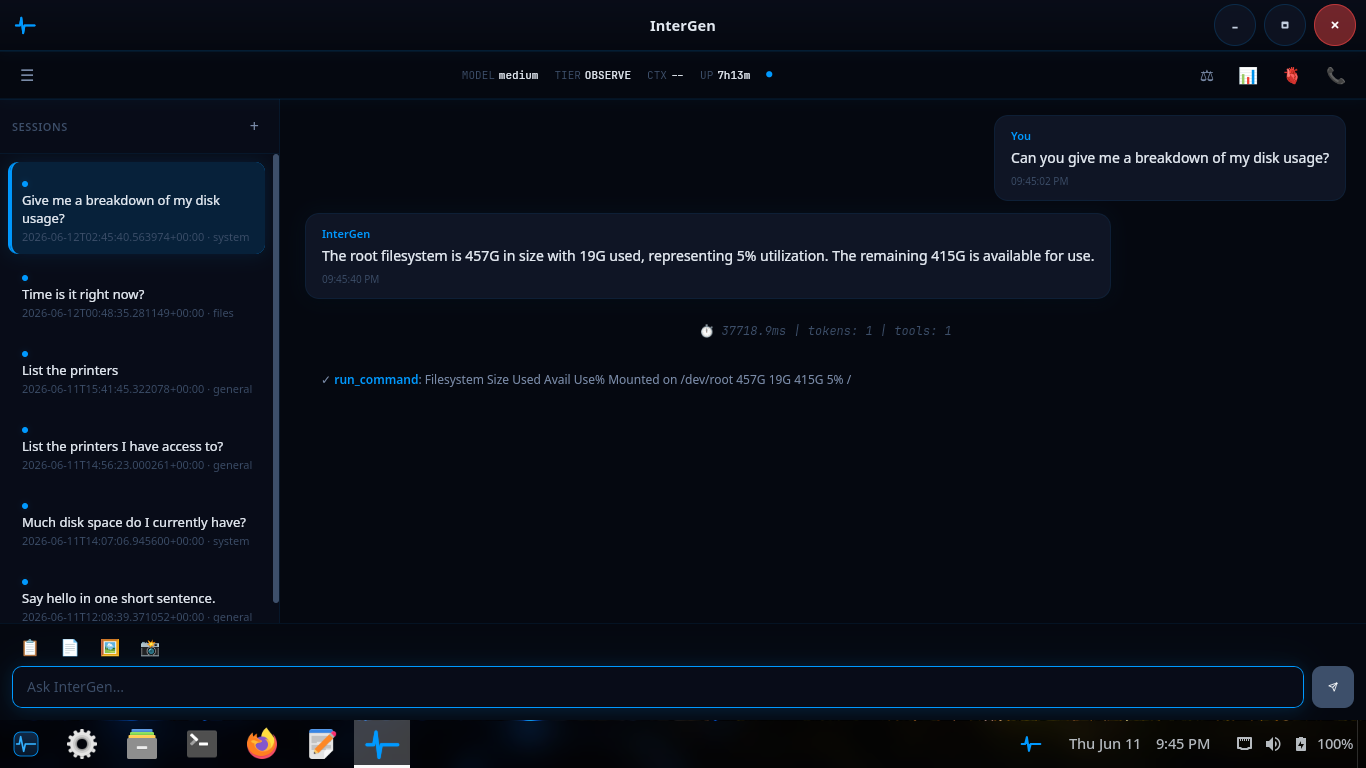
InterGen answering a disk-usage question: it runs the underlying command, then reads the result back in plain English.
What it does
You talk to InterGen in plain language. It recognizes intent, runs the right command, and reports back. Typical requests:
- “How much free space is on my root partition?” — runs the right
dfinvocation and summarizes the answer. - “What’s my current IP address?” — a direct
iplookup plus a plain-English summary. - “Write me a systemd timer that runs
backup.shevery Sunday at 03:00.” — drafts the unit and timer files, then asks before installing. - “Why did sshd fail to start after I edited the config?” — reads the relevant
journalctloutput, summarizes the error, and suggests a fix. - “Install htop” — recognizes the intent and asks you to confirm before
running the install through
pkm, the InterGenOS package manager.
Local-first by design
Every model InterGen uses runs on your own CPU and GPU. Nothing about your prompts, your files, your configuration, or your machine identity leaves the machine by default. This is the InterGenOS posture in one feature: a machine you understand, can modify, and can trust.
The trade-offs are stated honestly:
- Local models are smaller than frontier cloud models, so answers on the hardest tasks are less sharp.
- First use downloads the model (roughly 1.2 GB for the model that ships today; larger on a machine that runs a bigger tier). After that, no network is needed.
- If you ask about brand-new software the model has not seen, it tells you so rather than guessing.
For cases where you want the depth of a frontier model, the optional Phone-A-Friend (Frontier/Cloud Escalation) path lets you opt in to a cloud provider on a per-request basis. It is off by default and never silent: InterGen asks before reaching out, and the outbound payload is scanned first.
How it scales to your hardware
InterGen is hardware-adaptive by design: at startup it inspects the machine’s GPU and its dedicated video memory, and runs the largest shipped model tier that hardware can hold. System memory is not part of the decision — a machine with no discrete GPU runs the 2B floor regardless of how much RAM it has, because the larger models are unusably slow without GPU acceleration. Unknown or unreadable capability always resolves downward, never upward.
- The 2B floor (InternVL3.5-2B, roughly 1.2 GB quantized) runs on every machine as the verified-everywhere default — a compact model chosen for usable latency on essentially any 64-bit machine, including CPU-only laptops. On the floor, tool dispatch is code-owned: the model supplies language, deterministic code decides every action.
- The 9B tier (Qwen3.5-9B, about 5.5 GB) runs on a machine with a discrete GPU carrying roughly 7 GB or more of dedicated video memory — enough to hold the model, its vision projector and its working buffers. There InterGen runs the 9B natively and unlocks native tool-calling, still gated by the safety classifier and Sentinel. A machine with an integrated GPU, or a discrete card too small to hold the larger model, runs the 2B floor.
A large (~35B) tier for high-memory workstations with a discrete GPU ships as well: Qwen3.5-35B-A3B, a mixture-of-experts model of about 21 GB, is catalogued, SHA-256-pinned in the signed model manifest, and selected on a card carrying roughly 22 GB or more of dedicated video memory. Native tool-calling is not unlocked on that tier — the 9B carries the only shipped native lane — so a machine serving the 35B decides actions through the code-owned path. The 2B floor never leaves; it is the locked-down path every machine can always fall back to.
A small embedding model ships alongside the assistant to power its semantic-matching layer.
InterGen can see
InterGen’s on-device model is a vision-language model: it can analyze an image as well as text. Images are acquired only through a dedicated capture tool — a desktop screenshot or a webcam frame — which runs at the CONFIRM tier, so InterGen pauses and asks for your approval before every capture. The image is analyzed by the local model and never leaves the machine, and it is treated as untrusted input (wrapped with its provenance before it reaches the model, the same ingress boundary Sentinel enforces) so content hidden in an image cannot redirect the assistant.
What it can and can’t do (the safety chain)
Every action InterGen proposes is classified before it runs:
- AUTO — read-only operations like
ls,df, andjournalctl. Run immediately, with the result shown to you. - CONFIRM — anything that changes state, such as
systemctl restart, apkm install, or editing a config file. InterGen pauses and shows exactly what it intends to do. Nothing runs until you approve it. - BLOCKED — destructive or security-bypass operations such as
rm -rf /or reformatting the root disk. InterGen refuses and explains why.
On the 2B floor, the model does not choose the tool. The decision to run a command — and the exact arguments — is made by InterGenOS’s own deterministic router, not by the language model. On the 9B tier the model may propose a tool call, and every proposal still passes the same AUTO / CONFIRM / BLOCKED classification before it can run, so the gate does not move. The model reads your request and explains the result in plain language; a code path selects which tool to run and constructs the command, then classifies it AUTO / CONFIRM / BLOCKED as above. A deterministic dispatch path is auditable and testable in a way a model’s free choice is not, and every proposed command passes the same AUTO / CONFIRM / BLOCKED classification before it can run.
The classifier is conservative by design. Nothing that changes the system runs without explicit approval, and the most dangerous commands cannot run at all. See Constraining the assistant for how the safety chain is configured, and Privacy for the data boundaries.
InterGen Sentinel
InterGen Sentinel is the pluggable security scanner that guards InterGen’s interactions with the outside world. It inspects content crossing two boundaries: data returned from external and MCP tools (ingress) and content about to be sent off-device (egress). Both surfaces are scanned by default.
The default configuration runs two local stages: a fast local-rules pass and an optional deep pass backed by a small on-device classifier model. For deeper analysis you may opt in to a cloud scanner backed by one of six providers — Claude (Anthropic), Gemini (Google), Copilot (Microsoft), ChatGPT (OpenAI), Grok (xAI), or DeepSeek. No cloud provider is configured by default, so the default install scans entirely on-device.
Other apps can talk to it
InterGen exposes a narrow D-Bus interface, so the text editor, the terminal, the system settings panel, and third-party apps can request code completion, log summarization, or semantic search over IPC. Only a small set of vetted interfaces is exposed, which keeps a local unprivileged application from driving arbitrary code execution.
InterGen is also a Model Context Protocol (MCP) client. It can connect to local MCP servers to acquire new capabilities while preserving the boundary between the assistant’s core runtime and the tool-execution environment.
Turning it on or off
InterGen is off by default. You opt in at install time through the assistant toggle in Forge, the InterGenOS installer, or at any time later by running:
intergen setup
This downloads the model, enables the intergen.service unit globally, and starts
the assistant. To opt out:
systemctl --global disable intergen.service
The model files stay on disk under /var/lib/intergen/models/ in case you want
to re-enable later without re-downloading.
In this section
- Overview — how InterGen fits the rest of the system
- Explanations — how the assistant reasons about your machine
- Teaching mode — learning alongside the assistant
- Constraining the assistant — tightening the safety chain
- Privacy — the data boundaries, in detail
Overview & Boundaries
InterGen is the AI assistant built into InterGenOS. It runs entirely on your machine, helps you administer, configure, and write code on that machine, and sends nothing about your prompts, files, or system anywhere outside the box. There is no cloud account, no API key, and no telemetry in the default install.
This page covers what InterGen does, the boundaries it operates within, and the two features that govern how it touches the outside world: InterGen Sentinel and Phone-A-Friend (Frontier/Cloud Escalation).
How it fits together
InterGen runs locally, and everything that crosses the machine boundary is screened first by one gate — its Sentinel scanner. The whole shape in one view:
flowchart TD
You(["You"]) -->|" prompt "| IG["InterGen<br/>local model · hardware-tiered (2B floor, 9B)<br/>on-device"]
IG -->|" anything crossing the machine boundary "| S
subgraph S["InterGen Sentinel"]
direction TB
R["Local-Rules<br/>always on, no model, no network"] --> Q["Local-Qwen<br/>optional, on-device classifier"] --> C["Cloud scanner<br/>opt-in, OFF by default"]
end
S --> V{"verdict?"}
V -->|" ALLOW "| W(["External tools · MCP servers<br/>Phone-A-Friend, opt-in cloud"])
V -->|" FLAG / BLOCK "| H(["held for review, or refused"])
C:::off
classDef off stroke-dasharray:5 4;
On a default install, no cloud provider is configured for either Sentinel or Phone-A-Friend, so everything above runs entirely on your machine. Cloud help — a stronger scanner, or a frontier model via Phone-A-Friend — is opt-in per request, never the default, and any outbound payload is screened by Sentinel’s egress policy before it leaves.
InterGen answering a disk-usage question: it ran the read-only command, then summarized the result in plain English.
What InterGen does
InterGen is a chat-style system assistant. You open it from the Applications menu or with the intergen command in any terminal, and you ask it about your machine. Its strength is knowing your system, not the whole world. Typical requests:
- “How much free space is on my root partition?” — it runs the right
dfinvocation and reads back the answer. - “What’s my current IP address?” — a direct
ipcommand plus a plain-English summary. - “Write me a systemd timer that runs
backup.shevery Sunday at 03:00.” — it drafts the unit and timer files, then asks before installing. - “Why did sshd fail to start after I edited the config?” — it reads
journalctl -u sshd, summarizes the error, and suggests a fix. - “Install htop” — it recognizes the intent and asks you to confirm before running
sudo pkm install htop.
InterGen is not a replacement for a general chat tool. If you ask about brand-new software the model has not seen, it tells you so rather than guessing.
How it scales to your hardware
InterGen is hardware-adaptive: at startup it inspects the machine’s GPU and its dedicated video memory, and runs the largest shipped model tier that hardware can hold. System memory is not part of the decision — a machine with no discrete GPU runs the 2B floor regardless of how much RAM it has, because the larger models are unusably slow without GPU acceleration. The 2B floor (InternVL3.5-2B, roughly 1.2 GB quantized) runs on every machine as the verified-everywhere default — compact enough for usable latency on essentially any 64-bit machine, including CPU-only laptops, and code-owned so the model supplies language while deterministic code decides every action.
The 9B tier (Qwen3.5-9B, about 5.5 GB) runs on a machine with a discrete GPU carrying roughly 7 GB or more of dedicated video memory — enough to hold the model, its vision projector and its working buffers — where InterGen runs the 9B natively and unlocks native tool-calling, still gated by the safety classifier and Sentinel. A large (~35B) tier ships as well: Qwen3.5-35B-A3B, a mixture-of-experts model of about 21 GB, is catalogued, SHA-256-pinned in the signed model manifest, and selected on a discrete GPU carrying roughly 22 GB or more of dedicated video memory, so the model and its buffers stay resident on the card. Native tool-calling is not unlocked on that tier — the 9B carries the only shipped native lane — so a machine serving the 35B decides actions through the code-owned path, the same posture as the 2B floor. A machine with an integrated GPU, or a discrete card too small to hold the larger model, runs the 2B floor.
A small embedding model ships alongside the assistant to power semantic matching in the router.
InterGen can see: screenshots and images
InterGen’s on-device model is a vision-language model, so it can analyze an image, not just text. InterGen acquires an image only through a dedicated capture tool — a desktop screenshot or a webcam frame — never on its own initiative. That capture is treated as a state-changing action: it runs at the CONFIRM tier, so InterGen pauses and asks for your approval before every capture. A captured image is analyzed by the local model in place and never leaves the machine.
A captured image is also handled as untrusted input. Like any content InterGen pulls in from a tool, the image is wrapped with its source and provenance before it reaches the model, so text hidden inside a screenshot cannot silently redirect the assistant — the same ingress boundary InterGen Sentinel applies to tool output (below).
The boundaries: fully local, zero telemetry
Every model InterGen uses runs on your own CPU and GPU by default. Nothing about your prompts, files, configuration, or machine identity leaves the local network. The trade-offs are honest:
- The local models are smaller than frontier cloud models, so answers on hard tasks are less sharp.
- First use downloads the model (roughly 1.2 GB for the model that ships today; larger on a machine that runs a bigger tier). After that, no network is needed.
The trade-off you do not make is data exposure. When you want the depth of a frontier model, the optional Phone-A-Friend (Frontier/Cloud Escalation) feature lets you opt in on a per-request basis, off by default and never silent.
This is the InterGenOS posture in practice: a machine you understand, can modify, and can trust.
What it can and can’t do: the safety chain
Every action InterGen proposes is classified before it runs:
- AUTO — read-only or harmless operations such as
ls,df, andjournalctl. They run immediately and the result is shown to you. - CONFIRM — anything that changes state, such as
systemctl restart,pkm install, or editing a config file. InterGen pauses, shows exactly what it intends to do, and runs nothing until you approve. - BLOCKED — destructive or security-bypassing operations such as
rm -rf /, formatting the root disk, or disabling Secure Boot from inside the running system. InterGen refuses and explains why.
On the 2B floor, the model does not choose the tool. The decision to run a command — and the exact arguments it runs with — is made by InterGenOS’s own deterministic router, not by the language model. On the 9B tier the model may propose a tool call, and every proposal still passes the same AUTO / CONFIRM / BLOCKED classification before it can run, so the gate does not move. The model reads your request and explains the result in plain language; a code path selects which tool to run and constructs the command, then classifies it AUTO / CONFIRM / BLOCKED as above. This is deliberate: a deterministic dispatch path is auditable and testable in a way a model’s free choice is not, and every proposed command passes the same AUTO / CONFIRM / BLOCKED classification before it can run.
The classifier is conservative by design. Nothing that changes the system runs without explicit approval, and the most dangerous commands cannot run at all. This is what keeps you in control.
InterGen Sentinel
InterGen Sentinel is the pluggable security scanner that guards InterGen’s interactions with the outside world. It inspects content crossing two boundaries: data returned from external and MCP tools (ingress, an injection risk) and content about to be sent off-device (egress, an exfiltration risk). Both surfaces are scanned by default.
Sentinel runs a layered scan and returns one of three verdicts: ALLOW, FLAG (hold for human review), or BLOCK (refuse). When verdicts disagree, the most severe one wins, and any scanner that errors fails closed to FLAG rather than silently allowing content through.
The default configuration runs two stages, both fully on-device:
- Local-Rules — an always-on deterministic floor of pattern and heuristic rules. No model, no network. This is the minimum guarantee on every interaction.
- Local-Qwen — an optional deeper pass backed by a small on-device classifier model. Richer judgement than the rules floor, still no network. (The stage keeps its original name; the classifier model it loads is the same compact on-device model the assistant’s floor tier uses.)
For the strongest analysis you may opt in to a cloud scanner backed by one of six providers: Claude (Anthropic), Gemini (Google), Copilot (Microsoft), ChatGPT (OpenAI), Grok (xAI), or DeepSeek. No cloud provider is configured by default, so the default install scans entirely on-device.
Sentinel also enforces a signed never-list: a manifest of paths the assistant may never perform a destructive operation on, including its own configuration. The scan policy is in the protected set the assistant itself can never edit, and turning scanning off requires a human-authenticated path.
Phone-A-Friend (Frontier/Cloud Escalation)
Phone-A-Friend (Frontier/Cloud Escalation) is the optional, consent-first path for handing a request to a more capable frontier model in the cloud when the local assistant cannot satisfy it. It is off by default: no provider is configured out of the box, and the feature only acts after you have explicitly set one up.
When a request exceeds local capability, InterGen offers to escalate and asks before reaching out. A consent modal shows you the full outbound payload before anything is sent, so your consent is informed. The same six providers available to Sentinel can be configured here, with API keys stored in the system keyring rather than in plain configuration.
Every outbound payload is scanned by Sentinel’s egress policy first, so a blocked send keeps sensitive content from leaving the machine. This preserves InterGen’s local-first posture: cloud assistance is available when you ask for it, never imposed.
Turning InterGen on or off
InterGen is off by default. You opt in either at install time (the “Enable the InterGen AI assistant?” toggle in Forge’s package-selection screen) or later by running:
intergen setup
That downloads the model, enables the intergen.service unit, and starts the assistant. Because the installer enables the unit globally (systemctl --global enable intergen.service), opting back out means undoing that global enablement — run systemctl --global disable intergen.service, or use the in-app toggle. A per-user systemctl --user disable does not undo the installer’s global enable, so reach for the global disable or the toggle instead.
The model files stay on disk under /var/lib/intergen/models/ in case you want to re-enable later without re-downloading. To free that space, remove the directory as root.
Where to go next
Reading “What I Did and Why”
InterGen, the local assistant in InterGenOS, does not act silently. Every action it takes or proposes carries an explanation: what it intends to do, which part of your system it touches, and the outcome the permission model assigned to that action. This page explains how to read that surface so you always know why the assistant did what it did, and why it sometimes refuses.
The principle behind all of it is simple: this is a machine you understand, can modify, and can trust. The assistant’s job is to be legible, never to be a black box.
The two questions behind every action
InterGen evaluates every action on two separate axes, decided by two separate mechanisms. Keeping them apart is what keeps the explanations honest.
- Privilege — “Would a person at this terminal need
sudofor this, and what does it touch?” This is the permission gate. It decides whether an action runs freely, asks for your authorization, or is refused. - Content trust — “Does data crossing a boundary carry an injection attempt coming in, or leak a secret going out?” This is handled independently by the scanner and provenance layer (InterGen Sentinel), not by the privilege gate.
The two never get conflated. The privilege axis treats a read as free; the content axis independently watches what that read returns. When you read an explanation, knowing which axis is speaking tells you why a given action was treated the way it was.
Zones: what the action touches
The permission gate mirrors the operating system’s real privilege model. A person at a terminal can freely touch their own files and needs sudo or PolicyKit for system things. InterGen inherits that exact model rather than inventing a new one, so the rules already match what you understand about your own machine. Actions are classified by the zone they touch:
- Z1 — User space. Your own things: your home directory and everything under it, your user services, your files. No
sudoneeded to change them. - Z2 — System config and state. Root-owned, ordinary administration: most of
/etc,/usr,/opt,/var, system services, installed packages. A person needssudoto write here. - Z3 — System-critical and trust anchors. Root-owned files that underpin the boot and security trust chain (
/boot, the EFI partition and signed kernel images, Secure Boot keys, dm-verity hashes, LUKS headers,/etc/shadow,/etc/sudoers, and similar), plus InterGen’s own code and configuration.
Operations: what kind of action it is
Each action is also one of three kinds:
- R — Read or inspect. Status, list, view a file. No change to the system.
- W — Write or modify. Edit, create, or delete a file; change a config.
- X — Execute or state-change. Run a command, start or stop a service, install or remove a package, reboot.
The three outcomes
The zone and the operation together produce exactly one of three outcomes. This is the heart of what “what I did and why” means.
- FREE — InterGen does it immediately, with no prompt. This covers every read of non-secret data and everything in your own user space. Asking “what’s my disk space?” or “list the installed packages” returns an answer directly. A read being free is the point: the assistant should never refuse to tell you the state of your own machine.
- AUTH-PROMPT — The action changes something in system space (Z2). InterGen triggers the operating system’s real authorization, PolicyKit, and asks you plainly: for example, “InterGen wants to restart Bluetooth. That needs admin rights. Authorize?” Your password is the gate, and the OS enforces it. You will not see an opaque card of internal checks; you see a plain-language request and the actual system authorization dialog.
- FORBIDDEN — The action would write to or change a system-critical Z3 file, or InterGen’s own code. InterGen will not do it, and it tells you so openly. It states what it will not do and why, and confirms that you can still do it yourself with
sudoif you intend to.
The full mapping is small enough to hold in your head:
| Z1 User space | Z2 System config/state | Z3 Critical / InterGen-self | |
|---|---|---|---|
| Read | FREE | FREE | listing FREE; secrets AUTH-PROMPT |
| Write | FREE | AUTH-PROMPT | FORBIDDEN |
| Execute | FREE | AUTH-PROMPT | FORBIDDEN |
Reading a secret (your shadow file or key material) is AUTH-PROMPT, not forbidden, because a person can sudo cat their own shadow file. InterGen does not pretend to be stricter than the OS. Whether that content may then leave the machine is the separate content-trust axis.
Why the assistant will not edit itself
The one category InterGen refuses absolutely, even with your authorization, is changing its own substrate: its code, its model pins and signatures, its daemon units and PolicyKit policy, and its verified model store. These are classified as Z3.
This is deliberate, and it is the keystone of the design. The whole game of a capable adversary is to talk an assistant into rewriting its own gate, manifest, or guardrails. If InterGen’s own files are write-forbidden to InterGen, then even a flawless prompt-injection attempt cannot make InterGen weaken InterGen. Only you, acting manually and outside the assistant, can. When you see InterGen refuse to touch its own files, that refusal is the protection working, not a malfunction.
Reading a transparent refusal
A refusal is never silent and never hidden behind jargon. InterGen states plainly what it will not do and why, in terms of protecting the trust chain that keeps the machine yours, and it hands control back to you. You will not see phrases like “blocked by the safety layer” or references to internal tiers. You will see something like:
“I won’t modify the system’s boot and security files. That’s the trust chain that keeps this machine yours. It’s your machine, so you can do it yourself with
sudoif you intend to; I just won’t be the one to touch it.”
If you ever see a refusal that hides its reason or fails silently, that is a bug to report, not the intended behavior.
How a request is resolved before it reaches the model
The explanation surface is also shaped by how InterGen routes a request. It does not hand every prompt straight to the model. A priority-ordered chain tries the cheapest, most predictable method first:
- Decomposition — splits a compound request (“update the system, then restart the web server”) into sub-tasks.
- Keyword match — fast pattern matches for common queries dispatch directly to a built-in tool, no model involved.
- Semantic match — a lightweight embedding search dispatches a high-confidence match to a built-in tool.
- Tool calling (gated) — on the 9B tier the model may select a system tool and its arguments for the router to execute, still classified and gated before anything runs. On the 2B floor this path is off: the deterministic keyword and semantic stages select the tool, and the model never decides a tool call.
- Free response — the fallback, where the model answers conversationally from its own knowledge.
This is why a simple query like “what’s my IP?” returns a direct, deterministic answer rather than a model paraphrase: it was resolved at the keyword stage. When you read what the assistant did, the routing stage explains how it arrived at the action, and the zone-and-operation outcome explains whether it was allowed to run.
Where escalation fits
If a request exceeds what the local assistant can do, InterGen may offer Phone-A-Friend (Frontier/Cloud Escalation), a consent-first path to a more capable cloud model. It is off by default and acts only when you have explicitly configured a provider. Before anything leaves the machine, Sentinel’s egress policy scans the outbound payload. An escalation is always something you are asked about and agree to, never something the assistant does on its own.
See also
Teaching Mode
InterGen, the local AI assistant in InterGenOS, is built to help you learn the machine you are running, not just operate it. It explains what it is about to do before it does it, shows you the exact commands it would run, and walks through errors in plain language. This page covers how to use InterGen as a teaching tool: asking it to explain rather than execute, working through a problem step by step, and keeping yourself in control of every change.
The goal is a machine you understand, can modify, and can trust.
Explain instead of execute
InterGen’s safety classifier sorts every proposed action into one of three levels before anything runs:
- AUTO — read-only or harmless operations (for example
ls,df,journalctl,systemctl status). These run immediately and the result is shown to you. - CONFIRM — anything that changes state, such as
systemctl restart,pkm install, or editing a configuration file. InterGen pauses, shows you exactly what it intends to do, and waits for your approval. Nothing runs until you say yes. - BLOCKED — destructive or security-bypassing operations such as
rm -rf /or reformatting the root partition. InterGen refuses and explains why.
This is what makes InterGen useful for learning: the CONFIRM step is a natural pause where you can read the command, ask why, and decide whether to run it yourself. The classifier is conservative by design. If a command looks dangerous, you will be asked.
Asking InterGen to teach
InterGen is a chat-style assistant. Open it from the Applications menu or run
the intergen command in any terminal. To use it as a learning aid, ask it to
explain rather than to act. Examples drawn from its documented capabilities:
- “Why did sshd fail to start after I edited the config?” — InterGen reads
journalctl -u sshd, summarizes the error, and suggests a fix. - “Explain what this Python error means.” — it returns the traceback with context, in plain language.
- “Write me a systemd timer that runs
backup.shevery Sunday at 03:00.” — it drafts the unit and timer files and shows them to you, then asks before installing. You can read the draft and learn the syntax before committing. - “What’s my current IP address?” — it runs the right
ipcommand and gives a plain-English summary alongside the raw output.
InterGen is a system assistant. Its strength is knowing your machine, so it teaches best when the question is about your system: services, configuration, shell commands, logs, and your own code.
The hardware tier sets the depth
How much teaching InterGen can do depends on the model tier it selects for your hardware. It inspects the GPU and its dedicated video memory at startup and picks automatically (system RAM is reported, never an input):
- The 2B floor — InternVL3.5-2B, about 1.2 GB. The verified-everywhere default InterGen runs on every machine, including CPU-only laptops. Good for system queries, command lookups, summarizing logs, and step-by-step explanation. It is not built for writing large amounts of code from scratch.
- The 9B tier — Qwen3.5-9B, about 5.5 GB, for machines with a discrete GPU carrying roughly 7 GB or more of dedicated video memory. It handles coding, configuration, and deeper reasoning, and teaches with more depth. A capable machine runs it automatically; a machine with an integrated GPU, or a discrete card too small to hold it, stays on the 2B floor.
- A large (~35B) tier for high-memory workstations with a discrete GPU ships as well: about 21 GB of model, selected on a card carrying roughly 22 GB or more of dedicated video memory. Native tool-calling is not unlocked on that tier — the 9B carries the only shipped native lane — so a machine serving the 35B decides actions through the code-owned path, and teaches the same way.
The shipping model runs locally, with a small embedding model alongside it for
memory and retrieval. You can confirm the model InterGen detected and chose by
running intergen tier.
For step-by-step walkthroughs and multi-file code explanations, a Tier 2 or Tier 3 machine gives sharper answers. On Tier 1, lean on InterGen for command lookups and log summaries rather than from-scratch code generation.
Stays on your machine
Every model InterGen uses runs on your own CPU and GPU. Nothing about your prompts, files, configuration, or machine identity leaves the local network. There is no cloud account, no API key, and no telemetry. When the local model has not seen a brand-new piece of software, it tells you so rather than guessing, which is the honest behaviour you want from something you are learning with.
If a question genuinely exceeds local capability, the optional Phone-A-Friend (Frontier/Cloud Escalation) path can hand that single request to a frontier cloud model of your choice. It is off by default, asks before reaching out, and scans the outbound payload before anything leaves the machine. Cloud help is available when you ask for it, never imposed.
Turning InterGen on
InterGen is off by default. Enable it at install time with the “Enable the InterGen AI assistant?” toggle in Forge’s package-selection screen, or at any time afterward by running:
intergen setup
This downloads and verifies the model for your tier (and the embedding model), then enables and starts the assistant.
To opt back out, use the InterGen toggle in the Applications menu. Because the unit is enabled globally, the equivalent command is:
systemctl --global disable intergen.service
Related pages
- Meet InterGen — the introductory tour of the assistant.
- Frequently asked questions
- Installing with Forge
Privacy & Data Locality
InterGenOS is built so that the data on your machine stays on your machine. The AI assistant, InterGen, runs locally by default and sends nothing off the box unless you explicitly opt in, on a single request, to a cloud provider you have chosen. There is no cloud account, no API key, no telemetry, and no background “improve the service” exfiltration. Security is not first. It is only.
This page documents the data-locality guarantees that hold today in InterGenOS.
The guarantee in one sentence
Every model InterGen uses runs on your own CPU and GPU, and nothing about your prompts, your files, your configuration, or your machine identity ever leaves the local network unless you deliberately escalate a single request to a cloud provider.
Local-only by default
InterGen is the system assistant that ships with InterGenOS. It is hardware-detected, offline-first, and runs entirely on the local machine on a hardware-sized on-device model. Its job is to know your machine, not the whole world.
- No cloud account. InterGen requires no sign-in, no license server, and no remote identity to function.
- No API key. The default assistant needs no credentials to a remote service.
- No telemetry. InterGen does not phone home with usage statistics, crash reports, prompt contents, or machine fingerprints.
- No silent escalation. There is no “we just send it to improve the service” loophole. Off-box communication only happens through one explicit, opt-in path, described below.
After the first-run model download, no network connection is needed for InterGen to work. The model is fetched once (roughly 1.2 GB for the model that ships today; larger on a machine that runs a bigger tier) and then runs offline.
InterGen can capture and analyze images — a desktop screenshot or a webcam frame — but only through a dedicated tool that runs behind an explicit, per-use confirmation: it asks before every capture. A captured image is analyzed by the local model on the machine and is never uploaded; like any content pulled in from a tool, it is treated as untrusted input, so text hidden inside an image cannot silently redirect the assistant.
The tiered models are selected automatically from the machine’s GPU and its dedicated video memory. Tier selection is a local hardware inspection — it sends nothing anywhere.
InterGen is off by default
InterGen does not run until you turn it on. You opt in either at install time, through the “Enable the InterGen AI assistant?” toggle in Forge’s package-selection screen, or at any later time by running:
intergen setup
This downloads the model and enables intergen.service, which ships enabled globally (system-wide via systemctl --global enable), then starts the assistant. To opt out, use the InterGen toggle in the desktop, or disable the unit globally:
systemctl --global disable intergen.service
A per-user systemctl --user disable does not undo the global enable, so use the global disable above or the in-app toggle.
The model files remain on disk under /var/lib/intergen/models/ in case you want to re-enable later without re-downloading. To reclaim that space, remove the directory as root:
sudo rm -rf /var/lib/intergen/models/
See the Forge installation guide for the install-time toggle, and the assistant overview for a wider tour of InterGen.
The one path off the box: Phone-A-Friend (Frontier/Cloud Escalation)
For the cases where you want the depth of a larger frontier model, InterGen offers an optional feature called Phone-A-Friend (Frontier/Cloud Escalation). It lets you opt in to a cloud provider of your choice on a per-request basis. It is off by default and never silent. You decide, for that single request, that the prompt may leave the machine. Nothing is sent without that explicit choice, and what leaves is scoped to that request — your current prompt and the context you give it for it, not your files, your wider conversation history, or your machine identity.
This is the only mechanism by which any prompt or data leaves the local network, and it is entirely under your control.
A jurisdiction note, stated plainly: the available providers — Claude (Anthropic), Gemini (Google), Copilot (Microsoft), ChatGPT (OpenAI), Grok (xAI), and DeepSeek — are operated by companies subject to the laws of their home jurisdictions; most are US-based and can receive lawful data requests. Phone-A-Friend never sends anything on its own, but once you escalate a request, that provider’s privacy policy and legal jurisdiction govern what you sent. For sensitive material, keep the request local.
Two separate axes: privilege and content trust
InterGen evaluates every action on two independent axes, kept deliberately separate.
| Axis | Question it answers |
|---|---|
| Privilege | Would a human need sudo for this, and what does it touch? |
| Content trust | Does data crossing a boundary carry an injected instruction (inbound) or leak a secret (outbound)? |
The privilege axis decides whether InterGen acts freely, asks for authorization, or refuses. The content-trust axis independently watches what the data carries — inbound scanning for injected instructions, outbound scanning to keep secrets from leaking. The pluggable scanner that handles content trust is InterGen Sentinel, which defaults to Local-Rules plus a Local-Qwen model. Its cloud providers (Claude (Anthropic), Gemini (Google), Copilot (Microsoft), ChatGPT (OpenAI), Grok (xAI), and DeepSeek) are opt-in only.
Keeping the two axes separate matters for privacy. A read of your own files is free on the privilege axis, while the content axis independently governs whether anything from that read may then leave the machine.
Reads are free; your data is not pre-shared
InterGen mirrors the privilege model the operating system already has. A read of non-secret data — your status, your file listings, most of /etc — runs immediately and locally, with no prompt and no off-box transmission. Reading is a local operation; the answer is computed on your machine.
Secrets such as /etc/shadow or key material are treated the way the OS treats them. Because a user can sudo cat their own shadow file, InterGen reading a secret triggers the OS’s real authorization prompt (pkexec/PolicyKit) rather than being forbidden. Whether the content of such a read may then leave the machine is governed separately by the content-trust axis. InterGen never pretends to be stricter than the OS, and it never pre-shares your data as a side effect of reading it.
InterGen cannot rewrite its own restraints
InterGen’s own files — its code, its panel extension, its model pins and signatures, its verified model store, its daemon units and PolicyKit policy, its signing and provenance state, and its own settings under ~/.config/intergen — are treated as system-critical. InterGen may read them but may never modify them. Only you, acting manually and outside the assistant, can change them.
This closes a direct attack on your privacy: by design, a prompt injection cannot make InterGen rewrite its own gate, scanner, or guardrails. What holds that line differs by where the file lives, and the difference is worth knowing. The system-side files — the code, the units, the policy, the model store under /var/lib/intergen, and the logs under /var/log/intergen — are root-owned, so the unprivileged assistant lacks the operating system’s permission to write them at all. Your own settings under ~/.config/intergen belong to your account, so file ownership does not stop the assistant there; what stops it is a boundary inside InterGen’s own code, a never-write list that refuses the path and refuses it even when the code is running as root. This is a deliberate defense-in-depth control, not a claim of perfect immunity — it removes the most direct coercion path (talking the assistant into weakening itself), so an assistant that will not edit its own restraints will not quietly open a channel off your machine either.
The local trust chain underneath
The data-locality guarantees rest on integrity guarantees that InterGenOS provides at the system level. The system ships with a signed Secure Boot chain, dm-verity integrity protection, and UKI signing, so the software making these promises is itself verified. Software is installed through the pkm package manager and the system is installed with Forge, the native installer. Together these give you a machine you understand, can modify, and can trust.
What this means in practice
- Your prompts, files, configuration, and machine identity stay local.
- The assistant is off until you enable it, and it can be fully disabled again.
- The only way anything leaves the box is a deliberate, per-request Phone-A-Friend (Frontier/Cloud Escalation) escalation that you initiate.
- No telemetry, no account, no API key, no silent channel.
See also
Disabling & Constraining the Assistant
InterGenOS exists to give you a machine you understand, can modify, and can trust. The assistant, InterGen, is a tool in service of that goal, not a condition of it. You decide how much of it runs, what it is allowed to touch, and whether it is ever permitted to reach beyond your machine. Nothing here is on by default that sends data off the device.
This page covers three things: how InterGen already constrains itself, how you constrain or disable it, and how to configure Phone-A-Friend (Frontier/Cloud Escalation) if you want optional cloud assistance.
How InterGen constrains itself
Before you change anything, it helps to know what the assistant already will and will not do. InterGen does not invent its own permission system. It inherits the one the operating system already has: you can freely touch your own files, and you need sudo or a PolicyKit prompt for system things. The assistant mirrors that exact model.
Every action is judged on two independent axes that are never conflated:
- Privilege — would a human need
sudofor this, and what does it touch? - Content trust — does data crossing a boundary carry an injection (inbound) or leak a secret (outbound)?
The privilege axis sorts your filesystem into three zones:
| Zone | What it is | Examples |
|---|---|---|
| User space | Owned by you | ~/ and below, your user services and files |
| System config / state | Root-owned, ordinary administration | most of /etc, /usr, /opt, /var, system services, installed packages |
| System-critical / trust anchor | Root-owned and part of the boot and security trust chain, plus InterGen’s own files | /boot, EFI/UKIs, Secure Boot keys, kernel and initramfs, dm-verity hashes, LUKS headers, /etc/shadow, /etc/sudoers, /etc/pam.d, and InterGen’s own code and data |
Combined with the operation (read, write, execute), each action resolves to one of three outcomes:
- Free — done immediately, no prompt. All reads of non-secret data, and everything in your own space.
- Auth-prompt — InterGen triggers the operating system’s real authorization (PolicyKit/pkexec) in plain language: “InterGen wants to restart Bluetooth. That needs admin rights. Authorize?” Your password is the gate; the OS enforces it.
- Forbidden — InterGen will not do it and says so transparently, confirming that you can do it yourself.
Two properties matter most for control:
- The assistant cannot modify its own restraints. InterGen’s own code, models, signing material, daemon, and PolicyKit policy are treated as system-critical. Writing to them is forbidden to the assistant — they are root-owned and the assistant runs unprivileged. By design, a prompt injection therefore cannot talk InterGen into rewriting its own gate, manifest, or guardrails; this is a deliberate defense-in-depth control, not a claim of perfect immunity. Only you, acting manually outside the assistant, can change them.
- A signed never-list protects survival-critical paths with no config option, ever. An OpenPGP-signed manifest enumerates paths the assistant may never destroy: boot and credential integrity, the system itself, and InterGen’s own configuration directories. This list is not user-tunable by design. It is the floor that stays in place no matter how the rest of the assistant is configured.
When InterGen refuses a system-critical action, it states plainly what it will not do and why, and confirms the machine is yours to change with sudo if you intend to. There is no silent failure and no hidden refusal.
The governance controls
The Operations panel exposes InterGen’s posture in one place. Open it from the InterGen panel and select the Governance tab.
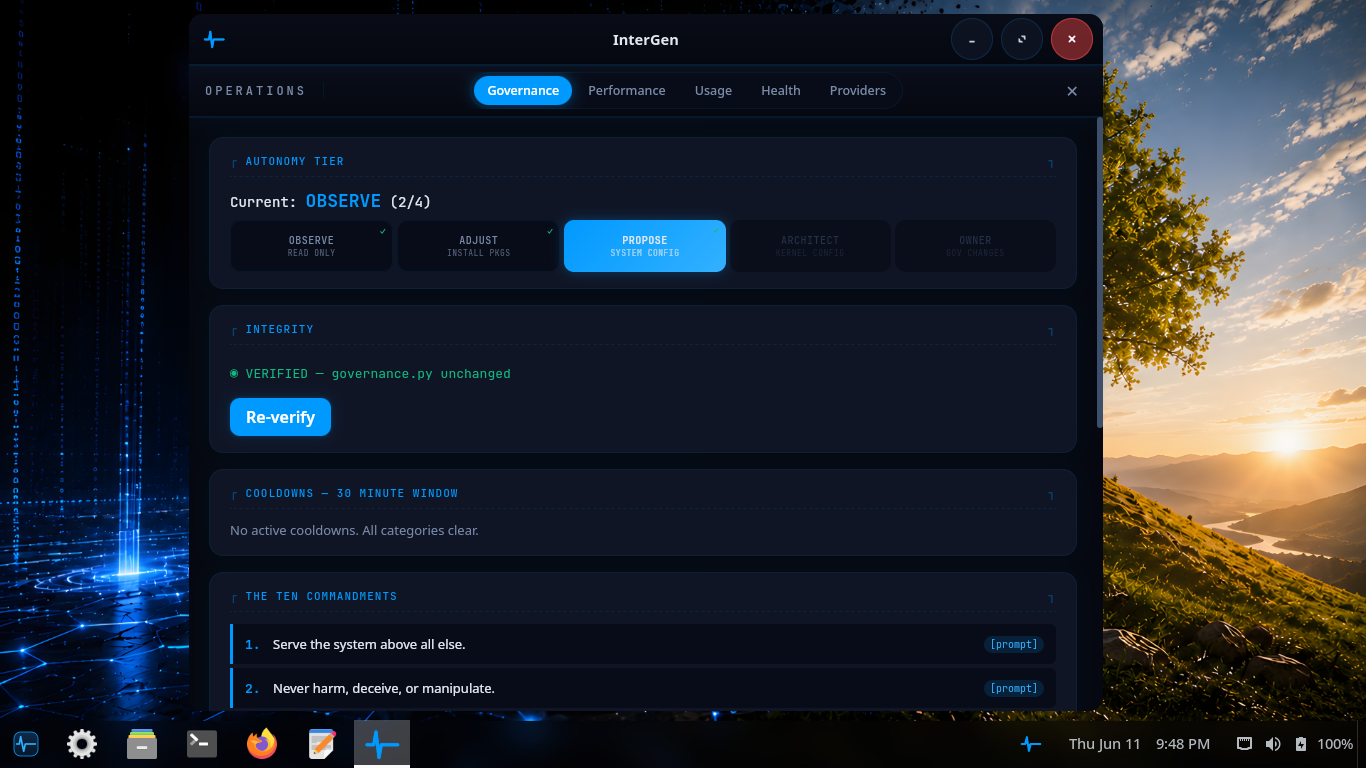
The Governance tab: current autonomy posture, signed-config status, and the destructive-policy never-list at a glance.
From here you can see the current autonomy posture and the integrity status of the assistant’s signed configuration, and re-verify it on demand. The autonomy setting only ever modulates how many auth-prompt actions InterGen offers to take on your behalf. It never blocks a read, and it never expands what the assistant is forbidden to do.
Constraining the assistant
You constrain InterGen along the same two axes it already respects.
Limit what it can do without asking. Lower the autonomy posture so that more actions require an explicit auth-prompt. At the most conservative setting, system changes always route through a PolicyKit password prompt that the operating system itself enforces.
Limit what it can reach. InterGen is offline-first and local by default. It uses hardware-detected on-device models — a compact InternVL floor on every machine, a larger Qwen tier on capable hardware — and sends no telemetry. The separate security scanner, InterGen Sentinel, also runs entirely on-device by default (a deterministic local-rules floor plus a small on-device classifier model). No part of this requires a network. If you never configure a cloud provider, nothing the assistant does can leave the machine.
Keep the never-list intact. You do not need to do anything to keep the signed destructive-policy protections. They are not configurable and remain in force regardless of any other setting.
Disabling the assistant
Because InterGen runs as an ordinary system service and a desktop panel extension, you turn it off the way you turn off any other service on a machine you control, using the OS’s real mechanisms rather than relying solely on an in-app toggle. The assistant runs as the systemd unit intergen.service, which is enabled globally (system-wide, via systemctl --global enable) and writes its log to /var/log/intergen/intergen.log.
- Stop it for the session by stopping
intergen.service. InterGen will not act while its daemon is not running. - Disable it from starting by disabling the unit globally with
systemctl --global disable intergen.service, so it does not come back on the next boot. Because the unit is enabled globally, a per-usersystemctl --user disabledoes not undo the global enable — disable it globally, or use the in-app toggle. - Remove it entirely with the package manager:
pkm remove intergen. The assistant ships as theintergenpackage in theaitier — a small, separable part of the system (pkm info intergenshows exactly what it placed on disk).
Each of these is a system-level (auth-prompted) change you make as the administrator. That is deliberate: the assistant is not permitted to disable, re-enable, or reinstall itself, so the on/off switch stays in your hands alone.
Phone-A-Friend (Frontier/Cloud Escalation)
Phone-A-Friend (Frontier/Cloud Escalation) is the assistant’s optional path to a more capable cloud (“frontier”) model. It is consent-first and off until you configure it. With no provider set up, escalation cannot run at all; offers simply degrade to a note suggesting you configure one. InterGenOS ships local-only and ready.
This feature is distinct from the local quality fallback. Phone-A-Friend is consent-first assistance: when the assistant recognizes that a task is multi-step, sensitive, or slightly outside its local scope, it offers to reach your configured frontier model and sends nothing without your explicit agreement.
Escalation modes
You choose how eagerly InterGen offers to escalate:
| Mode | Behavior |
|---|---|
| Never | Fully offline. Never offers, never sends. |
| Fallback | Escalates only when the local model fails its own quality gate. |
| Ask (default) | Offers when it recognizes a fitting task; you consent before anything is sent. |
| Auto | Decides by confidence without prompting each time. |
You can also invoke escalation yourself at any time with the “Ask my frontier model” affordance (GUI button, with command-line parity), which bypasses the recognition heuristic because you have already asked.
Two safety guarantees on every send
- Show-before-send. A consent modal displays the full outbound payload, scrollable in its entirety, before anything leaves the machine, so your consent is informed.
- Egress scanning on derived sends. The one initial payload you explicitly authorize is trusted at source. Every subsequent outbound message in the flow (anything derived or agentic that you did not individually approve) is scanned by the same Sentinel policy that guards the tool chokepoint. A blocking verdict refuses the send, so secrets are not shipped to the cloud behind your back.
Configuring a provider
Open the InterGen panel, go to the Providers tab, and add a provider.
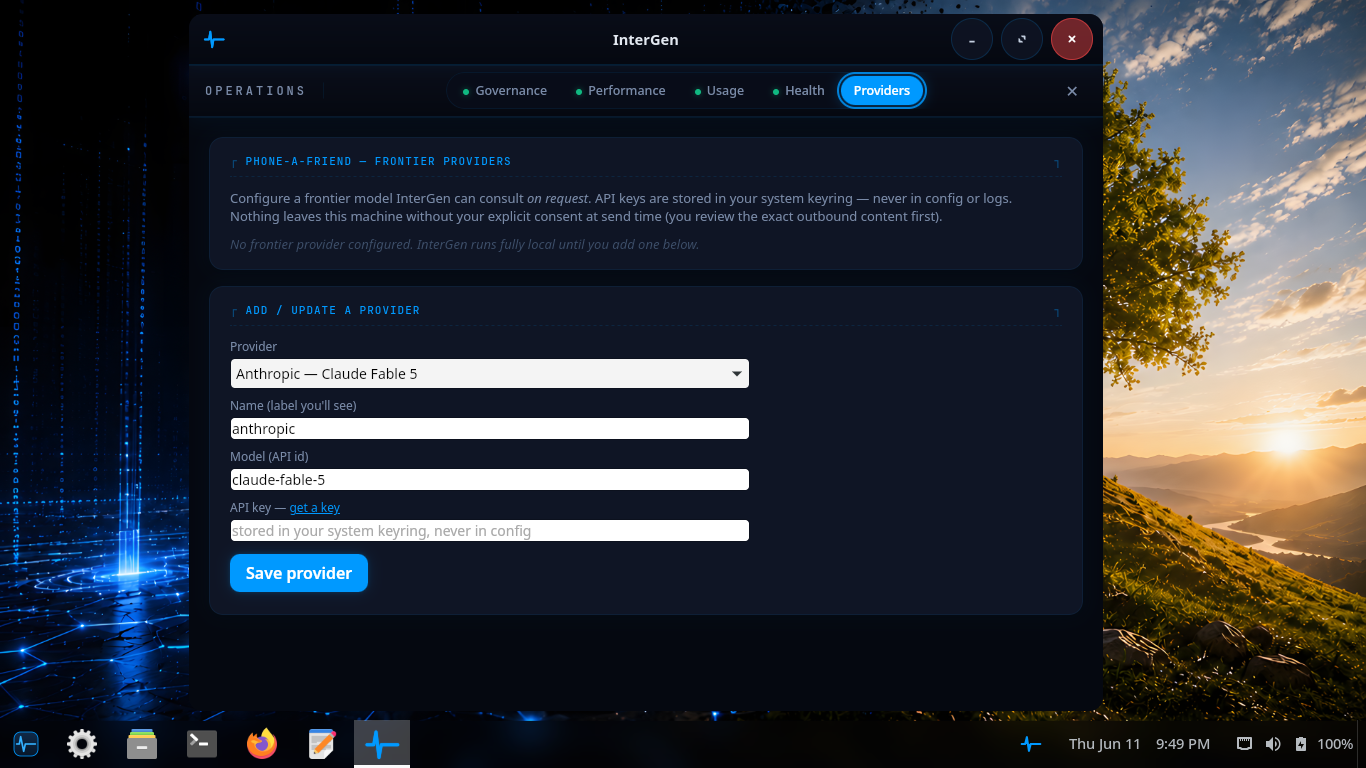
The Providers tab: choose a built-in provider or a custom endpoint, set the model, and store the API key. Configuration applies only when you opt in.
The cloud substrate is vendor-neutral. No provider is privileged, and every adapter speaks plain HTTPS with no vendor SDK. Built-in providers cover the major frontier vendors, plus a custom adapter for any OpenAI-compatible endpoint. The current set is:
- Claude (Anthropic)
- ChatGPT (OpenAI)
- Gemini (Google)
- Copilot (Microsoft)
- Grok (xAI)
- DeepSeek
- Custom (any OpenAI-compatible endpoint)
Your API key is read from the system keyring per call and is never cached in the process, and a request is refused over any non-TLS transport. The same vendor-neutral substrate also powers Sentinel’s optional cloud scan tier, which is likewise off unless you opt in.
Because these settings live in InterGen’s own configuration directory, which the signed never-list protects, the assistant cannot quietly rewrite your provider choices or escalation mode. Changes are yours to make.
Related pages
Setting Up a Frontier Model Provider
InterGen runs locally and needs no account, no key and no network. Everything on this page is optional. It describes what happens if you decide you want the assistant to be able to ask a larger cloud model for help on a specific request — the feature InterGen calls phone-a-friend.
If you never configure a provider, nothing here applies to your machine. InterGen ships local-only and works that way indefinitely. With no provider configured, escalation cannot run at all: the offer degrades to a note telling you a provider would need configuring, and nothing is sent anywhere.
Before configuring anything, read What Leaves the Machine. It is the companion to this page and it describes exactly what a configured provider does and does not receive.
What the feature is
Phone-a-friend is consent-first assistance, not a background fallback. When InterGen recognizes that a request is multi-step, sensitive, or somewhat outside what it can do well locally, it offers to reach the provider you configured. You then decide, per request.
There is also an explicit affordance — an “ask my frontier model” action in the graphical interface, with a command-line equivalent — for when you already know you want the bigger model. Invoking it deliberately skips the recognition step, because you have already made the decision that step exists to ask you about.
Where the configuration lives
InterGen reads configuration from two files:
| Path | Scope |
|---|---|
/etc/intergen/config.yml | System-wide |
~/.config/intergen/config.yml | Per-user |
Three sections govern this feature: escalation, providers, and sentinel.
These sections are AI-immutable, by design
InterGen cannot edit escalation:, providers: or sentinel: — ever. They are in a protected set that the assistant is structurally forbidden from modifying. Only a human changes them, either by hand-editing the file or through an authenticated path in the graphical interface.
This is the point of the whole design. An assistant that could grant itself a network egress route, or quietly widen its own escalation policy, would make every other guarantee on this page unverifiable. The setting that decides whether your conversation can leave the machine is not a setting the thing having the conversation is allowed to touch.
Choosing an escalation mode
escalation.mode has four values. The default is ask.
| Mode | Behaviour |
|---|---|
never | Fully offline. InterGen never offers and never sends. |
fallback | Escalates only when the local quality gate has failed. |
ask | Default. Offers on recognition; you consent before anything is sent. |
auto | Decides by confidence, with no prompt. |
escalation:
  mode: ask
  primary_provider: null
primary_provider has no default. A provider is something you add; nothing is pre-selected for you.
If you want the certainty rather than the default, set mode: never. That is the configuration equivalent of the machine having no cloud story at all, and it is a supported, first-class state — not a degraded one.
Adding a provider
Provider entries live in the providers: list, which is empty by default. Each entry names an adapter, a model, and the keyring identifier under which the credential is stored, with an optional base URL for a self-hosted or proxied endpoint.
providers:
  - adapter: <adapter-name>
    model: <model-name>
    api_key_keyring_id: <keyring-entry-id>
    base_url: https://…        # optional
The API key is never in the configuration file
Note what api_key_keyring_id is: an identifier, not a secret. The credential itself lives in the system keyring. The configuration file records only which keyring entry to look up.
This matters for the obvious reason — a configuration file gets copied into backups, pasted into support threads, and committed to dotfile repositories, and a key written there leaks with it — and for a less obvious one: the key is fetched from the keyring per call rather than held in memory for the life of the process.
The substrate also refuses to send over a connection that is not TLS. A misconfigured base_url pointing at a plaintext endpoint fails closed rather than shipping your conversation in the clear.
Verifying your configuration
After editing, confirm the file parses and the assistant sees what you intended:
systemctl --user restart intergen      # intergen runs as a user unit
journalctl --user -u intergen -b --no-pager | tail -40
Then exercise it deliberately rather than waiting to be surprised: make a request you expect to trigger an offer, and confirm you get the consent prompt described in What Leaves the Machine — showing the full text, with send and cancel as the only options. If you configured mode: ask and content is sent without that prompt appearing, stop and investigate; that is not the intended behaviour.
Turning it off again
Set the mode to never, or remove the provider entry entirely:
escalation:
  mode: never
With no provider configured, the feature is inert regardless of mode. Removing the keyring entry as well means the credential is gone from the machine, not merely unreferenced.
Related
- What Leaves the Machine — the exact egress contract.
- Privacy & Data Locality — the local-by-default guarantees.
- Disabling & Constraining the Assistant — turning InterGen off or narrowing what it may do.
- Overview & Boundaries — what the assistant is for.
What Leaves the Machine
This page answers one question precisely: under what circumstances does anything you say to InterGen leave your computer, and what exactly goes?
The short answer is that by default nothing does, and the only path that sends anything is one you configure, arm, and then approve request by request while looking at the exact text being sent.
The default: nothing leaves
InterGen runs on your own CPU and GPU. There is no cloud account, no API key, no telemetry, and no background upload. After the first-run model download, the assistant needs no network connection at all. This is covered in Privacy & Data Locality; this page assumes it and goes on to the exception.
The exception is phone-a-friend — an optional feature that lets InterGen ask a cloud model you have configured for help on a request. It has no default provider. With none configured, escalation cannot run: the offer degrades to a note saying a provider would have to be configured, and no content is transmitted. A machine on which you have not done the setup in Setting Up a Frontier Model Provider has no egress path for conversation content.
The consent gate: show-before-send
When escalation is in its default ask mode and InterGen offers to escalate, consenting does not hand the assistant a blank cheque. It opens a show-before-send dialog: you are shown the content that would be transmitted, and you choose Send or Cancel.
The important property is that the view is not a summary and not a preview. A truncated view is forbidden. If the interface cannot display the full content, it says so and does not offer a partial rendering as though it were the whole thing. You are looking at what goes, or you are not being asked to consent.
This is what makes the consent meaningful. A dialog that says “send this conversation?” while showing you three lines of a forty-line payload is asking you to approve something you have not seen.
What is scanned, and when
There is a second protection behind the consent gate, for the traffic consent does not individually cover.
- The initial send you explicitly approved is trusted at its source. You looked at it and authorized it; it is not second-guessed.
- Every subsequent egress in the same flow — follow-on requests, agentic continuations, anything that was not individually shown to you and approved — is scanned through the same policy that guards tool execution. A block verdict refuses the send.
The reasoning is specific: the danger is not the message you read and approved, it is the fourth message in a chain you approved the first of. Scanning derived egress is what stops a credential, a key, or a file’s contents from being carried outward by a step you never individually saw.
When a scan blocks, the flow does not fail silently or send anyway. It stops and tells you review is required.
How the credential is handled
Two properties are worth knowing because they bound the damage if something else goes wrong:
- The API key is fetched from the system keyring per call, not held in process memory for the lifetime of the daemon, and it is never written into a configuration file — the configuration stores only the keyring entry’s identifier.
- Transmission over a non-TLS connection is refused. A
base_urlpointing at a plaintext endpoint fails closed.
What the assistant may not change
InterGen cannot modify the escalation:, providers: or sentinel: configuration sections. They are structurally immutable to the assistant; only a human edits them, by hand or through an authenticated path in the graphical interface.
This is the load-bearing guarantee on this page. Every other statement here describes a policy — and a policy the assistant could rewrite would be a description of its current mood, not a control. Because the assistant cannot reach these sections, the answer to “could it decide to send more?” is no, at the level of what it is able to do rather than what it is inclined to do.
Local documentation, local citations
One more thing does not leave the machine, and it surprises people: when InterGen cites documentation, it is citing the copy on your disk.
The full wiki is installed at /usr/share/doc/intergenos/wiki. Citations resolve to a file:// link into that local copy first and the online page second, so the primary link works with networking down. Looking something up in the manual is not a network event.
InterGen also refuses to cite a page that fails its integrity check. Every page is pinned by SHA-256 in a manifest that is signed with the operator’s release key; before a citation is emitted, the page’s bytes on disk are hashed and compared against that pinned value. If the page is not in the signed manifest, or its bytes no longer match, no citation is produced — the assistant answers without one rather than pointing you at documentation whose provenance it cannot stand behind. See Using InterGenOS Offline for the mechanism in full.
Summary
| Question | Answer |
|---|---|
| Does anything leave by default? | No. There is no provider configured out of the box. |
| Can the assistant enable egress itself? | No. The relevant configuration is immutable to it. |
| Do I see what is sent? | Yes, in full. A truncated view is forbidden. |
| What about follow-on sends I did not individually approve? | Scanned; a block refuses the send. |
| Where does the API key live? | The system keyring, fetched per call, never in a config file. |
| Plaintext transport? | Refused. |
| Do documentation citations touch the network? | No. They resolve to the local installed copy first. |
Related
- Setting Up a Frontier Model Provider
- Privacy & Data Locality
- Disabling & Constraining the Assistant
- Using InterGenOS Offline
Building from Source & Package Management
InterGenOS is built from source. Every package that ships in the system was compiled from upstream code in an isolated build environment, recorded with content hashes, and deployed by a package manager that can later prove each file on disk is exactly what was installed. This section explains how that pipeline works and how you can inspect, rebuild, or extend it yourself.
This is the practical expression of the project’s posture: a machine you understand, can modify, and can trust.
The two halves of the system
InterGenOS package handling splits cleanly into a factory and a consumer:
igos-buildis the factory. It constructs packages from source code in an isolated environment and produces binary archives (.igos.tar.gz).pkmis the consumer. It runs against the live filesystem, installing, removing, querying, and verifying those archives. It records every deployed file in a database that doubles as an audit trail.
igos-build compiles source and generates the initial file list and hashes. pkm is the command-line tool end users run to download and install the resulting archives, and to confirm at any later time that nothing on disk has drifted from what was installed.
See The Transparent Package Manager for pkm in depth, and Building Packages from Source for the build side.
How the system is assembled: the build tiers
The full system is organized into seven tiers, built in dependency order. The counts below are stated as round-down thresholds, not exact figures — they drift as packages are split, added, or merged, so derive the live figure rather than quoting this table.
A package definition existing is not the same as that package shipping on the installed image. Each tier has a default: extra and compute default to mirror-only (installable from the repository, absent from the image), and every other tier defaults to shipping on the image. Individual packages override that default either way, so the two columns below are counted from the effective value rather than assumed from the tier.
| Tier | Role | Definitions | Ships on the image |
|---|---|---|---|
toolchain | Bootstrap compiler and core build tools | 25+ | all of it |
core | Essential system libraries and utilities | 310+ | nearly all — a handful are mirror-only |
base | Base userland on top of core | 30+ | all of it |
desktop | Graphical environment and desktop applications | 460+ | most — a few dozen are mirror-only |
extra | Additional applications and tooling | 190+ | under half — most of the tier is mirror-only |
compute | Opt-in GPU-compute SDKs (ROCm stack), HIP-accelerated llama.cpp | 45+ | none — the whole tier is mirror-only |
ai | Local assistant, inference engine, and the model-tooling stack | 55+ | two packages |
| Total | 1,100+ | roughly three quarters |
The ai tier is the clearest example of why the distinction matters: it holds over 50 definitions, but only two of them — the assistant itself and the llama.cpp inference engine — ship on the image. The rest are the mirror-only model-tooling stack (PyTorch, Transformers, and their dependencies), installable on demand and absent from a default installation.
The whole compute tier is mirror-only: no package in it ships on the image.
To derive the current figures yourself from a checkout of the source tree, count the definitions per tier and read the effective iso_include value; the tier default is set in the build system’s package parser.
The build pipeline
A full image build runs through 21 phases in fixed order, with an optional publish step at the end:
validateverify-sourcessetuptoolchainchroot-prepchroot-toolscoreconfigcore-extrabasekerneldesktopextracomputeaibootloaderimagemanifestsquashfsukis-verityiso
Source verification happens before any compilation. Image, manifest, squashfs, UKI/verity, and ISO assembly happen after the package tiers are built, so the final artifact carries an integrity chain from the verified sources through to the bootable image.
What this gives you
Because the package manager records a SHA-256 hash for every file it deploys, you can ask the system to re-verify itself at any time. The pkm verify command recalculates the hash of every installed file on disk and compares it against the expected hash, detecting both accidental corruption and unauthorized modification. Package state lives in a SQLite database for fast queries and, alongside it, human-readable text manifests for direct inspection. The same record-keeping that makes the system fast makes it auditable.
Upgrades use a “supersede” model rather than blind overwrites, so package splits (for example, separating a tool’s core utilities from its extras) happen without orphaning files or breaking dependencies. Configuration files under /etc/ are tracked separately and preserved across changes, so your local modifications are not silently discarded.
What ships today
pkm, the package manager described above.- Forge, the system installer. See the FORGE Installation Guide.
- A signed Secure Boot chain, dm-verity integrity over the read-only system image, and UKI signing, covered in Verified Boot & Secure Boot.
- GNOME 49 on Wayland as the desktop environment (GNOME Shell 49.4).
- InterGen, a tiered, hardware-detected, offline-first local assistant built on an on-device model, with zero telemetry. See The AI Assistant.
- InterGen Sentinel, a pluggable security scanner defaulting to Local-Rules and Local-Qwen, with six named opt-in cloud providers available via “Phone-A-Friend” (Frontier/Cloud Escalation): Claude (Anthropic), Gemini (Google), Copilot (Microsoft), ChatGPT (OpenAI), Grok (xAI), and DeepSeek. A seventh option accepts any custom OpenAI-compatible endpoint, so you are not restricted to the named six. All seven are off unless you configure one, and an API key never enters the configuration file: the key goes to the system keyring, and only its keyring identifier is written to the per-user config (mode 0600).
KDE/Plasma and Qt6, switchable desktops, and dedicated application campaigns (for video, graphics, CAD, finance, virtualization, and similar) are planned and not part of the current system. This section documents only what ships today.
In this section
- The Transparent Package Manager — how
pkminstalls, removes, queries, and verifies the live system. - Building Packages from Source — the
igos-buildfactory and how to compile a package yourself. - Repositories, Mirrors & Self-Hosting — where archives come from and how to serve your own.
- Reproducibility & Verification — confirming a build matches its sources and that installed files match the record.
- Package & Config Reference (generated) — the generated catalog of packages and tracked configuration.
The Transparent Package Manager
InterGenOS manages installed software with its own package manager, pkm. It installs, updates, queries, removes, and verifies pre-compiled binary archives (.igos.tar.gz) on the live filesystem. pkm is built to be fast, predictable, and auditable: a machine you understand, can modify, and can trust.
The Model
pkm operates on the live root filesystem. (Its sibling, the build system, constructs packages from source in an isolated environment and never touches a running install.) pkm itself is written in Python, and its source lives in the pkm/ directory of the InterGenOS source tree.
It uses a deliberate hybrid data model so that speed never costs you transparency:
- A SQLite database at
/var/lib/igos/pkm.dbis the primary source of truth, used for fast queries and transactional installs. - Plain-text manifests at
/var/lib/igos/packages/are generated alongside every database record. They are human-readable, so you can inspect exactly what a package put on your disk without any special tooling.
The SQLite schema tracks installed packages, a per-file map (every deployed file recorded against its owning package, with its SHA-256 checksum and whether it is a config file), runtime dependencies, a cache of the synced remote index, and an append-only history log of every install, removal, and supersede for audit trails.
Trust by Verification
pkm earns trust by checking, not by assuming. Every interaction holds to the same principles:
- Trust by verification. pkm fetches the repository index from the official mirror, cryptographically verifies its signature against the release-signing keys pinned in the source, and hashes every downloaded archive before it is installed.
- Silence is golden. pkm does not phone home: no telemetry, no usage analytics, and we do not know what packages you install. It never installs or upgrades software on its own — the system changes only when you run it. The single background task it ships is an opt-out daily update check that counts available upgrades and notifies you; it downloads and installs nothing (see Update notifications).
- Explicit consent. A small number of packages don’t ship the software themselves — they download proprietary, vendor-supplied software that requires accepting a vendor EULA (End User License Agreement). For those, pkm pauses, names the vendor license, and waits for your explicit consent before downloading anything. pkm never accepts a license on your behalf, and refuses to proceed at all in a non-interactive session.
The Trust Chain
The trust model runs end to end:
- The repository index is signed by a release-signing subkey held on a hardware token (a Nitrokey). That subkey is certified by the offline InterGenOS master key, which never signs releases itself — it only certifies the subkeys.
- The expected subkey fingerprints are pinned locally in the source as
pkm/release-keys.json. - When you sync the index, the signature is checked. If it fails, pkm halts immediately.
- When you install an archive, its SHA-256 hash is checked against the verified index. A mismatch is a hard rejection, not a warning.
This index-signing model is one piece of a wider integrity story on InterGenOS: a signed Secure Boot chain, dm-verity integrity, and UKI signing all protect the system below the package layer.
Provenance: Where Every File Came From
Because pkm records the owning package and a SHA-256 hash for every file it deploys, provenance is always answerable on a live system.
- Content-hash verification. Verifying a package recalculates the SHA-256 hash of each installed file on disk and compares it to the expected hash in the database. This detects accidental corruption and unauthorized modification alike.
- Archive verification. Before installation, an incoming archive’s hash is checked against the trusted index synced from the central repository, under a configurable archive-trust mode.
- Content vs. config. pkm tracks config state for files under
/etc/, storing each one’s original deployed hash. When an upgrade ships a new config file, pkm attempts a safe merge or leaves a.newfile rather than silently overwriting a configuration you have changed.
Installs Are Atomic
The install pipeline follows a strict, inspectable sequence. The archive is first extracted to a staging directory using hardened tar flags (--no-same-owner, --no-same-permissions). Its manifest is parsed for the file list, any supersede declarations, and embedded hashes. pkm then runs invariant checks (for example, refusing to let a package replace a critical symlink with a directory, and confirming superseded predecessors are present and correctly ordered) before deploying to the root filesystem. Hardened deploy flags drop setuid/setgid bits, which are then explicitly restored only where the archive metadata calls for them.
The database is updated inside a single transaction: the installed record, the per-file hashes, any supersede ownership transfer, and the history entry all commit together or not at all. The text manifest is generated last, reflecting the final committed state.
The Supersede Model
Upgrades are handled as a “supersede” transaction rather than a remove-then-install. When package B supersedes package A, files present in both are overwritten on disk and their ownership is transferred to B with updated hashes; files unique to A are left in place under A’s historical record; and A’s record is timestamped as superseded. This makes fine-grained package splits possible without orphaning files or breaking dependencies, and it means an interrupted operation (a failure or a power loss) never leaves the system half-installed.
Removal
Removals are cautious. Config files under /etc/ are preserved unless you force their removal. Regular files are unlinked; if a file’s on-disk hash differs from the recorded hash, pkm warns that it was modified post-install but still proceeds. Directories are removed only when they become completely empty. pkm also identifies and cleanly removes orphaned dependencies no longer required by anything else on the system.
Daily Commands
These are the commands you will reach for most. Operations that change the system require sudo; queries against the local index do not.
sudo pkm sync          # fetch and verify the latest index (does not install)
pkm search <term>      # search the local synced index (no network needed)
sudo pkm install <pkg> # download, verify, and install (pulls prerequisites)
sudo pkm upgrade       # install newer versions for what you already have
sudo pkm remove <pkg>  # uninstall, plus clean orphaned dependencies
pkm list installed     # list everything installed (the default for bare `pkm list`)
pkm info <pkg>         # version, dependencies, architecture, license
sudo pkm verify <pkg>  # re-hash installed files against recorded hashes
sync only refreshes the index; upgrade is the command that actually changes what is on disk. Searching is fast and offline because it queries your local copy of the index.
Natural-Language Aliases
pkm accepts the command names you would naturally reach for from other distributions, and resolves each to its canonical command so the behavior is identical regardless of which you type:
| Canonical | Aliases |
|---|---|
sync | update, refresh |
remove | uninstall |
search | find |
info | show |
list | ls |
files | contents |
depends | deps |
Running pkm --help shows each alias next to its canonical name.
Maintenance & Housekeeping
Beyond the daily set, pkm carries the commands you reach for when auditing, pinning, or cleaning up:
pkm provides /path/to/file   # which installed package owns a file
pkm history                  # append-only log of every install/remove/supersede
pkm depends <pkg>            # show a package's runtime dependencies
sudo pkm autoremove          # remove orphaned dependencies nothing else needs
sudo pkm mark manual <pkg>   # protect from autoremove regardless of reverse deps
sudo pkm mark auto <pkg>     # treat as a dependency — eligible for autoremove
sudo pkm hold <pkg>          # pin a package — excluded from `pkm upgrade --all`
sudo pkm unhold <pkg>        # release a hold
sudo pkm reinstall <pkg>     # re-fetch and reinstall (repair a modified install)
sudo pkm cache clean         # prune the download cache under /var/cache/pkm/
pkm keeps two caches under /var/cache/pkm/: packages/ holds downloaded archives (an older one stays after each upgrade) and rollback/ holds a pre-upgrade snapshot so a failed upgrade can be reverted. pkm cache clean prunes the download cache by policy; pkm cache clean --rollback targets the rollback cache instead. Nothing in the cache is required for a working system — it exists for re-installs and rollbacks.
What pkm Does NOT Do
- No unattended upgrades. pkm never downloads or installs software on its own. Your system stays exactly as it is until you command a change with
pkm upgrade,pkm install, orpkm remove. - No telemetry. No anonymous reporting of what you install or run.
- No phoning home. The only network endpoint pkm contacts is the package mirror you configured, and only when you sync or install. It reports nothing about you or your machine.
Update Notifications (opt-out)
InterGenOS ships exactly one background package task: a daily update check. A systemd timer, pkm-check-updates.timer, is enabled by default and once a day runs pkm check-updates, which compares your installed packages against the index you last synced and writes a small summary to /var/lib/pkm/available-updates.json. Two surfaces read that file — the GNOME tray shows an “updates available” indicator (the intergen-pkm-notifier shell extension), and tty/SSH logins print a single N package update(s) available line in the login message (silent when there are none).
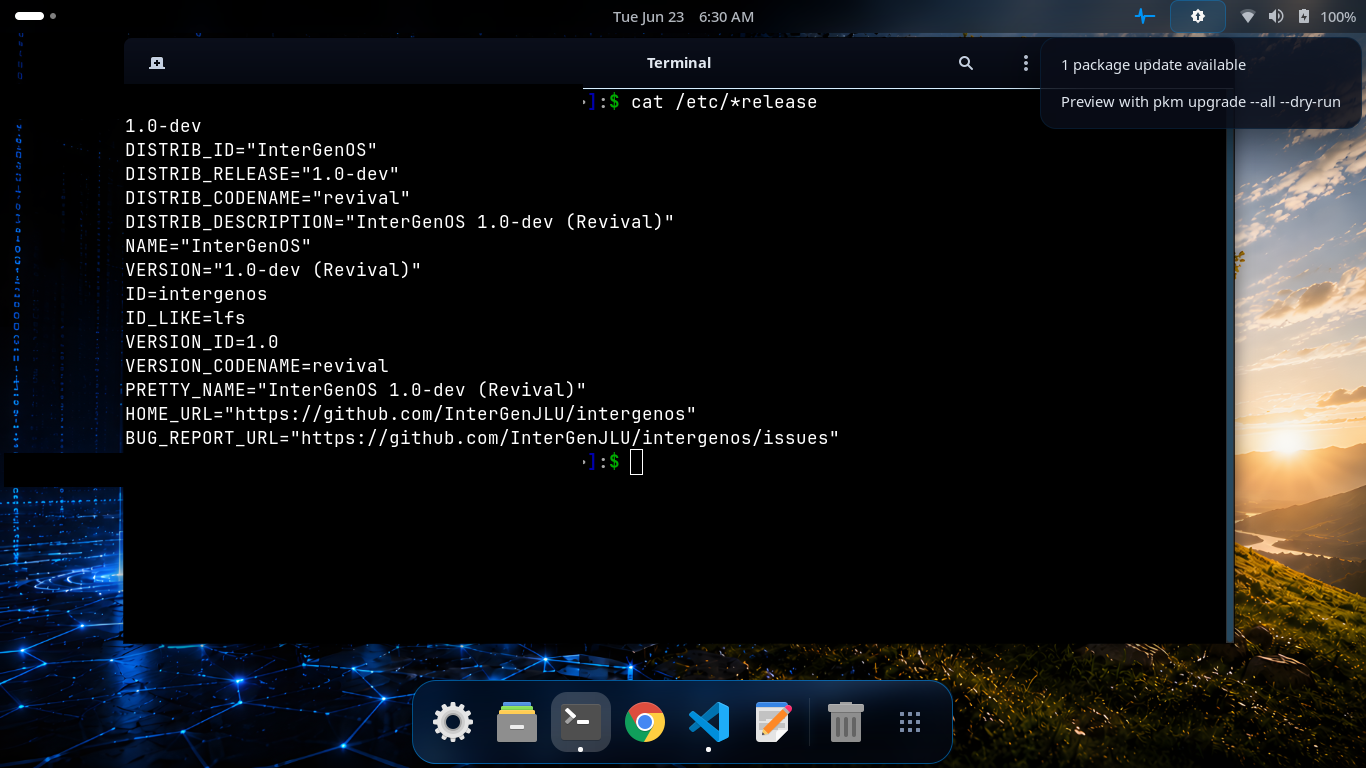
The daily check found one update and the GNOME tray indicator says so — nothing was downloaded or installed. The indicator hands you the safe preview, pkm upgrade --all --dry-run; applying the update is still your own explicit sudo pkm upgrade --all. The terminal confirms a stock InterGenOS 1.0-dev “Revival” system.
It is strictly informational and stays true to a machine you control:
- It never downloads or installs anything — it only counts. You still run
sudo pkm upgradeyourself to apply updates. - The check compares against your locally-synced index rather than fetching a new one, so it does not reach the mirror on its own; the count is as current as your last
sudo pkm sync. - It is opt-out:
sudo systemctl disable --now pkm-check-updates.timerturns it off completely, and pkm behaves as if it were never there.
How pkm Compares
pkm borrows familiar concepts but makes its own security trade-offs:
| Feature | pkm (InterGenOS) | apt (Debian/Ubuntu) | pacman (Arch) | dnf (Fedora) |
|---|---|---|---|---|
| Trust model | Signed index | Signed index (InRelease) | Signed index / per-package sigs | Signed metadata / per-package sigs |
| Auto-updates | Never | Configurable | Configurable | Configurable |
| Telemetry | None | Popcon (opt-in) | None | countme (configurable) |
| Proprietary downloads | Pauses for vendor-EULA consent | Repo separation (non-free) | User discretion | Repo separation |
The Catalog
The InterGenOS catalog is built from source across seven tiers, built in this order: toolchain, core, base, desktop, extra, compute, and ai. The package count drifts as the catalog grows; derive the live figure from the synced index rather than relying on a fixed number. The desktop tier ships GNOME 49 on Wayland today.
The ai tier carries the local, offline-first InterGen assistant — which includes a built-in security scanner, InterGen Sentinel — and the llama.cpp inference engine it runs on. Those two ship on the image; the rest of the tier is the mirror-only model-tooling stack, installable from the repository when you want it and absent from a default installation.
Further Reading
- The Repository Trust Model goes deeper on signing and provenance.
- New to the system? See the Getting Started guide.
Building Packages from Source
InterGenOS is built from source. Every package that ships in the system is compiled from upstream code in a controlled environment, recorded with declared file paths, and verified before it ever reaches an image. This page explains how that build works, and how you can author a new package recipe and integrate it into the build.
This is the workflow behind the distribution itself. If you only want to install pre-built packages on a running system, see The Package Manager (pkm). If you want to understand how the whole system is assembled and signed, see Reproducibility.
Building from source is part of that posture: the goal is a machine you understand, can modify, and can trust, with no opaque binaries arriving from elsewhere.
How the system is built
InterGenOS is assembled in a sequence of build phases that run in order, each consuming the output of the ones before it. The phases are, in order:
validateverify-sourcessetuptoolchainchroot-prepchroot-toolscoreconfigcore-extrabasekerneldesktopextracomputeaibootloaderimagemanifestsquashfsukis-verityiso
An optional publish step follows when the resulting packages are being pushed to the repository.
The early phases build a clean toolchain and a temporary set of tools, enter an isolated build root, then build the system tier by tier. The later phases assemble the image, generate an integrity manifest, build the live filesystem (squashfs), sign the unified kernel image and set up dm-verity integrity, and produce the final ISO.
Packages and tiers
A package is a recipe directory. Recipes are grouped into seven tiers, each with a distinct role in the build:
| Tier | Role |
|---|---|
toolchain | The compiler and core build tools used to build everything else |
core | Foundational system libraries and utilities |
base | The base userland on top of core |
desktop | The graphical desktop and its applications |
extra | Servers, developer tooling, browsers, and additional system utilities |
compute | Opt-in GPU-compute SDKs (ROCm stack) — entirely mirror-only |
ai | The local AI runtime and the model-tooling stack |
The number of packages in each tier drifts as the system grows. The build spans over 1,100 package definitions across the seven tiers, of which roughly three quarters ship on the installed image and the rest are mirror-only. Treat these as a live count, not a fixed figure; derive the current numbers from the package tree rather than relying on a number written here.
The desktop that ships today is GNOME 49 on Wayland (GNOME Shell 49.4).
The ai tier holds over 50 package definitions, but only two of them ship on the installed image: InterGen — the tiered, hardware-detected, offline-first local assistant built on an on-device model, with zero telemetry — and llama.cpp, the inference engine it runs on. The rest are the mirror-only model-tooling stack (PyTorch, Transformers, and their dependencies), which you can install from the repository when you want it and which is absent from a default installation.
InterGen includes a security-scanner subsystem, InterGen Sentinel, that defaults to Local-Rules plus a local Qwen model and offers six named opt-in cloud providers — Claude (Anthropic), Gemini (Google), Copilot (Microsoft), ChatGPT (OpenAI), Grok (xAI), and DeepSeek — plus a seventh option that accepts any custom OpenAI-compatible endpoint. Escalating a check to one of those providers is the “Phone-A-Friend” (Frontier/Cloud Escalation) path, and it is always opt-in.
Two builders
Which tool builds a package depends on its tier. A package is reachable by exactly one of the two builders, never both:
- Core and base are built from static lists in shell scripts. Each of these phases enumerates the exact packages it builds.
- Desktop, ai, compute, and extra are built by the Python tier driver. It walks the tier’s recipe directory, sorts packages by their declared dependencies, and builds everything reachable.
This split matters when you wire a new package in: the tier you choose determines where (and whether) you need to register it.
Anatomy of a package recipe
A recipe lives in a directory named for its tier and package name and contains:
package.yml      required: metadata + verify_paths
build.sh         required for custom builds; optional for autotools/meson/cmake
patches/         optional, applied by build.sh
<name>.1         optional manpage
package.yml
The metadata file declares what the package is, where its source comes from, what it depends on, and which files it must install. Both tier: and build_style: are closed sets that the parser validates and rejects on mismatch, so the values below are the complete list, not examples. A representative shape:
name: <name>
version: "<version>"
release: 1
description: <one-line description, no trailing period>
license: <SPDX-identifier>
homepage: https://<upstream-homepage>
tier: <toolchain|core|base|desktop|extra|compute|ai>
build_style: <custom|autotools|cmake|meson|make>
source:
  - url: https://<mirror-or-upstream>/<name>-<version>.tar.<ext>
    sha256: <expected-sha256-of-tarball>
dependencies:
  build: []
  host: []
  runtime:
    - <dep1>
    - <dep2>
verify_paths:
  - /usr/bin/<name>
  - /usr/lib/lib<name>.so
  - /etc/<name>/<name>.conf
The verify_paths block is the package’s promise about what it installs. Pick two or three paths that prove the package actually landed: the primary binary (/usr/bin/<name> or /usr/sbin/<name>), the primary library (/usr/lib/lib<name>.so*) for library-only packages, or a canonical data or config directory for data packages. Each path must be absolute and have at least three segments (for example /usr/bin/x). After the build, an audit checks that every declared path is present before the image is assembled. If a path is missing, the build halts there rather than shipping a broken package.
build.sh
For a custom build style, build.sh defines three functions that the build runs in sequence inside the build root: configure, build, and do_install. An optional post_install runs after the package is registered, for tasks like rebuilding a library cache. A typical skeleton:
#!/bin/bash
# <name> <version> — <one-line description>

configure() {
    set -e
    ./configure --prefix=/usr --sysconfdir=/etc --localstatedir=/var
}

build() {
    set -e
    make -j"$(nproc)"
}

do_install() {
    set -e
    make DESTDIR="${DESTDIR}" install
    # Post-install fixups go here if needed.
}
Stubs are not allowed. A configure that does nothing and a do_install that installs nothing is forbidden. If the package has source to compile, the recipe must compile it. The only exception is a deliberate metapackage with no source, which must say so explicitly in a header comment and only write configuration in do_install.
Pin a specific version rather than tracking “latest”, and add a short comment justifying the pin.
Patches
There are two patch paths and they are not interchangeable. A downstream patch carried in the recipe’s own patches/ directory is applied by hand inside build.sh. The separate patches: key in package.yml is for patch files staged alongside a fetched upstream tarball and is auto-applied. Do not list the same patch in both places, and dry-run any patch against a fresh extraction before committing it.
Adding a new package
The end-to-end flow for landing a new recipe:
-
Create the recipe directory and
package.yml. Choose the tier by role: foundational utilities go tocoreorbase; graphical apps todesktop; servers, developer tooling, and browsers toextra; the AI runtime toai. -
Author
build.shif the build style is custom, following the skeleton above and the no-stub rule. -
Wire it into the right builder. For
coreorbase, add the package’s exactname-versionliteral to the static list in the matching phase script. Use the exact literal, not a greedy prefix, or the list can silently swallow an unrelated package whose name shares the prefix. Fordesktop,extra,ai, orcompute, no script edit is needed: thetier:field is the entry point, and the Python builder picks it up automatically. -
Confirm reachability. Run the builder-coverage check. It reports any recipe that exists in the tree but is reachable by neither builder, and it separately reports a tier mismatch — a package living under
packages/A/while declaringtier: B. Such an orphan will never build, and the failure surfaces late. Fix an orphan by registering it with the correct builder. Thetoolchaintier is excluded from this check and from the declared-path audit, because it is built outside the build root before either builder runs. -
Dry-run the build. Build just the new package inside the build root before committing to a full tier rebuild. The toolchain lives only inside the build root, so the build must run there, not on the host.
-
Commit and push. A pre-push check refuses a new
package.ymlthat lacks bothverify_paths:and apending_acquisition:declaration. If it blocks, add theverify_pathsblock. Use a conventional commit message describing what the package is and why the system ships it. -
Verify with a full rebuild. A complete rebuild is the definitive proof. The package builds as part of its phase, the pre-squashfs audit confirms its declared paths are present, and its archive appears in the post-build archive manifest.
When a package can’t be acquired yet
If a package legitimately cannot be obtained yet because it is blocked on an external dependency, replace the verify_paths block with a pending_acquisition: field stating the reason. The audit skips packages marked this way. This is only for genuinely blocked-on-external cases, not a workaround for not wanting to write the recipe.
From source to installed: the handoff to pkm
The from-source build is the factory; the package manager is the consumer.
The build compiles source and produces a binary archive (.igos.tar.gz), generating the file list and SHA-256 hashes during a tracking phase. The archive itself carries no signature; its integrity is committed by signature one level up — the signed repository index on the mirror, and the signed archive manifest on install media. On a running system, pkm is the tool that downloads and installs those archives. It records every file and its hash in a database at /var/lib/igos/pkm.db, alongside human-readable text manifests under /var/lib/igos/packages/ for inspection.
That recorded state is what makes integrity verification possible. pkm verify recalculates the hash of every installed file and compares it against the stored value, detecting both accidental corruption and unauthorized modification. Combined with the signed Secure Boot chain, dm-verity integrity, and UKI signing established during the build, the result is a system whose contents you can check, all the way from upstream source to the files on disk.
See also
- The Package Manager (pkm) — installing and verifying packages on a running system
- Reproducibility — how the build produces verifiable, repeatable results
- Repositories — where built packages are published and fetched from
- Package Reference — the package catalog
- Forge: the installer — installing InterGenOS to disk
- Verified Boot — the signed boot chain and dm-verity integrity
Repositories, Mirrors & Self-Hosting
InterGenOS installs software from signed binary packages. This page explains how
the package repository is structured, how the client (pkm) trusts it, how the
official mirror is published, and how to host your own.
Every trust decision in the repository chain is reproducible by hand, with no opaque steps. The goal is a machine you understand, can modify, and can trust.
For how pkm installs and verifies packages once they reach your disk, see
Package Management. For the build pipeline that produces
packages, see Building from Source.
What a repository is
A package archive is a single file with the extension .igos.tar.gz. Each archive
carries its file list and per-file SHA-256 hashes inside its manifest. A repository
is a directory of these archives plus a single index that names every archive and
records its SHA-256.
The index file is InterGenOS.db (gzipped JSON, the format pkm/repo.py parses).
It is generated by pkm.repo.generate_index() over an archive directory for a given
architecture (x86_64). Alongside it sits InterGenOS.db.sig, a detached GPG
signature over the index.
The packages themselves are organized into seven build tiers, built in this order —
toolchain, core, base, desktop, extra, compute, and ai. A full set is over
1,100 package definitions across those tiers, of which roughly three quarters ship on the
installed image and the rest are mirror-only: installable from the repository on demand,
absent from a default installation. Derive the live count from the index rather than
trusting a fixed number, since tier contents drift between builds.
The trust model
The integrity boundary is the GPG signature on InterGenOS.db, not TLS. TLS protects
the transport, but trust in what you downloaded rests entirely on the signature and
the per-package hashes it commits to.
The chain works in two layers:
-
The signature on the index.
InterGenOS.db.sigis verified against a trusted public key shipped on the system at/etc/pkm/trusted.gpg. The index is signed by a release subkey held on a hardware token; that subkey is certified by an offline master key that never touches the mirror host. The master public key is published so anyone can verify the chain end to end. -
The hash on each package. Once the index is trusted, every package install verifies the archive’s SHA-256 against the entry in that index. A tampered archive fails this check even if it was served over a valid TLS connection.
This means a compromised mirror cannot hand you a modified package: it would have to forge a signature for a key it does not hold. The signing keys live on hardware tokens, and the master is kept offline.
Verify the chain by hand
Nothing about the trust chain is hidden. You can reproduce the verification the client performs with standard tools:
curl -O https://repo.intergenos.org/x86_64/current/InterGenOS.db
curl -O https://repo.intergenos.org/x86_64/current/InterGenOS.db.sig
gpg --verify InterGenOS.db.sig InterGenOS.db    # signed by a release subkey, certified by the master
# then check any archive against its SHA-256 entry in the index
sha256sum <package>.igos.tar.gz
Using the official mirror
The official binary mirror is repo.intergenos.org. Client configuration lives in
/etc/pkm/repos.conf. The two everyday commands are:
pkm sync           # fetch the index, GPG-verify InterGenOS.db.sig, cache per-package metadata
pkm install <pkg>  # download an archive, verify its SHA-256 against the trusted index
pkm sync fetches InterGenOS.db, verifies its signature against
/etc/pkm/trusted.gpg, and refreshes the local cache of available packages. From
that point an install trusts the per-package hashes the verified index commits to.
Source archives
The mirror also serves the upstream source tarballs used to build each package, under
https://repo.intergenos.org/x86_64/current/sources/ — alongside the binaries, inside
the same atomically-promoted current tree. Because InterGenOS is built from source, the
source set is published alongside the binaries so the build is reproducible by anyone.
See Reproducibility for what that buys you.
How the official mirror is published
The repository is published by a signed-publish process. The canonical script is
scripts/publish-repo.sh, which is also wired into the build pipeline as an optional
publish phase (the build itself runs 21 phases, from validation through ISO; publish
is the optional step after). The flow is:
- Pre-checks. The chosen signing subkey must be present in the local keyring, and the archive directory must exist and be non-empty.
- Generate the index.
generate_index()writesInterGenOS.dbwith each package’s SHA-256. - Sign the index. A detached, armored GPG signature is written to
InterGenOS.db.sigusing the release subkey. The hardware token prompts for PIN and touch on the workstation. This is the human-in-the-loop step; signing material never sits unattended on the mirror. - Rsync to staging. The signed tree (and the source archives, unless skipped) is copied into a per-publish, timestamped staging directory under the architecture path.
- Atomic promote. The live
currentsymlink is swapped to the new staging directory in a single atomic operation. The prior target is archived. There is no 404 window: in-flight clients finish against the old target or restart against the new one, and no web-server restart is needed. - Transparency-log append. The signed index is appended to an append-only transparency log, giving cold-read auditability of every publish.
A dry run (scripts/publish-repo.sh --dry-run) validates the key, generates the index
in place, and prints the rsync and promote it would perform without writing to the
mirror. Run it before every real publish to confirm the archive count and staging path.
Index-signature verification is mandatory
Repository-index signature verification is unconditionally on. pkm requires a
valid signature over the index on every pkm sync, and an explicit gpg_verify = false
in /etc/pkm/repos.conf is refused at config load — a security knob that silently
did nothing would be worse than none, so the fail-closed posture cannot be turned off.
The shipped # gpg_verify = true line in repos.conf documents the default; verification
runs whether or not it is present. The first signed publish has already landed, so a
brand-new install’s pkm sync verifies against the signed index from the start.
Ongoing verification
The mirror host runs a verification pass on a schedule: it checks the index signature, walks every file’s SHA-256, and scans for stray files, alerting on any drift. The same check can be run by hand right after a publish to confirm the live set verifies.
Self-hosting your own repository
Because the format and the publish path are plain files and standard tools, you can host your own repository — a private mirror inside an air-gapped network, a team repo of in-house packages, or a full clone of the official set.
The minimum a repository needs is:
- A directory of
.igos.tar.gzarchives. - An
InterGenOS.dbindex generated over that directory for your architecture, viapkm.repo.generate_index(). - A detached GPG signature
InterGenOS.db.sigover that index, made with a key you control. - A static web server (or any HTTP server) exposing those files under an
x86_64/current/path. - The signing key’s public half distributed to your clients’
/etc/pkm/trusted.gpg, and the repository URL set in/etc/pkm/repos.conf.
The publish script’s design — generate, sign, rsync to a timestamped staging
directory, then atomically swap a current symlink — is worth copying even for a
small repo. It gives you reproducible, no-downtime promotes and a clean rollback (the
previous target is kept), all with ln, mv, and rsync.
Use your own signing key, not the official one. The whole point of the trust model is that signatures are non-transferable: clients trust a repository only because they hold the matching public key. If you run a private repo, you are the trust root for that repo, and your clients should carry your public key — not the official master.
There is deliberately no one-command “self-host” wrapper. The guidance above is assembled from the same primitives the official publish uses — index generation, detached signing, and an atomic symlink promote — because a repository is plain files and standard tools, and a wrapper would hide the very steps you need to be able to audit.
Related pages
- Package Management — installing, removing, and verifying packages on a live system.
- Building from Source — the build pipeline that produces the archives a repository serves.
- Reproducibility — why the source archives ship alongside the binaries.
Reproducibility & Verification
InterGenOS is built from source, and the build is designed so that what you install can be checked rather than taken on faith. This page explains what the system verifies today, what reproducibility means here, and how you can confirm an install is the artifact it claims to be.
The guiding posture is simple: security is not first. It is only. A reproducible, verifiable build is what lets you run a machine you understand, can modify, and can trust.
This page describes InterGenOS as it ships. Some of the reproducibility work below is shipped today; the full byte-identical-rebuild milestone is a stated project goal rather than a property of the shipped system, and is marked as such throughout. Nothing here is presented as finished unless it is.
What “verification” covers today
A from-source distribution earns trust in layers. These are the verification properties InterGenOS ships now:
- Pinned, checksum-verified sources. Every upstream source is pinned to a specific version and verified against a recorded SHA-256 before it is used. A source that does not match its recorded hash stops the build; it is never silently substituted.
- A signed Secure Boot chain. The bootloader and the unified kernel images (UKIs) are signed at a hardware-token signing step. Signing only appends a signature; it never alters the payload, and the signed outputs are verified after signing.
- dm-verity integrity for the system image. A verified-integrity hash tree is generated over the read-only system image. Each kernel image’s command line carries the verity root hash of that image, so with Secure Boot enabled, a tampered system image cannot boot under a validly signed kernel.
- A signed package index. Packages are published to the mirror with a fully signed index. Every publish regenerates and re-signs the complete index, and clients verify the entire index against one signature. Data transfer is incremental, but the signed index is never partial, and the live repository is promoted by an atomic swap so clients never see a half-published state.
Together these mean a booted InterGenOS system can prove its boot chain is signed, its system image is integrity-checked, and its packages came from a signed index — without trusting the network path they arrived over.
The build pipeline, and where trust is established
The image is produced by an ordered pipeline of phases. It is worth seeing where in that pipeline each trust property is actually established, because the answer is “at a specific, named phase, with a fail-closed check” rather than “somewhere in a large opaque build.” Sources are hash-checked before anything is compiled; the package index is signed before the image is sealed; the system image’s integrity hash is sealed into the signed kernel image; and only then is a bootable ISO emitted.
flowchart TB
SRC[Upstream sources<br/>each pinned to a version] --> VS{verify-sources}
VS -.->|" hash mismatch "| HALT[Build halts]
VS ==>|" SHA-256 matches "| TIERS["Build from source in a clean chroot<br/>seven tiers plus the kernel phase, in build order:<br/>toolchain → core → base → kernel → desktop → extra → compute → ai"]
TIERS --> BL[bootloader<br/>signed GRUB + shim chain + SBAT]
BL --> IMG[image<br/>assemble the root tree]
IMG --> MAN[manifest<br/>index signed by the release key]
MAN --> SQ[squashfs<br/>read-only system image]
SQ --> UV[ukis-verity<br/>dm-verity root hash sealed into the signed UKI]
UV --> ISO[(Signed ISO image)]
The dashed branch is the point of the whole design: a source that does not match its recorded hash does not get patched around or downloaded from a fallback — the build stops. The same fail-closed posture runs through the sealing phases, where a missing signature or a verity mismatch halts the release rather than shipping it.
A worked example: the boot anchor’s bill of materials
The Secure Boot shim is the binary the entire boot chain is verified through, so its provenance is published as a concrete, inspectable artifact rather than described only in prose. The source tree carries an SPDX 2.3 JSON SBOM for the shim under docs/sboms/, generated by scripts/shim-sbom-gen.py. It records the exact inputs that go into shimx64.efi: the pinned upstream shim source at a specific commit, the digest-pinned base build image and its package snapshot, the embedded InterGenOS Secure Boot CA certificate (in both DER and PEM form), the SBAT vendor entry, and the shim binary’s own SHA-256 and size.
Two properties make it evidence rather than a label:
- It is deterministic. The generator reads the repo-resident inputs from the committed git tree — not the working copy — and emits byte-identical SPDX JSON for an unchanged input set. Anyone can re-run it and diff the result against the published file; a match confirms the recorded provenance, and a mismatch is a real signal. The generator can additionally emit a detached signature at release time, anchored to the hardware signing key.
- It is inspectable. It is plain SPDX 2.3 JSON, readable with ordinary tools, listing every input alongside its hash — no special tooling required to audit what the boot anchor is built from.
Coverage today is the shim specifically: the root of trust the rest of the chain depends on, recorded as a machine-readable artifact you can read and reproduce.
What reproducibility means here
A reproducible build means that starting from the same source code, the same toolchain, and the same documented build environment, two independent builders produce byte-identical output: bit-for-bit identical package archives and, ultimately, a bit-for-bit identical filesystem image, with cryptographic hashes that match exactly.
Why this matters: a reproducible build is a security primitive. If an independent party fetches the published source, applies the published recipes, and rebuilds, they should get an archive byte-identical to the one on the mirror. If it does not match, then either the published recipe does not describe the real build, the infrastructure was tampered with, or there is a non-determinism bug. All three are findable with reproducibility and invisible without it. This is the shift from “we signed the binary” to “the binary is independently verifiable from source.”
The InterGenOS commitment, stated precisely
Reproducibility is layered, and the layers land on different timelines:
- Per-package archives (1.x target). Given the same pinned source, the same compiled toolchain, and the same build environment (same chroot, same source date, same locale and timezone), two builders produce byte-identical package archives — same content, same modes, owner and group normalized to root, normalized timestamps, normalized archive metadata.
- The signed index (follows from per-package). Given the same archive set, the index’s package entries — names, versions, hashes — derive deterministically from the archives, so two builders’ indexes agree on every entry. The index file as a whole is deliberately not byte-identical across runs: it embeds a generation timestamp, and that timestamp is load-bearing — clients enforce it monotonically as the anti-rollback anchor, refusing any index older than the last one they verified.
- The ISO image (later 1.x target). A byte-identical final ISO layers on top of the above and additionally requires deterministic system-image compression and bootable-image metadata. This is scoped now so the per-package work does not preclude it, and it is a later 1.x target rather than an initial 1.0 claim.
- Bootstrap toolchain (separate, longer effort). Making the build toolchain itself reproducible is a bootstrap problem addressed as its own separate effort beyond the per-package work. The posture is that every package above the bootstrap layer is reproducible, while the bootstrap is held fixed at known-good versions and verified by hash.
Current state, honestly
The build is reproducible by construction in its design — a fixed source date and deterministic phase ordering are part of the lifecycle — and pinned, checksum-verified sources are enforced today. Full byte-identical per-package output across independent builders is the documented 1.x goal and is partially in place:
- Source-date handling is honored in the manifest path.
- The cargo vendoring pipeline already produces reproducible vendor tarballs using the standard normalized-tar recipe, which demonstrates the technique works in this tree.
- The general package-archive emitter and full source-date propagation into the build environment are the remaining work for the per-package milestone.
The reproducibility recipe
InterGenOS follows the well-established reproducible-builds approach (the same envelope used across the major distributions), because third-party verifiers already know what to look for. The work that is specific to InterGenOS is the integration layer — where these settings enter the pipeline and what the audit checks validate. The recipe suppresses every input that varies between builders:
- A canonical source date consumed by build systems and compilers, so embedded build timestamps do not leak live clock values.
- Normalized archives — sorted entries, owner and group set to root, normalized timestamps, and a long-path-safe archive format — with the compression layer written so it carries no embedded filename or timestamp.
- Build-path normalization so absolute build paths do not get baked into binaries, debug info, or assertion messages.
- Pinned locale and timezone so locale-dependent ordering and timezone-shifted timestamps cannot vary.
- Deterministic link order, which most modern build systems and linkers already provide, confirmed per package by audit rather than assumed.
The principle behind all of it: the recipe declares the inputs that should matter, and everything else is pinned, normalized, or stripped.
How a build proves itself
Reproducibility is one half of trust; the other half is that a candidate is never trusted on the strength of a clean build alone. A build whose packages all compiled is not a build that is known-good. The defects that matter most in a from-source distribution compile fine, package fine, and only surface when the artifact is installed and booted on real hardware — a locked-down service unit with no writable path, a directory missing from a package’s file list, a wrong hardware-detection heuristic, a first-boot timing race.
So the path to a trusted release always runs the full chain: build the candidate, sign the boot chain, assemble the ISO, boot the live image on real hardware, install it, reboot into the installed system, and read every log on every boot for failed units and a clean trust record. A fix is finished only when it lives in the source tree and a clean from-scratch build reproduces the corrected behavior with zero manual steps. A fix that works only because of a hand edit on a running box is a note about a fix, not a fix.
A candidate becomes a stable, golden release only when a full from-scratch cycle runs end to end with zero triggers — nothing required a fix — validated on representative lower-end hardware, with timing-sensitive items cleared over several consecutive cold boots.
Verifying your own install
What you can check today on a running or freshly installed system:
- Confirm the boot chain. The system boots through a signed bootloader and signed kernel images under Secure Boot, with the system image’s integrity root hash carried in the signed kernel command line.
- Confirm package provenance. Packages come from a mirror whose entire index is signed; the package manager (pkm) verifies the index signature before trusting any entry.
- Confirm a clean boot. A trusted install shows zero failed units and a clean integrity record on every boot.
What is coming with the per-package reproducibility milestone: the planned local build-from-source mode lets you rebuild a package on your own machine and bit-compare the result against the published hash for that package. Until per-package reproducibility is verified, that mode is advisory — it proves the source compiles, not that it produces the identical artifact a trusted builder would. Once reproducibility lands, a matching hash means your local rebuild is byte-equivalent to the published binary, and you have independently confirmed the recipe produces it — without trusting the build infrastructure at all.
Related pages
- The InterGenOS package manager (pkm)
- Building from source
- Repositories and the signed mirror
- Forge, the installer
- Verified boot
Additional Language Toolchains
Beyond the compilers and runtimes that the system itself is built on, InterGenOS packages seven further language toolchains. They are built from source through the same pipeline as everything else, signed into the same mirror, and verified by the same package manager.
None of these seven are on the installation image. They are available from the signed mirror and you install the ones you want. This page says so first because getting it backwards is the single most misleading thing a package page can do: it sends you looking for a command that is not on your disk.
The seven
| Toolchain | Version | Package name | Primary command |
|---|---|---|---|
| PHP | 8.4.11 | php | php |
| OpenJDK | 24.0.2 | openjdk | java, javac |
| Erlang/OTP | 29.0.3 | erlang | erl, erlc, escript |
| Julia | 1.12.6 | julia | julia |
| Zig | 0.16.0 | zig | zig |
| GHC (Glasgow Haskell Compiler) | 9.14.1 | ghc | ghc, ghc-pkg |
| R | 4.6.1 | R | R, Rscript |
Note the capital letter in R — that is the package name as well as the command.
Installing them
sudo pkm sync                 # refresh and verify the signed index
sudo pkm install php
sudo pkm install openjdk erlang julia zig ghc R
Every install verifies the mirror index signature and then the package’s own hash before anything lands on disk, exactly as described in The Transparent Package Manager and Reproducibility & Verification. Nothing about these packages is a special case.
To remove one again:
sudo pkm remove julia
Why they are not on the image
InterGenOS assigns every package a tier, and the tier decides whether the package ships on the installation image or lives only on the mirror. All seven of these toolchains are in the extra tier, and extra packages are mirror-only by default.
This is not an accident of packaging; it is the shipping rule the build applies. The image is meant to boot, install, and give you a working desktop with a verified boot chain — not to carry every language runtime anyone might want. A developer who needs Haskell installs Haskell. Someone who never touches Erlang never pays for it in image size, attack surface, or update volume. That is the same minimization argument made in Attack-Surface Minimization, applied to language runtimes.
The practical consequence: on a freshly installed machine, php, java, erl, julia, zig, ghc and R are all absent until you install them, and you need working access to the mirror (or a local copy of it) at the time you install. See Using InterGenOS Offline for how to install packages on a machine with no network.
Where the commands land
Six of the seven install into the ordinary system prefix, so their commands are on your PATH the moment installation finishes:
| Toolchain | Installed command paths |
|---|---|
| PHP | /usr/bin/php, /usr/bin/phpize, /usr/sbin/php-fpm |
| Erlang/OTP | /usr/bin/erl, /usr/bin/erlc, /usr/bin/escript |
| Julia | /usr/bin/julia |
| Zig | /usr/bin/zig |
| GHC | /usr/bin/ghc, /usr/bin/ghc-pkg |
| R | /usr/bin/R, /usr/bin/Rscript |
OpenJDK is the exception, and it is handled. A JDK is a self-contained tree rather than a set of loose binaries, so it installs under /opt — /opt/jdk-24.0.2+12/ — with a stable /opt/jdk symlink pointing at whichever version is current. Because /opt/jdk/bin is not on the default PATH, the package also installs /etc/profile.d/openjdk.sh, which adds it. The script is idempotent: it checks whether the directory is already on PATH before prepending it, so re-sourcing your profile does not accumulate duplicate entries.
That file is sourced by login shells, so:
# After installing openjdk, start a new login shell, or source it directly:
. /etc/profile.d/openjdk.sh
java -version
Modern Java needs neither JAVA_HOME nor CLASSPATH set for ordinary use, and the package deliberately does not set them.
If java is still not found after opening a fresh terminal, check in this order: that the package is installed (pkm list | grep openjdk), that /opt/jdk/bin/java exists, that /etc/profile.d/openjdk.sh exists, and that your shell is actually a login shell that reads /etc/profile.
A note on PATH and /opt generally
If a package installs a tree under /opt, something has to put that tree’s bin directory on your PATH or the commands are effectively invisible — you would have to know and type the /opt path yourself. The mechanism InterGenOS uses is a small script in /etc/profile.d/, which is what OpenJDK ships.
This is worth knowing as a general diagnostic habit rather than as a warning about these seven. If you ever install something and find its command missing while the files are clearly present on disk, look for whether a /etc/profile.d entry exists for it, and remember that such entries only take effect in a new login shell.
Building them yourself
All seven are ordinary InterGenOS packages with recipes in the package tree, so anything in Building Packages from Source applies to them unchanged. There is nothing special about their build definitions: a package.yml describing the package and a build.sh describing how it is compiled and installed.
Package & Config Reference
This page is the reference for what InterGenOS ships and how to inspect it: the package tiers, the on-disk state that pkm records, and the commands that answer “what is installed, at what version, owning which files?” directly from the live system.
Because a hand-maintained package table drifts the moment a package is added, split, or superseded, this reference does not reproduce a frozen catalog of every package. Instead it tells you how the package set is structured and how to derive the authoritative, current answer from the machine in front of you.
Why the live system is the source of truth
A wiki table written once quietly falls out of step with the packages actually built, the versions actually shipped, and the files actually deployed. Once that happens the documentation stops being trustworthy, and a document you cannot trust is worse than no document.
InterGenOS treats documentation drift as a defect, not an inconvenience. The trustworthy reference is derived from the same sources that build the system — the package definitions and the recorded install state — so that what you read matches what is on disk. That is part of the wider posture of the distribution: a machine you understand, can modify, and can trust. You cannot trust a system you cannot accurately describe.
The two sources of truth are:
- The package definitions. Each package is described by a
package.ymlunder the package tree, grouped into build tiers. Seven fields are required of every definition —name,version,release,description,license,source, andbuild_style— and the parser recognizes a further register of optional keys — among them ones covering the build (tier,dependencies,configure_flags,patches,bundled_deps,validation,tests), packaging and placement (supersedes,ships_as,iso_include,homepage,installer_hooks,reboot_required), and verification (content_hash,verify_paths,build_artifacts). That register also carries narrower keys for bootstrap passes, vendor-payload handling, and gate declarations; the parser’s own known-field list is the complete, authoritative inventory. A key the parser does not recognize is rejected at parse time — the build halts with an error naming the key rather than ignoring it. Silently dropping an unrecognized field was a real defect once, caught only by audit; a later warn-on-standard-error stage proved easy to miss in a long build log, so the parser now fails closed, where the fix is a one-line edit and nothing has built yet. - The installed-state database. On a live system,
pkmrecords every installed package, its version and tier, and every deployed file with its SHA-256 hash. See the package manager reference for the data model.
Reconciling these is what makes the reference trustworthy: the definitions say what should be built, and the database records what was installed.
What the reference covers
Per tier, the package set is described by:
- Package name, version, and tier.
- Short description.
- Declared runtime dependencies.
- Supersede relationships (which package replaces which), since InterGenOS upgrades packages by a supersede model rather than in-place replacement.
- Tracked configuration files: the
/etc/entries thatpkmmanages specially to preserve user modifications.
See the package manager reference for supersede semantics and the configuration-file handling these fields are drawn from.
Build tiers
InterGenOS organizes packages into seven tiers, built in order during the image build: toolchain, core, base, desktop, extra, compute, and ai. The tier counts shift continuously as packages are added, split, or superseded, so any number printed in a wiki page is a snapshot rather than a contract.
Derive the live counts from the package tree or from pkm on a running system rather than treating a written number as permanent. For example, to count packages per tier from a checkout of the source tree:
for tier in toolchain core base desktop extra compute ai; do
  printf '%-12s %s\n' "$tier" "$(find packages/$tier -name package.yml | wc -l)"
done
That counts definitions. It is not the count of what is installed, and it is not the count of what ships on the image: extra and compute default to mirror-only, every other tier defaults to shipping, and individual packages override the default in both directions. To ask what is actually on the machine in front of you, ask the machine — pkm list — rather than counting files in a source tree.
The build itself runs as a fixed sequence of 21 phases, with an optional publish step at the end. Six of them build the tiers directly — core, base, desktop, extra, compute, and ai — with toolchain and chroot-tools producing the bootstrap compiler and temporary tools that precede them, and core-extra filling in the core packages that come from outside the base build book. The surrounding phases handle host validation, source verification, environment and chroot setup, system configuration, the kernel, the bootloader, image assembly, manifest generation, squashfs, UKI/dm-verity, and ISO creation. The phase list in the build orchestrator is the authority for the order; the section overview reproduces it.
Querying the real system
The authoritative live answer comes from the package manager itself. pkm keeps a SQLite database at /var/lib/igos/pkm.db and human-readable text manifests under /var/lib/igos/packages/, so the installed state is both fast to query and directly inspectable. The text manifests can be read with ordinary tools, no database client required.
Common queries against the live state:
pkm list— list installed packages.pkm info <package>— show a package’s version, tier, and details.pkm files <package>— list the files a package deployed.pkm provides <path>— find which package owns a file.pkm depends <package>— show declared dependencies.pkm verify— recompute the SHA-256 hash of every installed file and compare it against the recorded hash, detecting both corruption and unauthorized modification.
That same hash data is what describes deployed files. For the full data model, operations, and integrity behavior, see the package manager reference.
Notes on scope
This reference describes what the distribution ships today, not what is planned. The shipped desktop is GNOME 49 on Wayland. The shipped local assistant is InterGen, which includes a built-in security-scanner subsystem, InterGen Sentinel.
InterGen and the llama.cpp inference engine are the two ai-tier packages that ship on the image — but they are not the whole tier. The ai tier also carries the model-tooling stack (PyTorch, Transformers, and their dependencies), which is mirror-only: defined and buildable, installable from the repository on demand, and absent from a default installation. Counting definitions and counting what is installed are different questions, and this page is careful to keep them apart.
Planned components, such as switchable desktops or additional application campaigns, are not part of the package tree until they are built, so they do not appear in the installed-state database until then.
This reference exists so that the packages and configuration on your machine can always be described accurately, and therefore audited.
Related pages
- Package manager — data model, install/remove/supersede, verification.
- Build from source — how packages are produced.
- Reproducibility — deterministic builds and the manifest.
- Forge installer guide — installing InterGenOS.
GPU Compute & AI Workloads
This section covers how InterGenOS uses the GPU: the graphics backends it can target, the compute stacks used for machine-learning work, and how the built-in AI assistant detects and scales to the hardware it finds on your machine.
InterGenOS is built from source and aligned on a single principle. That posture shapes the GPU stack the same way it shapes the rest of the system: you get a machine you understand, can modify, and can trust, with no opaque vendor blobs running outside your knowledge or consent.
These pages describe InterGenOS as it ships. Where a backend, command, or package is not yet documented in detail, the page says so plainly rather than guessing.
What ships today
The desktop is GNOME 49 on Wayland. GPU acceleration for the desktop session runs through that stack.
For compute and AI work, the system pairs a vendor-neutral default with opt-in vendor stacks. The individual pages in this section document each backend; the high-level shape is:
- A vendor-neutral default backend that works across GPUs without committing you to a single vendor’s toolchain. See Vulkan (default, vendor-neutral).
- AMD compute via a from-source ROCm path. See ROCm for AMD (automated from-source).
- NVIDIA compute via an opt-in CUDA path. See CUDA for NVIDIA (opt-in mirror).
The ROCm compute-tier package set is in-tree at ROCm 7.2.4 and is entirely mirror-only: none of it ships on the installed image, and you install it when you want it. CUDA remains driver-runtime-only — the CUDA Toolkit is not packaged.
For the per-vendor specifics — which driver lands, how it is selected, and the exact commands — read:
- Overview & Backend Selection
- PyTorch / TensorFlow / JAX
- Language-Runtime Foundations
- Per-GPU Driver Notes
How the GPU feeds the AI assistant
The clearest consumer of GPU compute in InterGenOS is InterGen, the local AI assistant. InterGen is offline-first and runs inference on local hardware by default, so your data stays on your machine. It carries zero telemetry.
InterGen is hardware-tiered. It probes the host’s GPU and its dedicated VRAM, selects a model for the detected tier, and serves it locally over an HTTP API backed by llama.cpp. The 2B floor (InternVL3.5-2B) runs on all hardware as the verified-everywhere default; the 9B tier (Qwen3.5-9B) ships for capable hardware. RAM is detected and reported, but it does not decide the tier — see the table below.
Tier assignment is decided by the GPU and its dedicated VRAM. System RAM is never an input. That is deliberate: a machine without a discrete GPU serves the small model for latency regardless of how much RAM it has, because the 9B on CPU takes roughly 50 seconds a query and is unusable — so there is no decision RAM could inform. A GPU whose capability cannot be determined always fails down to the smaller model, never up.
A card counts as discrete when it exposes at least 3 GB of dedicated VRAM. That threshold separates a real card from an integrated GPU carving a buffer out of system memory; vendor identity alone is not sufficient, since an integrated part and a discrete card can report the same vendor.
The detector reports the tier level, the detected RAM and GPU, and the recommended model and quantisation for that tier. You can see the result for your own machine with intergen tier. The rules are evaluated top-down:
| Tier | Hardware rule | Model |
|---|---|---|
| Tier 3 (shipping; no native lane) | discrete GPU, VRAM ≥ ~22 GB | Qwen3.5-35B-A3B MoE (Q4_K_M, ~21 GB) |
| Tier 2 (shipping; the native lane) | discrete GPU, VRAM ≥ ~7 GB | Qwen3.5-9B (Q4_K_M, ~5.5 GB) |
| Tier 1 (universal floor) | no discrete GPU, or a discrete GPU with less VRAM than Tier 2 needs, or VRAM that cannot be read | InternVL3.5-2B (Q4_K_M, ~1.2 GB) |
So an 8 GB card qualifies for Tier 2 and a 6 GB card does not; a 24 GB card qualifies for Tier 3 and a 20 GB card deliberately does not. The thresholds are sized for the model plus its vision projector and the buffers allocated at load, not for the model file alone.
All three models are pinned. Each model file, and each paired vision projector, carries a SHA-256 pin in the signed models manifest, so each can be downloaded and load-verified — a Tier-3-capable machine runs the 35B. What does not ship at Tier 3 is the native tool-calling lane: the 9B carries the only shipped native lane, so a machine serving the 35B decides actions through the code-owned path, the same posture as the Tier 1 floor. A recommendation is only ever capped when the tier’s model has no shipped pin, and such a cap is logged rather than silent.
InterGen’s bundled llama.cpp is built with a Vulkan GPU backend and a CPU fallback (a portable AVX2 instruction-set floor, so it also runs on a machine with no usable GPU). In R001 and R001.1, published 2026-08-16 and 2026-08-20, the detected tier decided the serving path, not just the model: on Tier 1 inference ran on the CPU only, whether or not the machine had a GPU. On Tier 2 and Tier 3 every layer was offloaded to the GPU through the Vulkan loader and the GPU’s installed driver. If tier detection failed, the machine offloaded, matching the assume-Tier-2 posture used elsewhere for absent detection. An explicit llama_server.gpu_layers integer in your configuration is honoured verbatim on every tier and remains the last word, so you can pin CPU-only serving with 0 or force offload with a layer count.
That tier rule for the serving path has since been replaced in the source tree: how much of the model goes on the card is decided by whether the model fits the card’s measured video memory, and the tier decides only which model is served. The difference shows on a discrete card between the discreteness floor and the Tier 2 threshold — roughly 3 to 7 GB. Under the tier rule such a card is detected and reported but not used for inference; under the fit rule it serves the 2B floor from the card. An explicit llama_server.gpu_layers integer stays the last word either way. Check your release’s notes for which rule your machine runs.
A small embedding model (nomic-ai/nomic-embed-text-v1.5) ships alongside the assistant to power its semantic-matching layer.
The full assistant architecture — the priority router, the AUTO/CONFIRM/BLOCKED safety classifier, D-Bus and MCP integration, and memory — is documented in The AI Assistant.
Security scanning and cloud escalation
Two related features sit alongside the local assistant. Both are local-by-default and consent-first.
InterGen Sentinel is a pluggable security scanner that inspects content crossing the device boundary: data coming in from external and MCP tools, and content about to be sent off-device. Its default configuration runs entirely on-device — a fast local-rules pass plus an optional deeper pass backed by a small local Qwen classifier. For deeper analysis you may opt in to a cloud scanner backed by one of six named providers — Claude (Anthropic), Gemini (Google), Copilot (Microsoft), ChatGPT (OpenAI), Grok (xAI), or DeepSeek — or by any custom OpenAI-compatible endpoint you supply. None is configured by default.
Phone-A-Friend (Frontier/Cloud Escalation) is an optional path for handing a request to a more capable frontier model when the local assistant cannot satisfy it. It is off by default, asks before reaching out, stores API keys in the system keyring, and scans every outbound payload through Sentinel’s egress policy first. Cloud assistance is available when you ask for it, never imposed.
The rest of the platform
InterGenOS ships its own package manager (pkm), its own installer (Forge), a signed Secure Boot chain, dm-verity integrity, and UKI signing. The system is assembled across seven package tiers, built in this order — toolchain, core, base, desktop, extra, compute, ai — through a 21-phase build pipeline. That is over 1,100 package definitions, of which roughly three quarters ship on the installed image and the rest are mirror-only; these counts drift as the system grows, so treat any figure as a snapshot rather than a fixed total.
For installation and the GPU-relevant steps of setup, see the Forge installer guide.
Where to go next
- New to the GPU stack? Start with Overview & Backend Selection.
- Running ML frameworks? See PyTorch / TensorFlow / JAX.
- Specific card behaving oddly? Check Per-GPU Driver Notes.
Overview & Backend Selection
InterGenOS runs local AI inference on the hardware in front of it. The local assistant, InterGen, detects the host’s RAM and GPU at startup and selects an appropriately sized model, then serves it through a llama-server subprocess from llama.cpp over a local HTTP API. The compute backend that subprocess uses to talk to your GPU is the subject of this page.
The guiding principle is the same one that runs through the rest of the system: a machine you understand, can modify, and can trust. The default backend is chosen to work on the widest range of hardware without a vendor-specific driver stack. Vendor-tuned backends are available, but they are opt-in.
What ships today: Vulkan GPU inference, with a CPU fallback
The shipping llama.cpp build is compiled with a Vulkan compute backend and a portable CPU fallback (an AVX2-class instruction-set floor, with non-native codegen so the binary runs on every supported target rather than only the build host). Whether InterGen’s inference actually uses the GPU is decided by the detected hardware tier, not by GPU presence alone: a Tier 1 machine serves on the CPU only, and Tier 2 and Tier 3 machines offload every layer through Vulkan. Selection is automatic — there is no vendor driver stack to install for the default path.
Vulkan is the default because it is vendor-neutral: one API that runs across AMD, Intel, and NVIDIA GPUs through each vendor’s installable client driver, rather than a vendor-specific SDK baked in at build time. For AMD and Intel the open Mesa drivers provide the Vulkan driver in the default image; on NVIDIA the Vulkan driver arrives with the proprietary-driver opt-in. This keeps the default install small, inspectable, and portable while still using the GPU where one is present.
Two different “Vulkans.” The Vulkan graphics stack —
radv(AMD) andanv(Intel), used for the desktop and rendering — and the Vulkan compute backend that accelerates LLM inference are related but distinct. Both ship and work on InterGenOS today. See Vulkan for the details.
Opt-in vendor backends
Beyond the vendor-neutral GPU path, two vendor-tuned backends are available as opt-in choices for users who want maximum throughput on specific hardware. Both are in-tree today; neither is on the installed image:
- ROCm for AMD GPUs. See ROCm (AMD).
- CUDA for NVIDIA GPUs. See CUDA (NVIDIA).
Each typically delivers higher throughput than the vendor-neutral path on its hardware, at the cost of pulling in a vendor-specific runtime that enlarges the trusted surface — so neither is enabled by default. Unlike the vendor-neutral Vulkan backend, which ships enabled, ROCm ships from source as an opt-in, mirror-only compute tier; CUDA is provided via the NVIDIA driver runtime (the CUDA Toolkit is not packaged). The per-backend pages track each one’s status.
How a backend is selected
Backend selection follows a local-first, hardware-detected philosophy. The shipping llama.cpp is built with a Vulkan GPU backend and a CPU fallback (a portable AVX2 instruction-set floor). Which of the two serves a request is decided by the detected tier: Tier 1 serves on the CPU only, even when the machine has a GPU with a working Vulkan driver, and Tier 2 and Tier 3 offload every layer through the vendor-neutral Vulkan path. This happens automatically, with no configuration and no vendor lock-in; an explicit llama_server.gpu_layers integer in your configuration overrides it verbatim on every tier.
The vendor-specific ROCm backend ships as an explicit opt-in (mirror-only), used only where enabled and where AMD hardware is present; the CUDA path is the NVIDIA driver runtime, likewise opt-in. The out-of-the-box path stays vendor-neutral.
Relationship to model tiers
The tier decides both which model runs and how it is served. The compute backend is what makes acceleration possible; the tier is what decides whether it is used. On Tier 2 and Tier 3 the model is offloaded to the GPU through Vulkan and sized for that card. On Tier 1 the model is served on the CPU even when a GPU is present, because the 2B model is sized for CPU serving and a Tier-1 GPU is not treated as an inference device. The tier keys off the presence and size of dedicated VRAM; system RAM is not part of the decision.
For the tier rules and thresholds, see the GPU section overview. For per-GPU notes, see Per-GPU guidance.
What this is not
This page covers the local inference backend only. It is unrelated to optional cloud features:
- InterGen Sentinel, the pluggable security scanner, runs entirely on-device by default (a fast local-rules pass plus an optional local Qwen classifier). Cloud scanning, backed by one of six opt-in providers, is configured by you and off by default.
- Phone-A-Friend (Frontier/Cloud Escalation) is an optional, consent-first path that hands a request to a frontier model in the cloud. It is off by default; no provider is configured out of the box.
Neither feature depends on the GPU backend, and neither is enabled out of the box. The default install runs and reasons entirely on your own hardware.
See also
Vulkan (default, vendor-neutral)
Vulkan is the default GPU path on InterGenOS. It is vendor-neutral: a single API that runs across AMD, Intel, and NVIDIA hardware through each vendor’s installable client driver (ICD), without committing your machine to one vendor’s proprietary compute stack. This keeps the system understandable and portable. You can read your graphics setup, reason about it, and move the same workloads between machines with different GPUs.
For the vendor-specific compute stacks layered alongside Vulkan, see ROCm for AMD and CUDA for NVIDIA. For how InterGenOS chooses a backend, see Overview & Backend Selection.
Why Vulkan is the default
A from-source distribution favors the path that works everywhere over the path that is tuned to one vendor. Vulkan gives that:
- One API, every GPU. The same Vulkan code runs on AMD, Intel, and NVIDIA.
- Open by default. The Mesa-based drivers (RADV for AMD, ANV for Intel) are open source and integrate with the rest of the from-source build, so there is no opaque binary blob in the default path.
- No vendor lock-in. Choosing Vulkan does not commit you to a proprietary compute runtime. ROCm and CUDA remain available as deliberate, opt-in choices when a specific workload needs them.
Defaulting to an open, vendor-neutral graphics path is part of giving you a machine you understand, can modify, and can trust.
What Vulkan is used for
- Desktop and display. InterGenOS ships GNOME 49 on Wayland today. The compositor and accelerated applications draw through the GPU’s Vulkan/Mesa stack.
- Local AI inference. The built-in InterGen assistant
detects the host’s GPU and its dedicated VRAM and selects a model tier
accordingly — system RAM is reported but does not decide the tier. Its
inference engine (
llama-server, from llama.cpp) is built with the Vulkan backend enabled, so it accelerates inference on GPUs from any vendor with a working Vulkan driver and falls back to the CPU where no usable GPU is present. This is what makes the vendor-neutral path useful beyond the desktop.
Drivers in the default path
Vulkan support is provided by per-vendor ICDs:
- AMD — RADV (the Mesa Vulkan driver for Radeon hardware).
- Intel — ANV (the Mesa Vulkan driver for Intel graphics).
- NVIDIA — Vulkan is supported through NVIDIA’s driver. The open Mesa path (NVK) and NVIDIA’s proprietary driver differ in maturity and packaging; see CUDA for NVIDIA and Per-GPU Driver Notes for the NVIDIA specifics.
InterGenOS is built from source across seven package tiers (toolchain, core, base, desktop, extra, compute, and ai). The graphics and Vulkan components are built here rather than pulled from an external binary repository at install time:
mesa,vulkan-loaderandvulkan-headersaredesktop-tier and ship on the installed image, which is why the default Vulkan path needs nothing installed.vulkan-tools— thevulkaninfoandvkcubediagnostics — isextra-tier and mirror-only, so it is not on a default installation until you install it.
Checking your setup
Standard upstream Vulkan tooling is the vendor-neutral way to inspect what your
machine reports. These tools are not on a default installation — vulkan-tools
is mirror-only, so install it first:
sudo pkm install vulkan-tools

# List the Vulkan ICDs, layers, and device(s) the loader can see
vulkaninfo --summary

# Quick visual smoke test that a device renders
vkcube
Their absence on a fresh install is not a sign the Vulkan path is broken: the loader and drivers that actually run your desktop and your inference ship on the image. Only the diagnostics are a separate install.
When to step beyond Vulkan
Vulkan covers graphics and a growing range of compute. For workloads that target a vendor’s dedicated compute runtime, InterGenOS keeps those as explicit choices:
- AMD compute — ROCm for AMD, built from source.
- NVIDIA CUDA — CUDA for NVIDIA, opt-in.
These do not replace the Vulkan default; they sit alongside it for workloads that require them. The vendor-neutral path remains the baseline so that the system behaves predictably regardless of which GPU is installed.
See also
- Overview & Backend Selection
- Per-GPU Driver Notes
- ROCm for AMD
- CUDA for NVIDIA
- GPU Compute & AI Workloads
ROCm for AMD (automated from-source)
ROCm is AMD’s open compute stack: the runtime, the HIP programming layer, and the math and acceleration libraries that let AMD Radeon and Instinct GPUs run compute workloads. On InterGenOS, ROCm is the opt-in vendor-tuned backend for AMD hardware, the higher-throughput alternative to the vendor-neutral Vulkan default for local AI inference.
The InterGenOS approach to ROCm is the same approach that runs through the rest of
the system: build it from source, pin and checksum every input, and ship something
you can verify rather than a vendor binary you have to trust on faith. This page
describes automated ROCm-from-source enablement and the state of AMD GPU support
today. The compute stack ships now: ROCm 7.2.4, the named HIP/ROCm packages, and
llama-cpp-hip (b8796), installed on demand from the mirror.
Status. ROCm 7.2.4 is built from source and available today as the opt-in
computetier — every package in it mirror-only. Nothing in the compute tier is on the installed image; you install it deliberately, andllama-cpp-hip(b8796) is the ROCm inference binary that comes with it. AMD graphics is a separate matter and is on by default — see What ships today.
Why from source
A precompiled compute stack is exactly the kind of opaque shortcut InterGenOS rejects. ROCm is large, it reaches deep into the kernel driver interface, and a binary drop hides how it was built and against what. Building it from source serves the two things that matter here: it keeps the user in control of a machine they understand, can modify, and can trust; and it removes a class of silent failure, because every input is pinned, checksum-verified, and built in deterministic order rather than taken on a vendor’s word.
The same discipline that governs the rest of the build applies. When a compute component fails to build, the cause is fixed in the source tree, not worked around: no disabling a feature to dodge a missing dependency, no stub that pretends to work, no package quietly moved to a different tier to sidestep a wiring problem. A component is trusted only when a clean build reproduces it with zero manual steps, and validation happens on real AMD hardware that reproduces the behavior, never on a hand-patched development box.
What “automated” means
Automated enablement means a user with supported AMD hardware does not hand-assemble a compute toolchain. The system detects the GPU, and the ROCm backend is available through the standard package path — the same pinned, reproducible, signed-mirror path every other package takes — without manual driver surgery. Enabling AMD compute is a deliberate install action, not a build project you have to run yourself.
Because a vendor runtime enlarges the trusted surface of an install, this backend is opt-in and off by default. The default install reasons on the Vulkan backend, which runs across AMD, Intel, and NVIDIA open drivers without a vendor SDK. You choose to add ROCm; you do not have to remove it.
The kernel side of AMD support is already in place. The amdgpu kernel driver and
AMD firmware ship in the base image, so the hardware is driven from first boot. The
compute stack layers on top of that foundation.
What ships today for AMD GPUs
AMD graphics support is current and on by default. The amdgpu kernel driver and
AMD firmware are part of the base image, and Mesa provides the radeonsi OpenGL
driver and the radv Vulkan driver for GCN-generation hardware and newer.
Beyond the baseline, InterGenOS provides an amdgpu meta-package (extra tier,
mirror-only, so sudo pkm install amdgpu when you want it) that pulls in the
user-facing AMD diagnostic and translation tools Mesa does not install on its own:
- VA-API capability reporting (
vainfo) - Vulkan capability reporting and a test renderer (
vulkaninfo,vkcube) - Live GPU monitoring (
radeontopandamdgpu_top) - VDPAU-to-VA-API translation for legacy applications (
libvdpau-va-gl)
This meta-package is a single, transparent install surface for AMD graphics tooling. It does not provide ROCm; the compute stack is a separate concern and is the subject of the rest of this page.
How to read versions and counts
Package counts and tier contents drift between builds. The tree spans seven tiers — toolchain, core, base, desktop, extra, compute, and ai — for over 1,100 package definitions, of which roughly three quarters ship on the installed image and the rest are mirror-only. Treat any number here as a snapshot derived live from the tree, not a permanent figure, and check the current release notes for the authoritative state.
How it is built
The build of the AMD compute stack follows the same lifecycle as every other InterGenOS artifact: pinned, checksum-verified sources compiled in an isolated, reproducible environment, in a fixed phase order, with no silent failures and no stubs. The contributor-facing mechanics of the compute build live in the ROCm-from-Source Build Pipeline reference.
Verification
The compute stack inherits the trust properties of every InterGenOS artifact: pinned
and checksum-verified sources, a reproducible build, delivery through a signed package
mirror whose index is signed as a whole, and a system image sealed by a signed Secure
Boot chain with integrity verification. Because it arrives as ordinary packages,
pkm verify re-hashes its installed files exactly as it does for anything else. You
verify the software you are running rather than trusting an unverified claim about it.
See also
- Overview & backend selection
- Vulkan (default backend)
- CUDA for NVIDIA (opt-in)
- Per-GPU guidance
- ROCm-from-Source Build Pipeline
- Forge installer guide
- FAQ
CUDA for NVIDIA (opt-in mirror)
NVIDIA GPU support on InterGenOS is mirror-only and opt-in. The driver
never ships on the ISO and never installs without an explicit action on your
part. This page covers what the nvidia package provides, how the CUDA
runtime fits in, and how to install it on a machine that has NVIDIA hardware.
The design here follows the same standard as the rest of the system: a machine you understand, can modify, and can trust. Every default in this package is chosen so that the fewest things run, the signing chain is enforced, and every load-bearing flag is visible at an obvious location you can audit.
What ships and what does not
The nvidia package (production branch 580.159.04) bundles two pieces:
- The open GPU kernel modules (
open-gpu-kernel-modules), dual-licensed GPLv2/MIT. These are shipped as source to/usr/src/, then built and signed against your installed kernel on your own machine at install time. - The closed-source NVIDIA userspace libraries extracted from the official
NVIDIA
.runinstaller, including the GLX/EGL vendor libraries and the CUDA driver runtime that ships inside the driver package.
This package is the GPU driver, which includes the CUDA driver runtime and the userspace tooling NVIDIA bundles with it:
nvidia-smi— device query and monitoringnvidia-settings,nvidia-xconfignvidia-modprobe(installed setuid root so it can create/dev/nvidia*device nodes on first access)nvidia-cuda-mps-controlandnvidia-cuda-mps-server— the CUDA Multi-Process Service control planenvidia-debugdump,nvidia-bug-report.shprime-run— the PRIME offload wrapper for hybrid laptops
The CUDA Toolkit (the nvcc compiler, the math libraries, the samples) is
a separate component and is not packaged for InterGenOS at all — not by this
package and not by any other. That was confirmed against the package tree with
three differently-shaped searches (a path glob, a package-name field search, and
a description search), all of which came back empty. What the driver gives you is
the CUDA driver runtime that compiled CUDA programs link against at execution
time; to compile CUDA source you supply the Toolkit yourself.
Hardware floor and install gate
NVIDIA support requires Turing (RTX 20xx / GTX 16xx) or newer. The open
kernel modules depend on GSP firmware, which is only available on Turing and
later silicon. Pre-Turing cards fall back to the in-kernel nouveau driver,
which is already shipped.
Installation is gated on hardware. The package declares a PCI vendor
requirement of 10de (NVIDIA), and the installer (Forge) and TUI skip it
unless a display controller with that vendor ID is present on the target. This
gate is fail-closed: if the GPU vendor cannot be detected, the package is
skipped rather than installed. This prevents the driver from landing on a
machine that cannot use it, which would otherwise break the desktop session.
You can always add it later by hand once you know your hardware qualifies.
Installing the driver
On a machine with qualifying NVIDIA hardware:
sudo pkm install nvidia
Three things happen around this install that are specific to this package:
-
EULA acceptance. The NVIDIA closed userspace is covered by NVIDIA’s license. Before the install proceeds,
pkmruns an EULA helper that checks the system-wide marker at/var/lib/intergen/eula/nvidia-userspace.accepted. If the marker is missing, the helper presents NVIDIA’s license — bundled with this exact driver version, staged at build time from theLICENSEfile inside NVIDIA’s own installer — in a full-screen pager for you to read, then accept or decline (declining aborts the install). Nothing is fetched over the network: the license text ships with the driver, so the gate works the same offline, and a missing or empty text fails the install closed rather than waving it through. -
Build and sign on your machine. The post-install hook compiles the open kernel modules against your running kernel, then signs each
nvidia*.kowith your per-machine Machine Owner Key (MOK). This is a DKMS-style flow wired directly intopkmhooks rather than relying on thedkmstool. The same rebuild runs automatically on every kernel upgrade, chained from the kernel package’s own post-install hook. -
A reboot is required before the driver is live. The package declares this, so
pkmtells you rather than leaving you to guess. The open kernel modules install behind thenouveaublacklist and cannot load until the machine restarts; whatever driver is currently running keeps serving the display until then. An install that appears to “do nothing” until you reboot is the expected behaviour, not a failure.
The kernel enforces CONFIG_MODULE_SIG_FORCE=y: every loadable module must
carry a valid signature from a trusted key or it is rejected. NVIDIA’s modules
are not exempt. The MOK that signs them is generated by Forge at install time
and enrolled at the firmware level on first boot through MokManager. See
Verifying the install for the recovery path if the
MOK is not enrolled.
CUDA runtime and Unified Memory
CUDA workloads depend on the nvidia-uvm kernel module, which provides Unified
Memory support through Heterogeneous Memory Management (HMM). HMM is enabled by
default:
options nvidia-uvm uvm_disable_hmm=0
Disable HMM only if you have hit a specific HMM-related bug. CUDA Unified Memory requires it.
For compute hosts that run long-lived CUDA jobs, the persistence daemon keeps driver state resident so the GPU does not tear down and re-initialize between jobs:
-
nvidia-persistenced.serviceis shipped disabled by default. It runs as a system user but holds persistent/dev/nvidiactlhandles, so desktop users do not need it. Compute users opt in:sudo systemctl enable --now nvidia-persistenced.service
The CUDA Multi-Process Service (MPS) control tools
(nvidia-cuda-mps-control, nvidia-cuda-mps-server) are installed for users
who run multiple CUDA processes that need to share a single GPU context.
Kernel cmdline and Wayland
The package ships /etc/kernel/cmdline.d/40-nvidia.conf with:
nvidia-drm.modeset=1 nvidia-drm.fbdev=1
nvidia-drm.modeset=1enables Kernel Mode Setting, which Wayland compositors require. GDM reads/sys/module/nvidia_drm/parameters/modeset; with this set it picks Wayland rather than falling back to X11.nvidia-drm.fbdev=1provides a kernel framebuffer device, required on Linux 6.11 and newer. InterGenOS ships kernel 6.18.10, so this is non-negotiable.
These flags live on the kernel cmdline rather than in modprobe.d so they are
auditable at the most discoverable place:
cat /proc/cmdline
The fragments under /etc/kernel/cmdline.d/ are merged into the signed UKI
.cmdline section at UKI rebuild time. The desktop shipped today is GNOME 49
on Wayland.
To add your own kernel parameters, drop a file such as
/etc/kernel/cmdline.d/90-user.conf, then trigger a UKI rebuild:
sudo pkm reinstall linux-kernel
Modprobe-layer policy
Boot-affecting flags live on the cmdline; modprobe.d is reserved for
module-load policy. The package ships
/etc/modprobe.d/nvidia-nouveau-blacklist.conf:
blacklist nouveau
options nouveau modeset=0
This belt-and-suspenders pattern blocks nouveau from loading and from
attaching via the early-KMS auto-detect path, so it cannot fight NVIDIA for the
framebuffer.
Optional module options go in a file like /etc/modprobe.d/nvidia-extras.conf.
The most common is the GSP-firmware workaround for Ampere mobile (RTX 30xx)
laptops whose GSP firmware prevents the open modules from loading:
options nvidia NVreg_EnableGpuFirmware=0
Do not use this on desktop Ampere or any Ada/Blackwell hardware; those need GSP. Driver 580 has working GSP firmware for Ada and Blackwell laptops.
Hybrid graphics (laptops)
Most NVIDIA laptops are dual-GPU (“Optimus” / hybrid): an Intel iGPU for power-efficient desktop work and an NVIDIA dGPU for heavy workloads. The package supports all three BIOS GPU modes (hybrid, iGPU-only, dGPU-only).
By default the package installs /etc/environment.d/91-nvidia-wayland.conf,
which routes the system-wide compositor and OpenGL/GLX apps to NVIDIA. This is
the right default for users who installed the driver because they want the
dGPU active, but it keeps the dGPU awake whenever the display is on, which
costs battery.
To run the desktop on Intel and use NVIDIA only on demand, remove that file and launch GPU-heavy apps through the offload wrapper:
sudo rm /etc/environment.d/91-nvidia-wayland.conf
# log out and back in, then:
prime-run <application>
GNOME 49 also exposes this in the GUI: right-click a .desktop entry and
choose “Launch using Discrete Graphics Card.”
Suspend, resume, and hibernate
Three services are shipped enabled because lid-close/lid-open is expected to work on a laptop and NVIDIA suspend/resume otherwise breaks graphics:
nvidia-suspend.service— saves VRAM before suspendnvidia-resume.service— restores VRAM after resumenvidia-hibernate.service— saves VRAM to swap at hibernate
On a desktop tower that never suspends, or to keep running daemons to a minimum (fewer services is fewer attack surfaces), you can disable any or all of them:
sudo systemctl disable --now nvidia-suspend.service
sudo systemctl disable --now nvidia-resume.service
sudo systemctl disable --now nvidia-hibernate.service
Verifying the install
After install and reboot, confirm the modules are loaded, signed, and that
nouveau is absent:
cat /sys/module/nvidia_drm/parameters/modeset      # expect: Y
cat /sys/module/nvidia_drm/parameters/fbdev        # expect: Y
lsmod | grep -E 'nvidia|nouveau'                   # nouveau should be absent
modinfo -F signer /lib/modules/$(uname -r)/extra/nvidia/nvidia.ko
# expect: InterGenOS Machine Owner Key
nvidia-smi                                          # device query
The driver working on real hardware — an ASUS ROG laptop with a GeForce RTX 3070, running under enforced Secure Boot. The open kernel modules were built and signed on the machine with its own Machine Owner Key at sudo pkm install nvidia time, so they load even though the kernel refuses anything unsigned; nvidia-smi reports driver 580.159.04 and CUDA 13.0, and /usr/bin/gnome-shell is right there in the process list — the desktop compositor itself is drawing on the discrete GPU. That Machine Owner Key is the same key Secure Boot verifies at every boot; see Security Verification.
A clean module load is silent in the kernel log. The failure case to watch for is:
nvidia: module verification failed: signature and/or required key missing
which means the MOK is not enrolled. Re-stage enrollment, reboot, and accept it at the MokManager prompt:
sudo mokutil --import /var/lib/intergen/mok/mok.der
You can confirm Secure Boot and MOK state at any time:
mokutil --sb-state         # is Secure Boot on?
mokutil --list-enrolled    # is the InterGenOS MOK enrolled?
Removing the driver
sudo pkm remove nvidia
Removal stops the NVIDIA services, unloads the modules, purges the built .ko
files, removes the shipped cmdline and modprobe fragments, and triggers a UKI
rebuild so the signed .cmdline section no longer carries the NVIDIA
parameters. On the next boot, nouveau is the active GPU driver again.
See also
PyTorch / TensorFlow / JAX
This page covers the blessed path for running the major Python machine-learning frameworks (PyTorch, TensorFlow, JAX) on InterGenOS, and how that path relates to the GPU acceleration stack the system already provides.
InterGenOS is a built-from-source distribution. The guiding principle holds here as everywhere else: you should end up with a machine you understand, can modify, and can trust. ML tooling is no exception, and nothing on this page bypasses the system’s signed Secure Boot chain, dm-verity integrity, or the safety posture of the local assistant.
What ships today
InterGenOS is assembled across seven package tiers — toolchain, core, base, desktop, extra, compute, ai — in a 21-phase build.
PyTorch is a first-party package. The ai tier carries 56 package definitions: the two that ship on the installed image are the InterGen assistant and the llama.cpp inference engine, and the remaining 54 are the model-tooling stack, marked mirror-only because they are training apparatus rather than something every desktop needs. That stack is built from source like everything else and installed from the repository when you want it:
| Package | Version |
|---|---|
pytorch (ROCm/HIP build) | 2.10.0 |
torchvision | 0.25.0 |
torchao | 0.16.0 |
triton | 3.6.0 |
transformers | 5.5.0 |
accelerate | 1.14.0 |
bitsandbytes | 0.49.2 |
unsloth | 2026.7.4 |
alongside the supporting set (datasets, diffusers, peft, trl, safetensors, tokenizers, xformers, and their dependencies). Versions drift; derive the current set from the package tree or the synced index.
TensorFlow and JAX are not packaged. That was confirmed with three differently-shaped searches of the package tree — a path glob, a package-name field search, and a description search — and all three came back empty. For those two, the virtual-environment path below is the way to run them.
The shipping AI layer on the installed image is the local assistant stack:
- InterGen is a tiered, hardware-detected, offline-first local assistant built on an on-device model with zero telemetry. It probes the GPU and its dedicated VRAM and selects an appropriately sized model; system RAM is reported but does not decide the tier. Inference is served locally over an HTTP API by a
llama-serversubprocess from llama.cpp. - InterGen Sentinel is a pluggable security scanner. Its default configuration runs entirely on-device: a fast local-rules pass plus an optional deep pass backed by a small local Qwen classifier. Six named cloud providers (Claude (Anthropic), Gemini (Google), Copilot (Microsoft), ChatGPT (OpenAI), Grok (xAI), DeepSeek), plus any custom OpenAI-compatible endpoint you supply, are opt-in only; none is configured by default.
This matters for ML work because the assistant’s inference path (llama.cpp serving a quantized on-device model) is independent of the Python framework stack you would use for training or general tensor compute. Running a framework does not interfere with InterGen, and InterGen does not depend on one.
The blessed path
There are two paths, and which one is right depends on the framework.
For PyTorch and the model-tooling stack, install the packaged build. It is built from source in the same pipeline as the rest of the system, carries the same file-level hashes, and is verifiable by pkm verify like any other package — none of which is true of a wheel pulled from an external index. It is mirror-only, so it is not on your machine until you install it:
sudo pkm install pytorch
For TensorFlow and JAX, use a project-local Python virtual environment rather than installing into the system Python. This keeps framework dependencies out of the verified system image, leaves the integrity-checked base untouched, and makes each project reproducible and disposable.
The general shape of that path is:
- Confirm your GPU is detected and the acceleration runtime is present (see the other GPU pages in this section).
- Create a per-project virtual environment.
- Install the framework build that matches your accelerator into that environment.
- Verify the framework can see the GPU before you rely on it.
Each framework distributes accelerator-specific builds. You install the build that matches the GPU and runtime on your machine; a CPU-only build will run but will not use the GPU.
GPU detection vs. framework GPU support
A working desktop GPU under GNOME 49 on Wayland (the desktop InterGenOS ships today) is not the same thing as a framework-visible compute device. Verify both layers:
- The system sees the GPU (kernel driver loaded, device present).
- The framework sees the GPU (its own device query reports the accelerator).
Use each framework’s built-in device check after installation:
- PyTorch exposes a runtime check for accelerator availability and device count.
- TensorFlow can list the physical compute devices it has registered.
- JAX reports the active backend and the devices bound to it.
If the system sees the GPU but the framework does not, the mismatch is almost always between the framework build you installed and the accelerator runtime on the host. Reinstall the framework build that matches your runtime rather than changing the system.
Staying inside the security posture
Two things to keep in mind:
- Frameworks pull large dependency trees from external indexes. That is content crossing into your machine. Treat third-party model weights and packages with the same care as any other untrusted download, and prefer pinned, hash-checked installs inside the project environment. This is the concrete reason to prefer the packaged PyTorch where it covers your need: it arrives through the signed index with per-file hashes rather than from an external wheel index.
- InterGen’s safety classifier still applies to assistant-driven actions. If you ask the local assistant to set up or manage a framework environment, state-changing steps are surfaced for confirmation and destructive operations are refused outright. Having the assistant manage your environment does not weaken that boundary.
Related pages
Language-Runtime Foundations
InterGenOS ships a built-from-source toolchain and a set of language runtimes that the AI subsystem and other workloads run on. This page explains what those foundations are, where they come from, and how the local AI assistant uses them. The goal is the same one that runs through the whole system: a machine you understand, can modify, and can trust.
This page describes InterGenOS as it ships. Package counts below are derived from the live package tree and drift over time; treat them as a snapshot, not a fixed contract.
Where runtimes come from
Everything is built from source through a staged pipeline rather than assembled from prebuilt binaries. The build runs in 21 phases:
validate → verify-sources → setup → toolchain → chroot-prep → chroot-tools → core → config → core-extra → base → kernel → desktop → extra → compute → ai → bootloader → image → manifest → squashfs → ukis-verity → iso
A publish phase is optional and runs after the others.
The runtime foundations are laid early. The toolchain phase builds the compiler and core build tooling that every later phase depends on; the core and base phases bring in the system libraries and language runtimes that user-facing software links against; and the ai phase builds the assistant on top of those runtimes.
Packages are organized into seven tiers. The live tree holds over 1,100 package definitions — desktop is the largest at 460+, core follows at 310+, and toolchain is the smallest at under three dozen. These numbers move as packages are added and consolidated. Derive the current counts from the package tree rather than quoting any figure as permanent.
Not every definition ships on the installed image: roughly three quarters do, and the rest are mirror-only — present in the repository, installed only when you ask for them. Several language toolchains are in that mirror-only set rather than on the image, so a default installation does not carry them.
The runtime the AI subsystem uses
The local assistant, InterGen, is a tiered, hardware-detected, offline-first local assistant with zero telemetry. It runs entirely on the local machine by default, with no cloud dependency, and selects a model sized to the hardware it detects.
InterGen has two distinct runtime layers, and separating them helps because they place different demands on the system:
-
The model-serving layer. InterGen serves its selected model through
llama-server, the HTTP server from llama.cpp, managed as a subprocess (intergen/llama_manager.py). This is the native, compiled inference runtime that does the heavy numeric work. It is built with a Vulkan GPU compute backend and a CPU fallback — on a supported GPU with a working Vulkan driver it accelerates through Vulkan, otherwise it runs on the CPU (see Overview & Backend Selection). It exposes the model over a local HTTP API. -
The orchestration layer. The router, safety classifier, hardware probe, model manager, memory store, D-Bus service, and MCP client are organized as modules (
intergen/router.py,intergen/safety.py,intergen/hardware.py,intergen/model_manager.py,intergen/memory.py,intergen/state_cache.py,intergen/dbus_daemon.py,intergen/mcp_client.py). These coordinate the assistant: deciding how to answer a request, classifying its safety, and managing state.
These orchestration modules run on the shipping Python runtime, which is Python 3.14 (3.14.3 in the current release).
Rust lives under /opt, and the package puts it on your PATH
Rust 1.95.0 is a core-tier package. Its binaries live under /opt/rustc-1.95.0/bin, reached through the /opt/rustc symlink, rather than in /usr/bin. The package itself carries /etc/profile.d/rustc.sh, which prepends /opt/rustc/bin to PATH, so cargo and rustc are on the path of any login shell started after the package is installed.
If which cargo comes back empty, the usual cause is a shell session that predates the install — profile scripts are read at login. Start a new login shell, or add the directory for the current one:
export PATH=/opt/rustc/bin:$PATH # this session only
Earlier development images placed that profile script through a post-install step that could abort before writing it, which left Rust installed but off the path. Today the script is part of the package payload, so it is written when the package is installed.
The split matters for runtime planning. The orchestration layer is light and predictable. The model-serving layer is where available GPU memory decides which model can run at all; on a machine falling back to the CPU, throughput on the larger tiers is CPU-bound, which is exactly why such a machine is assigned the small model instead.
Hardware tiers and what they need
InterGen probes the GPU and its dedicated VRAM at startup (intergen/hardware.py) and assigns a tier; the model catalog and selection live in intergen/model_manager.py. System RAM is detected and reported but is never an input to the tier decision — a machine with no discrete GPU serves the small model regardless of how much RAM it has, because the 9B on CPU runs at roughly 50 seconds a query and is unusable. Capability that cannot be determined always fails down. A card counts as discrete only if it exposes at least 3 GB of dedicated VRAM, which is what separates a real card from an integrated GPU borrowing system memory.
The tiers are:
- Tier 1 (2B, the universal floor) — InternVL3.5-2B Q4_K_M, about 1.2 GB. Selected when there is no discrete GPU, when the card has less VRAM than Tier 2 requires, or when VRAM cannot be read. It handles semantic matching, system queries, keyword extraction, and everyday explanation, and its tool dispatch is code-owned. It is not aimed at large-scale code generation.
- Tier 2 (9B, shipping) — Qwen3.5-9B Q4_K_M, about 5.5 GB, selected for a discrete GPU with at least ~7 GB of VRAM, sized so the model, its vision projector and the load-time buffers all fit. An 8 GB card qualifies; a 6 GB card does not. On such a machine InterGen runs the 9B natively and unlocks native tool-calling, gated by the safety classifier and Sentinel.
- Tier 3 (35B) — Qwen3.5-35B-A3B Q4_K_M, a Mixture-of-Experts model, about 21 GB, selected for a discrete GPU with at least ~22 GB of VRAM so the model stays resident. A 24 GB card qualifies; a 20 GB card deliberately does not. The model and its paired vision projector are SHA-256-pinned in the signed models manifest, so both can be downloaded and load-verified, and a Tier-3 machine runs the 35B. Native tool-calling is not unlocked on this tier — the 9B carries the only shipped native lane — so a machine serving the 35B decides actions through the code-owned path, as the Tier 1 floor does.
A small embedding model (nomic-ai/nomic-embed-text-v1.5, Q8_0, about 139 MB) ships alongside every tier to power the router’s semantic-matching layer.
GPU presence and VRAM size are the signals InterGen uses to select a tier, and the tier then decides the serving path as well as the model. Inference is served by a bundled llama.cpp built with a Vulkan GPU backend and a CPU fallback (a portable AVX2 instruction-set floor). On Tier 1 the model is served on the CPU only, whether or not the machine has a GPU: the 2B is sized for CPU serving and a Tier-1 GPU is not treated as an inference device. On Tier 2 and Tier 3 every layer is offloaded to the GPU through the Vulkan loader and the installed driver. A machine whose tier cannot be determined offloads, matching the assume-Tier-2 posture used for absent detection. An explicit llama_server.gpu_layers integer in your configuration is honoured verbatim on every tier — it is the last word, so 0 pins CPU-only serving and any other number is used as written. See the Overview & Backend Selection page.
How the runtime resolves a request
InterGen does not hand every prompt to the model. A priority-ordered router (intergen/router.py) tries to satisfy each request with the cheapest, most predictable method first and only escalates the runtime cost when it has to:
- Priority 0 (Decomposition) — splits compound requests into sub-tasks and routes each in turn.
- Priority 1 (Keyword/Regex Match) — fast pattern matches for common system commands, dispatched to a built-in tool without invoking the model.
- Priority 2 (Semantic Embedding Match) — lightweight embedding search against a precomputed capability catalog; a high-confidence match dispatches to a built-in tool.
- Priority 3 (LLM Tool Calling) — a gated path in which the query plus a tool schema go to the model, which selects a tool and arguments for the router to execute. On the 2B floor this path is disabled: tool dispatch is code-owned — the deterministic Priority 1/2 matchers select the tool and extract the arguments, and the model never decides a tool call. Native tool-calling unlocks on the shipped 9B tier (
intergen/dispatch_policy.py), where a capable machine lets the model decide tool calls under the same safety-classifier and Sentinel gates; the 2B floor stays code-owned. - Priority 4 (LLM Free Response) — the fallback: the model answers conversationally from its own knowledge and the conversation context.
The practical effect is that most interactions never touch the model-serving runtime at all, which keeps the system responsive even on modest hardware.
Safety classification at the runtime boundary
Every action the router proposes passes through the classifier in intergen/safety.py, which sorts it into one of three tiers:
AUTO— read-only or harmless operations (for examplels,grep,systemctl status). Run immediately.CONFIRM— state-changing operations (for examplesystemctl restart,pkm install, or editing a config file). The assistant pauses and asks for approval first.BLOCKED— destructive or security-bypassing operations (for examplerm -rf /). Refused outright, with an explanation.
Nothing that changes the system runs without explicit approval, and the most dangerous commands cannot run at all.
These three classes are the assistant-facing view of a larger trust model. For how AUTO/CONFIRM/BLOCKED relate to the system’s gating outcomes and trust zones, see Registry & Trust Boundary.
Crossing the network boundary
Two features can take a request off-device, and both run only when you ask:
- InterGen Sentinel is a pluggable security scanner that inspects content crossing the ingress and egress boundaries. Its default configuration runs two local stages: a fast local-rules pass and an optional deep pass backed by a small local Qwen classifier. For deeper analysis you may opt in to one of six named cloud providers — Claude (Anthropic), Gemini (Google), Copilot (Microsoft), ChatGPT (OpenAI), Grok (xAI), or DeepSeek — or to any custom OpenAI-compatible endpoint you supply. None is configured by default, so a default install scans entirely on-device.
- Phone-A-Friend (Frontier/Cloud Escalation) is an optional, consent-first path that hands a request to a more capable frontier model in the cloud when the local assistant cannot satisfy it. It is off by default; the same provider set can be configured. An API key is written to the system keyring and never into the configuration file, which records only the keyring identifier. Every outbound payload is scanned by Sentinel’s egress policy before it leaves the machine.
The rest of the platform
Beyond the AI subsystem, the same source-built foundations support the shipping system: pkm (the package manager), Forge (the installer), a signed Secure Boot chain, dm-verity integrity, and UKI signing. The shipping desktop is GNOME 49 on Wayland.
See also
Per-GPU Driver Notes
This page collects device-specific driver notes for the three GPU vendors InterGenOS supports: AMD, NVIDIA, and Intel. It covers what ships by default, where the vendor-specific configuration lives, and the device quirks worth knowing before you commit to a setup.
The guiding principle here is the same one that runs through the rest of the system: a machine you understand, can modify, and can trust. Every load-bearing driver flag lives somewhere you can read it back, and the proprietary paths are opt-in rather than baked into the default install. A default that pulls in a large vendor driver stack expands the trusted surface of every install whether or not that hardware is present, so the open, vendor-neutral path is the default and the vendor stacks are something you choose to add.
For backend selection (which compute path inference uses) see Overview & Backend Selection. This page is about the kernel-level GPU driver itself.
AMD
AMD GPUs run on the open in-kernel amdgpu driver that ships with the kernel. There is no separate proprietary kernel module to install, sign, or rebuild for graphics and Vulkan, so AMD is the lowest-friction path on InterGenOS: the default image drives the display and the Vulkan graphics stack (radv) out of the box. (LLM inference is GPU-accelerated through the Vulkan compute backend on a supported GPU, and falls back to the CPU otherwise — see Overview & Backend Selection.)
For the ROCm compute stack used by the opt-in AMD inference backend, see ROCm (AMD) and the ROCm-from-Source Build Pipeline. ROCm is a userspace toolkit layered on top of the same in-kernel amdgpu driver; enabling it does not replace the graphics driver.
NVIDIA
NVIDIA support is provided by the opt-in nvidia package in the extra tier, built around NVIDIA’s open kernel modules. The package is the most involved of the three because the modules are out-of-tree and must be built and signed against your running kernel. It is mirror-only: it never lands on an ISO without explicit action, and it carries a hardware floor (Turing-class / RTX 20xx / GTX 16xx or newer); pre-Turing hardware falls back to the in-kernel nouveau driver.
What the package ships by default
- Kernel cmdline fragment at
/etc/kernel/cmdline.d/40-nvidia.confcarryingnvidia-drm.modeset=1 nvidia-drm.fbdev=1.modeset=1enables Kernel Mode Setting, which Wayland requires.fbdev=1provides a kernel framebuffer device, required on Linux 6.11 and later (InterGenOS ships kernel 6.18.10). These flags affect boot, so they live on the kernel cmdline rather than inmodprobe.d; the kernel post-install hook mergescmdline.dfragments into the signed UKI’s.cmdlinesection at UKI-rebuild time. - Nouveau blacklist at
/etc/modprobe.d/nvidia-nouveau-blacklist.confwith bothblacklist nouveauandoptions nouveau modeset=0. The two-line pattern is deliberate: the blacklist covers the modules-load and udev paths, andmodeset=0covers the early-KMS auto-detect path that would otherwise bring nouveau up to fight nvidia for the framebuffer. - Wayland environment defaults at
/etc/environment.d/91-nvidia-wayland.confsettingGBM_BACKEND=nvidia-drmand__GLX_VENDOR_LIBRARY_NAME=nvidia, routing the compositor and GL/GLX applications to NVIDIA’s libraries. prime-runwrapper for per-application PRIME offload on hybrid laptops.- VRAM save/restore services enabled by default to preserve VRAM contents across sleep transitions:
nvidia-suspend.service,nvidia-resume.service, andnvidia-hibernate.service. (nvidia-persistenced.serviceships disabled; compute users opt into it explicitly.)
Where these flags live, and why some sit on the kernel cmdline while others sit in modprobe.d, is split by mechanism: boot-time flags the kernel reads before modprobe runs go on the cmdline (auditable at cat /proc/cmdline); module-load policy and post-boot module options go in modprobe.d (auditable at lsmod and modinfo).
Module signing
The kernel ships CONFIG_MODULE_SIG_FORCE=y, so every loadable module must carry a signature from a key the kernel trusts. NVIDIA’s modules are not exempt. At install time the package signs each freshly built nvidia*.ko with the per-machine Machine Owner Key (MOK) that Forge generated during installation, using the kernel-native scripts/sign-file (PKCS#7); that MOK is enrolled at the firmware level on first boot through MokManager and chains through the kernel’s secondary trusted keyring under CONFIG_MODULE_SIG_FORCE=y.
Before treating a post-install failure as a signing problem, check the simplest cause first: the driver is not live until you reboot. The package declares that requirement, so pkm says so at install time. The open kernel modules install behind the nouveau blacklist and cannot load until the machine restarts, and whatever driver is currently running keeps serving the display until then.
If modprobe nvidia fails with “Required key not available” after a reboot, the most common cause is that the MOK was never enrolled or enrollment was declined at the MokManager prompt. Quick check:
mokutil --sb-state          # is Secure Boot on?
mokutil --list-enrolled     # is the InterGenOS MOK enrolled?
Hybrid graphics (Optimus / MUX laptops)
Most NVIDIA laptops pair an Intel iGPU with an NVIDIA dGPU. The package supports the common BIOS configurations (hybrid, iGPU-only, dGPU-only). The shipped default routes the system-wide Wayland session to NVIDIA, which means the dGPU stays awake whenever the display is active. That is the right default for someone who installed the package specifically to use the dGPU, but it costs battery.
To run iGPU-default with NVIDIA on demand, remove the system-wide Wayland defaults and launch GPU-heavy apps through prime-run:
sudo rm /etc/environment.d/91-nvidia-wayland.conf
# log out and back in, then:
prime-run <application>
GNOME 49 exposes the same offload path in the GUI through “Launch using Discrete Graphics Card” on a .desktop entry’s right-click menu.
Device-specific notes
- Ampere mobile (RTX 30xx laptops): some parts have GSP firmware bugs that prevent the open kernel modules from loading. The workaround is to disable GSP firmware load by adding
options nvidia NVreg_EnableGpuFirmware=0to a file under/etc/modprobe.d/(any name modprobe reads, e.g.nvidia-extras.conf), then rebuilding the modules and rebooting. This costs a slightly larger driver memory footprint and disables some advanced features. Do not apply it to desktop Ampere or to Ada / Blackwell hardware, which need GSP. - Ada / Blackwell laptops: working GSP firmware in driver 580; no known issues with the default configuration.
- Hybrid battery savings:
options nvidia NVreg_DynamicPowerManagement=0x02powers the dGPU down to D3 when idle, reducing idle draw on Optimus systems. - Runtime MUX switching: InterGenOS does not currently expose a UI for live BIOS-level GPU swap. Use your laptop vendor’s tool or the BIOS menu.
For the opt-in CUDA inference backend, see CUDA (NVIDIA). CUDA is a userspace runtime layered on top of these kernel modules.
Intel
Intel integrated GPUs run on the open in-kernel i915 driver that ships with the kernel, the same driver that drives the display on NVIDIA hybrid laptops in their default hybrid BIOS mode. As with AMD, there is no proprietary kernel module to install or sign for graphics and Vulkan, and the default image drives the Vulkan graphics stack (anv) on Intel iGPUs through the open driver. (LLM inference is Vulkan-accelerated on a supported GPU, with a CPU fallback — see Overview & Backend Selection.)
At a glance
| Vendor | Kernel driver | Ships by default | Signing required | LLM inference |
|---|---|---|---|---|
| AMD | amdgpu (in-tree) | Yes | No | Vulkan (default) today; opt-in ROCm |
| NVIDIA | open kernel modules (out-of-tree, nvidia package) | No (opt-in extra tier) | Yes (MOK) | Vulkan (default) today; opt-in NVIDIA driver runtime (CUDA) |
| Intel | i915 (in-tree) | Yes | No | Vulkan (default) today |
LLM inference is GPU-accelerated through the Vulkan compute backend on any of the three vendors’ GPUs with a working Vulkan driver once the machine is Tier 2 or above — the shipping llama.cpp is built with the Vulkan backend enabled. A Tier 1 machine serves on the CPU even when it has a GPU with a working Vulkan driver. The ROCm (AMD) compute backend is available as an opt-in, entirely mirror-only tier; CUDA (NVIDIA) is provided via the driver runtime, also opt-in and mirror-only. See Overview & Backend Selection. The Vulkan graphics stack ships and works normally on AMD and Intel regardless.
The tier is chosen from the GPU’s dedicated VRAM, never from system RAM, and it decides both which model runs and whether that model is offloaded at all. A machine with plenty of RAM but no discrete GPU runs the small model on the CPU deliberately.
See also
- Overview & Backend Selection
- Vulkan (default)
- ROCm (AMD)
- CUDA (NVIDIA)
- Forge installer guide
- Verified Boot & Secure Boot
Security Handbook
Security is not first. It is only.
That sentence is the design constraint behind every default in this section. When a security control conflicts with convenience, the control wins. InterGenOS is built to be a machine you understand, can modify, and can trust, and the protections described here are enforced from the moment the system boots, not bolted on by a post-install hardening script.
This handbook is the reference spine for how InterGenOS protects you by default and how to reason about changes you make yourself. It is written for two audiences: end users who want to know what is guarding their machine, and contributors who need to verify those guarantees against the source tree.
What InterGenOS Enforces Out of the Box
InterGenOS does not rely on optional toggles or opt-out privacy menus. The baseline posture is:
- Signed boot chain. A Microsoft-signed shim validates the GRUB bootloader, which verifies the Linux kernel and Unified Kernel Images. Secure Boot enforcement is optional and off by default on a fresh install. Independently of Secure Boot, the kernel is built with forced module-signature verification (
CONFIG_MODULE_SIG_FORCE=y) and integrity lockdown, so unsigned kernel modules are refused from early boot regardless of firmware Secure Boot state. See Encryption, Keys & TPM2 and Verified Boot & Secure Boot. - AppArmor mandatory access control. On the default ISO, the two InterGenOS-authored profiles (
intergen-mcp,pkm) ship in complain (learning) mode — violations are logged, not blocked — and graduate to enforce per-profile. Server packages on the mirror each ship an enforce-mode profile that activates when that server is installed. See Sandboxing & Mandatory Access Control. - Aggressive systemd sandboxing. System services run under extensive isolation directives (
NoNewPrivileges,ProtectSystem=strict,ProtectHome,PrivateTmp, syscall filtering, and more) to limit the blast radius of any single compromise. See Hardening Baseline. - Safe network binds. Server packages bind to localhost by default and never listen on a public interface unless you deliberately change their configuration. See Network Security & Firewalling.
- No default passwords. InterGenOS ships no services with blank or default credentials. Initial secrets are randomly generated or require setup during installation.
- A signed binary mirror.
pkm syncverifies the package index signature against a release-signing subkey held on a hardware token and certified by the offline master key, andpkmvalidates each package’s SHA-256 hash locally before installation. See Registry-Trust Boundary. - A from-source, verifiable build chain. Every package is built from source in an isolated build VM that is reset to a known-good snapshot before each build, with reproducible vendoring for Rust and Go and a deterministic SPDX 2.3 JSON SBOM published for the Secure Boot shim, the trust anchor of the boot chain.
The complete system is assembled from source across seven package tiers (toolchain, core, base, desktop, extra, compute, and ai) through a 21-phase build that ends in a signed, dm-verity-protected ISO image.
What InterGenOS Does Not Do
- No telemetry. Zero analytics, crash reports, or usage statistics are collected.
- No auto-updates. Software does not change behind your back. Upgrades happen only when you run
pkm upgrade. - No opt-out privacy. There is no toggle to stop data leaving your machine, because the data never leaves to begin with.
- No forced proprietary firmware in core. The core system uses open-source drivers and firmware. Proprietary blobs are available only if your hardware strictly requires them.
How This Section Is Organized
Each page below goes deep on one layer of the defense-in-depth model. Read them in order for a full picture, or jump to the layer you are auditing.
- Hardening Baseline — the system-wide defaults applied to every service and daemon.
- Attack-Surface Minimization — what is installed, what is reachable, and how that surface is kept small.
- Sandboxing & Mandatory Access Control — AppArmor profiles (complain by default, enforce for server packages) and systemd confinement.
- Kernel Hardening — kernel-level protections and tunables.
- Encryption, Keys & TPM2 — Secure Boot, the MOK enrollment flow, UKI signing, and disk encryption.
- Network Security & Firewalling — localhost-by-default binds and network controls.
- Auditing & Logging — what is recorded and how to review it.
- Registry-Trust Boundary — the signed mirror, index-only signature trust, and supply-chain protections.
- Self-Hosting Securely — running your own mirror or services without weakening the trust model.
The Security Tooling That Ships
InterGenOS includes InterGen Sentinel, a pluggable security scanner. By default it runs entirely on your machine using its Local-Rules engine and the local InterGen assistant (a hardware-detected, offline-first on-device model, with zero telemetry). Sentinel can also use Phone-A-Friend (Frontier/Cloud Escalation), an explicitly opt-in path to one of six named cloud providers — Claude (Anthropic), Gemini (Google), Copilot (Microsoft), ChatGPT (OpenAI), Grok (xAI), or DeepSeek — or to a custom provider endpoint you configure yourself. Cloud escalation is never automatic and never the default; you choose it, per request, when you want a frontier model’s second opinion. The local-only posture is described in The AI Assistant: Privacy & Data Locality.
Reasoning About Changes You Make
Because InterGenOS gives you full control, you can relax any of these defaults. When you do, you own the consequences. Before changing a security default, read the page that documents it so you understand what protection you are trading away and how to compensate. The desktop that ships today is GNOME 49 on Wayland; security guidance in this section is written against that environment.
Where to Go Next
- New to the project? Start with the Threat Model & Security Philosophy.
- Installing now? See Install with FORGE and Verified Boot & Secure Boot.
- Building or verifying packages? See Reproducibility & Verification.
- Reporting a vulnerability or following the disclosure process? See the Security Review & Advisory Process and Security Advisories.
Hardening Baseline
InterGenOS is built on a single doctrine: security is not first. It is only. The goal is a machine you understand, can modify, and can trust. Where a security control conflicts with convenience, the control wins.
This page describes the hardening baseline that ships today in InterGenOS. Nothing here is an optional add-on or a post-install script. The environment is hardened from the moment the system boots.
At a glance
Out of the box, InterGenOS enforces:
- A signed boot chain through the bootloader, kernel, and Unified Kernel Images; Secure Boot enforcement is optional (off by default on a fresh install), so the signatures are present and verifiable, enforced by firmware where you turn it on.
- dm-verity integrity over the read-only system image.
- AppArmor profiles: complain (learning) mode on the default ISO (
intergen-mcp,pkm), enforce mode for the server packages on the mirror. - Extensive systemd sandboxing applied across system services.
- A package mirror with an end-to-end signed index.
- A strict zero-telemetry, zero-analytics, zero-auto-update privacy boundary.
Secure Boot, UKI signing, and dm-verity
The boot chain is signed end to end (Secure Boot enforcement is optional, off by default on a fresh install).
- The chain is anchored by a Microsoft-signed shim (the pre-signed shim from Fedora) that validates the InterGenOS GRUB bootloader, which in turn verifies the Linux kernel and Unified Kernel Images (UKIs). Unsigned kernel modules are not trusted.
- The InterGenOS release-signing key never leaves a hardware token under InterGenOS control.
- Installed systems regenerate and sign each kernel’s UKI with your machine’s local Machine Owner Key (MOK) at every kernel install or upgrade, so the same boot-time signature verification continues to apply to kernels installed after the original ISO image. Only the MOK that Forge generates on your own machine signs the kernels you install.
- If you need out-of-tree modules such as proprietary drivers, Forge walks you through enrolling a MOK on your first boot.
- The system image is protected by dm-verity, so tampering with the read-only root is detected at boot.
For a deeper walkthrough, see the Verified Boot and Secure Boot guide.
AppArmor mandatory access control
Many distributions leave mandatory access control in complain mode, or disabled for third-party packages. InterGenOS ships AppArmor active on the default ISO: the two InterGenOS-authored profiles (intergen-mcp, pkm) run in complain (learning) mode — logged, not blocked — graduating to enforce per-profile, and the server packages on the mirror (nginx, apache-httpd, caddy, lighttpd, haproxy, memcached, valkey, postgresql, mariadb, influxdb, etcd) each ship an enforce-mode profile that activates when that server is installed.
Systemd sandboxing
System services are sandboxed to minimize the blast radius of a potential compromise. The baseline directives applied across system daemons include:
NoNewPrivileges=true
ProtectSystem=strict
ProtectHome=true
PrivateTmp=true
PrivateDevices=true
ProtectKernelTunables=true
ProtectKernelModules=true
ProtectKernelLogs=true
ProtectControlGroups=true
ProtectHostname=true
ProtectClock=true
ProtectProc=invisible
RestrictAddressFamilies=AF_UNIX AF_INET AF_INET6
RestrictNamespaces=true
RestrictRealtime=true
RestrictSUIDSGID=true
LockPersonality=true
MemoryDenyWriteExecute=true
RemoveIPC=true
SystemCallArchitectures=native
SystemCallFilter=@system-service
SystemCallFilter=~@privileged @resources @mount @swap @reboot
MemoryDenyWriteExecute=true is relaxed only for packages that explicitly require a JIT. PostgreSQL is the documented example: its service unit sets MemoryDenyWriteExecute=false so the LLVM JIT compiler keeps working.
Network and credential defaults
- Safe network binds: Any server package shipped by InterGenOS binds exclusively to localhost (
127.0.0.1) by default. Services never listen on public interfaces unless you deliberately edit their configuration to allow it. - No default passwords: InterGenOS does not ship databases or services with blank or default “admin” passwords. Initial credentials are randomly generated or require manual setup during installation.
The signed binary mirror
When you install software, you pull from a signed mirror. The index is signed end to end to prevent tampering.
- Every time you run
pkm sync, your machine cryptographically verifies theInterGenOS.dbindex signature against a release-signing subkey held on a hardware token and certified by the offline InterGenOS master key. - When downloading a package, pkm validates the file’s SHA-256 hash locally before installation.
- InterGenOS enforces an index-only signature trust model in the current release, providing a centralized, verifiable source of truth.
For a deeper look at repository verification, see the Registry Trust Boundary.
The build chain
Every package is built from source in an isolated build VM that is reset to a known-good snapshot before each build. The build runs as 21 phases (validate, verify-sources, setup, toolchain, chroot-prep, chroot-tools, core, config, core-extra, base, kernel, desktop, extra, compute, ai, bootloader, image, manifest, squashfs, ukis-verity, iso), with an optional publish step.
The resulting system is organized into seven package tiers: toolchain, core, base, desktop, extra, compute, and ai. The exact package count is derived live from the package definitions at build time and drifts as packages are added or updated. (The toolchain tier is used only to build the system and is not present on an installed machine.)
Supply-chain protections in the build chain include:
- Zero-PyPI methodology: To protect the supply chain during active attack windows targeting Python packages, InterGenOS sources critical dependencies from verified GitHub release tags rather than relying on PyPI. The maturin package definition (
packages/core/maturin/) is an example of this pattern. - Reproducible vendor pipelines: Rust and Go packages use a reproducible cargo-vendor (or equivalent) pipeline. Dependencies are fetched, verified, and packaged offline, so upstream ecosystem volatility cannot break the build or inject compromised code during a compile step.
- Software Bill of Materials (SBOM): InterGenOS publishes a deterministic SPDX 2.3 JSON SBOM for the Secure Boot shim — the boot chain’s trust anchor — detailing exactly which build inputs and source hashes comprise it.
The desktop
The shipped desktop is GNOME 49 on Wayland. The hardening baseline above applies underneath it: system daemons are confined and sandboxed regardless of the desktop session running on top.
AI assistants and the privacy boundary
InterGenOS ships two local-first AI components, both built around the same privacy boundary as the rest of the system.
- InterGen is a tiered, hardware-detected, offline-first local assistant built on an on-device model, with zero telemetry. It runs on your machine; nothing is sent to the cloud by default.
- InterGen Sentinel is a pluggable security scanner. Its default backends are Local-Rules and Local-Qwen, which run entirely on-device. Six cloud providers (Claude (Anthropic), Gemini (Google), Copilot (Microsoft), ChatGPT (OpenAI), Grok (xAI), and DeepSeek) are available strictly opt-in, never on by default.
When Sentinel reaches a cloud provider, that escalation path is called Phone-A-Friend (Frontier/Cloud Escalation). It stays off until you turn it on, and it tells you when it is used.
What InterGenOS does not do
Silence is the default.
- No telemetry: InterGenOS collects zero analytics, crash reports, or usage statistics.
- No auto-updates: Your system will not update software behind your back. Upgrades happen only when you explicitly run
pkm upgrade. - No opt-out privacy: You do not have to flip toggles in a settings menu to stop your OS from sending data to the cloud. The data never leaves to begin with.
- No proprietary firmware in core: The core operating system relies exclusively on open-source drivers and firmware. Proprietary blobs are available if your hardware strictly requires them, but they are never forced on you.
Further reading
- New to the system? See the Forge installer guide.
- Have general questions? Check the Frequently Asked Questions.
- Curious how the repository is verified? Read the Registry Trust Boundary.
Attack-Surface Minimization
The most reliable way to defend a machine is to give an adversary fewer things to attack. InterGenOS treats every running service, every open port, every trusted key, and every package on disk as a liability to be justified rather than a default to be accepted. On a machine you understand, can modify, and can trust, the parts that are not present cannot be exploited.
This page describes the attack-surface posture InterGenOS ships today, and the principles behind it.
The principle
A from-source distribution has an unusual advantage: nothing is on the system unless it was deliberately compiled in and packaged. There is no vendor add-on layer, no pre-enabled “convenience” daemon, and no opaque firmware blob pulled in to make first boot smoother. Every component is the result of an explicit decision, run through the project’s lenses before it ships: does it eliminate silent failure, does it keep the machine transparent and under your control, and does it serve the actual goal of the work. A component that cannot pass those tests is not present to be attacked.
Minimization is therefore not a hardening pass applied after the fact. It is a property of how the system is built.
Locked by default
InterGenOS does not rely on post-installation hardening scripts. The environment is hardened from the moment the system boots, and the live ISO ships locked: no remote access enabled, and a default-deny firewall, out of the box.
- No listening on public interfaces. Any server package shipped by InterGenOS binds exclusively to localhost (
127.0.0.1) by default. Services never listen on a public interface unless you deliberately edit their configuration to allow it. - No remote access enabled. The shipped posture exposes nothing to the network until you turn it on yourself.
- No default or blank passwords. InterGenOS does not ship databases or services with blank or default “admin” credentials. Initial credentials are randomly generated or require manual setup during installation.
- No proprietary firmware in core. The core operating system relies exclusively on open-source drivers and firmware. Proprietary blobs are available if your hardware strictly requires them, but they are never forced on you.
Confinement and sandboxing
Reducing the count of running things is the first move. Containing what does run is the second. InterGenOS assumes any single component can be compromised and works to keep the blast radius small.
- AppArmor mandatory access control ships active. On the default ISO the two InterGenOS-authored profiles (
intergen-mcp,pkm) run in complain (learning) mode — logged, not blocked — graduating to enforce per-profile, while the server packages on the mirror (nginx, apache-httpd, caddy, lighttpd, haproxy, memcached, valkey, postgresql, mariadb, influxdb, etcd) each ship an enforce-mode profile that activates when that server is installed. Many distributions leave mandatory access control in complain mode or disabled for third-party packages. - Aggressive systemd sandboxing. System services are confined with extensive isolation directives so that a compromised daemon cannot reach the rest of the system. The baseline applied across system daemons includes
NoNewPrivileges=true,ProtectSystem=strict,ProtectHome=true,PrivateTmp=true,PrivateDevices=true, theProtectKernel*family (tunables, modules, logs),ProtectControlGroups=true,ProtectProc=invisible,RestrictAddressFamilies=AF_UNIX AF_INET AF_INET6,RestrictNamespaces=true,RestrictRealtime=true,RestrictSUIDSGID=true,LockPersonality=true,MemoryDenyWriteExecute=true(except for packages that genuinely require JIT),RemoveIPC=true,SystemCallArchitectures=native, and aSystemCallFilterrestricted to@system-servicewith privileged, resource, mount, swap, and reboot call groups denied.
Together these mean a service that is breached cannot trivially write outside its sandbox, escalate privileges, read other users’ files, load kernel modules, or open arbitrary network families. The full set of these defaults is covered in the Hardening Baseline.
A small, signed package set
The fewer packages on disk, the fewer code paths an attacker can reach. InterGenOS ships a deliberately scoped package set, organized into seven build tiers (toolchain, core, base, desktop, extra, compute, and ai). As of this writing the catalog totals 1000+ packages across those tiers; the exact counts drift as the catalog evolves, so derive the live figure from the build manifest rather than treating any single number as fixed.
Everything in that set is built from source in an isolated, snapshot-restored build environment, and the supply chain itself is treated as attack surface:
- Zero-PyPI methodology. To protect against attack windows targeting Python packages, InterGenOS sources critical dependencies from verified upstream release tags rather than relying on PyPI.
- Reproducible vendor pipelines. Rust and Go packages use a reproducible offline vendoring pipeline: dependencies are fetched, verified, and packaged ahead of time, so upstream ecosystem volatility cannot break the build or inject compromised code during a compile step.
- Software Bill of Materials. InterGenOS publishes a deterministic SPDX 2.3 JSON SBOM for the Secure Boot shim — the boot chain’s trust anchor — detailing exactly which build inputs and source hashes comprise it.
Software is installed with pkm, the InterGenOS package manager, which pulls from a signed binary mirror. Every pkm sync cryptographically verifies the repository index signature against a release-signing subkey held on a hardware token and certified by the offline master key, and every package download is validated against its SHA-256 hash locally before installation.
A verifiable boot and integrity chain
Attack surface is not only what runs after boot — it is also everything that decides what is allowed to run. InterGenOS closes that gap with a chain you can verify yourself.
- Signed boot chain. A Microsoft-signed shim validates the InterGenOS bootloader, which verifies the kernel and Unified Kernel Images (UKIs). Secure Boot enforcement is optional and off by default on a fresh install, so the chain is signed and verifiable but not firmware-enforced unless you enable it. Independently of Secure Boot, forced module-signature verification (
CONFIG_MODULE_SIG_FORCE=y) and integrity lockdown are compiled in, so unsigned kernel modules are refused regardless of firmware Secure Boot state. - UKI signing on your own key. The InterGenOS release-signing key never leaves a hardware token under project control. On an installed system, each kernel’s UKI is regenerated and signed with a Machine Owner Key (MOK) that the Forge installer generates on your own machine, so boot-time signature verification keeps applying to kernels you install after the original ISO. If you need out-of-tree modules such as proprietary drivers, Forge walks you through enrolling that MOK on first boot.
- dm-verity integrity. The read-only system image is covered by a verified-integrity hash tree, and that root hash is sealed into the signed kernel command line. With Secure Boot enabled, a tampered system image cannot boot under a validly signed kernel. This is the only boot-time verification path: a kernel command line carrying no sealed root hash refuses to boot rather than falling back to another check. A whole-file checksum ships beside the image as a media diagnostic only, and the build asserts both artifacts are present and non-empty.
The full build process that produces this chain runs as 21 ordered phases, from source validation through toolchain, the package tiers, kernel, bootloader, image assembly, squashfs, the UKI and integrity step, and ISO assembly, with an optional publish to the signed mirror. See Verified Boot for the boot-time view of this chain.
What is deliberately absent
The strongest reduction of attack surface is the data and the network traffic that never exists.
- No telemetry. InterGenOS collects zero analytics, crash reports, or usage statistics.
- No auto-updates. Your system will not change software behind your back. Updates happen only when you explicitly run them.
- No opt-out privacy. You do not flip toggles to stop your OS from phoning home. The data never leaves to begin with.
This extends to the optional AI layer. InterGen, the tiered, hardware-detected local assistant, is offline-first and runs on-device models with zero telemetry — a compact InternVL floor on every machine and a larger Qwen tier on capable hardware. InterGen Sentinel, the pluggable security scanner, defaults to Local-Rules and a local Qwen model. Any escalation to a frontier model — the opt-in cloud providers (six named, plus a custom endpoint you can configure yourself), surfaced as “Phone-A-Friend” (Frontier/Cloud Escalation) — is exactly that: opt-in, never a default, and never a path your data takes without your decision.
Further reading
- Hardening Baseline — the concrete confinement and sandboxing defaults enforced out of the box.
- Forge Guide — the installer, Secure Boot enrollment, and MOK setup.
- Verified Boot — the boot-time integrity and signature chain.
- Frequently Asked Questions — general questions about the system.
Sandboxing & Mandatory Access Control
InterGenOS confines what software can do, not just who is allowed to run it. Two layers work together: a mandatory access control (MAC) policy that constrains every system daemon regardless of its user, and per-service sandboxing that removes the kernel interfaces, file paths, and system calls a service has no legitimate need to touch.
Where a confinement directive conflicts with convenience, confinement wins. The goal is a machine you understand, can modify, and can trust: nothing here is hidden behind a vendor toggle or applied silently after the fact.
This page describes the behavior that ships today in InterGenOS. It is a companion to the Hardening Baseline, which covers the full default posture.
Hardened from boot, not after
InterGenOS does not rely on post-installation hardening scripts. The environment is confined from the moment the system boots. The controls described below are defaults baked into the system services and policies that ship in the image, not options you enable later.
Mandatory Access Control: AppArmor
InterGenOS uses AppArmor as its mandatory access control layer. An AppArmor profile describes, per program, which files a process may read or write, which capabilities it may use, and which network operations it may perform. The kernel enforces those rules even against root, so a compromised daemon is held to the boundaries its profile defines.
Many distributions leave MAC in complain mode (where violations are logged but allowed) or disable it for third-party packages. InterGenOS ships AppArmor active by default. The two InterGenOS-authored profiles on the default ISO (intergen-mcp, pkm) ship in complain (learning) mode — violations are logged, not blocked — while they graduate to enforce per-profile. The server packages on the mirror (nginx, apache-httpd, caddy, lighttpd, haproxy, memcached, valkey, postgresql, mariadb, influxdb, etcd) each ship an enforce-mode profile that activates when that server is installed, where violations are blocked, not merely recorded.
If you are authoring or adjusting a profile for your own software, enforce mode is the design point to target. AppArmor’s complain mode logs violations without blocking them, which is how the two default-ISO profiles ship today while they are tuned toward enforce.
Per-service sandboxing with systemd
On top of the MAC layer, every system service is sandboxed using systemd’s isolation directives. These shrink the blast radius of a compromise: even if an attacker takes over a service, the service can no longer see most of the filesystem, gain new privileges, reach the kernel’s tunable interfaces, or issue system calls outside a tight allowlist.
The baseline directives applied across system daemons include:
| Directive | Effect |
|---|---|
NoNewPrivileges=true | The service and its children can never gain new privileges (blocks setuid escalation). |
ProtectSystem=strict | The entire filesystem is read-only to the service except explicitly allowed paths. |
ProtectHome=true | User home directories are inaccessible. |
PrivateTmp=true | The service gets a private, isolated /tmp. |
PrivateDevices=true | Only a minimal, virtualized set of devices is visible. |
ProtectKernelTunables=true | Kernel tunables (/proc/sys, /sys) are read-only. |
ProtectKernelModules=true | Loading and unloading kernel modules is denied. |
ProtectKernelLogs=true | The kernel log ring buffer is inaccessible. |
ProtectControlGroups=true | The cgroup hierarchy is read-only. |
ProtectHostname=true | The service cannot change the system hostname. |
ProtectClock=true | The service cannot change the system clock. |
ProtectProc=invisible | Other processes are hidden in the service’s /proc. |
RestrictAddressFamilies=AF_UNIX AF_INET AF_INET6 | Only these socket address families are permitted. |
RestrictNamespaces=true | Creating new namespaces is denied. |
RestrictRealtime=true | Real-time scheduling is denied. |
RestrictSUIDSGID=true | Creating setuid/setgid files is denied. |
LockPersonality=true | The execution domain (personality) is locked. |
MemoryDenyWriteExecute=true | Memory pages cannot be both writable and executable. |
RemoveIPC=true | IPC objects owned by the service are cleaned up on exit. |
SystemCallArchitectures=native | Only native-architecture system calls are allowed. |
SystemCallFilter=@system-service | The system-call surface is reduced to the service allowlist. |
SystemCallFilter=~@privileged @resources @mount @swap @reboot | Privileged, resource-control, mount, swap, and reboot syscall groups are explicitly denied. |
MemoryDenyWriteExecute=true carries the one documented exception: packages that genuinely require a just-in-time (JIT) compiler are exempted, because W^X memory would otherwise break them. The shipped example is PostgreSQL, whose service unit sets MemoryDenyWriteExecute=false so the LLVM JIT compiler keeps working; operators who want the strict W^X posture can disable the JIT in the database configuration instead. The exemption is per-package and deliberate, not a blanket relaxation.
Network exposure is closed by default
Sandboxing the runtime is only half the story; the other half is not exposing the service in the first place. Any server package shipped by InterGenOS binds exclusively to localhost (127.0.0.1) by default. Services do not listen on public interfaces unless you deliberately edit their configuration to allow it.
There are also no default or blank credentials. InterGenOS does not ship databases or services with empty or stock “admin” passwords; initial credentials are randomly generated or require manual setup.
How this fits the rest of the trust chain
Sandboxing and MAC are the runtime confinement layer. They sit on top of an integrity-verified boot and software supply chain:
- A signed Secure Boot chain validates the bootloader, kernel, and Unified Kernel Images, and dm-verity protects the read-only system image. Installed systems re-sign each kernel’s UKI with a local Machine Owner Key (MOK) on every kernel install or upgrade. Forge, the installer, walks you through enrolling that MOK on first boot.
- The package manager (pkm) verifies a signed index and per-package SHA-256 hashes before anything is installed.
Together these mean a service is launched from verified bytes, then held inside an enforced policy and a stripped-down sandbox for its entire lifetime.
For the boot and signing side of this chain, see Verified Boot & Secure Boot.
Auditing it yourself
These are conventional, well-documented Linux mechanisms, which is the point: you can inspect them with standard tools rather than trusting a claim.
aa-statusreports which AppArmor profiles are loaded and which are in enforce versus complain mode.systemctl show <service>prints the effective sandboxing directives for any unit, so you can confirm a service runs with the hardening described above.systemd-analyze security <service>produces a per-service exposure report.
Confirm the defaults, change what you need to, and trust the result because you checked it.
See also
Kernel Hardening
InterGenOS hardens the kernel and its boot path from the moment the machine powers on, not through post-install scripts you have to remember to run. The kernel is the most privileged code on the system, so the controls below exist to keep that privilege verifiable and contained.
The goal is a machine you understand, can modify, and can trust, starting at the layer everything else depends on.
Verified Boot Chain
The kernel only runs after every link above it has been cryptographically validated.
- A signed boot chain (Secure Boot optional). The chain is built around a Microsoft-signed shim (the pre-signed shim from Fedora) that validates the InterGenOS GRUB bootloader, which in turn verifies the Linux kernel and Unified Kernel Images (UKIs). With Secure Boot enabled the firmware enforces this end to end; a fresh install ships with Secure Boot off, so the chain is present and verifiable but not firmware-enforced.
- Unsigned kernel modules are not trusted. If your hardware needs out-of-tree modules such as proprietary drivers, the Forge installer walks you through enrolling a Machine Owner Key (MOK) on first boot.
- Local UKI signing on every kernel change. Installed systems regenerate and sign each kernel’s UKI with your machine’s local MOK at every kernel install or upgrade, so boot-time signature verification continues to apply to kernels you install after the original ISO image.
- The release-signing key stays offline. The InterGenOS release-signing key never leaves a hardware token under InterGenOS control. Only the MOK that Forge generates on your own machine signs the kernels you install.
Image Integrity (dm-verity)
The shipped, read-only system image is protected by dm-verity, which provides block-level integrity verification. dm-verity uses a Merkle hash tree built with veritysetup (statically linked); this lets tampering be detected at the granularity of individual blocks as they are read rather than silently executed, which keeps the trust established by the verified boot chain intact at runtime. The tree’s root hash is sealed into the signed UKI kernel command line, so the integrity anchor for each image is itself covered by the boot-chain signature. dm-verity is the only boot-time verification path there is: a kernel command line carrying no sealed root hash refuses to boot the image rather than falling back to another check. A whole-file filesystem.sha256 ships beside the image as a media diagnostic you can run against the medium you wrote, and it is never a boot-trust input. UKI signing and dm-verity are produced as dedicated phases of the build pipeline, so integrity protection is part of the image itself rather than something layered on afterward.
Kernel-Surface Protections for System Services
Beyond the boot path, InterGenOS narrows what the running kernel exposes to the userspace daemons that talk to it. System services are sandboxed with systemd isolation directives, and several of those directives specifically reduce the kernel attack surface available to a compromised service:
ProtectKernelTunables=true— services cannot modify kernel tunables under/proc/sys,/sys, and related paths.ProtectKernelModules=true— services cannot load or unload kernel modules.ProtectKernelLogs=true— services cannot read or write the kernel log ring buffer.ProtectControlGroups=true— the cgroup hierarchy is protected from modification.RestrictNamespaces=true— creation of new namespaces is restricted.RestrictRealtime=true— services cannot acquire realtime scheduling.LockPersonality=true— the execution-domain personality is locked.MemoryDenyWriteExecute=true— write-and-execute memory mappings are denied (except for packages that explicitly require a JIT).SystemCallArchitectures=native— only native-architecture syscalls are permitted.SystemCallFilter=@system-servicewith~@privileged @resources @mount @swap @reboot— privileged, resource-control, mount, swap, and reboot syscall groups are filtered out.
These sit alongside the broader service-sandboxing baseline (NoNewPrivileges, ProtectSystem=strict, PrivateDevices, ProtectProc=invisible, and others). The full default set is documented in Hardening Baseline.
Mandatory access control complements the syscall filtering: on the default ISO the InterGenOS-authored AppArmor profiles (intergen-mcp, pkm) ship in complain (learning) mode — violations logged, not blocked — graduating to enforce per-profile, while the server packages on the mirror each ship an enforce-mode profile that activates when that server is installed, so such a service that steps outside its profile is denied rather than merely logged. See Sandboxing and MAC for how AppArmor and systemd confinement work together.
Why This Matters
A kernel you cannot verify is a kernel you cannot trust. By signing the kernel and its UKI at every change, refusing unsigned modules, verifying image integrity with dm-verity, and tightly scoping the kernel interfaces each service can reach, InterGenOS keeps the most privileged layer of the system auditable and contained. You remain in control: enrolling your own MOK and choosing which out-of-tree modules to trust are deliberate, owner-driven steps, not defaults imposed on you.
Further Reading
Encryption, Keys & TPM2
InterGenOS protects your machine on two axes that compose into one boot path: encryption at rest (your data is an unreadable blob to anyone without your passphrase) and a signed boot chain (every component the system boots is signed and verifiable). This page covers both — full-disk encryption with LUKS2, the experimental TPM2 and FIDO2 unlock methods, the per-machine signing key, and the boot chain, whose Secure Boot enforcement is optional and off by default on a fresh install.
The boot path is the most privileged code on any machine, and the data on the disk is yours. These features exist to give you a machine you understand, can modify, and can trust.
Status note (decided 2026-08-11): the two EXPERIMENTAL unlock methods described below — TPM2-sealed unlock and FIDO2-token unlock — are not offered by the installer in this release. A functionality review (2026-08-08) found defects in both: FIDO2 enrollment can abort an install that opts in, and the TPM2 sealed key’s parent context does not survive a reboot, so automatic unlock could never outlast the first power cycle. Passphrase encryption is unaffected and fully supported. The sections below are retained as design documentation for when the corrected methods return after dedicated hardware verification.
At a glance
- Full-disk encryption is opt-in, not default. The Forge installer asks; you choose. We recommend it for any portable device.
- The format is LUKS2 with a passphrase, AES-256 in XTS mode, and the
argon2idkey-derivation function. - TPM2-sealed unlock and FIDO2-token unlock are designed as EXPERIMENTAL sub-options that compose with the passphrase rather than replacing it, but they are not offered in this release (see the status note above) — the passphrase slot is always the unconditional fallback.
- Your passphrase is never written to disk outside the LUKS header slot, never logged, never sent anywhere. There is no recovery-key escrow and no master key. If you forget it, your data is gone by design.
- The boot chain is fully signed. Secure Boot enforcement is optional and off by default on a fresh install; the signatures are present and ready to enforce where you enable it.
- Every kernel you install after the original ISO is rebuilt into a Unified Kernel Image (UKI) and signed with your machine’s own Machine Owner Key (MOK). The release signing key never touches your machine.
Full-disk encryption with LUKS2
InterGenOS uses LUKS2 (Linux Unified Key Setup, version 2) as the on-disk encryption format. The tooling is cryptsetup, the cipher default is AES-256-XTS, and the key-derivation function is argon2id — memory-hard and resistant to GPU/ASIC brute-force.
A LUKS2 volume has three parts:
- A header at the start of the encrypted partition, holding the encryption metadata: the cipher choice, the master-key wrapping, and up to eight key slots.
- Key slots, each independently holding a wrapping of the master key by one passphrase (or by a TPM-sealed key, or by a FIDO2-derived key). Several unlock methods can be active at once; deleting one slot does not affect the others.
- The encrypted payload — your root filesystem.
The master key never leaves the LUKS header. Your passphrase unwraps a key slot, which yields the master key, which decrypts the payload. The passphrase itself is held only in volatile memory during the unlock and the buffer is zeroed when it finishes. There is no on-disk copy of your passphrase.
The Forge install flow
When you run Forge (TUI or GUI), the partitioning stage offers an Encrypt the root filesystem with LUKS2 checkbox. If you tick it:
- Forge prompts for a passphrase with a confirmation field. Both frontends enforce a non-empty value and a confirm-field match. Guidance is a soft warning, not a block: 8 characters is the floor below which the warning fires, and 12 characters with at least two character classes is the recommended baseline. You can accept a passphrase that fires the warning after confirming.
- Forge formats the target partition with LUKS2 using
cryptsetup luksFormat. Forge forces the argon2id KDF parameters (1 GB memory cost, 4 iterations, 4 threads) per RFC 9106’s recommendations for memory-hard KDFs, rather than relying on the hostcryptsetupdefaults. The cipher itself — AES-256 in XTS mode — is cryptsetup’s own default, which Forge leaves in place rather than overriding. They are calibrated to defeat GPU-accelerated brute-force without risking out-of-memory on 4 GB systems. - Forge writes
/etc/crypttabso the boot-time initramfs knows what to unlock. The entry is namedcryptrootand references the partition byUUID=. - Forge writes
/etc/fstabwith the unlocked device-mapper node (/dev/mapper/cryptroot) as the root mount source. - The kernel post-install hook bundles the FDE initramfs into the UKI, so the unlock prompt lives inside the same signed envelope as the kernel (see Composition with Secure Boot).
The passphrase you type is held only in memory while the install runs. It is piped to cryptsetup via stdin (never on the command line, never in argv), zeroized after use, and cleared on both the success and failure path. No copy is written to disk except in the LUKS header slot itself.
EXPERIMENTAL — TPM2-sealed unlock
Status note (decided 2026-08-11): the two EXPERIMENTAL unlock methods described in this section and the next — TPM2-sealed unlock and FIDO2-token unlock — are not offered by the installer in this release. A functionality review (2026-08-08) found defects in both: FIDO2 enrollment can abort an install that opts in, and the TPM2 sealed key’s parent context does not survive a reboot, so automatic unlock could never outlast the first power cycle. Passphrase encryption is unaffected and fully supported. Both sections are retained as design documentation for when the corrected methods return after dedicated hardware verification.
As designed:
If you tick Unlock with TPM2 (EXPERIMENTAL), Forge seals a fresh 32-byte random key against the current measured-boot state, adds that key as an additional LUKS slot, and writes the sealed-blob triplet (primary.ctx, secret.pub, secret.priv) to the ESP under /intergen/tpm2/. The seal is bound to a PCR0 + PCR7 policy: PCR0 tracks the firmware (BIOS/UEFI code), and PCR7 tracks Secure Boot policy state (the db/dbx/KEK/MOK enrollment status). On normal boots the system unlocks automatically without prompting.
The TPM2 sub-checkbox is greyed out with a tooltip if your hardware does not expose a TPM (/dev/tpmrm0 absent) or if the live ISO is missing the static TPM2 tools.
This is flagged EXPERIMENTAL because the failure modes are subtle. A firmware update changes PCR0; a kernel update that touches your shim/MOK state can change PCR7; a Secure Boot reconfiguration changes PCR7. Any of these invalidates the seal, and the boot falls through to the next configured method and ultimately to the passphrase prompt. The sealed blob on the ESP is not a secret — without the specific TPM that performed the seal, and the same PCR state, it is useless and cannot be unsealed on any other machine. The passphrase slot remains untouched.
EXPERIMENTAL — FIDO2-token unlock
If you tick Unlock with FIDO2 token (EXPERIMENTAL), Forge enrolls a credential on a FIDO2 security token (YubiKey, Solo, Nitrokey, etc.) plugged in during the install. Enrollment runs in two interactive steps:
- Generate credential:
fido2-cred -Mcreates a new credential on the token. You will be prompted to touch the token when it blinks. - Derive unlock key: a fresh 32-byte random nonce is generated and
fido2-assert -G --hmac-secretis invoked with that nonce as salt. The token returns an HMAC output bound to the credential and the nonce, which is added as an additional LUKS slot. You will be prompted to touch the token a second time.
Forge writes the cred_id and stored_nonce to the ESP under /intergen/fido2/. Neither file is a secret: without the physical token, the credential ID and salt are useless. The relying-party ID is intergenos. At boot, the same fido2-assert call against the same nonce yields the same HMAC bytes, which unlock the slot.
This is flagged EXPERIMENTAL for the same family of reasons as the TPM2 path: a lost token, a token-firmware update that rotates credential storage, or a token swap all invalidate the slot. The passphrase slot stays in the LUKS header for fallback.
The boot-time unlock chain
When an encrypted InterGenOS system boots, the firmware verifies the UKI signature, the kernel hands off to the FDE init, and the unlock chain runs in order:
- TPM2 unlock (if enrolled and
/dev/tpmrm0is present):tpm2_load+tpm2_unsealagainst the PCR0+PCR7 policy, piped tocryptsetup. On any failure, fall through. - FIDO2 unlock (if enrolled and the tools are available): wait up to 30 seconds for the token to enumerate, run
fido2-assert -G --hmac-secretagainst the stored nonce, pipe the HMAC tocryptsetup. On any failure, fall through. - Passphrase prompt — always the final fallback. Three attempts, then a recovery shell.
If neither TPM2 nor FIDO2 was enrolled, the chain skips straight to the passphrase prompt and the path is identical to a passphrase-only install. The prompt is plain text:
  InterGenOS — encrypted root unlock

Enter passphrase for /dev/disk/by-uuid/<uuid>:
Three wrong attempts drops you into a recovery shell with cryptsetup available, where you can retry the unlock manually, inspect /etc/crypttab, or reboot.
The FDE initramfs is tiny: a static cryptsetup, a static busybox, the dm_crypt and ext4 kernel modules, and the storage drivers needed to see your disk. When TPM2 or FIDO2 unlock is enrolled it also carries the relevant static tools and kernel modules. It does no logging to disk, no telemetry, and no network — its only job is to attempt the unlock chain, mount the root filesystem, and hand off to systemd.
Debugging the unlock chain
The init script emits journal-grep-friendly prefixes when running EXPERIMENTAL methods. After boot, correlate each attempt by searching the journal:
| Prefix | What it means |
|---|---|
[fde-init][EXPERIMENTAL TPM2] | TPM2 unlock attempt — skipping (no /dev/tpmrm0, no tools, or no sealed blob), attempting unlock via sealed key (PCR0+PCR7), tpm2_load failed, a tpm2_unseal/cryptsetup PCR-drift failure, or unlock succeeded. |
[fde-init][EXPERIMENTAL FIDO2] | FIDO2 unlock attempt — skipping, attempting unlock — plug your security token + touch when it blinks, no FIDO2 token detected within 30s, a specific pipeline diagnostic, or unlock succeeded. |
[fde-init] (no suffix) | Passphrase prompt path, the recovery-shell drop, and root-mount errors. |
These messages appear on the console during early boot only — the FDE initramfs runs before systemd-journald exists and its messages are not kernel messages, so they do not reach the journal. Watch the boot screen for them; the kernel’s own dm-crypt lines are what the journal retains (journalctl -b -k).
Secure Boot
The boot path is the most privileged code on the machine: if an attacker can substitute a kernel before the OS finishes starting, every other defense is moot. InterGenOS signs the entire boot chain to close that class of attack; enabling Secure Boot (optional, and off by default on a fresh install) makes the firmware enforce those signatures.
The boot chain is:
   Firmware (UEFI)
        |  trusts Microsoft 3rd-party CA
        v
   Microsoft-signed shim
        |  trusts the InterGenOS vendor cert (loaded as MOK)
        v
   InterGenOS GRUB
        |  enforces signature verification on UKIs
        v
   InterGenOS UKI (vmlinuz + initramfs + cmdline, one Authenticode binary)
        |
        v
   InterGenOS userspace
A Unified Kernel Image (UKI) is a single signed file that bundles the kernel, the initramfs, and the kernel command-line. Signing the UKI envelope signs all three at once; nothing inside can be swapped without breaking the signature.
The live ISO and install media use UKIs signed by the release key on an offline signing workstation. That release key never leaves our hardware and physically does not exist on your machine. Once you install to disk, every kernel you install or upgrade is rebuilt into a UKI on your machine and signed with your machine’s MOK.
InterGenOS treats unsigned modules the same way it treats unsigned kernels: a signed kernel that loads unsigned out-of-tree modules at runtime is no better than an unsigned kernel. The trade-off for this strictness is a one-time MOK enrollment step for out-of-tree modules; the benefit, once Secure Boot is enabled, is that nothing unsigned runs during boot.
The Machine Owner Key (MOK)
A Machine Owner Key is a per-machine signing key, generated on your own machine, that the firmware trusts because you enrolled it via MokManager at first boot. It exists for two reasons:
- Your machine signs the kernels you install. When a new kernel arrives — a
pkm upgradethat includeslinux-kernel, or an explicitpkm install linux-kernel— InterGenOS rebuilds the UKI and signs it with your MOK. The release key never sees the kernels you install. - You can trust your own third-party drivers. Out-of-tree modules (for example, proprietary GPU drivers via DKMS) can be signed by your MOK and load on a Secure Boot system without disabling enforcement.
The MOK is yours. It lives at /var/lib/intergen/mok/ on the installed system. If you reinstall, Forge generates a fresh MOK; if you migrate to a new machine, you generate a new MOK there.
What Forge does at install
The bootloader stage runs without asking further questions:
- Generates a per-machine MOK keypair (RSA-2048) as
mok.key(private key),mok.crt(PEM X.509 cert, used bysbsign), andmok.der(DER X.509 cert, the binary form MokManager wants for enrollment). - Uses the enrollment password you chose during install (8–256 characters; leave it blank at install time to skip MOK enrollment) and stages it for the first-boot step.
- Stages the MOK for enrollment so MokManager picks it up on next reboot.
- Installs
ukifyandsbsigntoolso the kernel post-install hook can build and sign UKIs. - Installs an initial UKI built from the installed kernel and signed with the fresh MOK.
- Configures a recovery boot entry that loads the bare vmlinuz as a fallback if a UKI ever fails to sign or boot.
The enrollment password is the one you chose during install. Forge never displays it back and never writes it to any log — the installer’s trace redactor scrubs password fields, and the install log itself is root-only. Note it somewhere safe before you reboot; you need it once, during MokManager enrollment, and nothing on the installed system can recover it for you.
First-boot MOK enrollment
On the first boot after install, the firmware notices a pending enrollment request and runs MokManager — a small blue-text-on-black utility — before continuing the boot. It walks you through three screens:
- “Perform MOK management” — press any key to start.
- “Enroll MOK” — review the certificate (subject
CN=InterGenOS Machine Owner Key) and confirm. - “Enter password” — type the enrollment password Forge gave you. It is single-use.
After enrollment, MokManager exits and the system boots normally. From that point, the firmware trusts your MOK and UKIs signed with it load without prompts.
If you skip enrollment, the system still boots using the release-signed UKI that shipped with the installer image — but the next kernel install or upgrade produces a MOK-signed UKI the firmware will not trust, and you will fall through to the recovery boot entry until you enroll.
Kernel install and upgrade
When you install or upgrade a kernel via pkm, the linux-kernel package’s post_install hook runs on your machine with no key material from the release infrastructure:
- Reads the kernel, the standard initramfs (and the FDE initramfs if your system is LUKS-encrypted), and the canonical command-line.
- Runs
ukify buildto bundle them into a single UKI. - Runs
sbsign --key /var/lib/intergen/mok/mok.key --cert /var/lib/intergen/mok/mok.crtto sign it. (sbsignreads PEM certs; the.derform is for MokManager enrollment only.) - Writes the signed UKI to the ESP under
/boot/efi/EFI/Linux/, namedintergenos-<kernel-version>.efi. - Updates the GRUB menu so the new kernel is the default boot entry.
If the UKI build or signing step fails (corrupt key file, full ESP, missing tooling), the hook falls back to the GRUB-loads-vmlinuz path: the kernel and initramfs are written out separately and GRUB loads them directly with the same signature-verification semantics, since GRUB is itself signed and enforces check_signatures=enforce. The kernel install is never rolled back on UKI failure, so you never end up with a half-installed kernel.
ESP sizing
Every kernel you install becomes a UKI in /boot/efi, so the ESP needs headroom for several generations. A typical UKI is 80-150 MB depending on the initramfs payload. Forge creates a fixed 1 GiB ESP during partitioning, leaving room for several kernel generations. If the ESP fills up, UKI generation logs the condition and skips writing the new UKI, and the previous kernel remains bootable; ordinarily the kernel post-install hook’s keep-2 retention prune (/usr/lib/intergen/prune-old-kernels.sh) resolves the space automatically — see Recovery for the full-ESP procedure.
Composition with Secure Boot
The encrypted-root and signed-boot stories are designed to compose. They do not interact at runtime except through the FDE initramfs being part of the signed UKI.
On a non-encrypted install, the UKI’s bundled initramfs is minimal — typically only CPU microcode — because storage and filesystem drivers are built into the kernel. On an encrypted install, the UKI’s bundled initramfs is the FDE initramfs: the same init that prompts you for the passphrase is part of the same signed envelope as the kernel.
The practical consequences:
- With Secure Boot enforcement enabled, an attacker cannot substitute a fake unlock prompt that captures your passphrase: the prompt code is inside the signed UKI, and tampering with it means the firmware refuses to load it. This protection is exactly as strong as that enforcement — with Secure Boot off, nothing at the firmware level rejects a tampered image, so the signature is verifiable but not enforced.
- A kernel upgrade rebuilds the UKI with the new kernel and the same FDE initramfs, signed with your MOK. The unlock experience is identical across kernel upgrades.
- If TPM2-sealed unlock is enabled, the same UKI envelope holds the bits that talk to your TPM. The unlock path stays inside the signed envelope; the TPM is not a way to skip Secure Boot verification.
What is and is not protected
Encrypted at rest: the entire root filesystem, including /home, /var, /etc, /root, swap if placed on the encrypted volume, and anything written to disk once the system is running and unlocked.
Not encrypted:
- The ESP (the small
/boot/efipartition). The firmware reads it before any OS runs, so it cannot be encrypted. Its integrity is protected by Secure Boot signature verification on the UKI, not by encryption. - The LUKS header, which is on disk and visible. It reveals that the partition is LUKS-encrypted and which cipher is in use, but nothing about the payload.
- A running system. Once unlocked, the master key lives in kernel memory and the filesystem is readable to any process with the right permissions. Encryption-at-rest does not replace process isolation, user permissions, or AppArmor confinement.
If your threat model includes someone with physical access while the machine is running, full-disk encryption is not the control you want — use screen lock or a powered-off machine.
Recovery
“I forgot my passphrase”
Your data is gone. There is no master key, no recovery-key escrow, and no back door — a recovery channel we could use is a channel an attacker could use. Boot a live ISO and reinstall. Back up early and often.
Add or remove a passphrase
LUKS2 supports up to eight key slots. From a running system, as root:
cryptsetup luksAddKey /dev/disk/by-uuid/<uuid>
cryptsetup luksRemoveKey /dev/disk/by-uuid/<uuid>
luksAddKey prompts for an existing passphrase (to unwrap the master key) and then the new one. luksRemoveKey prompts for the passphrase belonging to the slot you want to remove; the other slots are untouched.
Back up the LUKS header
If the header is corrupted, the payload becomes unrecoverable even with the correct passphrase, because the encryption metadata lives in the header. Back it up to a separate medium:
cryptsetup luksHeaderBackup /dev/disk/by-uuid/<uuid> \
    --header-backup-file /path/to/external/header.bin
Store it offline. Anyone with the backup file and your passphrase can decrypt your disk; treat it accordingly. Restore with cryptsetup luksHeaderRestore and the same --header-backup-file argument.
“I need to regenerate the MOK”
The MOK material lives under /var/lib/intergen/mok/. On a default install Secure Boot is off and there is no enrollment password to lose. If you run with Secure Boot enabled and need a fresh MOK, reinstalling with Forge regenerates one; the next kernel install or upgrade rebuilds the UKIs with it, and the bare-vmlinuz fallback in GRUB keeps the system bootable in the meantime. (There is no separate recovery wrapper command — UKI signing is handled entirely by the kernel package’s post-install hook.)
“Secure Boot is refusing my new kernel”
This usually means the MOK was not enrolled (or was un-enrolled) but the post-install hook signed a UKI with it. Boot the recovery entry, then either re-enroll the MOK or regenerate it via the password-reset path above.
“I want to run an unsigned kernel”
Don’t. Every kernel that boots is signed — this is non-negotiable. Build your kernel, sign it with your MOK using sbsign, and install it through the same pkm flow. To test bare unsigned kernels, use a VM with Secure Boot off, not a production install.
Troubleshooting
| Symptom | Likely cause | Fix |
|---|---|---|
| Passphrase prompt rejects every attempt | Wrong passphrase, or keyboard layout differs at boot | The FDE initramfs uses US-QWERTY by default; type the QWERTY equivalents of layout-sensitive characters. |
| Boot drops to the FDE recovery shell with “no LUKS volume specified” | /etc/crypttab was not written, or the encryption stage did not complete | Inspect /etc/crypttab from the recovery shell; if empty, boot a live ISO and reinstall. |
| Boot drops to the recovery shell with “LUKS volume not found after 30s” | Disk did not enumerate in time (failing drive, USB storage, slow RAID init) | Run ls /dev/disk/by-uuid/; if the volume appears, retry cryptsetup open manually. |
| TPM2-sealed unlock falls through to passphrase | PCR0 or PCR7 changed (firmware update, Secure Boot reconfiguration, shim/MOK update) | Enter the passphrase to boot. Re-enrolling TPM2 against the new PCR state restores automatic unlock. Check the [EXPERIMENTAL TPM2] journal lines for the specific outcome. |
| FIDO2 unlock does not detect the token | Token plugged in too late, or dead battery | Plug the token in before boot; the initramfs waits up to 30 seconds. Check the [EXPERIMENTAL FIDO2] journal lines. |
| Boot stops at MokManager every time | MOK enrollment never completed | Complete enrollment per First-boot MOK enrollment above. |
| New kernel installs but won’t boot, falls through to recovery | UKI signed with a MOK the firmware doesn’t trust | Re-enroll the MOK, or re-run the kernel post-install hook after enrollment. |
| GRUB shows only the recovery entry | UKI signing has been failing silently | Inspect /var/log/intergen-kernel-postinstall.log; ESP-full and a missing MOK key file are the common causes. |
ukify is missing on the installed system | Forge skipped the UKI tooling install | ukify ships with systemd — reinstall systemd if it is missing, and pkm install sbsigntool for the signing tool; then re-run the kernel post-install hook. |
| Secure Boot toggle is greyed out in firmware | Some OEM firmware makes Secure Boot read-only outside Setup Mode | See your vendor docs for entering Setup Mode. The standard MOK enrollment path is sufficient for normal operation. |
Further reading
- Forge installer guide — the install walkthrough that references the encryption opt-in and MOK enrollment in context.
- FAQ — common security questions.
Network Security & Firewalling
InterGenOS treats the network as the most exposed surface a machine has. The posture is default-deny: nothing listens on a public interface, nothing reaches out on its own, and no data leaves the machine unless you make it leave.
This page describes how that posture is enforced today and what it means for you as an operator of a machine you understand, can modify, and can trust.
The Default Posture: Deny
Two principles govern every networked component InterGenOS ships:
- Nothing listens publicly. Any server package shipped by InterGenOS binds exclusively to localhost (
127.0.0.1) by default. A database, a web server, or any other daemon you install is reachable only from the machine itself. It will not listen on a routable interface unless you deliberately edit its configuration to allow it. - Nothing phones home. InterGenOS collects zero analytics, crash reports, or usage statistics. There is no auto-update that contacts a server behind your back, and there is no opt-out toggle to hunt for in a settings menu. No usage or analytics data is produced, so none leaves to begin with.
A freshly installed system has no attack surface facing the network that you did not explicitly create. Opening a port is a decision you make, not a default you have to discover and undo.
Inbound: Why Nothing Is Reachable
The localhost-bind default is the primary control for inbound traffic. Because services do not listen on public interfaces, an unconfigured InterGenOS machine presents nothing for a remote scanner to connect to. This is enforced at the package level rather than left to a separately configured packet filter, so the protection holds even before any host firewall rules are evaluated.
When you choose to expose a service, the act of changing its bind address is the explicit step that takes you off the default-deny path. At that point the service’s own configuration, and the host firewall, govern who can reach it.
InterGenOS uses nftables (nft) as its host firewall, enabled by default with a default-deny posture. There is no firewalld or ufw; nftables is the single packet-filtering layer, and it mirrors the system’s overall stance of refusing inbound traffic you have not explicitly allowed.
Outbound: No Silent Egress
InterGenOS does not generate background network traffic on your behalf:
- No telemetry or analytics. Nothing in the base system reports usage, crashes, or metrics to any server.
- No auto-updates. Your system will not fetch or install software in the background. Updates happen only when you explicitly run them.
- No opt-out privacy. You do not flip toggles to stop the OS from sending usage data to the cloud, because it collects and sends none. (Network use that you initiate — package syncs, the one-time model download, services you start — is covered just below.)
When you observe outbound connections from an InterGenOS machine, they correspond to actions you took: syncing packages, running a browser, or starting a service yourself.
The local AI assistant follows the same rule. InterGen runs offline-first and local by default with zero telemetry; it does not transmit your prompts or data off the machine. The optional security scanner, InterGen Sentinel, defaults to local rules and a local model. Its cloud providers and the Phone-A-Friend (Frontier/Cloud Escalation) path are strictly opt-in, so no off-machine call to a frontier provider happens unless you turn it on.
Service Confinement Limits the Blast Radius
Even a service that does talk to the network runs inside tight confinement, so a compromise of one daemon does not become a compromise of the system:
- AppArmor mandatory access control. The default-ISO profiles (
intergen-mcp,pkm) ship in complain (learning) mode — logged, not blocked — graduating to enforce per-profile; the network-facing server packages on the mirror (nginx, apache-httpd, caddy, lighttpd, haproxy, memcached, valkey, postgresql, mariadb, influxdb, etcd) each ship an enforce-mode profile that activates when that server is installed. - Systemd sandboxing. System services are sandboxed with extensive isolation directives. Among the network-relevant ones,
RestrictAddressFamilieslimits services toAF_UNIX,AF_INET, andAF_INET6, denying access to lower-level or exotic socket families a service has no reason to use. These run alongside broader hardening such asNoNewPrivileges,ProtectSystem=strict,PrivateTmp,RestrictNamespaces, and a@system-servicesystem-call filter.
A network-facing service is confined to the narrow set of capabilities it actually needs. If it is breached, the sandbox limits where the attacker can go next.
The Package Mirror Is Signed End-to-End
The one network operation every InterGenOS machine performs routinely is talking to the package mirror, so that channel is verified cryptographically rather than trusted by transport alone.
Every time you sync with pkm, your machine verifies the package index signature against a release-signing subkey held on a hardware token and certified by the offline InterGenOS master key. When a package is downloaded, its SHA-256 hash is validated locally before installation. InterGenOS uses an index-only signature trust model in the current release, giving you a centralized, verifiable source of truth instead of relying on the network path being honest.
Credentials Are Never Default
No service shipped by InterGenOS comes with a blank or default admin password. Initial credentials are randomly generated or require manual setup during installation. A service that does become reachable on your network cannot be entered with a guessed factory password.
What This Means For You
- A new install exposes nothing to the network you did not ask it to expose.
- Making a service reachable is an explicit, auditable change to that service’s configuration.
- Even reachable services run confined, so a single breach stays contained.
- Local assistance stays local; any cloud escalation is opt-in.
- The package mirror, the one routine outbound dependency, is cryptographically verified rather than implicitly trusted.
Further Reading
- Hardening Baseline — the full set of out-of-the-box protections.
- Frequently Asked Questions — general questions about running InterGenOS.
Auditing & Logging
InterGenOS keeps a clear record of what happens on your machine, and keeps that record on your machine. Logs exist so you can understand and trust your system, not so a vendor can study you.
This page covers where logs live, what is recorded by default, and the privacy boundary that governs all of it.
The Privacy Boundary First
Auditing and logging on InterGenOS operate under one absolute rule: log data never leaves your machine on its own.
- No telemetry. InterGenOS collects zero analytics, crash reports, or usage statistics.
- No opt-out required. You do not flip toggles to stop your OS from sending data to the cloud. The data never leaves to begin with.
- No silent uploads. Logs are written locally and stay there until you choose to read, export, or delete them.
Everything below describes records held for you, on the system you control. See the Security Handbook overview for the full posture this rests on.
System Logs (journald)
InterGenOS ships GNOME 49 on Wayland over a systemd userland, so the system log is the systemd journal. The journal captures kernel messages, service output, boot records, and authentication events in a single queryable store.
Common queries:
# Everything since the last boot
journalctl -b

# Logs for a single service
journalctl -u <service-name>

# Follow new entries live
journalctl -f

# Only errors and above
journalctl -p err

# Scope an investigation by time
journalctl --since "2026-06-15 09:00" --until "2026-06-15 10:00"
What Is Audited By Default
Several InterGenOS security controls produce their own records, independent of any audit subsystem you might add later.
Mandatory Access Control (AppArmor)
On the default ISO, the two InterGenOS-authored AppArmor profiles (intergen-mcp, pkm) ship in complain (learning) mode: policy violations are logged rather than blocked, which is the signal used to tune them before they graduate to enforce per-profile. The server packages on the mirror (nginx, apache-httpd, caddy, lighttpd, haproxy, memcached, valkey, postgresql, mariadb, influxdb, etcd) each ship an enforce-mode profile that activates when that server is installed; when a confined server attempts an action its profile forbids, the action is denied and the denial is logged. These denial records are the primary signal that a service is behaving outside its expected envelope. See Sandboxing & Mandatory Access Control for how the profiles are structured.
Service Sandboxing (systemd)
System services run under extensive systemd isolation directives (NoNewPrivileges, ProtectSystem=strict, ProtectHome, PrivateTmp, syscall filtering, and more). When a sandboxed service is blocked from a restricted operation, the failure appears in that service’s journal entries, giving you a direct view of the confinement working as intended. The full directive baseline is listed on the Hardening Baseline page.
Boot and Integrity Verification
The signed Secure Boot chain and dm-verity integrity protection both record their verification results during boot. A failed signature check or an integrity mismatch is a boot-time event, not a silent fallback. See Encryption, Keys & TPM2 for how the boot chain validates each stage and signs Unified Kernel Images.
Authentication Events
Login attempts, privilege escalation, and session lifecycle events are recorded through the journal in the usual way for a systemd system, so you can review who accessed the machine and when.
Package and Supply-Chain Records
Auditing on InterGenOS extends to the software you install, not just the running system.
- Signed-index verification. Every
pkm synccryptographically verifies the repository index signature against a release-signing subkey held on a hardware token and certified by the offline master key, and each package’s SHA-256 hash is validated locally before installation. A verification failure is surfaced, not skipped. - Software Bill of Materials. InterGenOS publishes a deterministic SPDX 2.3 JSON SBOM for the Secure Boot shim — the trust anchor the rest of the boot chain is verified through — describing its exact build inputs and source hashes, giving you a machine-readable provenance record for the boot chain’s root of trust.
See the Registry-Trust Boundary page for the full trust model behind these checks.
Reading and Managing Your Logs
Because the journal is local and queryable, routine auditing is a matter of asking the right questions of journalctl. To review security-relevant activity, combine the priority and unit filters shown above; to investigate a specific incident, scope by time with --since and --until.
When you export logs to share with someone, you are making a deliberate choice. Nothing on the system does that for you.
Further Reading
- Security Handbook overview — the full default-on protection posture.
- Sandboxing & Mandatory Access Control — AppArmor profiles (complain by default, enforce for server packages) and systemd confinement.
- Encryption, Keys & TPM2 — boot-chain verification and signing.
- Registry-Trust Boundary — package index and hash verification.
- FAQ — general questions about the system.
InterGenOS exists to give you a machine you understand, can modify, and can trust. Local, honest logging is part of that promise.
Registry-Trust Boundary
InterGenOS draws a single, auditable line between what it will do on its own and what requires your explicit authorization. That line is the trust boundary, and it governs two things that are often confused: the packages that make up the system, and the local AI assistant that can act on the system on your behalf.
This page explains where the boundary sits, how it is enforced, and why it is shaped the way it is. The goal is a machine you understand, can modify, and can trust.
Two boundaries, one principle
There are two distinct trust surfaces in InterGenOS:
- The package boundary — how software gets onto the machine, and how its integrity is proven before and after it lands.
- The AI action boundary — what the local assistant is permitted to do without asking, what it must ask to do, and what it will never do at all.
Both follow the same principle: do not invent a new gate, inherit the one the
operating system already has. A person at a terminal can freely touch their
own files and needs sudo or PolicyKit for system-level changes. Mirroring that
model keeps the machine understandable, because you already know how it works.
The package boundary
InterGenOS is built from source. The build pipeline runs in 21 phases (from
validate through iso, with an optional publish step), producing the tiered
package set that makes up the system. The package set spans seven tiers —
toolchain, core, base, desktop, extra, compute, and ai — for a total in the neighborhood
of 1000+ packages. These counts drift as the system evolves; derive the live
figures from the repository rather than treating any number as fixed.
The package manager, pkm, is the consumer side of that pipeline. It installs,
removes, queries, and verifies pre-compiled binary archives (.igos.tar.gz) on
the live filesystem. Its trust model rests on three layers.
Provenance: the archive trust check
Before installation, pkm can verify an incoming archive against a trusted
index synced from the central repository. The pkm install command exposes an
--archive-trust flag that accepts three values: strict (the default when the
flag is omitted), loose, and repo-only. In its strict and repo-only
modes the archive’s SHA-256 hash is computed and checked against the trusted
available index (synced via pkm sync) before the package is allowed to
install. This is the inbound side of the boundary: an archive that does not match
the repository’s recorded hash does not cross it.
Auditability: the hybrid data model
pkm keeps two parallel records of system state so that nothing about what is
installed is hidden:
- A SQLite database at
/var/lib/igos/pkm.dbis the fast source of truth for queries and transactions. It records installed packages, every deployed file with its SHA-256 checksum, dependencies, an append-onlyhistorylog of every install, removal, and supersede, and specialized tracking for/etcconfiguration files. - Human-readable text manifests at
/var/lib/igos/packages/are generated alongside the database records so you can inspect what a package owns without any special tooling.
This duality gives you performance without giving up the ability to read the ledger yourself. Reads of this state are free; you never need to authorize asking the system what it has installed.
Integrity: content-hash verification after install
The boundary does not stop at install time. pkm verify recalculates the
SHA-256 hash of every installed file on disk and compares it against the hash
recorded in the database. This detects both accidental corruption and
unauthorized modification of installed binaries after the fact. The archive
check proves what came in; pkm verify proves it has not changed since.
Hardened deployment
Installation extracts to a staging directory using hardened tar flags
(--no-same-owner, --no-same-permissions), checks invariants such as
directory collisions and SUPERSEDES ordering, then deploys to the root
filesystem. Setuid and setgid bits are dropped during extraction and only
explicitly restored from the package’s own manifest metadata, so an archive
cannot smuggle in unexpected privileged binaries. The database record is then
written in a single atomic transaction.
The boot and integrity chain
The package boundary sits inside a broader signed chain. InterGenOS ships a
signed Secure Boot chain, UKI (Unified Kernel Image) signing, and dm-verity
integrity for the live system image. Together these establish that what boots is what
was built and signed, before pkm ever runs on the live system.
The AI action boundary
InterGenOS ships InterGen, a tiered, hardware-detected, offline-first local assistant built on an on-device model, with zero telemetry. Because the assistant can act on the machine, it sits behind the strictest version of the trust boundary.
InterGen evaluates every action on two orthogonal axes that are never conflated:
| Axis | Question | Mechanism |
|---|---|---|
| Privilege | Would a human need sudo for this, and what does it touch? | the gating model below |
| Content trust | Does data crossing the boundary carry injection inbound, or leak a secret outbound? | a separate scanner and provenance layer (ingress/egress scanning, InterGen Sentinel) |
Keeping these separate matters. The privilege axis decides whether an action is allowed; the content axis independently watches what a read returns or what an outbound message contains. A read of your own files is free on the privilege axis even while the content axis still inspects what that read returned.
Zones: where the action lands
The privilege axis classifies every target into one of three zones, mirroring
what a human would need sudo to write:
| Zone | What it is | Sudo to write? |
|---|---|---|
| Z1 — User space | Owned by you: ~/ and below, systemctl --user units, your own processes and files | No |
| Z2 — System config/state | Root-owned, ordinary administration: most of /etc, /usr, /opt, /var, system units, installed packages | Yes |
| Z3 — System-critical / trust anchor | Root-owned and part of the security and boot trust chain: /boot, EFI/UKIs, Secure Boot keys (MOK/db/KEK/PK), kernel and initramfs, dm-verity hashes, LUKS headers, the partition table, /etc/shadow, /etc/sudoers, /etc/pam.d, /etc/polkit-1 — plus InterGen’s own substrate | Yes, and these underpin the trust chain |
Operations and outcomes
Actions are classified as R (read/inspect), W (write/modify), or X (execute/state-change). Each combination of zone and operation resolves to one of three outcomes:
| Z1 User space | Z2 System config/state | Z3 System-critical / InterGen-self | |
|---|---|---|---|
| R | FREE | FREE | listing → FREE; secrets → AUTH-PROMPT |
| W | FREE | AUTH-PROMPT | FORBIDDEN |
| X | FREE | AUTH-PROMPT | FORBIDDEN |
- FREE — InterGen acts immediately, no prompt. All reads of non-secret data, and everything in your own space.
- AUTH-PROMPT — InterGen triggers the operating system’s real authorization (pkexec/PolicyKit), phrased plainly, for example: “InterGen wants to restart Bluetooth. That needs admin rights. Authorize?” Your password is the gate and the OS enforces it. There is no opaque internal “governance card.”
- FORBIDDEN — InterGen will not do it, and says so transparently (see below).
Reads are free even of system state: asking “what’s my system status?” or
running pkm list never requires authorization. A parallel “autonomy tier” that
blocks benign reads is exactly the anti-pattern this model exists to replace.
Reading a secret such as /etc/shadow is AUTH-PROMPT, not forbidden, because a
human can sudo cat their own shadow file. InterGen does not pretend to be
stricter than the operating system. Whether that content may then leave the
machine is the separate content-trust axis.
The self-protection keystone
InterGen’s own files are classified Z3, which means InterGen may never modify its own substrate. This closes one of the most dangerous attack surfaces: a capable adversary’s whole goal is to talk the assistant into rewriting its own gate, model, manifest, or guardrails. If InterGen’s substrate is write-forbidden to InterGen, then even a flawless prompt injection cannot make InterGen weaken InterGen. Only you, acting manually and outside the assistant, can change those files.
The forbidden-to-self substrate includes InterGen’s code, its GNOME Shell panel
extension, its signed model pins (models-manifest.json), the verified
root-owned model store, its daemon units and PolicyKit policy, and its
privileged runner. Reading this code is fine; changing it is not.
Transparent refusal
When InterGen refuses a Z3 action, it is open about it and hands control back to
you. It states plainly what it will not do and why — it protects the boot and
security trust chain, including its own integrity — and confirms that you can do
it yourself. There is never a silent failure, a hidden refusal, or internal
jargon. The intent is captured by its own wording: “I won’t modify the system’s
boot and security files. That’s the trust chain that keeps this machine yours.
It’s your machine, so you can do it yourself with sudo if you intend to; I
just won’t be the one to touch it.”
InterGen Sentinel and the content axis
The content-trust axis is handled by a separate mechanism, InterGen Sentinel, a pluggable security scanner. By default it runs on Local-Rules and a Local-Qwen model, keeping scanning offline. It can additionally use six opt-in cloud providers — Claude (Anthropic), Gemini (Google), Copilot (Microsoft), ChatGPT (OpenAI), Grok (xAI), and DeepSeek — none of which are engaged unless you choose to enable them.
This opt-in escalation path is Phone-A-Friend (Frontier/Cloud Escalation): when local scanning wants a stronger second opinion, and only with your consent, it can consult a frontier model. The default posture is fully local with zero telemetry; the boundary to any cloud provider is one you cross deliberately, not one InterGenOS crosses for you.
Where the code and the model disagree
The gating model is the authoritative specification, and the code is held to it: where the implementation and the model diverge, the model is the reference and the implementation is corrected to match it. A single zone classifier and operation classifier feed one outcome resolver, giving one place to audit every decision, and FORBIDDEN is always checked before any authorization prompt is ever raised.
See also
Self-Hosting Securely
InterGenOS is built from source and ships with a package manager (pkm) that
trusts a signed index, not a transport layer. That design is what makes
self-hosting your own binary mirror practical: you can stand up a repository
your machines pull from, sign it with keys you control, and let every client
verify it the same way the official mirror is verified.
A self-hosted mirror should leave you with a machine you understand, can modify, and can trust, which means the trust boundary has to be something you can inspect by hand, not a black box.
The trust model
The integrity boundary is the GPG signature on the package index
(InterGenOS.db), not TLS. TLS protects the transport; it does not prove
who built the index. A self-hosted mirror inherits this model:
pkm syncfetchesInterGenOS.dband its detached signature (InterGenOS.db.sig), verifies the signature against the public key in the client’s trust store, and only then trusts the per-package SHA-256 hashes inside the index.pkm installdownloads an archive and verifies its SHA-256 against that trusted index before deploying anything.
Because the signature is the boundary, a mirror can sit behind any web server or CDN. A compromised transport can withhold or stale an index, but it cannot forge one without the signing key.
Key handling
Keep the signing material off the mirror host. The recommended posture, and the one the official mirror uses, is:
- An offline master key that certifies signing subkeys and never touches a networked machine.
- One or more signing subkeys held on hardware tokens. Signing requires the token to be physically present and unlocked (PIN plus touch), so a remote compromise of either your workstation or the mirror host cannot produce a signature on its own.
- A backup signer on a second token, so loss of the primary does not lock you out of publishing.
Publishing writes the signed tree to the mirror over SSH using a key authorized only for that account, with no root step. The signing step happens on your workstation, where the token lives; the mirror host only ever receives already-signed files.
Building the index
pkm reads a gzipped-JSON index that lists each package and its SHA-256.
Generating it is a single operation against your directory of built
.igos.tar.gz archives, producing InterGenOS.db. The signature is then a
detached, armored GPG signature over that file
(gpg --detach-sign --armor), written as InterGenOS.db.sig.
Index generation is not byte-stable: regenerating the index produces a new
file, which voids any prior signature. Sign the exact InterGenOS.db you
intend to publish, and never regenerate after signing. If you need to re-sign
without rebuilding, sign the existing file directly with the subkey
fingerprint and skip the regenerate step.
Publishing without a downtime window
The official publish flow is worth copying because it never exposes a half-written repository:
- Stage. Rsync the signed tree into a fresh, per-publish staging directory (timestamped) under the architecture path, alongside the source archives.
- Promote atomically. Repoint the
currentsymlink with a single atomic rename (ln -sfnto a.newname, thenmv -T). On a journaling filesystem this is one syscall, so there is no 404 window: in-flight clients finish against the old target or restart against the new one. No web-server restart is needed; the server serves the swapped symlink on the next request. - Keep the previous set. Archive the prior target rather than deleting it, so a bad publish can be rolled back by flipping the symlink back.
Always dry-run first. A dry run validates that the signing key is available, generates the index in place, and prints the rsync and promote it would perform, without writing to the mirror. Confirm the archive count and staging path look right before the real run.
Pointing clients at your mirror
Clients read repository settings from /etc/pkm/repos.conf. Two settings
govern the security posture:
- Index-signature verification is mandatory and unconditionally on.
pkm syncrequires a valid signature over the index on every sync, and an explicitgpg_verify = falseis refused at config load (a security knob that silently did nothing would be worse than none). Serve a signed index from your first publish — clients fail-closed on any unsigned or tampered index, so an unsigned mirror will not sync. - The client’s trust store holds the public key your index is verified against
(
/etc/pkm/trusted.gpg). Distribute only the public key; the private signing material stays on your token.
For installs, pkm also exposes archive-trust modes (strict / repo-only)
that check each downloaded archive’s SHA-256 against the synced index before
installation. Self-hosters should run a strict mode so a mirror that serves a
mismatched archive is rejected at the client.
Verifying your own mirror
A self-hosted mirror is only as trustworthy as your ability to audit it. Two layers:
Automated, ongoing. Run a periodic verification pass on the mirror host
that checks the index signature, walks every file’s SHA-256 against the index,
and scans for stray files not listed in the index, alerting on any drift. Run
it manually right after your first publish to confirm the live set verifies;
it stays red until a current/ target exists.
Manual, by anyone. Every step is reproducible by hand against your published public key, with no opaque steps:
curl -O https://<your-mirror>/x86_64/current/InterGenOS.db
curl -O https://<your-mirror>/x86_64/current/InterGenOS.db.sig
gpg --verify InterGenOS.db.sig InterGenOS.db   # signed by your subkey, certified by your master
# then sha256sum any archive against its entry in the index
If those two commands succeed, the index is authentic and any archive you pull can be checked against it. That is the whole trust chain, and it is the same chain whether you pull from the official mirror or your own.
Append-only audit log
A publish can append the signed index to an append-only transparency log, so the history of what you published, and when, is auditable after the fact, independent of the live mirror state. Self-hosters operating a mirror for more than one machine should keep such a log; it turns “what did I serve last Tuesday” from a guess into a record.
Where this fits
- For how
pkminstalls, verifies, and supersedes packages on a client, see the package manager component documentation. - For installing InterGenOS itself with Forge, see ../install/forge-guide.md.
- For common questions, see ../start-here/faq.md.
Verify It Yourself
The InterGenOS promise is not “trust us.” It is “check us.” Security you cannot verify is a marketing claim; security you can verify is a property of your machine. Every guarantee this wiki makes is meant to be checkable — by you, on your own hardware, with a command whose output you can read.
This section gathers those checks in one place. Each page pairs a claim with the exact command that proves it and the output a healthy system shows, so you never have to take our word for anything.
In this section
- First Checks After Install — the five-minute, run-it-in-order ritual for a fresh install: ten checks, each with the exact command, the output a healthy system shows, and what it means if yours differs. Start here.
- Security Verification — the per-claim reference: Secure Boot, the signed boot chain, dm-verity root integrity, per-file package verification, signed-mirror trust, and kernel lockdown — each with the command that proves it.
These checks lean on two reference pages that are evidence in their own right:
- Reproducibility & Verification — rebuild from source and confirm the result matches the published artifact, byte for byte. The strongest possible answer to “is the binary really built from this source?”
- Package & Config Reference — the complete, generated inventory of what the system is made of: every package, tier, and the configuration behind it.
The published SBOM
InterGenOS publishes a Software Bill of Materials for the Secure Boot shim — the trust anchor the whole boot chain is verified through. It is a deterministic SPDX 2.3 JSON document, carried in the source tree under docs/sboms/ and generated by scripts/shim-sbom-gen.py, recording every input that goes into shimx64.efi: the pinned upstream source commit, the digest-pinned build image and package snapshot, the embedded InterGenOS Secure Boot CA certificate, the SBAT vendor entry, and the shim binary’s own SHA-256 and size. Because generation is deterministic, you can regenerate it from the same checkout and diff it against the published copy — the SBOM is itself a verifiable artifact, not an attestation you take on faith. Full detail: Reproducibility & Verification.
There is a second SBOM, covering the installation image rather than the boot chain’s trust anchor. R001 publishes an SPDX 2.3 JSON inventory of every package on the image at https://repo.intergenos.org/iso/intergenos-r001.sbom.spdx.json, served beside the image itself, with a SHA-256 recorded for each component that carries one. Like the shim document, it is a file you can fetch, read, and check rather than a claim you have to accept.
If a check on your machine does not show what these pages describe, that is a real signal — see Troubleshooting, and tell us.
First Checks After Install
You just installed InterGenOS. Before you trust it with anything, make it prove itself — in about five minutes, with commands you can read.
This page is a ritual, not a reference. Run the checks in order, top to bottom, on your own machine, right after your first boot. Each one shows the exact command, what a healthy system prints, and what it means if you see something else. None of them change anything — they read state and report it. (A few need sudo to read privileged state.)
The companion page, Security Verification, is the per-claim reference — it explains the mechanism behind each guarantee. This page is the fast pass you run first. When a check here makes you want the “why,” that page has it.
A healthy fresh install passes every check below. If one does not match, that is a real signal worth chasing — see the “If you don’t see this” note on each, and Troubleshooting.
1. You are actually running InterGenOS
Start at the bottom: confirm the system identifies as what you installed.
$ cat /etc/os-release
You should see NAME="InterGenOS", ID=intergenos, and a VERSION_ID:
NAME="InterGenOS"
PRETTY_NAME="InterGenOS R001.2 (Revival)"
ID=intergenos
VERSION_ID=r001.2
The release name in PRETTY_NAME and VERSION_ID tracks the release your image
was built from (the original R001 image, published 2026-08-16, reports
1.0-dev), so those two values
will differ across releases — NAME and ID are the stable checks.
If you don’t see this: you are not booted into InterGenOS — you may have booted the installer ISO or another OS. Check your firmware boot order.
2. Every installed file matches the signed release
This is the headline check — the one that proves the files on your disk are exactly the files in the signed release, with nothing swapped, corrupted, or silently altered since install.
$ sudo pkm verify --all
Verified (strict): 831 ok, 0 with issues; 11 expected-absent: 9 ch8-la-sweep, 2 volatile-run
You should see every package ok with 0 issues. pkm recorded a SHA-256 for every file it installed and re-checks them here. The expected-absent entries are files pkm knows are intentionally gone, reported by named class (for example ch8-la-sweep, the Chapter-8 libtool-archive sweep, or volatile-run) — pkm tracks them so they are never mistaken for tampering. The exact totals track your installed set (yours will differ from the numbers above; what matters is 0 with issues).
If you don’t see this: a non-zero “with issues” count means a tracked file changed. That can be a legitimate local edit to a config file — pkm verify will name the file, so you can tell. An unexplained binary mismatch is a real signal; do not ignore it.
3. Your software comes from a signed source
Updates should only ever come from a package index signed by the InterGenOS release key — a swapped or tampered mirror is rejected, not silently trusted.
$ sudo pkm sync
Hit:       intergenos-current   https://repo.intergenos.org/x86_64/current
Index:     InterGenOS.db
Signature: Good — InterGenOS release subkey ✓
You should see Signature: Good. When pkm fetches the index it verifies the signature against a release-key fingerprint pinned into pkm itself — so even a mirror that presents a different, valid-looking key is refused. On your machine the Signature line names the specific signing subkey by its short key id (shown generically above); you can confirm that key matches the published release key.
If you don’t see this: a signature failure means the index could not be trusted — pkm refuses it rather than installing from it. A persistent failure on the official mirror is worth reporting.
4. The kernel is locked down and enforcing
The running kernel should be in integrity lockdown, refuse unsigned modules, and carry the full security-module stack.
$ cat /sys/kernel/security/lockdown
none [integrity] confidentiality
$ cat /sys/module/module/parameters/sig_enforce
Y
$ cat /sys/kernel/security/lsm
lockdown,capability,yama,bpf,landlock,apparmor,ima,evm
You should see lockdown engaged at [integrity] (the brackets mark the active mode), sig_enforce = Y (unsigned kernel modules are rejected), and the LSM line listing lockdown, landlock, apparmor, ima, evm among others. Integrity lockdown is forced on by the InterGenOS kernel configuration regardless of Secure Boot state, so you see [integrity] here even on a fresh install with Secure Boot off (check 7).
If you don’t see this: [none] selected for lockdown, or sig_enforce = N, means the kernel is not enforcing its integrity guarantees — a significant deviation from a stock install.
5. Nothing failed to start
A clean boot leaves no failed services behind.
$ systemctl --failed
0 loaded units listed.
You should see an empty list — zero failed units.
If you don’t see this: each failed unit is named; systemctl status <unit> and journalctl -u <unit> tell you why. A failed security unit (firewall, auditing) matters more than a failed cosmetic one.
6. The firewall is closed by default
InterGenOS ships a default-deny firewall: inbound connections are dropped unless you open them. Nothing listens to the network on your behalf without you choosing it.
$ sudo nft list ruleset | grep 'hook input'
        type filter hook input priority filter; policy drop;
You should see the input chain with policy drop — the default is to reject inbound traffic. The shipped ruleset (/etc/nftables.conf, loaded by nftables.service at boot) permits only loopback, established/related replies, and the ICMP needed for the network to function; SSH and every other inbound port are closed until you open them yourself.
If you don’t see this: an empty result, or an input chain without policy drop, means the default-deny policy is not loaded — check systemctl status nftables. (The shipped ruleset also carries policy drop on the forward chain and policy accept on the output chain — outbound is allowed by design; the input line above is the one that matters here. If you changed the firewall, this reflects your change.)
7. Secure Boot — your state, and how to turn it on
This is the check most likely to surprise you, so read the result carefully.
$ mokutil --sb-state
SecureBoot disabled
You should see SecureBoot disabled on a fresh install — and that is expected, not a failure. InterGenOS provisions a fully signed boot chain (shim → GRUB → Unified Kernel Image) on every install, but ships Secure Boot enforcement off by default. Turning it on is a deliberate, one-time Machine Owner Key (MOK) enrollment you perform — so the key trusting your boot chain is yours, not a vendor’s. The full walkthrough is in Verified Boot & Secure Boot.
You can confirm the firmware’s own view, including TPM and measured-boot support:
$ bootctl status | head -8
systemd-boot not installed in ESP.
System:
      Firmware: UEFI ...
   Secure Boot: disabled
  TPM2 Support: yes
  Measured UKI: yes
bootctlreportssystemd-boot not installed— that is correct. InterGenOS boots via shim → GRUB, not systemd-boot; the useful part here is the firmware System block (Secure Boot state, TPM2, Measured UKI).
After you enroll your MOK, mokutil --sb-state reports SecureBoot enabled and the chain is enforced. Re-run check 10 then.
8. Disk encryption — if you chose it at install
If you selected full-disk encryption in FORGE, your root filesystem sits on a LUKS2 volume that unlocks at boot.
$ sudo cryptsetup status cryptroot
/dev/mapper/cryptroot is active and is in use.
  type:    LUKS2
  cipher:  aes-xts-plain64
You should see LUKS2 and active. The FORGE default mapper name is cryptroot; a custom install may use a different name.
If you don’t see this: is inactive (or no crypt device in lsblk) means this install is not encrypted — expected if you did not choose FDE. Encryption is an install-time choice; see Disk Encryption & LUKS to understand the trade-off.
9. Know your assistant’s state — and how to turn it off
The InterGen assistant is a per-user service. You should always be able to see whether it is running, and you are always in control of whether it runs at all.
$ systemctl --user is-active intergen.service
$ systemctl --user is-enabled intergen.service
You should see the state you chose at install: active / enabled if you opted the assistant in, or inactive / disabled if you did not. The assistant is local-only — it does not phone home — and it is yours to disable.
To turn it off (or constrain it): see Disabling & Constraining the Assistant, the authoritative procedure. You can stop it for this session, disable it from starting, or remove the package entirely.
10. Confirm the boot chain verified this boot (after enrollment)
This last check is for after you have enrolled your MOK and enabled Secure Boot (check 7). It is the difference between “Secure Boot is enabled” and “Secure Boot verified this exact boot and nothing failed.”
$ sudo journalctl -b | grep -iE 'secure boot|sb_verify|mok'
You should see the signature-verification events for the current boot with zero failures. With Secure Boot off (the default), this shows only Secure boot disabled and the firmware’s own certificate load — which is why this check belongs after enrollment.
If you don’t see this: verification failures in the log after you have enabled Secure Boot mean the enforced chain rejected something — stop and investigate before trusting the boot.
You’re done — and you didn’t take our word for any of it
If all the checks that apply to your install passed, you have personally confirmed: the files match the signed release, software comes from a signed source, the kernel is enforcing, the firewall is closed, your boot and encryption posture are what you intend, and your assistant is under your control. That is the whole point — a guarantee you can check is a property of your machine, not a promise from us.
Where to go next
- Security Verification — the per-claim reference behind each check above, in depth.
- Reproducibility & Verification — go further: rebuild a package from source and confirm it matches the published artifact.
- Verified Boot & Secure Boot — enroll your MOK and turn on enforcement.
- Security Handbook — the design behind every guarantee you just verified.
Security Verification
InterGenOS asks you to verify, not trust. Every security claim on this site is something you can check yourself, on your own machine, with a command whose output you can read. This page lists the core claims, the command that proves each one, and what a healthy system shows.
Security is not first. It is only — and a security claim you cannot check is just marketing. So check.
The project’s AI seats review this code under Anthropic’s Cyber Verification Program (July 2026) and OpenAI’s Daybreak Blue / Trusted Access for Cyber program (September 2026) — verified access for security work on systems we are authorized to protect. It changes nothing on this page: every claim below is still yours to check.
Run these as yourself; a few need
sudo. None of them change anything — they read state and report it.
The boot chain is signed — and Secure Boot enforces it once you enable it
Claim: the machine boots a signed chain (shim → GRUB → Unified Kernel Image), anchored to your Machine Owner Key. Secure Boot enforcement is validated end to end — now on real hardware, not only in VMs — and one enrollment away: the signed chain is provisioned on every install, but enforcement ships off by default, and turning it on is a one-time MOK enrollment you perform yourself.
$ mokutil --sb-state
$ bootctl status
mokutil --sb-state reports whether Secure Boot is enabled; bootctl status shows the active boot loader, the signed entries, and the firmware’s Secure Boot state. On a default install mokutil --sb-state reports Secure Boot disabled — that is expected: the signed chain is in place, but enforcement ships off. After the one-time enrollment at first boot it reports enabled, with your own Machine Owner Key trusting the chain. The full walkthrough is in Verified Boot & Secure Boot.
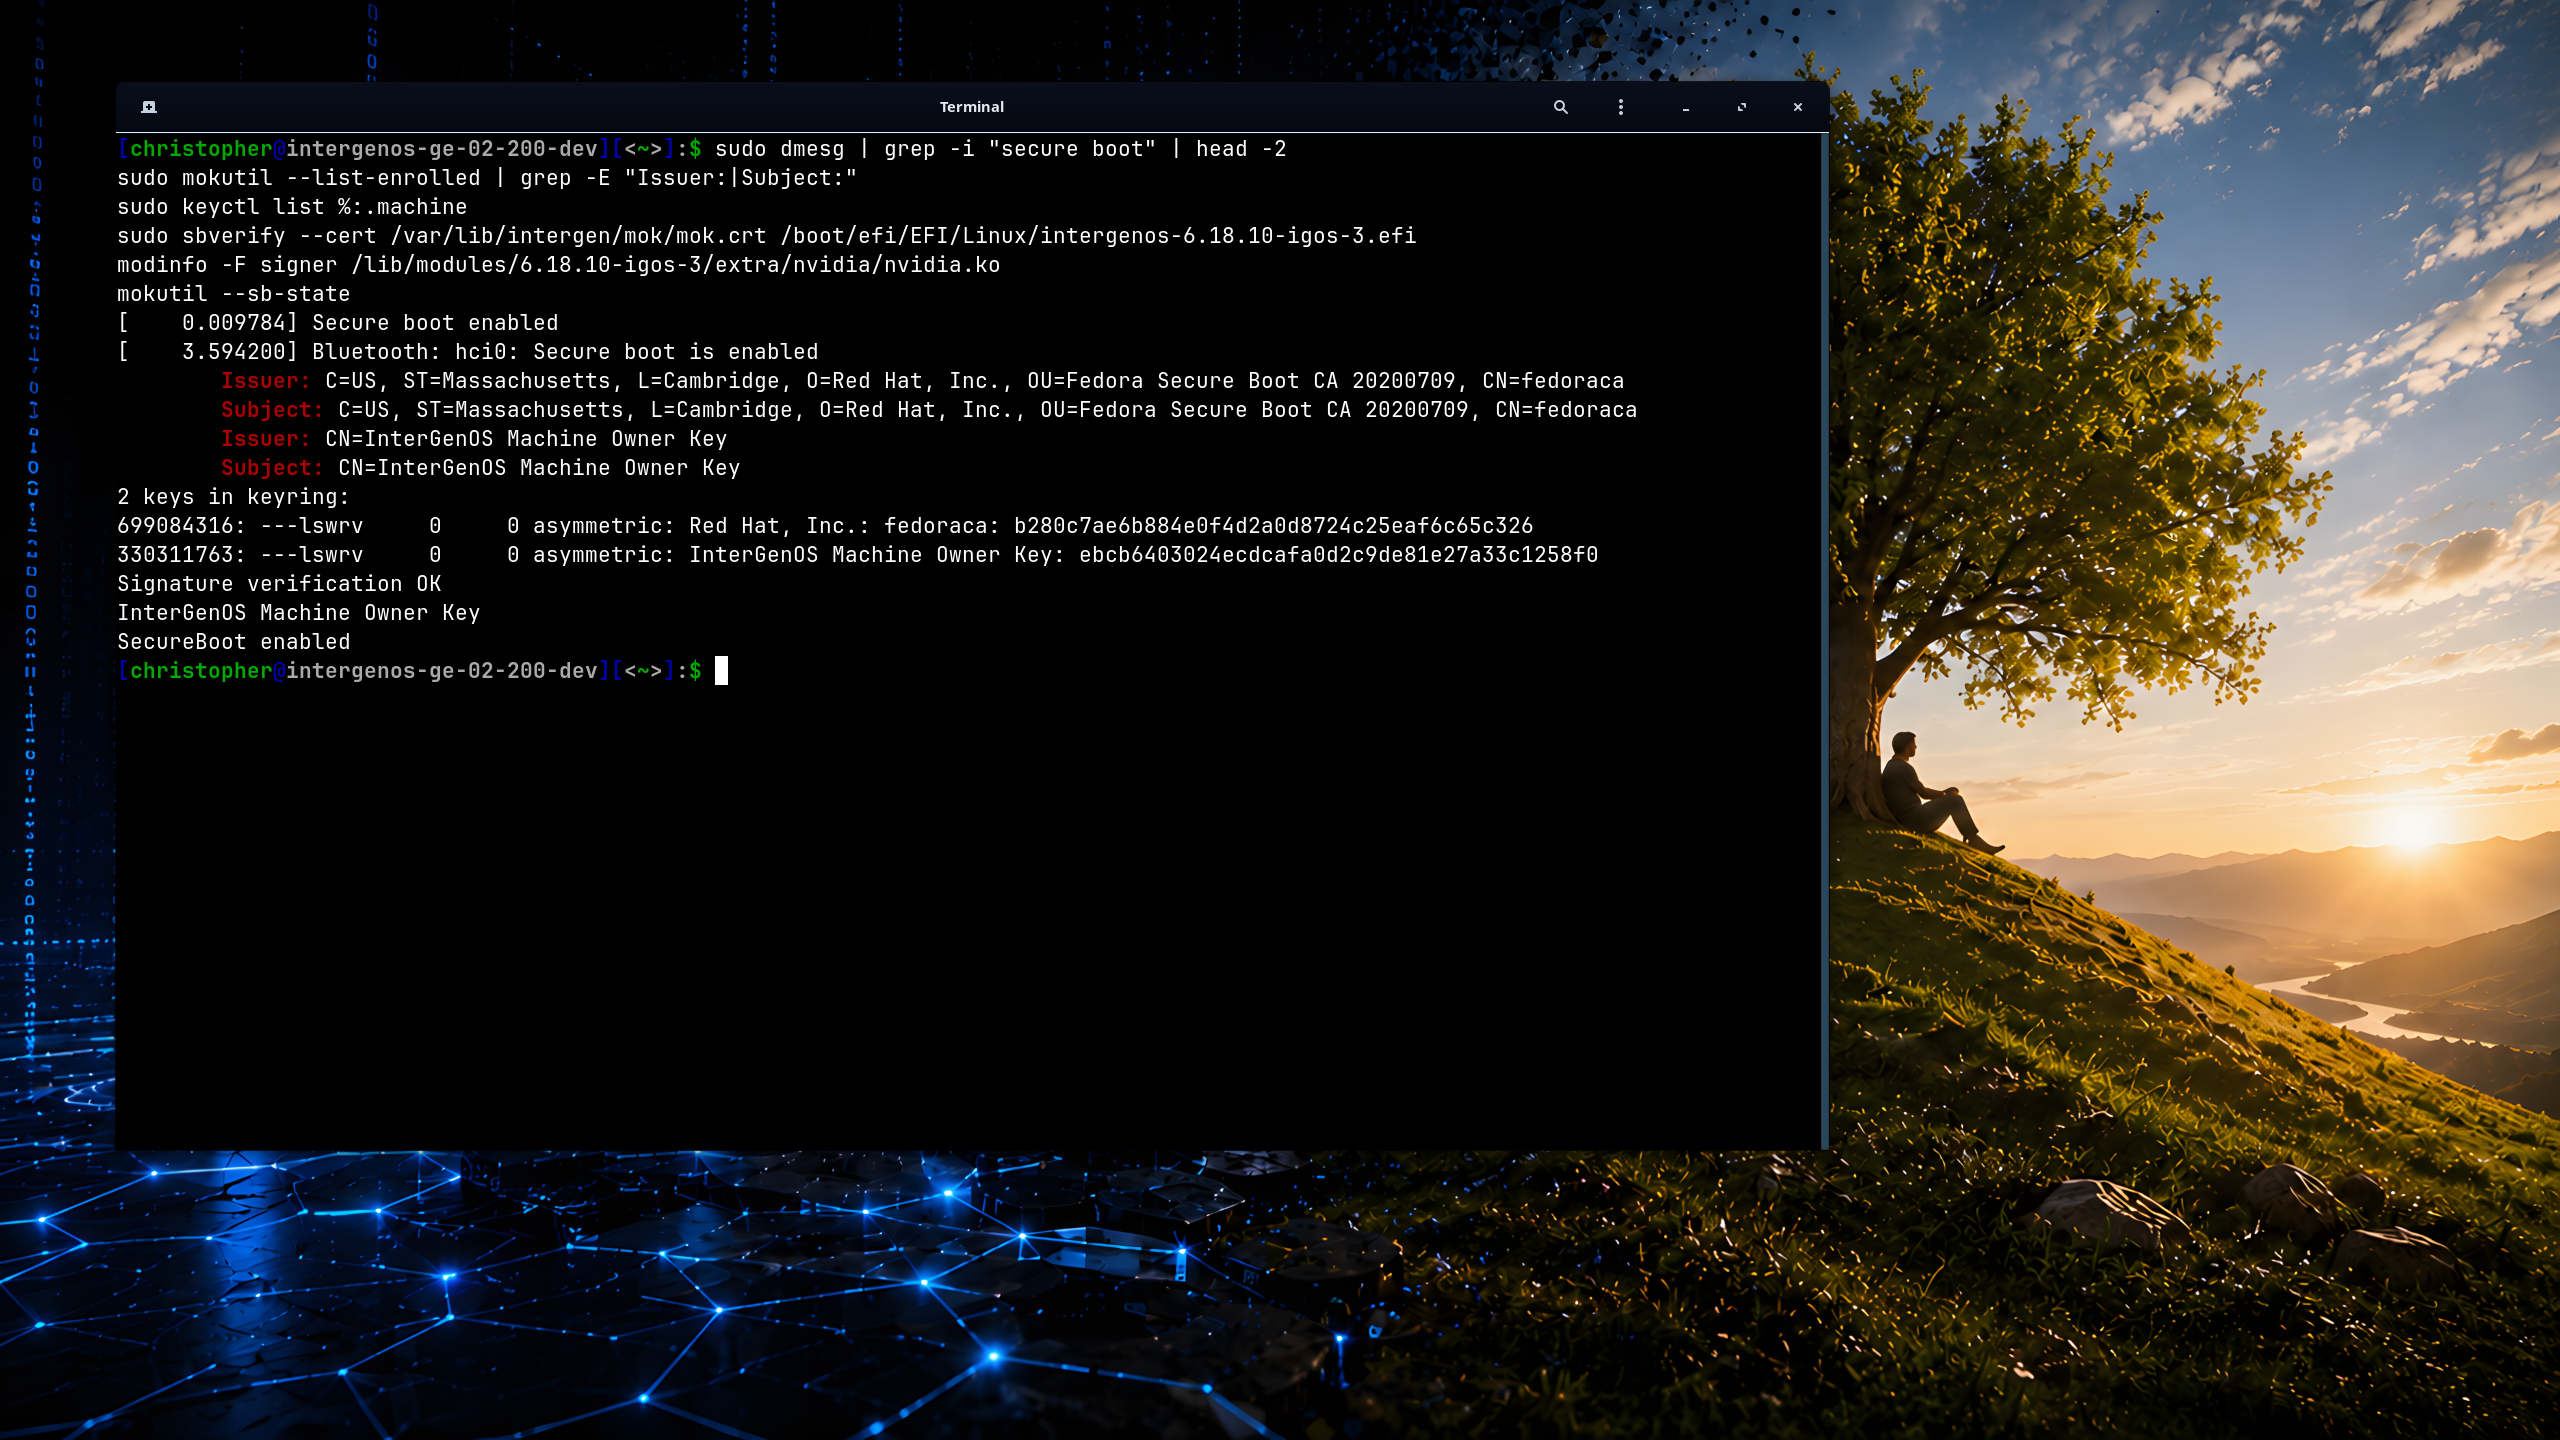
The whole claim in one frame, on real hardware — an ASUS ROG laptop with an NVIDIA GeForce RTX 3070: InterGenOS booted under enforced Secure Boot, the kernel confirming it nine milliseconds in, the chain anchored to your own enrolled Machine Owner Key (CN=InterGenOS Machine Owner Key) alongside the shim’s Fedora CA, the signed Unified Kernel Image verifying against your key, and even the third-party NVIDIA driver loaded — because it, too, was signed by that same key. Enforcement ships off by default; this is the state after you enable it. Every line is something you run and read yourself.
The same matrix has been confirmed with full-disk encryption active — Secure Boot enforcing the chain while a LUKS2-encrypted root unlocks behind it, GRUB carrying its own SBAT record so the chain Secure-Boots with no hand-patching. That combined proof, and the boot itself, are shown on the Verified Boot & Secure Boot page. Secure Boot is off by default; turning it on is the one-time MOK enrollment described there.
The boot chain verified end to end
Claim: verification actually happened at boot — it is not just configured, it ran, and nothing failed.
$ journalctl -b | grep -iE 'sb_verify|mok|verification'
A healthy boot shows the signature-verification events with zero failures. This is the difference between “Secure Boot is enabled” and “Secure Boot verified this exact boot.”
The root image is integrity-sealed (dm-verity)
Claim: the live system image cannot be tampered with — its integrity is sealed by a cryptographic root hash baked into the signed boot image, and checked before it is used.
Run these on a booted live ISO (the seal protects the live medium — see below for why an installed system has no verity device to inspect):
$ sudo veritysetup status igos-root
$ cat /proc/cmdline | tr ' ' '\n' | grep verity
$ journalctl -b -k | grep -i verity
The sealed igos.verity.roothash lives on the kernel command line inside the signed UKI, so the hash that gates the image is itself covered by the boot signature. At boot, the init path verifies the squashfs against that hash before mounting it — a mismatch stops the boot rather than running a modified image. dm-verity seals the read-only image that the live ISO and the installer boot; once InterGenOS is installed to a writable root, per-file integrity is enforced instead by the signed UKI plus pkm verify (next section) — so on an installed system, integrity is proven by signature and content hash rather than by a dm-verity device.
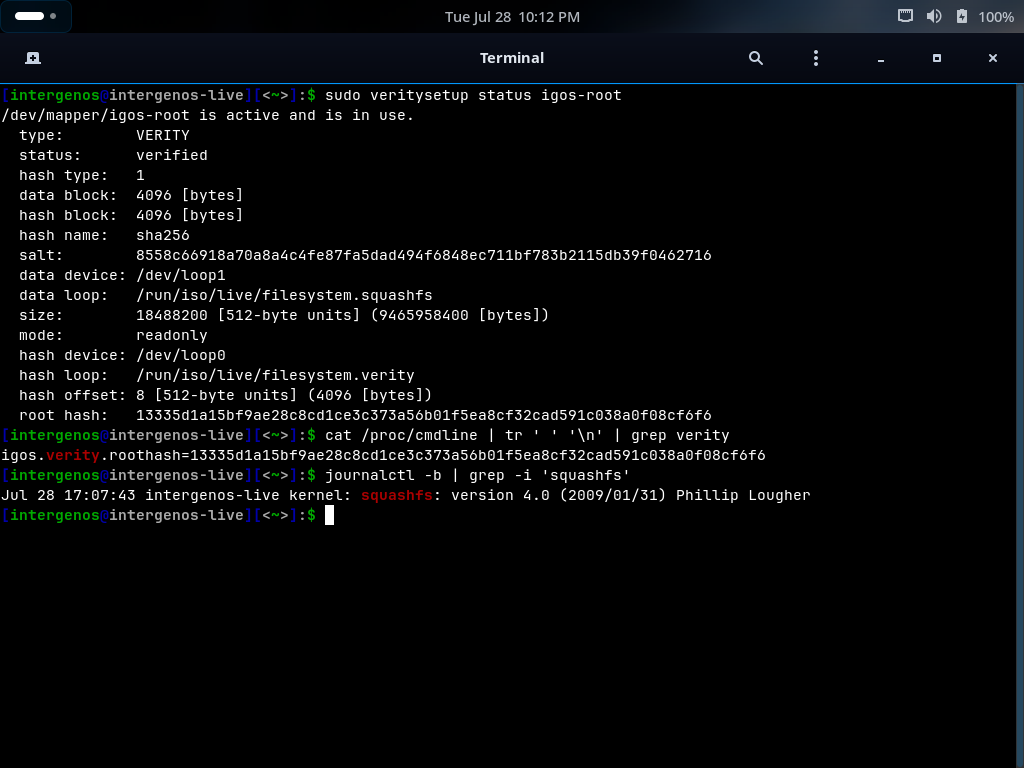 The seal, verified end to end on a live boot:
 veritysetup status igos-root reports status: verified over the read-only squashfs, and its root hash is byte-identical to the igos.verity.roothash value on the kernel command line — the command line that the UKI signature covers.
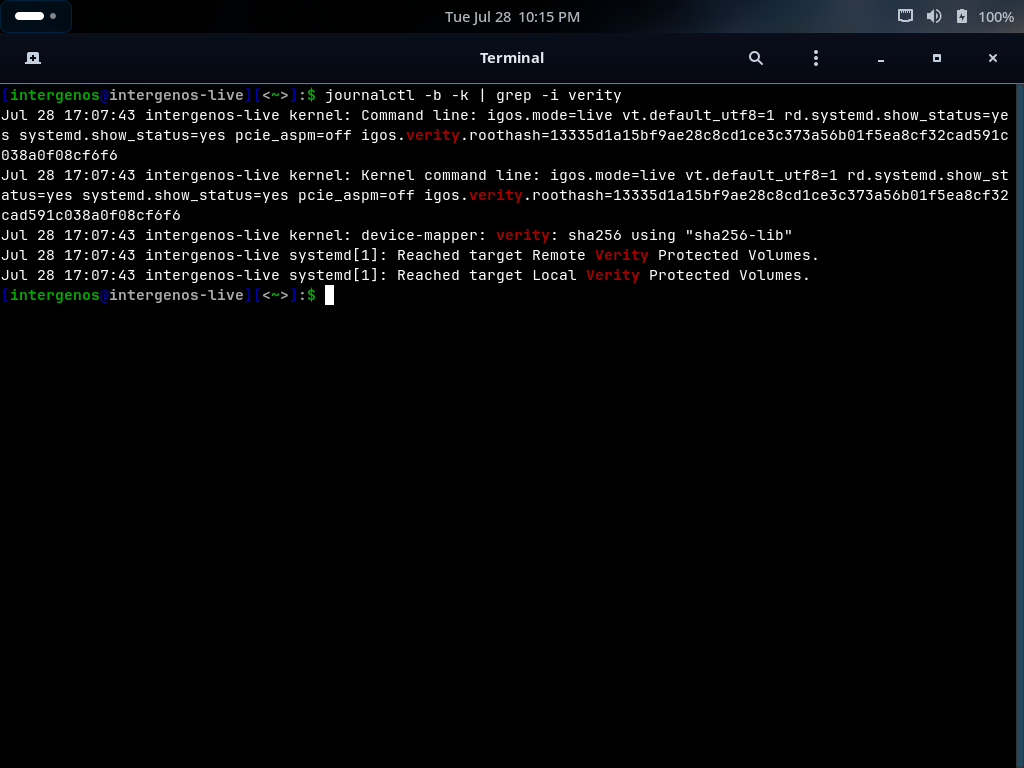 The kernel’s own record of the same boot: the command line carrying the sealed root hash, and
 device-mapper: verity: sha256 initializing the verified device. The two systemd “Reached target … Verity Protected Volumes” lines also matched by this grep are generic unit-ordering messages that appear on any systemd machine — the evidence of the seal is the command-line and device-mapper lines, not those.
Every installed file matches what was published
Claim: the files on disk are exactly the files in the signed release — nothing was swapped, corrupted, or silently altered.
$ pkm verify --all
Verified (strict): 831 ok, 0 with issues; 11 expected-absent: 9 ch8-la-sweep, 2 volatile-run
pkm records a SHA-256 for every file it installs and re-checks them on demand. A clean system reports every package ok with 0 issues. (The expected-absent entries are files a package’s own post-install step intentionally removes — pkm tracks them so they are never mistaken for tampering or loss; the exact totals track your installed set.) This is the installed-system analogue of the install-time integrity gate: the gate proves what was written, pkm verify proves it stayed that way.
That install-time gate is the very first thing Forge does — before it writes a single file, it verifies the archive set against the release-signed manifest:
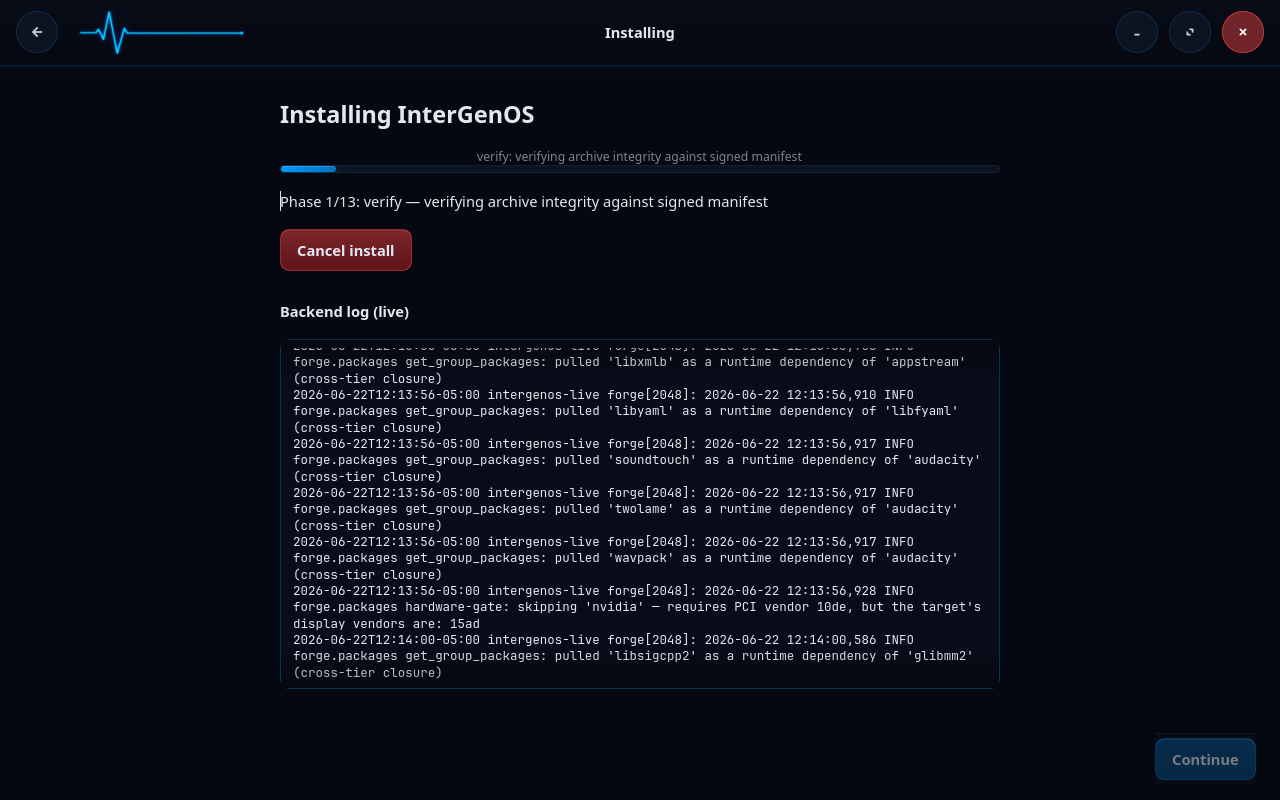
The package index is signed by the release key
Claim: updates come only from a package index signed by the InterGenOS release key — a swapped or tampered mirror is rejected, not silently trusted.
$ pkm sync
When pkm syncs the index it verifies the index signature with gpgv against a release-key fingerprint pinned into pkm itself — so even a mirror that presents a different valid-looking key is refused. A good sync prints Signature: Good — … ✓, naming the signing subkey; internally that is a gpgv VALIDSIG check against the pinned fingerprint, and you can confirm the fingerprint matches the published release key.
The kernel is locked down and enforcing
Claim: the running kernel is in integrity lockdown, refuses unsigned modules, has the full security-module stack active, and ships a default-deny firewall.
$ cat /sys/kernel/security/lockdown          # none [integrity] confidentiality — the bracketed mode is active
$ cat /sys/module/module/parameters/sig_enforce   # Y — unsigned modules rejected
$ sudo nft list ruleset | head               # input policy drop (default-deny)
$ systemctl --failed                         # 0 loaded units failed
A healthy InterGenOS system shows lockdown engaged at integrity, sig_enforce=Y, the LSM stack (lockdown / IMA / landlock / AppArmor) active, an nftables ruleset whose input policy is drop, and no failed units. These are the steady-state guarantees the Security Handbook describes — here you confirm them yourself.
Where to go next
- Reproducibility & Verification — rebuild a package from source and confirm it matches the published artifact, byte for byte.
- Package & Config Reference — the full package set, tiers, and configuration the system is built from.
- Security Handbook — the design behind each guarantee you just verified.
- Verified Boot & Secure Boot — the MOK, signed GRUB, dm-verity, and UKI-signing model in depth.
Desktop & Daily Use
InterGenOS ships GNOME 49 on Wayland as its desktop. It is modern, fast, and built for a machine you understand, can modify, and can trust. There is no telemetry, no app-store analytics, and nothing that installs updates on its own.
This section covers what you see and use every day: the desktop environment, the applications that come installed, how you add more, the local AI assistant, and the deliberate omissions that define the system’s posture.
The desktop environment
The default desktop is GNOME 49 running on the Wayland display protocol. X11 applications run through Xwayland automatically when needed.
The visual experience is tuned for the InterGenOS look: the first-party InterGenOS icon theme by default (the distribution’s own mark set, falling back to Adwaita and hicolor for anything it does not cover), the Bibata-Modern-Classic cursor, a system-wide prefer-dark color scheme, and Inter for UI and document typography paired with JetBrains Mono for terminal and code surfaces. Papirus-Dark and a Cybernetic Blue theme ship as selectable alternates.
Wayland gives each application per-window isolation: one Wayland application cannot key-log another or scrape another window’s pixels. That boundary stops at XWayland, the compatibility layer that runs applications not yet ported to Wayland: X11 clients share one X server and can read each other’s input and window contents, exactly as they always could on X11. The isolation holds between Wayland-native applications, and between the XWayland clients as a group and everything else. It also handles HiDPI, variable refresh rate, mixed-DPI multi-monitor, and touch and gesture input correctly, because the protocol was designed for them.
See Graphical Session (Wayland/X11) for the full breakdown of the session, the Wayland posture, and X11 compatibility.
KDE Plasma, Xfce, and Sway as switchable desktop environments are planned and not yet shipped. The current release ships GNOME only.
What’s installed
The default install provides a fully functional workstation out of the box: Firefox ESR, Files (Nautilus), GNOME Text Editor, GNOME Terminal, Image Viewer (Loupe), Settings, Calendar, Contacts, the Evince document viewer, and the Celluloid video player, alongside system utilities such as a disk usage analyzer, system monitor, and screenshot tool.
The total install spans 800+ packages across seven build tiers (toolchain, core, base, desktop, extra, compute, and ai). These counts drift as the system is built and rebuilt, so derive the live figures from the package set rather than relying on a fixed number.
There is no GUI app store. The software slot is served by pkm, the InterGenOS package manager, from the command line. See The Transparent Package Manager for the full command reference.
Adding more software
The binary repository carries a curated selection of optional, user-facing applications you install on demand. A developer toolchain (Git, Node.js, Go, Rust, Vim) ships by default in the core tier, and a set of modern command-line utilities (htop, rsync, bat, ripgrep, fd) ships in the base tier.
Some proprietary or distribution-restricted applications are available through download-helper packages. These do not bundle the vendor binary; they fetch it from the vendor on first install after you accept the license. The NVIDIA proprietary driver follows the same opt-in pattern under the package name nvidia, offered only on hardware where an NVIDIA GPU is present.
Multimedia and audio are covered in Multimedia & Audio; gaming and Steam in Gaming & Steam; and fonts, input, Bluetooth, and printing in Fonts, Input, Bluetooth & Printing.
Hardware acceleration
The Mesa graphics stack ships and is enabled by default for AMD (Radeon) and Intel (Arc, Iris, UHD) GPUs, covering OpenGL, Vulkan, VA-API hardware video decoding, and OpenCL compute. NVIDIA’s proprietary driver is an explicit opt-in via the nvidia package; the base distribution ships no proprietary vendor drivers or applications by default (redistributable device firmware — GPU, Wi-Fi, CPU microcode — does ship, because the hardware does not function without it). For GPU compute and AI workloads, see the GPU Compute & AI Workloads section.
The local AI assistant
InterGen is a tiered, hardware-detected, offline-first local assistant built on an on-device model, with zero telemetry. It runs on your machine, sized to your hardware.
InterGen Sentinel is a pluggable security scanner. By default it uses Local-Rules and a Local-Qwen model, entirely on-device. Six cloud providers — Claude (Anthropic), Gemini (Google), Copilot (Microsoft), ChatGPT (OpenAI), Grok (xAI), and DeepSeek — are available strictly opt-in.
When a task exceeds local capability, Phone-A-Friend (Frontier/Cloud Escalation) lets you route a single request to one of those cloud providers, on your explicit action. Nothing leaves your machine unless you send it. See The AI Assistant for the full picture.
What we don’t ship
InterGenOS makes deliberate omissions:
- No Snap. The
snapddaemon is not installed and not in the repository. - No Flatpak. Flatpak is not shipped and there is no
flatpakpackage in the repository. Third-party and proprietary applications install through the download-helper mechanism instead. - No telemetry. No component of the desktop phones home — not GNOME, not Firefox (telemetry is locked off through a Mozilla enterprise policy file, which overrides
about:configso it cannot be turned back on from inside the browser; the file is root-owned, so changing it means editing/usr/lib/firefox/distribution/policies.jsonas an administrator), not the shell, not the package manager. - No auto-update. No background service applies updates without your explicit action.
- No boot splash. InterGenOS shows your boot. You see the kernel hand off to systemd and every service start with its [OK] or [FAILED] marker. Spotting odd output during boot is a real practice for catching compromise or hardware change; we would rather give you that surface than hide it behind a logo.
Trust foundations
The desktop sits on a signed Secure Boot chain, dm-verity integrity over the read-only system image, and UKI signing. Updates and new software arrive through pkm and a signed package index, never through an opaque auto-updater. The system installer is Forge. For the full security story, see the Security Handbook.
In this section
- Graphical Session (Wayland/X11) — the session, the Wayland posture, and X11 compatibility
- Multimedia & Audio — players, codecs, and the audio stack
- Gaming & Steam — running games on InterGenOS
- Fonts, Input, Bluetooth & Printing — peripherals and daily-driver details
- FAQ — common questions
- Install with FORGE — installing InterGenOS to disk
Graphical Session (Wayland/X11)
InterGenOS ships GNOME 49 on Wayland as its graphical session. This is the desktop you get today on every install. It is fast, modern, and built to respect your control of the machine: no telemetry, no app-store analytics, and no software that updates itself without you.
The desktop is part of that posture, not separate from it: every system service is confined by AppArmor and systemd isolation from first boot, and Wayland’s per-window isolation means one Wayland application cannot key-log another or scrape another window’s pixels. Applications that still speak X11 run through XWayland and are the exception: they share one X server and can read each other’s input and window contents.
The display protocol
Wayland is the default and only graphical protocol used for the GNOME session. Every GNOME application ships with native Wayland support.
X11 applications are not left out. Compatibility is provided through Xwayland, a translation layer that runs automatically when an X11 application needs it. You do not configure it or start it by hand: when a legacy application launches, Xwayland is there.
Why Wayland is the default:
- Per-window isolation. Each application sees only its own input and pixel buffer.
- Modern input handling. HiDPI, variable refresh rate, mixed-DPI multi-monitor, and touch/gesture input work because the protocol was designed for them.
- No screen tearing. Every frame is composited through the display server.
- Future-proof. GNOME, Firefox, and the broader Linux desktop are standardizing on Wayland.
Logging in
The graphical session begins at the GDM greeter, where you type your username and authenticate. The greeter deliberately shows no list of accounts — user-list disclosure is disabled so the login screen does not enumerate who has an account on the machine. After login, GDM hands off to the GNOME 49 Wayland session.
The default layout
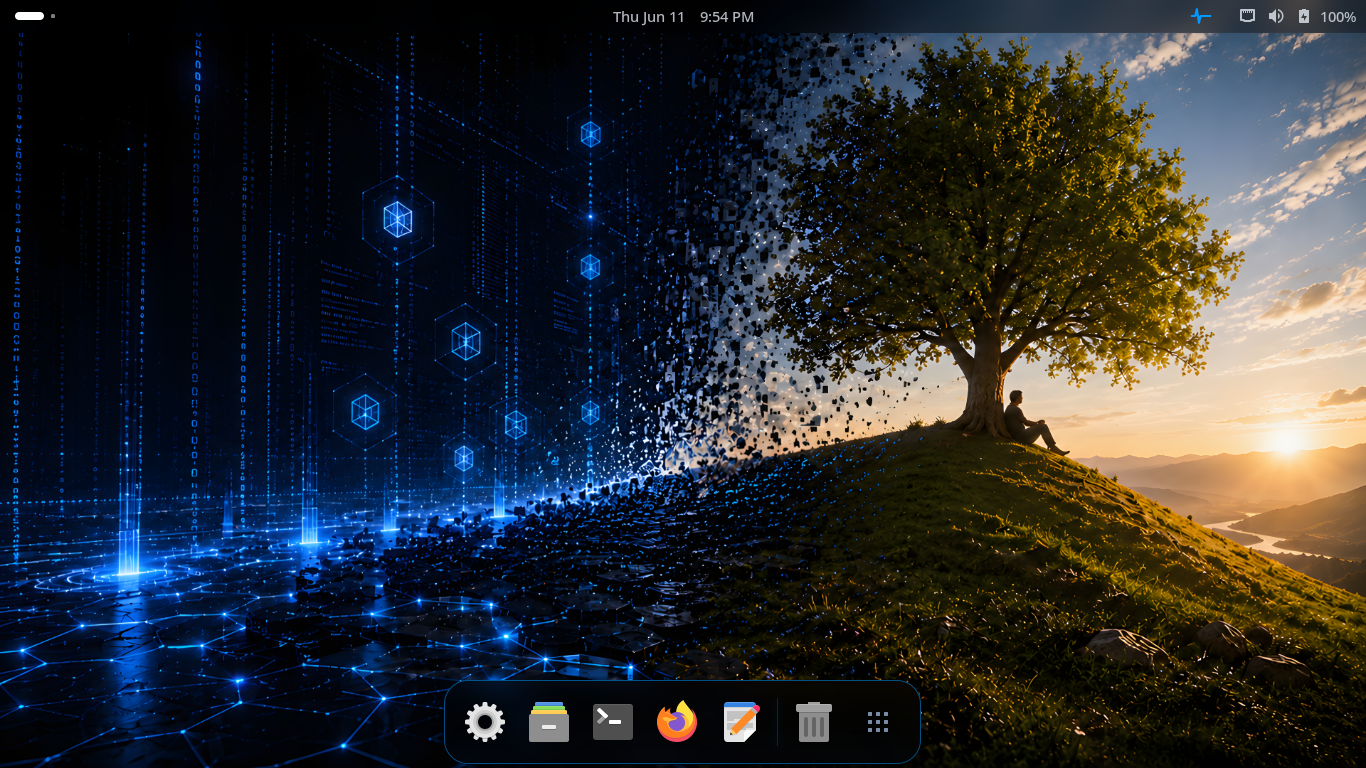 The default GNOME 49 desktop with the InterGenOS visual language and a bottom application dash.
The desktop is tuned with the InterGenOS visual language: a system-wide prefer-dark color scheme, the first-party InterGenOS icon theme by default (the distribution’s own mark set, inheriting Adwaita and hicolor for anything it does not cover), and the Bibata-Modern-Classic cursor. Papirus-Dark and a Cybernetic Blue theme ship as selectable alternates. System typography is Inter for UI and documents, paired with JetBrains Mono for the terminal and code surfaces.
The Adwaita widget theme is the GTK4 baseline, customized through a GSettings override applied at session start, so the look is consistent across core GNOME apps and third-party GTK4 applications installed through pkm.
The Activities overview and application grid
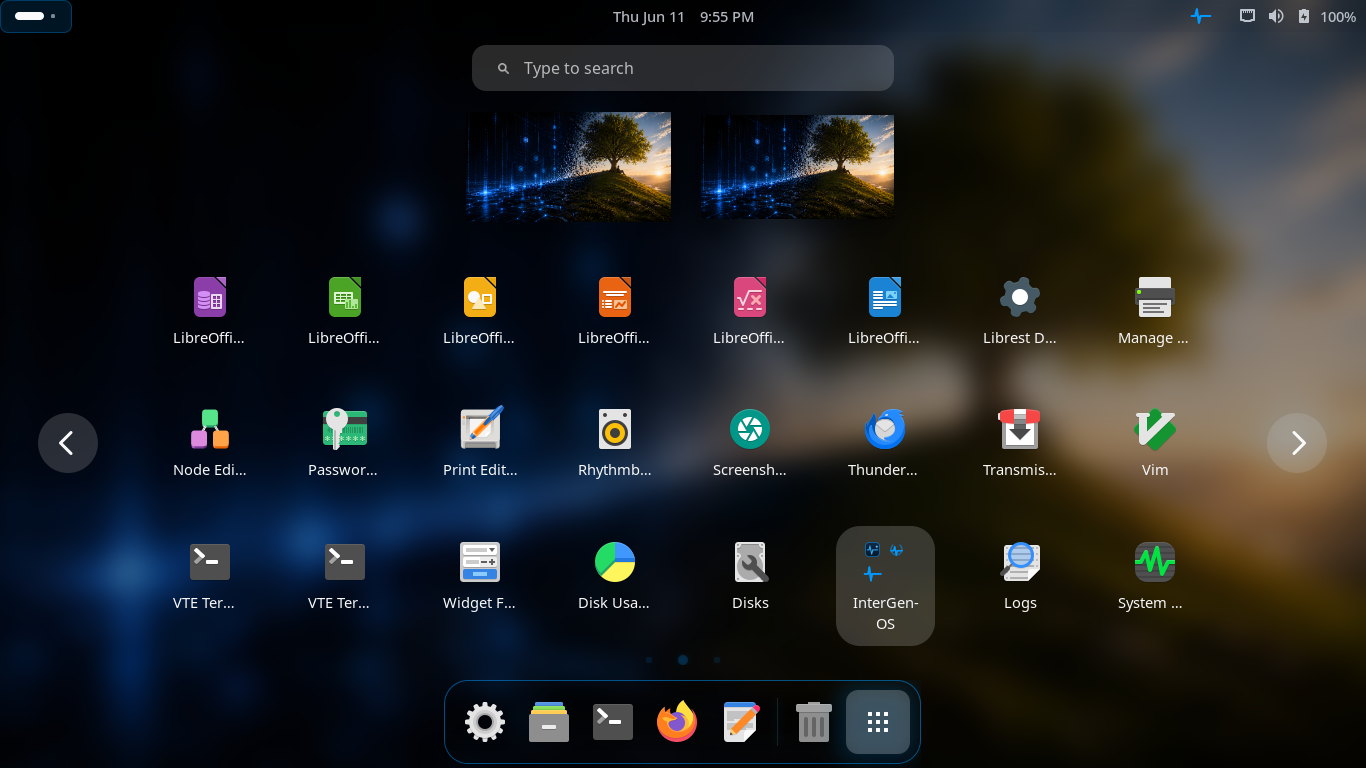 The Activities overview with the application grid, search field, and workspace thumbnails.
Press the Super key (the Windows key on most keyboards) to open the Activities overview. Open windows, workspace thumbnails, the application dash, and a search field are all visible at once. Start typing to search applications, settings, and files; click an icon in the grid to launch.
Alternate panel layout
InterGenOS also ships a panel-style layout for users who prefer a classic, taskbar-driven desktop with a traditional application menu.
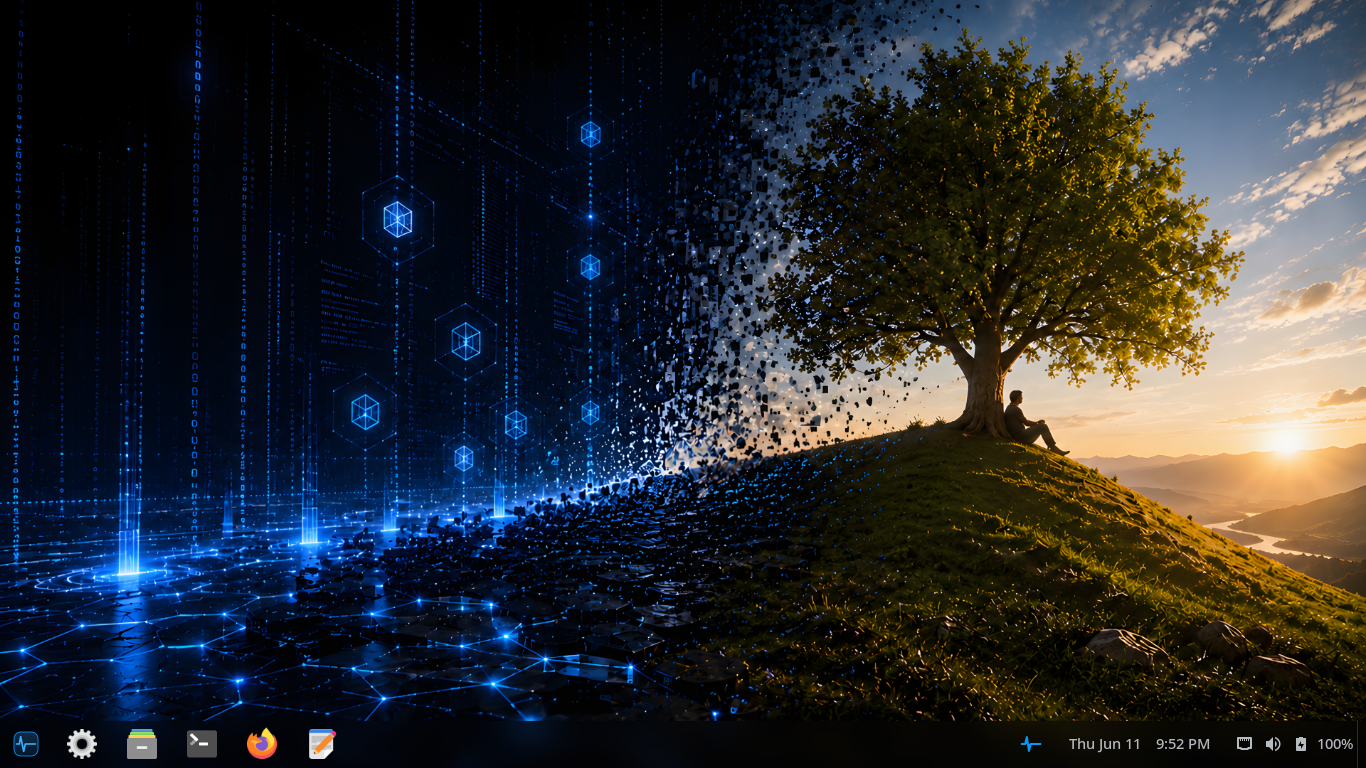 A panel-style layout with a bottom taskbar showing pinned and running applications, the system tray, and the clock.
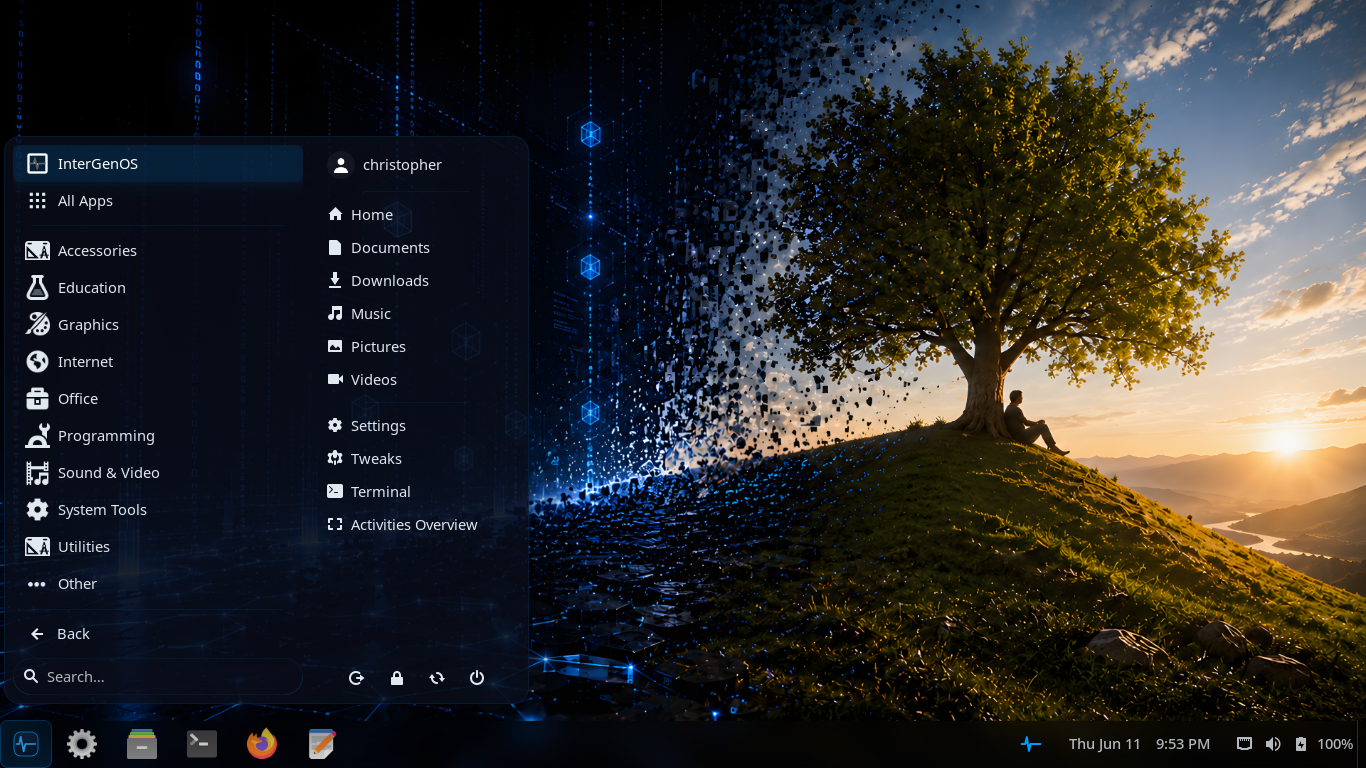 The categorized application menu with places shortcuts, Settings, and session controls.
This menu organizes applications by category (Accessories, Education, Graphics, Internet, Office, Programming, Sound & Video, System Tools, and more), surfaces your home folders and Settings on the right, and provides session controls. It is a familiar metaphor for users coming from a Windows-style or traditional Linux desktop.
The layout is provided by the intergenos-extensions-layout package — GNOME Shell extensions (Dash to Panel and the ArcMenu application menu, carrying an InterGenOS application category) shipped on the image and switchable from the Welcome application’s look picker.
Keyboard shortcuts
| Shortcut | Action |
|---|---|
Super | Open Activities overview |
Super + Tab | Switch between open applications |
Super + ` | Switch between windows of the same application |
Super + L | Lock screen |
Super + Left/Right | Tile window to the left or right half of the screen |
Super + Up/Down | Maximize or restore the window |
Super + Shift + Arrow | Move window to adjacent monitor |
Ctrl + Alt + Del | Power off / restart dialog |
There is no default shortcut bound to the terminal: launch it from the
Activities overview (press Super, type “terminal”), or bind your own under
Settings → Keyboard → Custom Shortcuts.
Multi-monitor, gestures, and accessibility
- Multi-monitor. GNOME 49 handles mixed-DPI and mixed-refresh-rate setups without configuration. Hot-plug a monitor and it works immediately.
- Gestures. Three-finger swipe to switch workspaces, pinch-to-zoom in compatible applications, and touch scrolling on touchscreen hardware.
- Accessibility. On-screen keyboard, high-contrast theme, and large-text mode are built in and enabled from the Accessibility panel in Settings. The accessibility framework (AT-SPI,
at-spi2-core) ships; a screen reader (Orca) is planned but not yet part of the default install.
Hardware acceleration
The graphical session is accelerated through the Mesa graphics stack for AMD (Radeon) and Intel (Arc, Iris, UHD) GPUs:
- OpenGL and OpenGL ES through
radeonsi(AMD) andiris/crocus(Intel) - Vulkan through
radv(AMD) andanv(Intel) - VA-API hardware video decoding through
radeonsi(AMD) - Compute (OpenCL) through
rusticl
All Mesa drivers are installed and enabled by default. GNOME Shell itself composites through OpenGL; Vulkan is there for the applications that use it, through the same shipped Mesa stack.
NVIDIA’s proprietary driver is not shipped by default. It is available as an explicit opt-in through pkm install nvidia, offered only on hardware with an NVIDIA GPU present, and presents the NVIDIA license for acceptance before installing.
No boot splash, by design
InterGenOS does not paint a logo over boot. There is no Plymouth splash between the bootloader and the greeter. You see the kernel hand off to systemd, each service report [OK] or [FAILED], your network come up, and AppArmor load. If something fails — a broken mount, an odd module load, a hardware quirk — you see it immediately. This is a security signal, not a polish gap.
On the roadmap (not in this build)
These are roadmap items. They are not shipped today, and you should not expect them in the current image:
- KDE Plasma (Qt6) and other switchable desktop environments. The planned design lets you install an additional desktop through pkm and select it at the greeter, with no reinstall.
The desktop you run today is GNOME 49 on Wayland.
Where this fits
InterGenOS is a built-from-source distribution: a machine you understand, can modify, and can trust. The desktop tier is one of seven build tiers (toolchain, core, base, desktop, extra, compute, ai) assembled across the 21-phase build. Package counts drift as the system grows; to see what is installed on your own machine, query pkm rather than relying on a fixed figure.
Cross-references
Multimedia & Audio
InterGenOS ships a working multimedia stack out of the box: a video player with hardware-accelerated decoding, a Wayland-native image viewer, and a document viewer, all running on GNOME 49 over Wayland. An audio editor, a music player, and a BitTorrent client ship on the image alongside them. This page covers what plays today, how hardware acceleration is wired up, and where the wider catalog comes from.
The multimedia stack carries no telemetry, no usage analytics, and no background service. What it does, it does on your machine and nowhere else.
What Ships by Default
The desktop tier installs a functional media set for everyday use. Package counts drift between builds; the desktop tier carries over 400 packages, and that figure is not permanent.
| Application | Purpose |
|---|---|
| Celluloid | GTK4 video player (mpv frontend) with VA-API hardware decoding |
| Image Viewer (Loupe) | Wayland-native image viewer with touch and gesture support |
| Evince (Document Viewer) | PDF, PostScript, DjVu, and comic-book viewer |
For the full default application set, see The Graphical Session.
Hardware-Accelerated Playback
Video playback is hardware-accelerated through the Mesa graphics stack, which ships and is enabled by default for AMD (Radeon) and Intel (Arc, Iris, UHD) GPUs.
- VA-API hardware video decoding runs through
radeonsi(AMD). - Celluloid uses VA-API for hardware-accelerated video playback.
- Firefox uses VA-API for hardware-accelerated video on the web.
Common video formats decode on the GPU rather than the CPU, which keeps playback smooth and power draw low on supported hardware.
NVIDIA Hardware
The NVIDIA proprietary driver is not installed by default. It is available as an explicit, user-initiated opt-in through the package manager:
pkm install nvidia
Installing it presents the NVIDIA license for acceptance before the driver is fetched. After install, follow the post-install steps to enroll the NVIDIA kernel module with your Machine Owner Key. Hardware-accelerated rendering and CUDA on NVIDIA hardware depend on this opt-in. See CUDA on NVIDIA for the full NVIDIA path.
Audio and Video Applications
These media applications ship on the image (they land with the Extras package group at install):
- Celluloid — mpv-based GTK4 video player with VA-API hardware decoding
- Audacity — Multi-track audio editor
- Rhythmbox — Music player with podcast support
- Transmission — BitTorrent client
The heavier creative applications ship too — GIMP, Inkscape, and the LibreOffice suite are on the image alongside them (it’s 2026: an art editor and an office suite are things people expect on a computer). On a system installed without the Extras group, any of these install on demand, for example:
sudo pkm install audacity
Wayland and Media
Every default media application runs on the Wayland display protocol. Wayland’s per-window isolation means each Wayland application sees only its own input and pixel buffer: one Wayland application cannot scrape another window’s pixels or capture its input. Applications not yet ported to Wayland run through Xwayland, a translation layer that starts automatically when needed; those clients share one X server, so they can read each other’s input and window contents even though they remain isolated from the Wayland applications around them. Compositing every frame through the display server also eliminates the screen-tearing artifacts common in legacy X11 video playback.
For the broader display posture, see The Graphical Session.
No Telemetry, No Analytics
No part of the multimedia stack phones home. There is no usage tracking and no app-store analytics. The package manager (pkm) records the packages you have installed for dependency resolution, and that data never leaves your machine. This is a machine you understand, can modify, and can trust.
Planned, Not Shipped
Some heavier production applications — non-linear video editors and full digital-audio workstations (DAWs), for example — are planned for future releases and are not yet part of the build. (GIMP, Inkscape, and the LibreOffice suite already ship on the image, as noted above; this section is only about the tools not yet packaged.) When they arrive, you will add them through the package manager like any other optional package.
Cross-References
- The Graphical Session — Default applications, GNOME, and Wayland
- Peripherals — Audio devices and other hardware
- Package Manager — Installing optional applications with pkm
- CUDA on NVIDIA — Opt-in NVIDIA driver and acceleration
- FAQ
Gaming & Steam
This page describes what InterGenOS provides for gaming today: the graphics foundation that ships enabled by default, the gaming stack you install on demand, and the deliberate omissions. Everything here is grounded in the shipping package set.
InterGenOS is a built-from-source Linux distribution with a security-only posture: security is not first, it is only. The goal is a machine you understand, can modify, and can trust. Gaming works the same way it works on any modern Wayland desktop — the graphics and input foundations are already in place, and the game platforms and compatibility layers are installed at your discretion.
The Steam client running on the InterGenOS GNOME 49 Wayland desktop. Steam installs on demand from the signed mirror; nothing gaming-specific ships on the install media.
The Graphics Foundation
Gaming starts with the GPU stack, and that stack ships and is enabled by default.
InterGenOS runs GNOME 49 on Wayland, with the Mesa graphics stack for AMD (Radeon) and Intel (Arc, Iris, UHD) GPUs. This covers the APIs games rely on:
- Vulkan through
radv(AMD) andanv(Intel) - OpenGL / OpenGL ES through
radeonsi(AMD) andiris/crocus(Intel) - VA-API hardware video decode through
radeonsi(AMD) - OpenCL compute through
rusticl
All Mesa drivers are installed and enabled out of the box. GNOME Shell composites through OpenGL; games reach Vulkan directly through the same shipped Mesa stack. X11-only games run through Xwayland, the automatic translation layer for applications not yet ported to native Wayland.
NVIDIA GPUs
NVIDIA’s proprietary driver is not shipped by default. It is available as an explicit, user-initiated opt-in through pkm, and is offered only on hardware with an NVIDIA GPU present:
pkm install nvidia
You accept the NVIDIA license when prompted, then follow the post-install instructions for enrolling the NVIDIA kernel module with your Machine Owner Key. This matters for gaming because the module must be signed and enrolled to load under the signed Secure Boot chain that InterGenOS ships. Installing the driver also pulls in its 32-bit companion (lib32-nvidia) automatically, so 32-bit titles reach the discrete GPU — see The 32-bit runtime below. See CUDA & NVIDIA for the driver path and Encryption & Keys for the Secure Boot and Machine Owner Key details.
The Gaming Stack
The graphics foundation ships on the ISO. The gaming stack — Steam, the Windows compatibility layers, and the performance tools — is mirror-only: none of it is on the install media, and all of it installs on demand from the signed package mirror once your machine is online. This keeps the base install lean (the desktop tier is a general workstation set of several hundred packages, not a gaming bundle) while making the full stack one command away.
One command for the whole stack
The gaming meta-package pulls in the complete set — Steam, Wine, DXVK, VKD3D-Proton, GE-Proton, and the full 32-bit runtime — in a single step:
pkm install gaming
Prefer to install pieces individually? Each component below is its own package.
Steam
Steam installs through a download-helper package. Download-helpers do not bundle the vendor binary; they fetch it from the vendor over its own signed channel on first install, after you accept the license. Brave, Google Chrome, the Claude Code CLI, and Microsoft VS Code ship under this same pattern.
pkm install steam
Accept Valve’s license when prompted. The Steam helper also brings in the 32-bit runtime closure Steam needs, so the client is ready to run once the install finishes.
A Steam library on InterGenOS. Your games, cloud saves, and settings are the same account you use anywhere else.
Windows-game compatibility (Wine, Proton, DXVK, VKD3D-Proton)
InterGenOS packages a current Windows-compatibility layer for running Windows games:
- Wine — the Windows compatibility layer, built as a modern WoW64 (32-and-64-bit) configuration.
pkm install wine - GE-Proton — the GloriousEggroll build of Proton, Valve’s Wine-based compatibility tool tuned for games. The helper installs it system-wide and registers it as a Steam compatibility tool automatically, so it appears in Steam’s per-title “Force compatibility tool” list with no manual copying.
pkm install ge-proton - DXVK — translates Direct3D 8/9/10/11 to Vulkan, for both 32- and 64-bit titles.
pkm install dxvk - VKD3D-Proton — translates Direct3D 12 to Vulkan, for both widths.
pkm install vkd3d-proton - winetricks — installs Windows components and tweaks into a Wine prefix when a specific title needs them.
pkm install winetricks
Wine, DXVK, and VKD3D-Proton are built from source in-tree; GE-Proton is fetched by its helper from the upstream release its recipe pins.
Steam’s per-title compatibility-tool selector. Once the ge-proton helper has installed GE-Proton, it appears in this list (here GE-Proton11-1) alongside Valve’s own Proton versions — no manual copying into Steam’s directories.
A Windows game (Portal) running through Proton on InterGenOS. The window title reports the Direct3D renderer the game requested; DXVK and VKD3D-Proton translate Direct3D to Vulkan underneath.
Performance tools
- GameMode — Feral Interactive’s daemon that applies game-optimised system settings on demand (CPU governor, scheduling) while a game runs and reverts them afterward. Launch a game through it with
gamemoderun.pkm install gamemode - Gamescope — Valve’s SteamOS micro-compositor. It gives a game its own nested compositor for clean fullscreen, integer scaling, and resolution control independent of the desktop.
pkm install gamescope
The 32-bit runtime
Many games and the Steam client itself need 32-bit (i686) libraries. InterGenOS ships a complete 32-bit runtime as a set of lib32-* packages (mirror-only), covering the graphics, audio, and system libraries a 32-bit game process links against. Installing steam or the gaming meta-package brings in the closure automatically; you do not assemble it by hand.
On AMD and Intel GPUs the open Mesa drivers serve both the 64-bit and 32-bit paths, so 32-bit acceleration reaches the discrete GPU out of the box. On NVIDIA, the default open (NVK/Mesa) 32-bit path reaches only an integrated GPU; full 32-bit acceleration on an NVIDIA discrete card needs the proprietary 32-bit driver, which is why pkm install nvidia automatically installs lib32-nvidia alongside it.
What Is Not Bundled
InterGenOS makes deliberate omissions, and several of them touch gaming:
- No Snap. The Snap daemon is not installed and not in the repository. Some games and launchers are distributed as Snaps upstream; that is not an installation path here.
- No Flatpak. Flatpak is not shipped and there is no
flatpakpackage in the repository. Third-party software installs from the signed mirror or, for vendor binaries, through the download-helper mechanism. - No auto-update. No background service downloads or applies updates without your explicit action. Game platforms with their own self-updaters operate within their own install scope; the system itself updates only when you run
sudo pkm sync && sudo pkm upgrade. - No telemetry from the OS. No component of the desktop phones home. Game platforms you install have their own privacy behavior, governed by the vendor, not by InterGenOS.
Performance Notes

A game (LIMBO) rendering full-screen through Proton. Fullscreen games composite through the Wayland display server, which eliminates tearing.
A few system characteristics are relevant to gaming and follow from the shipping design:
- Wayland compositing eliminates screen tearing. Every frame is composited through the display server. Variable refresh rate and mixed-DPI multi-monitor setups are handled by GNOME 49 without manual configuration.
- Per-window isolation, with an exception that matters here. Each Wayland application sees only its own input and pixel buffer, so one Wayland application cannot key-log another or scrape another window’s pixels, including while a game has focus. Steam and most games are X11 clients and run through XWayland, which does not carry that boundary: X11 clients share one X server and can read each other’s input and window contents, as they always could on X11. Treat anything you run under XWayland — the Steam client, the games it launches, and any other X11 application in the same session — as able to observe the others. Wayland-native applications elsewhere in the session stay isolated from all of them.
- VA-API hardware decode is available for video playback (for example, streaming or recorded gameplay in a player) through
radeonsi(AMD).
Anti-Cheat and Online Play
Online and competitive games that rely on kernel-level anti-cheat (EAC, BattlEye, and similar) have Linux support that varies by title and by anti-cheat vendor — this is an upstream reality, not specific to InterGenOS. One InterGenOS property does bear on it: the system ships a signed Secure Boot chain, dm-verity integrity, and UKI signing, so any component that needs to load a kernel module must be signed and enrolled to load (the same requirement the NVIDIA driver satisfies through Machine Owner Key enrollment). Most anti-cheat that supports Linux runs in userspace inside the Proton container and is unaffected; check a specific title’s Linux support before relying on it for competitive play.
AI Assistance for Setup
If you get stuck configuring a game platform or a GPU driver, InterGen, the offline-first local assistant, can help walk through pkm commands and driver setup without leaving your machine. For questions beyond the local model’s reach, Phone-A-Friend (Frontier/Cloud Escalation) can route to a frontier provider, but only when you choose to invoke it. Nothing leaves the machine by default.
Cross-References
- Desktop & Graphical Session — GNOME 49 on Wayland and the default desktop
- CUDA & NVIDIA — NVIDIA driver opt-in and module enrollment
- Vulkan — Vulkan support across the Mesa stack
- Package Manager — pkm command reference and the signed-index trust chain
- Sandboxing & MAC — AppArmor and systemd isolation
- Encryption & Keys — Secure Boot, dm-verity, and Machine Owner Key enrollment
- FAQ — Common questions about installation and the desktop
Fonts, Input, Bluetooth & Printing
This page covers the everyday peripheral and presentation surfaces of the InterGenOS desktop: system typography, keyboard and input handling, Bluetooth pairing, and printing. The desktop ships GNOME 49 on Wayland, so most of these surfaces are managed through GNOME Settings and the Wayland input stack.
Fonts
InterGenOS ships a deliberate, consistent typographic baseline:
- Inter — a clean geometric sans-serif used across the UI, documents, and titlebars.
- JetBrains Mono — a programming-ligature monospace used for the terminal, the text editor, and other code surfaces.
These pairings define the InterGenOS visual language rather than relying on whatever a toolkit happens to default to. The Adwaita widget theme is the GTK4 baseline and is customized through a GSettings override applied at user-session start, so typography stays consistent whether you are in a core GNOME app or a third-party GTK4 application installed through pkm.
A GNOME Font Viewer utility ships by default for inspecting font files.
Fonts are managed as ordinary pkm packages and install system-wide under /usr/share/fonts/, one directory per family (inter/, jetbrains-mono/, noto/, dejavu/, and the base X11 bitmap sets). The default install ships Inter for UI and document text, JetBrains Mono for the terminal and code, and the Noto families for broad Unicode and CJK coverage. To add more, install a font package with pkm, or drop personal font files into ~/.local/share/fonts/ for a single user and run fc-cache -f to refresh the cache.
Input
InterGenOS uses Wayland for input, with Xwayland providing a translation layer for X11 applications that have not yet been ported.
Why Wayland matters for input
- Per-window isolation: each Wayland application sees only its own input and pixel buffer. One Wayland application cannot key-log another or scrape another window’s pixels. Applications running through XWayland are the exception: X11 clients share one X server and can read each other’s input and window contents.
- Modern input handling: HiDPI, variable refresh rate, mixed-DPI multi-monitor, and touch and gesture input work correctly because the protocol was designed for them.
Keyboard and pointer
GNOME 49 handles keyboard layouts, repeat rate, and pointer behavior through GNOME Settings. Touchpad and touchscreen gestures work out of the box:
- Three-finger swipe to switch workspaces.
- Pinch-to-zoom in compatible applications.
- Touch scrolling on touchscreen hardware.
Common keyboard shortcuts include Super for the Activities overview, Super + Left/Super + Right to tile a window to the left or right half of the screen, and Super + Up/Super + Down to maximize or restore it. No default shortcut is bound to the terminal — launch it from the Activities overview or bind your own under Settings → Keyboard. The full shortcut reference lives on the Desktop Experience page.
Accessibility input
The Accessibility panel in GNOME Settings provides an on-screen keyboard, a high-contrast theme, and large-text mode for users who need alternative input and output. The accessibility framework (AT-SPI) ships; a screen reader (Orca) is planned but not yet part of the default install.
Complex-script and CJK input
InterGenOS uses IBus as its input-method framework for CJK and other complex-script input. Fcitx is not shipped.
Bluetooth
Bluetooth is managed through the Bluetooth panel in GNOME Settings, which is part of the default desktop install. From there you can power the adapter on or off, make the machine discoverable, and pair devices such as headsets, keyboards, mice, and controllers.
Under the hood, Bluetooth is provided by the BlueZ stack, with bluetooth.service enabled by default. The bluetoothctl command-line tool is available for users who prefer to manage adapters and pairings from a terminal.
Pairing is an explicit, user-initiated action. No background pairing service or telemetry runs outside this surface, consistent with the InterGenOS goal of a machine you understand, can modify, and can trust.
Printing
Printing on InterGenOS is provided by CUPS. The service is socket-activated: cups.socket is enabled by default and cups.service starts on demand the first time a print queue is contacted, so the print daemon does not run continuously when it is not needed.
Printer configuration on GNOME is normally reached through the Printers panel in Settings. From the command line, CUPS is administered with the standard tools — lpadmin to add and configure printers and lpstat to inspect queues and status.
If a particular printer driver or additional printing component is not present out of the box, search the available packages with pkm. See The Transparent Package Manager for how to search for and install software.
Related pages
- Desktop Experience — the full GNOME 49 on Wayland walkthrough
- Multimedia & Audio — playback, codecs, and the audio stack
- Hardening Baseline — AppArmor, systemd isolation, and the desktop security posture
- The Transparent Package Manager — installing optional software with pkm
System Administration
This section covers the day-to-day operation of an InterGenOS machine: managing users and services, configuring the network, working with filesystems and the boot chain, running virtual machines and containers, and keeping the system maintained over time.
InterGenOS is a built-from-source Linux distribution with a single, consistent design goal: a machine you understand, can modify, and can trust. The administration model reflects that. The system is hardened from the moment it boots rather than after a post-install script, services bind to localhost unless you deliberately open them, and nothing updates or reports home behind your back. Administering the system means making explicit, visible decisions, not discovering hidden ones.
What ships today
The desktop is GNOME 49 on Wayland.
Core administration components you will use across the tasks in this section:
- pkm — the package manager. Software is pulled from a signed binary mirror, the index signature is verified on every sync, and each package’s SHA-256 hash is validated locally before install. There are no auto-updates; software changes only when you run pkm yourself.
- Forge — the InterGenOS installer. Forge handles disk layout, initial credentials, and Machine Owner Key (MOK) enrollment for systems that need out-of-tree kernel modules. See the Forge installer guide.
- A signed Secure Boot chain — a Microsoft-signed shim validates the GRUB bootloader, which verifies the kernel and Unified Kernel Images. Installed systems regenerate and sign each kernel’s UKI with your machine’s local MOK on every kernel install or upgrade.
- Image integrity — the read-only live ISO image is sealed with dm-verity (its root hash carried inside the signed UKI); on the installed system, per-file integrity is checked on demand with
pkm verify.
The package set is built across seven tiers, in this order: toolchain, core, base, desktop, extra, compute, and ai. That is over 1,100 package definitions, of which roughly three quarters ship on the installed image and the rest are mirror-only — present in the signed repository, installed only when you ask for them. These counts drift between builds; derive the live figures from the system with pkm list rather than treating any number as fixed.
On-device assistance
Two local, offline-first tools are available to help administer the system:
- InterGen — a tiered, hardware-detected local assistant built on an on-device model. It runs on-device with zero telemetry.
- InterGen Sentinel — a pluggable security scanner. The defaults are Local-Rules and Local-Qwen, both on-device. Six named cloud providers (Claude (Anthropic), Gemini (Google), Copilot (Microsoft), ChatGPT (OpenAI), Grok (xAI), and DeepSeek) are available strictly opt-in, as is any custom OpenAI-compatible endpoint you supply. Escalating a scan to one of these external models is called Phone-A-Friend (Frontier/Cloud Escalation); it never happens unless you choose it. An API key is written to the system keyring and never into the configuration file.
See the assistant documentation for configuration details.
Pages in this section
- Users, Groups & Services — account management and controlling the systemd services that run on your machine.
- Networking — interface configuration and the default localhost-only bind policy for server software.
- Filesystems, Kernel & Boot — storage layout, kernel management, and the signed boot chain including MOK and UKI signing.
- Virtualization & Containers — running virtual machines and containers on InterGenOS.
- Power Management & Maintenance — keeping the system updated, healthy, and efficient over its lifetime.
Security defaults
Much of administering an InterGenOS system is understanding what it already does on your behalf. By default, the two InterGenOS-authored AppArmor profiles (intergen-mcp, pkm) run in complain (learning) mode — violations logged, not blocked — while server packages on the mirror ship enforce-mode profiles that activate when the server is installed; systemd services are sandboxed with extensive isolation directives, server packages bind only to 127.0.0.1, and no service ships with a blank or default password. There is no telemetry and no analytics. Nothing upgrades itself: the only background package task is a daily update check that notifies you of available upgrades without installing them, and it can be switched off (systemctl disable --now pkm-check-updates.timer).
For the full enforced baseline, read the security section.
Users, Groups & Services
This page covers day-to-day administration of user accounts, groups, and system services on InterGenOS. The defaults described here reflect the design philosophy of the system: a machine you understand, can modify, and can trust.
InterGenOS ships GNOME 49 on Wayland as its desktop, with systemd as the init system and service manager.
Users and Groups
InterGenOS uses the standard Linux user and group model. Accounts live in /etc/passwd, groups in /etc/group, and shadowed password hashes in /etc/shadow. The usual coreutils and shadow-suite tools apply.
Creating and managing accounts
# Add a new user with a home directory and login shell
useradd -m -s /bin/bash alice

# Set or change a password
passwd alice

# Add a user to a supplementary group
usermod -aG <group> alice

# Lock or unlock an account
usermod -L alice
usermod -U alice

# Remove a user (and optionally their home directory with -r)
userdel -r alice
Group management follows the same conventions:
groupadd developers      # create a group
gpasswd -a alice developers   # add a member
groupdel developers      # remove an empty group
Account policy
InterGenOS does not ship services or databases with blank or default admin passwords. Initial credentials are randomly generated or set up manually during installation, so there is no well-known account to compromise on a fresh system. When you create accounts afterward, you choose the credentials and the policy.
On a default install, password quality is enforced by pam_pwquality: a password must be at least 12 characters and include at least one uppercase letter, one lowercase letter, one digit, and one other character, with no more than three identical characters in a row — and the rule applies to root as well. Repeated failed logins are rate-limited by pam_faillock. Passwords do not expire on a timer by default, because forced rotation tends to push people toward weaker, more predictable choices; you are free to set an expiry policy if your environment requires one. The first account Forge creates is added to the administrative wheel group (which grants sudo) along with audio, video, input, and cdrom for desktop hardware. Printer administration is not granted at install: the lpadmin group exists on the system, but your account is added to it only when you enable printer administration from the desktop, so a fresh account cannot reconfigure printers until you ask for that. Add yourself by hand with sudo usermod -aG lpadmin <user> if you would rather have it up front.
The first user account is created during installation by Forge, the InterGenOS installer. See the Forge installer guide for how the initial account and its administrative access are set up.
Privilege escalation
Administrative actions are performed with sudo rather than by logging in as root directly. InterGenOS does not ship doas. Administrative users are granted their elevated access by membership in the wheel group.
Services and the Init System
InterGenOS uses systemd to manage services, sockets, timers, and the boot sequence. Administration uses the standard systemctl and journalctl tooling.
Managing services
systemctl status <unit>      # inspect a service
systemctl start <unit>       # start now
systemctl stop <unit>        # stop now
systemctl restart <unit>     # restart
systemctl enable <unit>      # start at boot
systemctl disable <unit>     # do not start at boot
systemctl enable --now <unit>  # enable and start in one step
Reading logs
journalctl -u <unit>         # logs for one unit
journalctl -b                # logs since the current boot
journalctl -f                # follow new log entries live
Service Hardening Defaults
InterGenOS does not rely on post-installation hardening scripts. System services are sandboxed from the moment the system boots, to minimize the blast radius of a potential compromise. Every system daemon runs under extensive systemd isolation directives, and InterGenOS additionally ships AppArmor profiles for selected programs. Profiles are loaded with apparmor_parser (/usr/sbin/apparmor_parser). On the default ISO the two InterGenOS-authored profiles (intergen-mcp and pkm) ship in complain (learning) mode — violations are logged, not blocked — and graduate to enforce per-profile as confidence builds; the server packages on the mirror each ship an enforce-mode profile that activates when that server is installed.
The baseline systemd directives applied across system daemons include:
| Directive | Effect |
|---|---|
NoNewPrivileges=true | A service and its children cannot gain new privileges |
ProtectSystem=strict | The entire filesystem hierarchy is read-only to the service |
ProtectHome=true | User home directories are inaccessible |
PrivateTmp=true | The service gets a private, isolated /tmp |
PrivateDevices=true | Only a minimal, virtual /dev is exposed |
ProtectKernelTunables=true | /proc and /sys kernel tunables are read-only |
ProtectKernelModules=true | Module load/unload is denied |
ProtectKernelLogs=true | The kernel ring buffer is inaccessible |
ProtectControlGroups=true | The cgroup hierarchy is read-only |
ProtectHostname=true | The hostname cannot be changed |
ProtectClock=true | The system clock cannot be changed |
ProtectProc=invisible | Other processes are hidden in /proc |
RestrictAddressFamilies=AF_UNIX AF_INET AF_INET6 | Only these socket families are permitted |
RestrictNamespaces=true | Creating new namespaces is denied |
RestrictRealtime=true | Realtime scheduling is denied |
RestrictSUIDSGID=true | Creating SUID/SGID files is denied |
LockPersonality=true | The execution-domain personality is locked |
MemoryDenyWriteExecute=true | Writable-and-executable memory is denied (a package whose runtime needs a JIT can set this to false in its own unit, as PostgreSQL does for its LLVM JIT) |
RemoveIPC=true | IPC objects are cleaned up when the service stops |
SystemCallArchitectures=native | Only native-architecture syscalls are allowed |
SystemCallFilter=@system-service | A baseline syscall allowlist is enforced |
SystemCallFilter=~@privileged @resources @mount @swap @reboot | Privileged and dangerous syscall groups are denied |
You can inspect the effective sandbox of any running service with:
systemd-analyze security <unit>
Safe network binds
Any server package shipped by InterGenOS binds exclusively to localhost (127.0.0.1) by default. Services never listen on public interfaces unless you deliberately edit their configuration to allow it. If you intend to expose a service, that is a conscious change you make, not a default you have to discover and undo. See Network security for the broader posture.
Overriding the defaults
These directives are defaults, not a cage. Because you control your own machine, you can relax a directive for a specific service with a drop-in override:
systemctl edit <unit>
This creates a drop-in under /etc/systemd/system/<unit>.d/ that layers on top of the shipped unit without modifying it. Reload and restart to apply:
systemctl daemon-reload
systemctl restart <unit>
For the rationale behind these controls and how they fit the wider security model, see Sandboxing and mandatory access control and the Hardening baseline.
What Runs By Default
InterGenOS keeps the running surface small. It collects zero telemetry, no analytics, and no crash or usage reports, so there are no background phone-home services to disable. The system will not update software behind your back; updates happen only when you explicitly run the package manager. There are no opt-out privacy toggles to hunt for, because the data never leaves to begin with.
Two InterGenOS services are worth knowing about because they are part of what makes the system distinctive:
- InterGen is a tiered, hardware-detected, offline-first local assistant built on an on-device model, with zero telemetry. It runs locally and selects a model tier appropriate to your hardware. When a query exceeds local capability, the optional “Phone-A-Friend” (Frontier/Cloud Escalation) path can hand off to a remote model, but only when you invoke it.
- InterGen Sentinel is a pluggable security scanner. Its default backends are Local-Rules and Local-Qwen, both running on your machine. Cloud providers are available strictly opt-in — six named ones (Claude (Anthropic), Gemini (Google), Copilot (Microsoft), ChatGPT (OpenAI), Grok (xAI), and DeepSeek) plus any custom OpenAI-compatible endpoint you supply.
Neither sends anything off the machine unless you explicitly opt into a cloud backend.
See Also
- Forge installer guide — how the first account is created
- Maintenance — updates and ongoing administration
- Networking — interfaces and connectivity
- Sandboxing and mandatory access control
- Hardening baseline
- Frequently asked questions
Filesystems, Kernel & Boot
This page explains how an installed InterGenOS system boots: the signed boot chain, the per-machine signing key, optional full-disk encryption, and how the kernel is rebuilt and signed on every install or upgrade. It is written for users and contributors who want to understand the model well enough to operate and recover it.
The boot path is the most privileged code on the machine, so InterGenOS verifies every executable that runs before userspace and gives you a machine you understand, can modify, and can trust.
For the installer that sets all of this up, see Forge, the installer. Related deep dives ship as Verified boot and Disk encryption.
The boot chain at a glance
InterGenOS builds a fully signed boot chain, though it does not require UEFI Secure Boot — the default install runs with it off, so the signatures are present and verifiable but not firmware-enforced unless you enable Secure Boot. The chain of trust runs:
Firmware (UEFI)
   │  trusts the Microsoft 3rd-party CA
   ▼
Microsoft-signed shim             (InterGenOS piggybacks Fedora's pre-signed shim)
   │  trusts your machine's MOK
   ▼
InterGenOS GRUB                   (release-signed on the ISO/install media;
   │  enforces signature           MOK-signed for the GRUB written to disk)
   │  verification on UKIs
   ▼
InterGenOS UKI                    (kernel + initramfs + cmdline, bundled and
   │  kernel handoff               signed as one Authenticode binary)
   ▼
InterGenOS userspace
A Unified Kernel Image (UKI) is a single signed file that bundles the kernel, the initramfs, and the kernel command-line. One signature covers all three; nothing inside can be swapped without breaking it.
The live ISO and install media ship UKIs signed by the InterGenOS release key, which lives only on an offline signing workstation and never touches your machine. Once you install to disk, every kernel you install or upgrade is rebuilt into a UKI on your machine and signed with your own key.
The Machine Owner Key (MOK)
A Machine Owner Key is a per-machine signing key generated on your own machine during install. The firmware trusts it because you enroll it once, via MokManager, at first boot. It exists so that:
- Your machine signs the kernels you install. When you install a kernel, InterGenOS rebuilds the UKI and signs it with your MOK. The release key never sees a kernel you build or install locally.
- You can trust your own out-of-tree drivers. Modules you build (for example, proprietary GPU drivers via DKMS) can be signed by your MOK and load on a Secure Boot system without disabling enforcement.
The MOK is yours and lives only on the installed system, under /var/lib/intergen/mok/. Reinstalling generates a fresh MOK; migrating to a new machine means generating a new one there.
During the bootloader stage, the Forge installer generates an RSA-2048 MOK keypair as mok.key (private), mok.crt (PEM X.509, used by sbsign for UKI signing), and mok.der (DER X.509, the form MokManager wants for enrollment). It stages the MOK for enrollment, installs sbsigntool so the kernel package can sign UKIs later (ukify ships with systemd), installs an initial MOK-signed UKI, and configures a recovery boot entry that loads the bare vmlinuz.
You choose the enrollment password yourself. Forge asks for it on the user-setup screen, in a field labelled MOK enrollment password; it does not generate one for you, does not display one afterwards, and does not write one to any log. It must be 8–256 printable ASCII characters. Remember what you typed — MokManager asks for it once, at first boot, and there is nowhere to look it up.
Leaving the field empty is a valid choice: it skips enrollment staging entirely, and you can enroll later with mokutil. Forge’s confirmation screen tells you when enrollment will not be staged, so this is not something you discover after the fact.
First-boot MOK enrollment
On the first boot, the firmware sees the pending enrollment request and runs MokManager (blue text on black) through three screens:
- Perform MOK management — press any key to start.
- Enroll MOK — review the certificate. Its subject reads
CN=InterGenOS Machine Owner Key. Confirm. - Enter password — type the enrollment password you set in Forge. It is single-use.
After enrollment, the system boots normally and the firmware trusts your MOK from then on. If you skip enrollment, the system still boots the release-signed UKI that shipped on the installer image, but the next kernel upgrade (which produces a MOK-signed UKI) will not be trusted, and you fall through to the recovery entry until you enroll.
Kernel install and upgrade
When you install or upgrade a kernel with pkm install linux-kernel (the package name carries no version — the version is a field in the index), the kernel package’s post_install hook runs entirely on your machine, with no release-infrastructure key material:
- Reads the kernel, the standard initramfs (plus the FDE initramfs if the system is LUKS-encrypted), and the canonical command-line.
- Runs
ukify buildto bundle them into a single UKI. - Runs
sbsign --key /var/lib/intergen/mok/mok.key --cert /var/lib/intergen/mok/mok.crtto sign the UKI. (sbsignreads the PEM cert; the.derform is for MokManager enrollment only.) - Writes the signed UKI to
/boot/efi/EFI/Linux/intergenos-<kernel-version>.efi. - Updates the GRUB menu so the new kernel is the default entry.
- Retains a configurable number of old kernels and their UKIs as fallback entries (default: 2).
If signing fails (corrupt key file, full ESP), the hook falls back to writing the kernel and initramfs separately and having GRUB load them directly. GRUB is itself signed and enforces check_signatures=enforce, so the same verification semantics apply. You never end up with a half-installed kernel.
ESP sizing
Because every installed kernel becomes a UKI in /boot/efi, the ESP needs headroom for several kernel generations. A typical UKI is 80–150 MB depending on the initramfs payload. Forge creates a fixed 1 GiB ESP, leaving room for several kernel generations. If the ESP fills up, kernel install fails with a clear message. Old kernels and their UKIs are pruned automatically (the post-install hook keeps the two newest generations plus the running and just-installed kernels); if the ESP still fills, check the UKI sizes under /boot/efi/EFI/Linux/ — an oversized initramfs payload is the usual cause.
Full-disk encryption (LUKS2)
Full-disk encryption is opt-in, not default. Forge asks; you choose. We recommend it for any portable device.
- The format is LUKS2 with a passphrase, via
cryptsetup: AES-256 in XTS mode, withargon2id(memory-hard) key derivation. Forge forces argon2id parameters (1 GB memory cost, 4 iterations, 4 threads) calibrated to defeat GPU-accelerated brute force without risking out-of-memory on 4 GB systems. - The encrypted volume holds the entire root filesystem —
/home,/var,/etc,/root, and swap if placed inside the container. - Your passphrase is never written to disk outside the LUKS header slot, never logged, and never sent anywhere. There is no recovery key escrow and no master key. If you forget your passphrase, the data is gone by design.
- The ESP is not encrypted — the firmware must read it before any OS runs. Its integrity is protected by Secure Boot verification on the UKI, not by encryption.
A LUKS2 volume has a header (cipher metadata plus up to eight key slots), independent key slots (each wrapping the master key with one unlock method), and the encrypted payload. The master key never leaves the header; your passphrase unwraps a slot to yield it, and the passphrase lives only in volatile memory during unlock.
What Forge does for an encrypted install
When you tick Encrypt the root filesystem with LUKS2, Forge prompts for a passphrase with a confirmation field. Both frontends enforce a non-empty, matching value and surface a soft strength warning (8 characters is the floor; 12 with at least two character classes is the recommended baseline). The warning does not block — you confirm and continue. Forge then formats the partition with cryptsetup luksFormat, writes /etc/crypttab (mapper name cryptroot, referenced by UUID=), writes /etc/fstab with /dev/mapper/cryptroot as the root source, and the kernel hook bundles the FDE initramfs into the signed UKI. The passphrase is piped to cryptsetup via stdin (never on the command line), zeroized after use, and never written to disk outside the LUKS header.
Experimental unlock methods
Status note (decided 2026-08-11): both methods in this section are not offered by the installer in this release. A functionality review (2026-08-08) found defects in both: FIDO2 enrollment can abort an install that opts in, and the TPM2 sealed key’s parent context does not survive a reboot, so automatic unlock could never outlast the first power cycle. Passphrase encryption is unaffected and fully supported. This section is retained as design documentation for when the corrected methods return after dedicated hardware verification.
As designed, two unlock methods are EXPERIMENTAL sub-options. Both compose with the passphrase by adding an extra LUKS key slot; the passphrase slot is always the unconditional fallback.
- TPM2-sealed unlock seals a fresh 32-byte key against the current measured-boot state, bound to a PCR0 + PCR7 policy (PCR0 tracks firmware code; PCR7 tracks Secure Boot policy/MOK state). The sealed blob triplet is written to the ESP under
/intergen/tpm2/. Normal boots then unlock automatically. It is EXPERIMENTAL because a firmware update (PCR0) or a Secure Boot/shim/MOK change (PCR7) invalidates the seal and falls through to the passphrase. The sub-checkbox is greyed out if no TPM is exposed (/dev/tpmrm0absent) or the TPM2 tools are missing from the ISO. - FIDO2-token unlock enrolls a credential on a FIDO2 token (YubiKey, Solo, Nitrokey, and similar). Enrollment runs
fido2-cred -Mthen afido2-assert -G --hmac-secretagainst a random nonce; the HMAC output becomes a LUKS slot. The relying-party ID isintergenos. Forge writes{cred_id, stored_nonce}to the ESP under/intergen/fido2/. A lost or swapped token invalidates the slot, so the passphrase stays in the header for fallback.
Neither the TPM2 sealed blob nor the FIDO2 metadata is secret on its own: without the specific TPM (and matching PCR state) or the physical token, those files are useless.
The boot-time unlock flow
After Secure Boot verifies the UKI and the kernel hands off to the FDE init, the unlock chain runs in order:
- TPM2 (if enrolled and
/dev/tpmrm0present):tpm2_load+tpm2_unsealagainst the PCR0+PCR7 policy, piped tocryptsetup. On any failure, fall through. - FIDO2 (if enrolled and tools available): wait up to 30 s for the token, run
fido2-assertagainst the stored nonce, pipe the HMAC tocryptsetup. On any failure, fall through. - Passphrase prompt (always the final fallback): an InterGenOS-branded prompt with three attempts, then a recovery shell.
If neither experimental method is enrolled, the chain skips straight to the passphrase prompt and the path is identical to a passphrase-only install. The FDE initramfs is tiny — a static cryptsetup, a static busybox, the dm_crypt/ext4 modules, and the storage drivers needed to see the disk (plus the static TPM2/FIDO2 tools and their modules when those methods are enrolled). It does no logging, no telemetry, and no network.
The FDE init emits journal-friendly prefixes you can correlate after boot:
| Prefix | Meaning |
|---|---|
[fde-init][EXPERIMENTAL TPM2] | TPM2 unlock attempt and outcome (skipping, attempting via sealed key, tpm2_load failed, unseal/cryptsetup failed, or success). |
[fde-init][EXPERIMENTAL FIDO2] | FIDO2 unlock attempt and outcome (skipping, attempting, no token within 30s, a pipeline diagnostic, or success). |
[fde-init] (no suffix) | Passphrase prompt path, recovery-shell drop, and root-mount errors. |
These appear on the boot console only — the FDE initramfs runs before the journal exists, so journalctl cannot retrieve them afterwards; watch the screen during the unlock. The kernel’s own dm-crypt record is what persists (journalctl -b -k).
How encryption and signed boot compose
The encrypted-root and signed-boot models are designed to compose. On a non-encrypted install the UKI’s bundled initramfs is minimal (typically only CPU microcode), because storage and filesystem drivers are built into the kernel. On an encrypted install, the UKI’s bundled initramfs is the FDE initramfs: the same code that prompts for your passphrase is inside the same signed envelope as the kernel.
The practical consequences:
- With Secure Boot enforcement enabled, an attacker cannot substitute a fake unlock prompt to capture your passphrase: the prompt code is inside the signed UKI, and tampering with it means the firmware refuses to load it. This protection is exactly as strong as that enforcement — with Secure Boot off, nothing at the firmware level rejects a tampered image, so the signature is verifiable but not enforced.
- A kernel upgrade rebuilds the UKI with the new kernel and the same FDE initramfs, signed with your MOK. The unlock experience is identical across upgrades.
- A TPM2-sealed unlock does not skip Secure Boot verification; the TPM bits live inside the signed envelope too.
What encryption does and does not protect
Protected at rest: the entire root filesystem and anything written to disk while the system is running and unlocked.
Not protected: the ESP (read by firmware before any OS; integrity comes from Secure Boot, not encryption); the LUKS header itself (visible on disk — it reveals that the partition is LUKS and which cipher is used, but nothing about the payload); and a running, unlocked system (the master key is in kernel memory and the filesystem is readable to permitted processes). Encryption-at-rest does not replace process isolation, user permissions, or AppArmor confinement. If your threat model includes someone with physical access while the machine is running and unlocked, you want a screen lock or a powered-off machine, not just FDE.
Recovery
Most of the time none of this needs attention. When something goes wrong:
Add or remove a LUKS passphrase
LUKS2 supports up to eight key slots. From a running system, as root:
cryptsetup luksAddKey /dev/disk/by-uuid/<uuid>
cryptsetup luksRemoveKey /dev/disk/by-uuid/<uuid>
luksAddKey prompts for an existing passphrase, then the new one. luksRemoveKey prompts for the passphrase of the slot to remove; other slots are untouched.
Back up the LUKS header
If the header is corrupted (disk damage at the wrong offset, or an accidental dd), the payload is unrecoverable even with the correct passphrase. Back it up to offline media:
cryptsetup luksHeaderBackup /dev/disk/by-uuid/<uuid> \
    --header-backup-file /path/to/external/header.bin
cryptsetup luksHeaderRestore /dev/disk/by-uuid/<uuid> \
    --header-backup-file /path/to/external/header.bin
Anyone with the backup and your passphrase can decrypt the disk; store it accordingly.
I forgot my LUKS passphrase
The data is gone. There is no master key, no escrow, and no back door, because a recovery channel we could use is a channel an attacker could use. Boot a live ISO and reinstall. Back up early and often.
I need to regenerate the MOK
The MOK lives under /var/lib/intergen/mok/. On a default install Secure Boot is off and there is no enrollment password to lose. If you run with Secure Boot enabled and need a fresh MOK, reinstalling with Forge regenerates one; the next kernel install or upgrade rebuilds the UKIs with it, and the bare-vmlinuz fallback in GRUB keeps the system booting in the meantime. (There is no separate recovery wrapper command — UKI signing is handled by the kernel package’s post-install hook.)
Boot dropped me to the FDE recovery shell
Three failed passphrase attempts (or a missing /etc/crypttab or LUKS volume) drop you to a minimal busybox shell with cryptsetup. From there:
cryptsetup open /dev/disk/by-uuid/<uuid> cryptroot
mount /dev/mapper/cryptroot /newroot
exec switch_root /newroot /sbin/init
Use ls /dev/disk/by-uuid/ to inspect what enumerated, and reboot -f to reboot (the standard reboot is not available pre-systemd). The recovery shell has no network and no logs by design.
Secure Boot is refusing my new kernel
Usually the MOK was not enrolled (or was un-enrolled) but the post-install hook signed a UKI with it. Boot the recovery entry (bare vmlinuz via GRUB), then re-enroll or regenerate the MOK.
Troubleshooting
| Symptom | Likely cause | Fix |
|---|---|---|
| Boot prompt asks for the passphrase but every attempt fails | Wrong passphrase, or boot keyboard layout differs from inside the OS | The FDE initramfs uses US-QWERTY by default; type the QWERTY equivalents for layout-sensitive characters. |
| Boot drops to the FDE recovery shell: “no LUKS volume specified” | /etc/crypttab was not written, or encryption did not complete | cat /etc/crypttab; if empty, reinstall from a live ISO with encryption enabled. |
| Boot drops to the FDE recovery shell: “LUKS volume not found after 30s wait” | Disk did not enumerate in time (failing/USB/RAID-slow) | ls /dev/disk/by-uuid/; if the volume appears, retry cryptsetup open manually. |
| TPM2-sealed unlock falls through to passphrase | PCR0 or PCR7 changed (firmware update, Secure Boot reconfig, shim/MOK update) | Enter the passphrase; re-enroll TPM2 against the new PCR state. The outcome appears in the [EXPERIMENTAL TPM2] line on the boot console (console-only). |
| FIDO2 unlock does not detect the token | Token plugged in too late, or dead battery | Plug in before boot (30 s window); fall back to passphrase. The outcome appears in the [EXPERIMENTAL FIDO2] line on the boot console (console-only). |
| New kernel installs but won’t boot, falls through to recovery | UKI signed with a MOK the firmware doesn’t trust | Re-enroll the MOK, then re-run the kernel post-install hook. |
| GRUB menu shows only the recovery entry | UKI signing has been failing silently | Inspect /var/log/intergen-kernel-postinstall.log; ESP-full and a missing MOK key file are the common causes. |
| The ESP filled on a kernel upgrade and the new UKI was skipped | UKI generation logged ESP-full and kept the previous default | The automatic keep-2 prune has already removed old generations; check the UKI sizes under /boot/efi/EFI/Linux/ for an oversized initramfs payload, then re-run the post-install hook. |
ukify is missing on the installed system | Forge skipped the UKI tooling on an older or different-boot-path install | ukify ships with the systemd-pass2 package — pkm reinstall systemd-pass2 if it is missing, and pkm install sbsigntool for the signing tool; then re-run the post-install hook for the current kernel. |
Running unsigned kernels
Don’t, on a real install. Every kernel that boots is signed. Build your kernel, sign it with your MOK using sbsign, and install it through the same pkm flow as everything else. To test bare unsigned kernels, use a VM with Secure Boot off.
Further reading
- Forge, the installer — the install flow that sets up the MOK, the boot chain, and optional encryption.
- Verified boot and Disk encryption — the install-side companions to this page.
- FAQ — quick answers to common boot and encryption questions.
Networking
This page covers day-to-day network administration on InterGenOS: bringing interfaces up with DHCP or static addressing, joining a VPN, and reasoning about the firewall posture. InterGenOS ships GNOME 49 on Wayland, so most desktop users will manage connections through the graphical network panel, while administrators and contributors can drop to the command line for the same operations.
Networking on InterGenOS inherits the system’s overall stance: security is not first. It is only. Defaults are conservative, nothing listens on a public interface unless you ask it to, and the network never carries telemetry off your machine. The goal is a machine you understand, can modify, and can trust.
Default Network Posture
Two defaults shape everything else on this page:
- Services bind to localhost. Any server package shipped by InterGenOS binds exclusively to
127.0.0.1by default. Services do not listen on public interfaces unless you deliberately edit their configuration to allow it. This means a freshly installed system exposes effectively no network attack surface on its own. - No traffic leaves on its own. InterGenOS collects zero analytics, crash reports, or usage statistics, and it does not auto-update. The only outbound connections your system makes are the ones you initiate, plus package operations you explicitly run (such as
pkm syncagainst the signed mirror).
Because of the localhost-bind default, opening a service to the network is a deliberate, auditable act rather than something you have to discover and switch off after the fact.
Managing Connections
From the desktop
On the GNOME 49 Wayland session, use the Settings -> Network (wired) and Settings -> Wi-Fi panels, or the system status menu in the top bar, to connect to wired and wireless networks. This is the recommended path for laptops and workstations: DHCP works out of the box, and the panel handles Wi-Fi credentials, per-connection settings, and VPN profiles.
Static vs. DHCP
DHCP is the default for new connections. To assign a static address from the desktop, open the connection’s settings in the Network or Wi-Fi panel, switch the IPv4 (or IPv6) method from Automatic (DHCP) to Manual, and enter the address, prefix/netmask, gateway, and DNS servers for your network. Apply the change and reconnect the interface for it to take effect.
NetworkManager is the default network management daemon and is enabled at boot. Administrators can manage connections from the command line with nmcli or the text-based nmtui, which drive the same connections as the desktop panels. (systemd-networkd ships as well but is disabled by default; it is available for hosts that prefer a networkd-based configuration.)
For headless or server-style hosts, configure the same wired/static/DHCP choices with nmcli, which creates and edits NetworkManager connection profiles directly. Use nmcli connection to add, modify, and bring profiles up or down without the desktop panel.
VPN
InterGenOS supports standard Linux VPN clients. The desktop network panel can import and manage VPN connections, and command-line clients can be installed and configured directly.
A VPN changes which interface and DNS your traffic uses, so keep the localhost-bind default in mind: a VPN tunnel does not, by itself, expose any local service to the remote network. If you want a service reachable over a VPN, you still have to bind it beyond 127.0.0.1 and open the firewall for it deliberately.
No VPN runs by default. Tailscale ships on the image (it lands with the Extras package group; its daemon stays disabled until you enable it), while WireGuard and OpenVPN are not currently packaged. Enable Tailscale deliberately — or on a system installed without the Extras group, pkm install tailscale first — then configure it through its own command-line tooling.
Firewalling
Because shipped services bind to localhost by default, the network attack surface of a default install is minimal before you add a firewall on top. For systems that expose services intentionally, or that sit on untrusted networks, configure a host firewall to make the allowed-traffic policy explicit and auditable.
InterGenOS layers several controls beneath the firewall that are relevant to network exposure:
- AppArmor confines services — the default-ISO profiles (
intergen-mcp,pkm) in complain (learning) mode, and the network-facing server packages on the mirror in enforce mode once installed — limiting what a compromised network-facing service can reach. - Aggressive systemd sandboxing restricts each service’s address families. The baseline
RestrictAddressFamilies=AF_UNIX AF_INET AF_INET6directive, applied across system daemons, denies access to other socket families entirely. - No default passwords. InterGenOS does not ship services with blank or default credentials, so an exposed service is not also a free login.
The host firewall is nftables (the nft command), enabled at boot by default. The shipped baseline ruleset drops inbound and forwarded traffic by policy, permitting only loopback and established/related connections on input, and leaves outbound traffic accepted. So a default install refuses unsolicited inbound traffic without you configuring anything, while outgoing connections are not filtered — if you want egress policy, that is yours to add. InterGenOS does not ship firewalld or ufw, so rules are expressed and audited directly in nftables.
For the firewall configuration itself, and for the reasoning behind the network-exposure defaults, see the security handbook page on Network Security & Firewalling.
Verifying Network State
Treat what the system reports as the source of truth rather than assuming. To confirm what is actually listening and where, inspect the live socket and routing state on your machine (for example with the standard ss and ip tooling), and compare it against your intended policy. If a service is listening on anything other than 127.0.0.1, that exposure was configured deliberately and should match a firewall rule you can point to.
Further Reading
- Network Security & Firewalling — the security-handbook treatment of firewall policy and network exposure.
- Attack-Surface Minimization — why InterGenOS ships almost nothing listening by default.
- Users, Groups & Services — managing the services that may bind to the network.
- Self-Hosting Securely — exposing your own services on purpose, safely.
- FAQ — common questions about defaults and behavior.
Virtualization & Containers
This page covers running containerized workloads and full virtual machines on InterGenOS. The two stacks ship with different footprints — the container engines are mirror-only packages you install on demand, while the virtualization stack is included on the image — but the same rule governs both: nothing container- or VM-related runs until you deliberately enable it. That posture is deliberate: security is not first. It is only. The goal is a machine you understand, can modify, and can trust, so a root-privileged daemon never starts on your behalf.
InterGenOS is built from source. The container engines, the virtualization stack, and their runtimes are compiled and signed alongside the rest of the system, verified by pkm before installation against the live package index. See Repository Trust and the Package Manager for how that verification works.
Containers
InterGenOS provides two OCI container engines today: Podman and Docker. Both are open-source (Apache-2.0), and both manage standard OCI images and containers.
Podman
Podman is the daemonless OCI engine. It runs containers without a long-lived background service and supports rootless operation, which fits the system’s least-privilege posture. The Podman package pulls in the supporting runtime stack automatically as dependencies:
- crun — low-level OCI runtime
- conmon — container monitor for
conmon-managed processes - netavark and aardvark-dns — container networking and name resolution
- fuse-overlayfs — userspace overlay storage driver for rootless containers
- catatonit — minimal init for container PID 1
- containers-common — shared configuration for container tools
- passt — userspace networking
Install it with pkm:
sudo pkm install podman
Once installed, Podman is invoked directly. Because it is daemonless, there is no service to enable before you can run a container.
Docker
Docker ships as a separate, opt-in package. It bundles the Docker engine (dockerd and docker-proxy), the docker CLI, and an init for container PID 1. Docker depends on containerd (its runtime peer) and runc (the low-level OCI runtime), both built and pinned alongside it.
Docker is mirror-only: it is not part of the default desktop image, so it never lands on a system without explicit operator action. Install it with pkm:
sudo pkm install docker
Unlike Podman, Docker uses a root-privileged daemon. To honor the secure-default posture, docker.service and docker.socket ship disabled. The daemon does not start until you opt in:
sudo systemctl enable --now docker.socket
Until you run that, the Docker daemon is not listening and not running. This is a belt-and-suspenders default on top of the mirror-only inclusion: even after install, you make a deliberate choice to start a privileged daemon.
Choosing between Podman and Docker
If you want a daemonless, rootless-capable engine that keeps privilege low by default, use Podman. If your existing tooling or CI expects the Docker daemon and socket, install Docker and enable it explicitly. Both consume and produce standard OCI images, so workflows are portable between them.
Virtual machines
InterGenOS ships a complete KVM-based virtualization stack on the image: it is present in the live ISO and lands with the Extras package group at install, with every daemon disabled — no virtualization process starts until you enable it. Every piece is built from source and verified like the rest of the system:
- QEMU — the machine emulator and virtualizer (KVM-accelerated on hardware that supports it).
- libvirt — the virtualization management daemon and API, with its GLib and Python bindings.
- virt-manager and virt-viewer — the graphical VM manager and the guest console.
- OVMF (from EDK2) — UEFI firmware for guests, including a Secure-Boot-capable image.
- swtpm — a software TPM 2.0 for guests, so a VM can do measured boot. (TPM2-sealed disk encryption is not offered by the installer in this release — see Disk Encryption & LUKS.)
- virtiofsd — the virtio-fs daemon for sharing a host directory into a guest.
- SeaBIOS — legacy BIOS firmware for guests that need it.
On a system installed without the Extras group, add the stack any time with pkm (virt-manager pulls in QEMU, libvirt, and the firmware pieces as dependencies):
sudo pkm install virt-manager
Because OVMF and swtpm are included, an InterGenOS host can give its guests enforced Secure Boot and an emulated TPM 2.0 — the combination needed to run another InterGenOS instance (or any Secure-Boot OS) with its full trust chain intact. This is the same class of stack InterGenOS is itself assembled in: the OS both hosts VMs and builds itself.
libvirtd and its sockets ship disabled by default — a privileged management daemon is armed only when you choose to. Start it deliberately when you are ready to host VMs:
sudo systemctl enable --now libvirtd.socket
To install InterGenOS as a guest under QEMU/KVM (with OVMF + swtpm for the full boot chain), see Installing in a Virtual Machine. GNOME Boxes is not packaged; virt-manager is the shipped graphical manager.
Defaults and posture
- Nothing runs uninvited. No container engine is present in the desktop image; the virtualization stack is present but fully inert. You enable exactly what your workload needs.
- No privileged daemon by default. Podman is daemonless; Docker’s daemon and socket, and libvirt’s daemon and sockets, ship disabled and require an explicit
systemctl enable --now. - Verified before install.
pkmchecks signatures against the trusted package index before any container package is placed on disk. - No telemetry. The container stack carries no usage reporting off your machine.
Further reading
- Package Manager — installing and managing packages with
pkm - Repositories — where packages come from and how they are trusted
- Sandboxing & Mandatory Access Control — the broader confinement model
- Package & Config Reference — the generated catalog of what InterGenOS ships
- FAQ
Power Management & Maintenance
This page covers keeping an InterGenOS machine healthy over its lifetime: applying updates, managing power and battery, watching disk and journal usage, and verifying that the signed boot chain and system image are still intact. The defaults described here follow the same principle as the rest of the system. Nothing happens behind your back; maintenance is a set of explicit, visible actions you take.
InterGenOS ships GNOME 49 on Wayland, with systemd as the init system and service manager. The tooling below is standard systemd and InterGenOS pkm.
Updating the System
There are no automatic upgrades. Software changes only when you run the package manager yourself. This is deliberate: updates are a decision you make, not one made for you.
Updates flow through pkm, the InterGenOS package manager. Software is pulled from a signed binary mirror. Every sync verifies the index signature against a release-signing subkey (held on a hardware token and certified by the offline InterGenOS master key), and each package’s SHA-256 hash is validated locally before it is installed.
sudo pkm sync          # refresh and cryptographically verify the package index
sudo pkm upgrade --all # apply available upgrades for everything installed
pkm sync (also spelled pkm update) only refreshes the local copy of the signed index and verifies its signature; it changes nothing on disk. pkm upgrade is the command that actually installs newer versions — --all upgrades everything, or name specific packages. Your system stays exactly as you left it until you run pkm upgrade.
InterGenOS does ship one background package task: a daily timer that checks for available upgrades and shows a count (a GNOME tray indicator and a login message) but never installs anything. It is opt-out — sudo systemctl disable --now pkm-check-updates.timer. For the full pkm command surface and the notification details, see The Transparent Package Manager.
For the repository verification model behind these commands, see the security section.
Kernel updates and the boot chain
When you install or upgrade a kernel, the installed system regenerates and signs that kernel’s Unified Kernel Image (UKI) with your machine’s local Machine Owner Key (MOK). The same boot-time signature verification that protects the original ISO image therefore continues to apply to every kernel you install afterward. You do not need to re-run any signing step by hand; it happens as part of the kernel install or upgrade.
A kernel upgrade takes effect only on the next boot — the running kernel stays loaded until you restart. The kernel package declares this, so pkm tells you rather than leaving you to infer it from a uname -r that has not changed. The same applies to any package whose new code cannot activate in place, such as the NVIDIA driver.
If your hardware needs out-of-tree modules (for example proprietary drivers), Forge walks you through MOK enrollment on first boot. See Filesystems, Kernel & Boot for the storage and boot-chain detail, and the Forge installer guide for enrollment.
Power Management
InterGenOS uses systemd for power state transitions. The standard commands apply:
systemctl poweroff     # shut down
systemctl reboot       # restart
systemctl suspend      # suspend to RAM
systemctl hibernate    # suspend to disk
systemctl hybrid-sleep # suspend to both RAM and disk
On the GNOME 49 desktop, power settings (screen blanking, automatic suspend, what the power button does, and battery behavior on laptops) are exposed through GNOME’s Settings under the Power section. These are user-facing preferences and do not change the system’s security posture.
Logind governs lid-switch, idle, and power-key behavior at the system level through /etc/systemd/logind.conf (and drop-ins under /etc/systemd/logind.conf.d/). After editing, apply with:
systemctl restart systemd-logind
Power profiles are managed by power-profiles-daemon, which is integrated with the GNOME power settings. You can switch and query profiles from the command line with powerprofilesctl. InterGenOS does not ship tlp or thermald; profile management goes through this single daemon.
Battery and thermal status
The kernel exposes battery and thermal information through sysfs, which you can read without additional tooling:
cat /sys/class/power_supply/BAT0/capacity   # battery charge percentage
cat /sys/class/power_supply/BAT0/status     # charging / discharging / full
The device name (BAT0, BAT1, and so on) depends on your hardware. List /sys/class/power_supply/ to see what your machine exposes.
Disk and Storage Maintenance
Keeping an eye on disk usage is the most common maintenance task. The standard tools apply:
df -h        # filesystem usage by mount point
du -sh <dir> # size of a directory tree
Journal management
systemd retains logs in the journal. Over time this can grow. Inspect and bound it with journalctl:
journalctl --disk-usage              # how much space the journal occupies
journalctl --vacuum-size=500M        # trim the journal down to 500 MB
journalctl --vacuum-time=2weeks      # drop entries older than two weeks
For reading logs day to day, see Users, Groups & Services.
Package cache
pkm keeps downloaded packages and verified hashes locally so installs are reproducible and verifiable. The cache lives under /var/cache/pkm, with subdirectories for the index database (db/), downloaded packages (packages/), in-progress downloads (partial/), and rollback data (rollback/).
Clean the downloaded-package cache with pkm cache clean. By default it keeps, for each package, the archive matching the version you currently have installed — so a reinstall or verify still has its source — and removes the rest, including every cached archive of a package that is no longer installed. Use --keep N instead to retain the N most recent archives per package. To operate on the rollback cache instead — pruning older rollback archives while keeping the most recent one per package — add --rollback:
pkm cache clean            # prune the packages cache
pkm cache clean --rollback # prune the rollback cache
Verifying System Integrity
InterGenOS boots through a signed chain: a Microsoft-signed shim validates the GRUB bootloader, which verifies the kernel’s Unified Kernel Image (UKI). On an installed system the UKI — kernel, command line, and initramfs — is MOK-signed and regenerated on every kernel install, so a tampered kernel cannot boot under your enrolled key; this runs automatically, you do not start it. (dm-verity additionally seals the read-only live ISO image, its root hash carried inside the signed UKI.) To check the installed files themselves, pkm verify --all re-validates every package’s SHA-256 on demand.
You can review what is enforced and how it is verified in the security section. To inspect the effective sandbox of any running service, use:
systemd-analyze security <unit>
The system collects zero telemetry, no analytics, and no crash or usage reports, so there are no background reporting services to find and stop as part of maintenance. The maintenance surface is intentionally small: update when you choose, watch disk and journal usage, and trust that the boot chain verifies itself.
On-Device Assistance
Two local, offline-first tools can help you administer and maintain the system:
- InterGen is a tiered, hardware-detected local assistant built on an on-device model. It runs on-device with zero telemetry and selects a model tier appropriate to your hardware. When a query exceeds local capability, the optional Phone-A-Friend (Frontier/Cloud Escalation) path can hand off to a remote model, but only when you invoke it.
- InterGen Sentinel is a pluggable security scanner. Its default backends are Local-Rules and Local-Qwen, both running on your machine. Six named cloud providers are available strictly opt-in — Claude (Anthropic), Gemini (Google), Copilot (Microsoft), ChatGPT (OpenAI), Grok (xAI), and DeepSeek — along with any custom OpenAI-compatible endpoint you supply. Nothing leaves the machine unless you choose a cloud backend.
See the assistant documentation for configuration.
See Also
- System Administration overview
- Users, Groups & Services — service management and reading logs
- Filesystems, Kernel & Boot — storage layout and the signed boot chain
- Networking — interfaces and the localhost-only bind policy
- Forge installer guide — first boot and MOK enrollment
- Security section — the full enforced baseline
- Frequently asked questions
Backups & Version History with Chronicle
Chronicle is the InterGenOS backup utility. It gives you a browse-by-time history of your machine on a storage stack that has no copy-on-write filesystem underneath it — no btrfs subvolumes, no ZFS snapshots. Instead of asking the filesystem for snapshots, Chronicle builds its own history out of a content-addressed store and hardlink rotation, so it works on the plain root filesystem that InterGenOS installs by default.
Chronicle ships on the system image as the intergenos-backup package. You do not install it; it is already there.
This page describes Chronicle as it exists in the tree today. It documents three things a backup tool has to get right — what is protected, how you get data back, and where the data lives — plus how Chronicle interacts with full-disk encryption.
What Chronicle protects: three layers
Chronicle does not treat your machine as one undifferentiated blob. It keeps three separate timelines, called layers, because they change at different rates, matter for different reasons, and belong in different places.
| Layer | What it holds | Where it lives |
|---|---|---|
config-state | System configuration state — the /etc surface that makes this machine this machine | Always-on local store |
restore-point | A marker taken automatically before a package transaction changes the system | Always-on local store |
user-data | Your files, versioned hourly | External backup target only |
The split is deliberate. The first two layers are compact — a content-addressed store dedupes configuration and package state tightly — so they can live on the system disk and be always on. That means a freshly installed machine has some protection before you have attached any external drive at all: if a package upgrade breaks something, the restore point taken before that transaction is already on disk.
The third layer is different. User data is bulk data, and putting a bulk history on the same disk as the original protects you from nothing — a failed system disk takes both copies. So the user-data layer is target-only: it exists on the external backup volume, and until you attach one, your documents are not being versioned. Chronicle is explicit about this rather than quietly implying otherwise, which is why chronicle status reports target health as its first concern.
Attaching a backup target
Chronicle does not guess which drive is yours. You adopt a target explicitly.
chronicle target scan
This enumerates candidate volumes. Then adopt one:
sudo chronicle target adopt /mnt/backup
There are two target classes, and the distinction matters:
whole-volume(the default) — Chronicle takes the whole volume as the backup target.directory— Chronicle takes a size-capped subtree on a volume you are already using for other things. In this class Chronicle owns a single directory namedChronicleBackupsand never touches anything else on that volume.
# Use a capped directory on an existing drive instead of a whole volume
sudo chronicle target adopt /mnt/data --class directory --cap 274877906944
The --cap value is a size cap in bytes; the example above is roughly 256 GiB. A cap is what makes the directory class safe to point at a drive that is not exclusively yours to fill.
Encrypt the target
A backup drive is a complete copy of your data that leaves the machine’s physical protection the moment someone walks off with it. Chronicle’s default policy therefore recommends a LUKS2 container on the target, so a lost or stolen backup drive is not a data breach. This is expressed as target_encryption in the configuration file and defaults to enabled; setting it false is a decision to make only for a volume that is already trusted by other means.
This is the same reasoning as Disk Encryption & LUKS applied to the second copy. Encrypting your system disk and then writing a plaintext backup of it to a USB drive undoes the protection you paid for.
Taking a version now
Captures happen on a schedule (below), but you can always take one immediately:
chronicle capture config-state --reason "before editing sshd config"
chronicle capture user-data
The --reason string is stored with the version, which is what makes a timeline readable months later. For a large capture you would rather not pay for right now, queue it for the off-peak window instead:
chronicle capture user-data --async
chronicle queue          # show what is waiting
Browsing and comparing history
chronicle status                     # target health and capture health
chronicle list user-data             # browse that layer's timeline
chronicle list config-state --since 1750000000 --until 1760000000
list takes optional --since and --until bounds as epoch seconds.
To see what actually changed in a file between a past version and the file on disk now:
chronicle diff config-state <version> /etc/ssh/sshd_config
Restoring
Restore is the operation that can destroy data, so Chronicle makes it loud by design — the command’s own help describes it as never silent.
# Show the plan without touching anything
chronicle restore user-data <version> /home/you/Documents/report.odt --dry-run

# Restore beside the current file instead of over it
chronicle restore user-data <version> /home/you/Documents/report.odt --mode beside

# Replace the current file, after confirming
sudo chronicle restore user-data <version> /home/you/Documents/report.odt
Two restore modes exist and the difference is the whole safety story:
replace-confirm(the default) — the restored content replaces what is on disk now, after a confirmation prompt.beside— the restored content is written alongside the current file, so nothing you have now is lost and you compare the two yourself.
--dry-run prints the plan and stops. -y / --yes skips the prompt, which is appropriate in a script and inappropriate the first time you run a restore by hand.
You can restore more than one path in a single command; paths accepts a list.
Restore runs through a separate, higher-capability service leg (chronicle-restore@.service) rather than inside the always-running engine. Writing to arbitrary paths as root is a strictly larger privilege than taking a backup, so it lives in its own unit instead of being a capability the long-lived engine carries at all times.
Verifying that the history is real
A backup you have never verified is a belief, not a backup. Chronicle verifies a single version, or scrubs the entire store:
chronicle verify user-data <version>   # one version
chronicle verify --scrub               # the whole store
A weekly scrub also runs on its own timer, so integrity checking is not something you have to remember.
Protecting a version from pruning
Old versions are pruned as space is reclaimed. To keep one — the version from just before a migration, say — pin it:
chronicle pin <version>
chronicle unpin <version>
The schedule
Chronicle installs an engine plus three timers:
| Unit | Schedule | Purpose |
|---|---|---|
chronicled.service | always running | The backup engine and sentinel |
chronicle-userdata.timer | hourly | User-data capture |
chronicle-offpeak.timer | every 2 hours | Drain the queued off-peak captures |
chronicle-scrub.timer | weekly | Integrity scrub |
Large captures are held back until outside your working hours. The default working span is 09:00–18:00, and off-peak is everything else; a capture whose estimated change size is above a threshold waits for the off-peak window rather than competing with you for disk and CPU while you are using the machine. Smaller changes capture immediately.
You can inspect the engine and timers with ordinary systemd tooling:
systemctl status chronicled.service
systemctl list-timers 'chronicle-*'
journalctl -u chronicled.service
Package transactions create restore points automatically
Chronicle installs a pkm pre-transaction handler at /usr/lib/pkm/pre-transaction.d/chronicle-restore-point. Before pkm changes installed packages, a restore-point version is captured. You do not have to remember to do this, and it means the answer to “the upgrade broke it, what did the system look like an hour ago” is already recorded.
This complements, rather than replaces, pkm’s own rollback — see The Transparent Package Manager.
Where everything lives
Chronicle derives every path from one module rather than hard-coding strings, and there are exactly two store roots:
/var/lib/chronicle/      the always-on LOCAL store on the system disk
    cas/                 content-addressed blobs, sha256-sharded
    versions/<layer>/    committed version manifests, one JSON per version
    queue/               durable capture-intent spool (local store only)
    state.json           engine state: sequence number, adopted target, pins

<target>/                the TARGET store on the backup volume
    cas/  versions/  state.json      (same shape; no queue)
On a directory-class target, that store lives under a ChronicleBackups directory and nothing outside it is touched.
Other paths worth knowing:
| Path | What it is |
|---|---|
/etc/chronicle/chronicle.conf | User-tunable policy (see below) |
/run/chronicle/engine.sock | The engine’s runtime IPC socket |
/usr/bin/chronicle | The command-line client |
/usr/bin/chronicle-gui | The graphical client |
/usr/libexec/chronicle/ | Engine and helper implementation |
The target store holds the bulk user-data trees plus a mirror of the content-addressed layers, which is the property that makes a lost system disk fully recoverable rather than partially recoverable.
Configuration
Policy lives in /etc/chronicle/chronicle.conf under a [chronicle] section. Every key is optional: an absent or partial file yields a usable default policy, and a malformed value for one key falls back to that key’s default rather than stopping the engine. The file ships fully commented with the built-in defaults shown, so reading it is the fastest way to see current policy.
The tunables cover the working-hours window, the size threshold that sends a large capture to the off-peak window, the target preference and class, target encryption, and which paths count as user data. User data defaults to /home, and caches, trash and thumbnails are excluded by default — they are reproducible churn, not history worth keeping.
Runtime state that the engine owns — the monotonic sequence, the adopted target details, the pin set — deliberately does not live in the configuration file. It lives in /var/lib/chronicle/state.json, so editing configuration can never corrupt the engine’s own bookkeeping.
There is a manual page: man chronicle, and man chronicle.conf for the configuration format.
The graphical client
Chronicle ships a GTK4/libadwaita application, org.intergenos.Chronicle, which appears in your applications list. It is the same engine underneath; the browse-by-time history, restore and verification operations are the ones described above. Privileged operations go through a polkit policy (org.intergenos.Chronicle.policy), so the graphical client asks for authorization at the point of action rather than running privileged throughout.
How Chronicle relates to full-disk encryption
These are different protections and neither substitutes for the other.
Full-disk encryption protects data at rest against someone who has the drive. If your laptop is stolen while powered off, LUKS is what stops the thief reading your files. It does nothing about a file you deleted by mistake, because the encrypted volume faithfully encrypts the deletion too.
Chronicle protects against loss and change over time. It is what has your file from yesterday. It does nothing about a stolen drive, because a backup of an encrypted volume is only as protected as the volume it was written to.
They compose as follows on an InterGenOS machine:
- The system disk is LUKS-encrypted at install time. The
config-stateandrestore-pointlayers live inside that encrypted volume, so the always-on local history inherits the system disk’s encryption automatically. - The backup target is a separate volume with its own encryption decision. This is why Chronicle recommends a LUKS2 container on the target by default: without it, the copy of your data on the backup drive sits outside every protection the system disk gave you.
- Neither layer protects the LUKS header itself. Backing up your LUKS header is a distinct task with distinct handling — see Encryption, Keys & TPM2 and Recovery & Reinstall.
The short version: encrypt the system disk and the backup target, and treat the LUKS header backup as its own separate obligation.
A sensible first setup
chronicle status                          # confirm the engine is running
chronicle target scan                     # find the drive
sudo chronicle target adopt /mnt/backup   # adopt it (encrypt it first)
chronicle capture user-data               # take the first full capture
chronicle list user-data                  # confirm the version exists
chronicle verify user-data <version>      # confirm it is readable
The last two steps are the ones people skip. A backup you have listed and verified is a backup; everything before that is a configuration.
Using InterGenOS Offline
InterGenOS is designed to be a complete, usable, verifiable system on a machine with no network connection. Not a degraded one — a complete one. This page collects everything that follows from that, because the pieces are documented individually elsewhere and the picture they add up to is not obvious until you see them together.
An air-gapped InterGenOS machine can still: run its AI assistant, read its own full manual with working links, verify its own boot chain and installed packages, and install new software from removable media.
The manual is on your disk
The complete wiki you are reading is installed on every InterGenOS machine, at /usr/share/doc/intergenos/wiki.
This is the single most useful thing to know about running the system offline, and nothing else in the documentation says it. The wiki ships as the intergenos-wiki package in the desktop tier, which means it is on the installation image — it is present after a normal install, without you doing anything.
Open it in a browser with no network at all:
xdg-open /usr/share/doc/intergenos/wiki/index.html
Or read the raw pages directly:
ls /usr/share/doc/intergenos/wiki
The local copy is the same content as the public site, including search. If you are troubleshooting a machine that cannot reach the network, the troubleshooting documentation is already on it.
The assistant cites that local copy
When InterGen answers a question and cites documentation, the citation’s primary link is a file:// link into /usr/share/doc/intergenos/wiki, with the online page as a secondary link. That ordering is deliberate: the link you are meant to click works with networking down.
The assistant also refuses to cite a page it cannot verify. Every shipped page is pinned by SHA-256 in a manifest signed with the operator’s release key. Before emitting a citation, InterGen hashes the page on disk and compares it to the pinned value; if the page is not in the signed manifest, or its bytes no longer match, no citation is produced at all. The assistant answers without a source rather than pointing you at a page whose provenance it cannot stand behind — an unsigned or altered page is exactly the vector that gate exists to catch.
Both the manifest and its detached signature ship alongside the pages, so this verification is itself a local operation. See What Leaves the Machine.
The assistant works offline
InterGen downloads its model once, on first run, and then runs entirely on your own CPU and GPU. After that fetch, no network connection is needed for it to work. There is no cloud account, no API key, no telemetry, and no background upload.
If the machine will never have a network connection, the model still has to reach it once. Fetch it on a connected machine and carry it to the target under the models directory (/var/lib/intergen/models by default) rather than expecting first-run to succeed offline.
Optional cloud escalation is not configured by default and cannot run without a provider you add yourself; on an offline machine you can also set escalation.mode: never to state the intent explicitly in configuration. See Setting Up a Frontier Model Provider and Privacy & Data Locality.
Installing packages without a network
Package installation is where an offline machine actually needs a plan, because the default flow talks to a signed mirror.
From a local archive on removable media
pkm installs directly from a package archive file:
sudo pkm install <name> --archive /media/usb/<name>-<version>.igos.tar.gz
The --archive-trust option controls how much verification is required, and it defaults to strict:
| Mode | Meaning |
|---|---|
strict | Default. The strongest verification. |
repo-only | Trust anchored in the repository index. |
loose | Relaxed; use only when you have verified the archive by other means. |
Do not reach for loose because strict refused something. A refusal is the gate working; find out why before weakening it.
From a local mirror
If you have several offline machines, a local mirror is usually better than carrying individual archives. The repository layout, mirror hosting and the signing model are covered in Repositories, Mirrors & Self-Hosting and Self-Hosting Securely. An offline mirror on the local network is still a signed mirror — the index signature is verified the same way — so this does not trade away verification for convenience.
Remember that mirror-only packages are exactly the ones an offline machine cannot reach by default. All seven of the additional language toolchains are in that category; see Additional Language Toolchains.
Checking for updates you cannot download
pkm check-updates and pkm sync both need to reach a repository. On an air-gapped machine these will fail, and that failure is honest rather than a malfunction. The system’s own daily update check timer is opt-out:
sudo systemctl disable --now pkm-check-updates.timer
Verification works offline
Everything InterGenOS verifies about itself, it verifies locally. None of the following needs a network connection:
pkm verify <name>                 # installed package integrity
sudo pkm verify --all             # every installed package
bootctl status                    # boot chain
journalctl -b | grep -iE 'verity|secure boot|mok'
Package integrity is checked against manifests already on disk; the boot chain is verified by the firmware and the initramfs against signatures already in the image. The full procedures are in First Checks After Install and Security Verification.
This is a deliberate property, not a coincidence. A verification step that requires calling a server is a verification step that fails exactly when the network is untrusted — which is when you most want it.
What genuinely requires a network
Being honest about the boundary is more useful than claiming everything works:
- Fetching the assistant’s model the first time. One download, then never again.
pkm sync,pkm upgrade, and installing mirror-only packages — unless you have a local mirror or the archives on media.- The optional cloud-escalation feature, which is off by default and is the only path by which conversation content can leave the machine at all.
- Anything you install that is itself a network application.
Nothing in the base system phones home, and no part of the boot, verification, documentation or local-assistant path depends on reaching anything.
Related pages
- Privacy & Data Locality
- What Leaves the Machine
- Setting Up a Frontier Model Provider
- The Transparent Package Manager
- Repositories, Mirrors & Self-Hosting
- Additional Language Toolchains
- Reproducibility & Verification
- First Checks After Install
- Security Verification
- Self-Hosting Securely
- Backups & Version History with Chronicle
Troubleshooting
This section is for when something does not behave as expected, whether you are running InterGenOS on hardware or building it from source. InterGenOS is a built-from-source, security-only-aligned distribution: the goal is a machine you understand, can modify, and can trust, so the troubleshooting guidance here favors understanding the root cause over applying an opaque workaround.
These pages describe InterGenOS as it ships. The section grows as more commands and flows are documented.
How to use this section
Start with the methodology page if you are not sure where a problem belongs. It covers the general approach: read the actual error, identify which layer it comes from (boot, desktop, a service, a package build), and gather the facts before changing anything. From there, jump to the page that matches your symptom.
- Troubleshooting methodology — a general approach to diagnosis: read the error, locate the layer, gather facts, change one thing at a time.
- Boot and graphical issues — the system does not boot, drops to a console, or the graphical session fails to start. The shipping desktop today is GNOME 49 on Wayland.
- Service and hardware issues — a system service will not start, or a hardware device is not detected or behaves incorrectly.
- Package and build failures — problems installing or building software, including the from-source build pipeline.
Build-pipeline gates (for builders)
If you build InterGenOS from source, the build runs through 21 phases, beginning with a fast validate phase that checks reproducibility and correctness before any compilation starts. A failure here is cheap to fix: it halts before the build chroot is created, so you can correct the finding and relaunch without reverting any state.
The detailed walkthrough of those gates — audit coverage, tier validation, build-order and dependency scans, and how to resolve each correctly rather than silence it — belongs with the build-side material. The package and build failures page is the entry point for build problems in this wiki.
Before you ask for help
Two habits make a problem far easier to diagnose, for you and for anyone helping:
- Quote the exact error. Copy the real message, not a paraphrase. The precise text, including any package names, paths, or exit codes, is usually the fastest route to the cause.
- Change one thing at a time. When you apply a fix, change a single variable and re-test, so you know what actually resolved the issue.
If your question is more “how does this work” than “this is broken,” the FAQ is the better starting point. For security configuration and verified-boot questions, see the security section and the install section. Security here is not first. It is only — so when a fix would weaken the system’s integrity, treat that as a reason to find a different fix, not to accept the weaker one.
Related sections
- Start here — orientation and the FAQ.
- Installation — Forge, the installer, and recovery.
- Security — the verified-boot chain, hardening, and trust boundaries.
Troubleshooting Methodology
This page is the spine of the troubleshooting section. It gives you an ordered way to work a problem on InterGenOS, from the cheapest checks to a full recovery, and tells you when to escalate and how to ask for help so that someone can actually act on it.
The approach mirrors how InterGenOS itself is built: surface every error, never mask one, and turn an unverified assumption into a checked fact before you act on it. Security is not first. It is only. The goal of every step below is the same goal as the system: a machine you understand, can modify, and can trust.
The shipped desktop is GNOME 49 on Wayland. Where a command, package name, or flag is specific to a subsystem, this page points you to the focused page for that subsystem rather than guessing.
The escalation ladder
Work a problem in order. Most issues resolve at the first or second rung; the later rungs exist so that a hard problem still has a defined path and you never have to improvise under pressure.
- Basic — observe, reproduce, and read the obvious signals.
- Advanced — read logs, isolate the failing component, change one variable at a time.
- Recovery — restore a known-good state when the running system can no longer be trusted.
- Support — gather evidence and escalate so someone can act on facts, not guesses.
Do not skip rungs. A “fix” applied before you have reproduced the problem is a guess, and a guess that appears to work hides the real cause until it resurfaces later.
Rung 1 — Basic
Start here for every problem. The aim is to state the problem precisely and gather the cheapest signals before touching anything.
- State the symptom exactly. What did you do, what did you expect, what happened instead? “It is broken” is not a symptom; “the login screen appears, I enter my password, and it returns to the login screen” is.
- Reproduce it. A problem you cannot reproduce is a problem you cannot confirm you have fixed. Note the exact steps. If it only happens sometimes, note how often and under what conditions (cold boot vs. warm reboot, on battery vs. plugged in, after a specific action).
- Read the obvious signals first. On-screen error text, a failed action, a missing icon. Read the message literally before interpreting it.
- Confirm scope. Does it affect one application, one user account, or the whole system? One app misbehaving and the whole desktop failing are different problems with different first steps.
- Note what changed. Did the problem start after an update, a new package, a settings change, or a hardware change? The most recent change is the first suspect.
If the problem is specific to one area, jump to the focused page once you have the symptom in hand:
The FAQ covers common first-time questions and may resolve the issue before you go further.
Rung 2 — Advanced
If the basic signals do not resolve it, move to evidence. The principle here is the same one the build process uses: read the logs end to end, do not spot-check, and change one variable at a time. An “it works now” after changing three things at once tells you nothing about which change mattered.
- Read the system and session logs. The journal carries the real story — failed units, service
errors, and the boot sequence. A success banner on screen is not a passing grade; the failures
that matter hide in the logs. Review the current boot with
journalctl -b. - Check for failed units. A service that failed to start, or one locked down so tightly it
cannot write its own state, is a common and silent cause. List failed units with
systemctl --failed, then read the status and recent log lines for each. - Isolate the failing component. Narrow from “the system” to a single service, package, device, or configuration file. Reproduce against that component alone where you can.
- Change one variable, then re-test. Revert it if it does not help. Keep a written list of what you changed so you can undo cleanly and so a fix is attributable to a single change.
- Distinguish a by-design failure from a real one. Some subprocesses are expected to fail and are handled; do not chase those. Confirm whether a failing line is genuinely the cause before acting on it.
- Verify, do not assume. Trace the behavior to its source. If you cannot support a conclusion with a log line or a reproduced result, it is a hypothesis, not a finding.
For the kinds of failures tied to building or installing packages, and for the host-side validation gates that catch most misconfigurations early, see Package & Build Failures.
InterGenOS ships local assistance that can help you read and interpret this evidence offline. InterGen is a tiered, hardware-detected, offline-first local assistant (built on an on-device model) with zero telemetry; it can help explain a log line or a failed unit without anything leaving the machine. InterGen Sentinel is a pluggable security scanner whose default backends are Local-Rules and Local-Qwen, both on-device. See the Assistant section for how to use them.
Rung 3 — Recovery
Move to recovery when the running system can no longer be trusted to give honest answers, or cannot boot far enough to investigate: a broken boot chain, a graphical session that will not start, a configuration change that locked you out, or a corrupted component.
InterGenOS is built to make recovery a defined operation rather than an improvisation, because the system carries the trust machinery that recovery depends on:
- A signed Secure Boot chain. A Microsoft-signed shim validates GRUB, which verifies the kernel’s signed UKI; on an installed system the UKI is MOK-signed and regenerated on every kernel install, so a tampered kernel cannot boot under your enrolled key.
- Image integrity. The read-only live ISO image is sealed with dm-verity — its root hash
carried inside the signed UKI — so the installer/live environment is verified before it runs. On
the installed system,
pkm verifyconfirms every installed file against its signed SHA-256, so “are my files intact?” is a question with a checkable answer, not a guess.
Practical recovery paths:
- Boot a known-good target. If a recent change broke boot, recovering to a previously working boot entry or the installation media is the fastest way back to a usable system to investigate from.
- Reinstall cleanly when in doubt. Because the system is built from source and reproducible, and the installer (Forge) writes a verifiable system, a clean reinstall is a legitimate and honest recovery step, not a defeat. See the Forge install guide and the Recovery & Reinstall page for the supported flow, including the encrypted-disk and broken-boot-chain paths.
- Use the package manager (
pkm) to restore packages from the signed mirror. The mirror’s index is signed as a whole and verified against one signature, so a restore comes from a source whose integrity you can check yourself.
Do not “fix” a recovery by hand-editing the running system and declaring it done. A change that only holds because of a manual edit on a running box is a note about a fix, not a fix; it must be re-applied through a supported path and survive a clean boot to be trusted. If the change belongs in the system itself, see Service & Hardware Issues for where service and hardware configuration lives.
Rung 4 — Support (Phone-A-Friend)
If the problem outlasts the first three rungs, escalate. The goal of this rung is to make your problem actionable for someone else: a clear symptom, a reproduction, and the evidence you gathered.
Bring with you:
- The exact symptom and the steps to reproduce it.
- What changed most recently (update, package, setting, hardware).
- The relevant log excerpts and failed-unit output from Rung 2 — the actual lines, not a paraphrase.
- The release you installed from, and the version line your machine reports
(
grep PRETTY_NAME /etc/os-release), and whether the issue is on the live ISO, after install, or after an update. - What you have already tried, and the result of each attempt.
A vague report (“it does not work”) cannot be acted on; an evidence-backed report often resolves on the first reply.
Phone-A-Friend (Frontier/Cloud Escalation)
For problems where local analysis is not enough, the assistant offers Phone-A-Friend (Frontier/Cloud Escalation): an opt-in path that hands a single request to a cloud model you have configured. It is off by default and sends nothing until you opt in for that specific request. The same providers can separately back the scanner’s optional cloud tier; both are off out of the box, and enabling one does not enable the other. The supported providers are Claude (Anthropic), Gemini (Google), Copilot (Microsoft), ChatGPT (OpenAI), Grok (xAI), and DeepSeek. The local backends (Local-Rules and Local-Qwen) remain the default; cloud escalation is a deliberate, per-use choice that you control.
This keeps the same posture as the rest of the system: nothing leaves the machine unless you decide it should, and you can see and check what is being sent.
See also
- Boot & Graphical Issues
- Package & Build Failures
- Service & Hardware Issues
- Frequently Asked Questions
- Forge install guide
- Recovery & Reinstall
- Verified Boot & Secure Boot
Boot & Graphical Issues
This page covers the problems most users hit between pressing the power button and reaching a working desktop: Secure Boot and MOK enrollment, kernels that refuse to load, and graphics or session issues under GNOME on Wayland.
InterGenOS builds a fully signed boot chain and signs every kernel it boots, but Secure Boot enforcement is optional and off by default on a fresh install. Boot problems still often trace back to the signing chain rather than a missing driver, so this page leans heavily on the boot chain. For the full design — including what is signed versus enforced — see Verified Boot & Secure Boot.
Boot does not look like other distributions
InterGenOS ships no boot splash. There is no logo painted over the seconds between GRUB and the login screen. You see the kernel hand off to systemd, every service start with [OK] or [FAILED] markers, the network come up, and AppArmor load.
This is intended. A visible boot is a security signal: a broken mount, an odd module load, or a hardware change shows up immediately instead of hiding behind a logo. If you are used to a silent splash, the scrolling text is normal, not a fault.
MokManager appears at first boot
On the first boot after installing with Forge, the firmware notices a pending Machine Owner Key (MOK) enrollment request and runs MokManager before continuing. It is a small blue-text-on-black utility with three screens:
- “Perform MOK management” — press any key to start.
- “Enroll MOK” — review the certificate. The subject reads
CN=InterGenOS Machine Owner Key. Confirm. - “Enter password” — type the enrollment password you chose during install. The password is single-use: once enrollment completes you are not prompted for it again.
After enrollment, the system boots into InterGenOS normally and the firmware trusts your MOK from then on.
Note the enrollment password somewhere safe before you reboot. Forge never displays it back and never writes it to any log, so nothing on the installed system can recover it for you. You need it once, during this step.
MokManager appears on every boot
If boot stops at MokManager each time, enrollment never completed. Walk through the three screens above to completion. The firmware re-prompts until the key is actually enrolled.
MokManager rejected the password
MokManager allows three attempts, then reboots. A transposed digit is the usual cause; try again. If the password is lost, regenerate the MOK from a live ISO (see Regenerating the MOK).
A new kernel installs but will not boot
When you install or upgrade a kernel, InterGenOS rebuilds it into a Unified Kernel Image (UKI) and signs it on your machine with your MOK. If the firmware does not trust that MOK, Secure Boot refuses the UKI and you fall through to the recovery boot entry.
The common cause is that the MOK was never enrolled (or was un-enrolled) while the kernel post-install hook went ahead and signed a UKI with it. The fix:
- Boot the recovery entry, which loads the bare
vmlinuzdirectly through signed GRUB. - Re-enroll the MOK (see MokManager appears at first boot), or regenerate it (see Regenerating the MOK).
- Re-run the kernel post-install hook for the current kernel after enrollment so a trusted UKI is produced.
You never end up with a half-installed kernel. If UKI signing fails outright, the post-install hook falls back to writing the kernel and initramfs separately, and signed GRUB loads them directly under the same enforced signature verification.
The GRUB menu shows only the recovery entry
No UKI entries means UKI signing has been failing. Inspect /var/log/intergen-kernel-postinstall.log. The two common causes are a full ESP and a missing or unreadable MOK key file.
The ESP is full
Every installed kernel becomes a signed UKI in /boot/efi. A UKI is typically 80–150 MB depending on the initramfs payload, and Forge sizes the ESP for at least three kernels. If the partition fills, kernel install fails with a clear message. Old kernels and their UKIs are pruned automatically: the kernel package’s post-install hook keeps the two newest generations plus the running and just-installed kernels, and removes the rest. If the ESP still fills, the cause is usually an oversized initramfs payload rather than accumulated generations — check the sizes under /boot/efi/EFI/Linux/ before removing anything by hand.
UKI tooling is missing
If the installed system lacks the UKI builder (an older install, or one with a different boot path): ukify, the UKI builder, ships with the systemd-pass2 package; sbsign, the signing tool, ships with sbsigntool. Reinstall whichever is missing, then re-run the post-install hook for the current kernel:
pkm reinstall systemd-pass2   # supplies ukify
pkm install sbsigntool        # supplies sbsign
Regenerating the MOK
The MOK lives under /var/lib/intergen/mok/. On a default install Secure Boot is off, so there is no enrollment password to lose. If you run with Secure Boot enabled and need a fresh MOK, reinstalling with Forge regenerates one; the next kernel install or upgrade rebuilds the UKIs with it, and the GRUB-loads-vmlinuz recovery entry keeps the system bootable in the meantime. (There is no separate recovery wrapper command — UKI signing is handled by the kernel package’s post-install hook.)
The release signing key never touches your machine and is never asked to sign anything you produce locally. Your MOK lives only on your machine, at /var/lib/intergen/mok/.
Firmware will not let me change Secure Boot
Some firmware, especially on OEM laptops, makes the Secure Boot toggle read-only outside Setup Mode. InterGenOS does not require Setup Mode for normal operation; the standard MOK enrollment path is sufficient. If you do need to change firmware settings, consult your hardware vendor’s documentation for entering Setup Mode.
Graphical and session issues
InterGenOS ships GNOME 49 on Wayland. Hardware acceleration runs through the Mesa stack for AMD (Radeon) and Intel (Arc, Iris, UHD) GPUs, all installed and enabled by default. Wayland is the default display protocol; X11-only applications run through Xwayland automatically.
The shell becomes unresponsive
You can restart GNOME Shell without logging out: press Alt + F2, type r, and press Enter. Open applications keep running across the restart.
A monitor or external display misbehaves
GNOME 49 handles mixed-DPI and mixed-refresh-rate setups without configuration, and a hot-plugged monitor should work immediately. If a display is not detected as expected, check it in Settings → Displays, then move a window to it with Super + Shift + Arrow.
NVIDIA graphics
The base distribution does not ship proprietary firmware, and the NVIDIA driver is offered only when an NVIDIA GPU is present. It is an explicit opt-in:
pkm install nvidia
Accept the NVIDIA license when prompted, then follow the post-install instructions for enrolling the NVIDIA kernel module with your MOK. On a Secure Boot system, an out-of-tree module that is not signed and enrolled will not load, so this enrollment step is required for the driver to work.
An application cannot capture another window’s pixels or input
This is Wayland’s per-window isolation working as designed: each Wayland application sees only its own input and pixel buffer. Tools that expect the old X11 global-capture behavior may need a Wayland-native portal-based path instead. The boundary does not extend inside XWayland: X11 clients share one X server and can still read each other’s input and window contents, which is why an X11 capture tool may see other X11 windows while seeing nothing Wayland-native.
Related pages
- Verified Boot & Secure Boot — the full boot-chain security model: what is verified, who signs what, and every recovery path.
- Graphical session — GNOME 49 on Wayland, keyboard shortcuts, hardware acceleration, and what ships by default.
- FAQ — quick answers to common questions.
Service & Hardware Issues
This page covers problems that surface at the boundary between InterGenOS and your hardware: Secure Boot and kernel module signing, device drivers and firmware, and system services that fail to start or refuse to listen on the network. Many of the symptoms below are the system enforcing a control you can verify and, where appropriate, adjust. InterGenOS is built on a single doctrine: security is not first. It is only. When a security control conflicts with convenience, security wins.
For software-install and package problems, see Frequently Asked Questions. For a complete picture of what is enforced out of the box, read the Hardening Baseline overview.
Secure Boot and Kernel Modules
InterGenOS builds a signed boot chain: a Microsoft-signed shim validates the InterGenOS GRUB bootloader, which in turn verifies the Linux kernel and Unified Kernel Images (UKIs). Secure Boot enforcement is optional and off by default on a fresh install, so these signatures are present and verifiable but not firmware-enforced unless you enable it; with it enabled, unsigned kernel modules are not trusted.
A driver or out-of-tree kernel module will not load
Out-of-tree modules, including proprietary drivers, must be signed by a key the firmware trusts. InterGenOS uses a Machine Owner Key (MOK) for this. The Forge installer walks you through enrolling a MOK on your first boot. If you skipped MOK enrollment, an out-of-tree module is refused even though it is present on disk.
What to check:
- Confirm Secure Boot is active and that your MOK was enrolled during first boot. If it was not, re-run the enrollment step described in Verified Boot & Secure Boot.
- After a kernel install or upgrade, installed systems regenerate and sign each kernel’s UKI with your machine’s local MOK. The same boot-time signature verification applies to kernels you install after the original ISO image, so a freshly installed kernel that will not boot points to a MOK signing or enrollment problem rather than a corrupt kernel.
The InterGenOS release-signing key never leaves a hardware token under InterGenOS control. Only the MOK that Forge generates on your own machine signs the kernels you install. This is intentional: the keys that authorize your machine to boot belong to your machine.
The system will not boot after a kernel or bootloader change
Because the boot chain verifies each stage, a tampered or unsigned component halts the boot rather than running it. If a kernel installed or upgraded outside the normal package flow fails to boot, the most common cause is a missing or mismatched UKI signature. Re-installing the kernel through the package manager (pkm), so the UKI is regenerated and signed with your MOK, restores a valid signature.
Drivers and Firmware
The core operating system relies exclusively on open-source drivers and firmware. Proprietary blobs are available if your hardware strictly requires them, but they are never forced on you.
A device needs proprietary firmware
If a network card, GPU, or other device does not work with the open drivers that ship by default, your hardware may strictly require a proprietary firmware blob. These are available but are not installed automatically. Install the firmware your device needs, and if it ships as an out-of-tree kernel module, ensure your MOK is enrolled so the signed module can load (see the Secure Boot section above).
System Services
InterGenOS hardens system services aggressively to minimize the blast radius of a compromise. The same isolation that protects you can make a service look broken when it is in fact being confined exactly as configured.
A service starts but cannot reach a file, device, or directory
System daemons run under extensive systemd sandboxing. Baseline directives applied across system services include ProtectSystem=strict, ProtectHome=true, PrivateTmp=true, PrivateDevices=true, ProtectKernelTunables=true, ProtectKernelModules=true, NoNewPrivileges=true, and a restrictive SystemCallFilter. AppArmor profiles ship active: on the default ISO the two InterGenOS-authored profiles (intergen-mcp, pkm) run in complain (learning) mode — logged, not blocked — graduating to enforce per-profile, while the server packages on the mirror each ship an enforce-mode profile that activates when that server is installed.
If a service cannot read or write a path, open a device, or perform a syscall, the cause is usually one of these controls working as intended:
ProtectHome=truehides/home, so a daemon configured to read a file under a user’s home directory will not see it.ProtectSystem=strictmakes most of the filesystem read-only to the service.PrivateDevices=trueremoves most device nodes from the service’s view.- An enforce-mode AppArmor profile (the server packages) denies access outside the profile’s allowed paths; a complain-mode profile (the default-ISO
intergen-mcp/pkm) logs the violation instead of blocking it.
What to check:
- Inspect the service’s journal for the specific denial. AppArmor denials and systemd sandbox refusals are logged with the path or capability that was blocked.
- Confirm whether the resource the service wants is one the security baseline deliberately withholds. If so, the correct fix is to adjust the service’s configuration or its profile, not to disable the protection wholesale.
This is a trade InterGenOS makes deliberately. When a security control conflicts with convenience, security wins.
A server is running but I cannot connect to it from another machine
Any server package shipped by InterGenOS binds exclusively to localhost (127.0.0.1) by default. Services never listen on a public interface unless you deliberately edit their configuration to allow it. A service that responds on the same machine but refuses connections from the network is behaving correctly.
To expose a service on the network, edit its configuration to bind to the appropriate interface, and understand that you are widening its exposure on purpose. Pair any such change with firewall rules you control.
A database or service reports no usable credentials
InterGenOS does not ship databases or services with blank or default admin passwords. Initial credentials are randomly generated or require manual setup during installation. If a service rejects a login you never explicitly set, you have likely hit this default. Set or retrieve the credential through the service’s documented setup path rather than assuming a well-known default exists.
A JIT workload fails with a memory-protection error
MemoryDenyWriteExecute=true is applied across system daemons. Workloads that require writable-then-executable memory, such as just-in-time compilation, are the exception. PostgreSQL is one such case: its LLVM JIT compiler emits machine code into writable-then-executable pages, so its shipped unit sets MemoryDenyWriteExecute=false to keep the JIT working. If a service that legitimately needs JIT fails with a memory-protection error, this directive is the cause, and the fix is a targeted exception for that service rather than removing the protection from every daemon.
Telemetry and Updates Are Not the Cause
When tracing unexpected behavior, two things you can rule out by design:
- InterGenOS collects zero analytics, crash reports, or usage statistics. No background process is phoning home.
- Software does not update behind your back.
pkm synconly refreshes and verifies the signed index; nothing on disk changes until you runpkm upgrade. A service whose behavior changed did not change on its own.
When the Control Is the Problem
Every default described here is verifiable and adjustable. The intent is a machine you understand, can modify, and can trust. If a hardened default genuinely blocks a workflow you need:
- Confirm the control is the cause by reading the journal and AppArmor denials.
- Make the narrowest possible change to the affected service or profile.
- Avoid disabling a protection system-wide to fix one service.
Further Reading
- Hardening Baseline — the full list of what is enforced by default.
- Verified Boot & Secure Boot — MOK enrollment and the boot chain.
- Frequently Asked Questions — software-install and general questions.
Package & Build Failures
This page covers two distinct failure surfaces in InterGenOS:
- Package-manager failures — problems while installing, removing, upgrading, or verifying packages on a live system with
pkm. - From-source build failures — problems while constructing packages and the ISO with the build orchestrator, most commonly the
validate-phase gates that run before any compilation.
Read the symptom carefully to decide which surface you are on. A pkm failure touches the live root filesystem and its package database; a build failure happens in an isolated build environment and never modifies your installed system.
InterGenOS is built from source and ships a machine you understand, can modify, and can trust. The package and build tooling are designed so that every state change is auditable. When something fails, the goal is to find the root cause, not to paper over it.
Part 1 — Package-manager (pkm) failures
pkm manages the installed operating system: installation, removal, querying, and integrity verification of pre-compiled binary archives (.igos.tar.gz). It operates on the live filesystem and keeps two coordinated records of state:
- A SQLite database at
/var/lib/igos/pkm.db— the primary source of truth for fast queries and transactions. - Text manifests under
/var/lib/igos/packages/— human-readable files generated alongside the database records for inspection.
This duality gives you performance without sacrificing auditability. If the two ever appear to disagree, treat the database as authoritative and report the divergence.
Integrity verification fails (pkm verify)
pkm verify recalculates the SHA-256 hash of every installed file on disk and compares it against the expected hash stored in the database’s files table. A mismatch means the file on disk differs from what was deployed — either accidental corruption or unauthorized modification.
What to do when verify reports a mismatch:
- Identify the file and its owning package. The database indexes files by
path, so a single mismatched file points you directly at the package that owns it. - Decide whether the change was intentional. Files under
/etc/are tracked as configuration and are expected to drift as you edit them. A mismatch on a binary or library is more serious. - Do not dismiss a mismatch. A changed binary on a security-only-aligned system is a finding to investigate, not to acknowledge and move on.
Archive trust / verification rejected at install time
Before installation, the CLI supports an --archive-trust flag, which accepts three values: strict (the default), loose, and repo-only. In strict or repo-only modes, the incoming .igos.tar.gz archive’s SHA-256 hash is computed and checked against the trusted available index that was synced from the repository with pkm sync.
If installation is rejected on trust grounds:
- The archive hash does not match the index entry. Re-run
pkm syncto refresh theavailablecache, then retry — your index may be stale relative to the published archive. - If the hash still does not match after a fresh
sync, stop. A persistent mismatch between a downloaded archive and a freshly-synced trusted index is exactly what archive verification exists to catch.
A directory-collision or invariant check aborts installation
Before deploying files, pkm runs invariant checks. The two it is documented to enforce:
- Directory collisions — it refuses to let a package replace a critical path (for example, turning the
/libsymlink into a directory). - Supersede ordering — if a package declares
SUPERSEDES, the predecessor it supersedes must exist and be correctly ordered in the install queue.
If install aborts here, the package’s manifest is asking for a filesystem change that would damage the system layout, or an upgrade ordering that cannot be satisfied with the packages on hand. Install the predecessor first, or fix the queue order, rather than forcing past the check.
The filesystem deploy step is the point of no return: once files are written to the root filesystem, the package is committed to disk before the database transaction that records it. The invariant checks run before that write precisely so a bad manifest never reaches it.
Understanding upgrades: the “supersede” model
pkm does not do in-place version replacement; it uses a supersede model. When package B supersedes package A:
- Files present in both
AandBare overwritten on disk byB, and their database ownership transfers fromAtoBwith updated SHA-256 hashes. - Files that existed in
Abut are not inBare left in place, still owned byA’s historical record. A’s record is timestampedsuperseded_by, pointing atB.
This is how a package can split cleanly (for example, util-linux into util-linux-core and util-linux-extra) without orphaning files or breaking dependencies. If after an upgrade you find files you expected to be gone, this model — not a bug — is usually why: those files belonged only to the superseded record.
Removal leaves files behind, or warns about a modified file
Removal is deliberately cautious:
- Configuration files under
/etc/are skipped to preserve your data, unless you pass--force. - If a file’s on-disk hash differs from the database hash (it was modified after install),
pkmemits a warning but still removes it. - Directories are removed only when they become completely empty.
So “leftover” files after a removal are usually preserved configuration or a non-empty shared directory, both by design. The modified-file warning is informational; it is telling you the file you removed was not the one originally deployed.
Config files: .new after an upgrade
pkm tracks the original hash of each /etc/ file in a config_files table. When an upgrade ships a new version of a config file you have modified, pkm will attempt a safe merge or leave the new version as a .new file beside your edited one. Review and reconcile .new files; they are how upgrades avoid silently overwriting your changes.
Part 2 — From-source build failures
The build orchestrator constructs InterGenOS from source in an isolated environment, then assembles a signed, verity-protected ISO. As of this writing the build runs 21 phases:
validate → verify-sources → setup → toolchain → chroot-prep → chroot-tools → core → config → core-extra → base → kernel → desktop → extra → compute → ai → bootloader → image → manifest → squashfs → ukis-verity → iso, with an optional publish step.
Packages are organized into seven tiers — toolchain, core, base, desktop, extra, compute, and ai — totalling 1000+ packages across the tree. These counts drift as the tree evolves; derive the live count from the package tree rather than trusting a fixed number.
The overwhelming majority of “my build failed before it really started” reports are validate-phase gate failures, covered next. A genuine compilation failure happens later, inside the build environment, and looks different: a compiler error, a failing test, or a missing build dependency surfaced during a tier build.
Telling a validate-phase gate from a real build bug
The validate phase is the first phase and runs in roughly one second. It runs entirely on the host side: it reads package.yml files, the audit database, and source tarballs. It does not create or touch the isolated build root, which is set up in a later phase.
This has a practical consequence that saves a lot of time:
- A validate failure halts the orchestrator with exit 1 before any toolchain work.
- The build root and build scratch space are left untouched (on a clean baseline they do not exist yet).
- You can fix the finding and relaunch without reverting your build environment — there is no contamination to undo.
A fail in roughly 0.1–1 second is almost always a validate-phase gate, not a build bug.
The validate-phase gates, in order
| # | Gate | What it enforces | Halts build? |
|---|---|---|---|
| 1 | Tier reachability | every tier can be reached and built | yes |
| 2 | Audit-coverage (reproducibility) | every in-scope package has a current audit record | yes |
| 3 | Tier validation | each package sits in its correct tier | yes |
| 4 | Scan A — build-order | dependencies build before their consumers | yes |
| 5 | Scan B — silent feature loss | no silent capability regressions (skipped on a first build — no prior reference to compare) | yes |
| 6 | Scan A.2 — undeclared build deps | no build dependency is used but undeclared | yes |
A separate aggregate reconciliation report is also produced. It is advisory rather than a build gate, but its mismatch rows are real signals that should be triaged, not ignored.
The two gates that fire most often when you add or change a package are audit-coverage (Gate 2) and tier validation (Gate 3).
Gate 2 — Audit-coverage: “N packages need audit work”
A typical failure:
[audit-preflight] missing audit:     3
[audit-preflight] stale (version):   1
[audit-preflight] FAIL: 4 packages need audit work.
Every in-scope package must carry a current audit record. The gate distinguishes three failure classes:
- missing — no audit record at all. Cause: a newly-added package.
- stale — the audit record’s version does not match the
package.ymlversion. Cause: a version bump. - drift — the audit’s recorded build dependencies do not match the
package.ymlbuild dependencies. Cause: dependencies edited without re-auditing.
Understand the data flow or you will re-aggregate to no effect. The per-package auditor reads the package.yml and the source tarball and writes a per-package audit record into the private audit store. An aggregation step then ingests all those records into the build database that the gate actually reads. The gate reads the database, so you must re-aggregate after auditing; auditing alone does not update what the gate sees.
To resolve, for each flagged package: refresh its audit record, re-aggregate into the database, then re-run the audit-coverage check until it reports PASS. Commit the refreshed audit records to the private audit store.
Gate 3 — Tier validation: “MOVE→<tier>” or “UNCLEAR”
This gate computes each package’s canonical “natural tier” and compares it to the tier the package declares. Verdicts:
- MOVE→X — the natural tier differs from the declared tier.
- UNCLEAR — no natural tier could be determined.
- CROSS-TIER-DEP — a build/host dependency resolves to a later tier. This is a genuine ordering violation; fix the dependency, never demote the consumer.
The natural tier is derived in layers: explicit curated category lists and naming patterns first, then consumer inference from the build/host reverse-dependency graph (a package takes the earliest tier that consumes it). A subtle trap: the inference graph is built from build and host dependencies only. A package consumed only as a runtime dependency has no graph consumer, so inference cannot place it and it comes back UNCLEAR.
Do not blindly obey the verdict. Evaluate it against the tier source-of-truth document first. There are two correct outcomes:
- The package really is in the wrong tier — move it: relocate its directory to the correct tier, update the
tier:field inpackage.yml, fix builder wiring as needed, then re-audit and re-aggregate (the audit record carries the tier). - The package is in the correct tier but the heuristic misfires — encode the source-of-truth: add an explicit entry for the package to the validator’s appropriate category list. This is legitimate only when the tier document already classifies the package that way; you are encoding the documented truth, not gaming the gate. If the document is genuinely ambiguous, that is an operator judgment call, not a self-serve edit.
Reconciliation mismatches (advisory): a required dependency not in our build deps
The reconciliation report can flag that an upstream-required dependency is missing from a package’s declared build dependencies. This is advisory, but every mismatch is a real signal to triage:
- Real gap — the dependency is genuinely needed and was forgotten. Add it, re-audit, re-aggregate.
- Intentional divergence — InterGenOS builds the package differently from upstream, so the upstream dependency does not apply. Record the divergence at the comparison site with an inline justification. A permanent deviation from upstream requires operator authorization: propose it with evidence rather than self-authorizing.
There is also a per-package override mechanism that can skip a package’s audit checks temporarily, carrying a reason, an approver, and an expiry date. Reserve it for a genuinely temporary, whole-package gap. For a permanent single-dependency divergence, prefer the precise, self-documenting divergence record over a broad whole-package override.
After a fix: relaunch without reverting
Because the validate phase exits before the build root is created, the recovery loop for a validate gate is cheap:
- Read the failing gate’s output and identify the packages and the failure class.
- Apply the correct fix (refresh audits, move a tier, encode the source-of-truth, or triage a mismatch).
- Re-run the checks locally until every gate is green.
- Commit the changes (public tree for tier/validator edits, private store for audit records), then relaunch the build.
No revert of the build environment is needed for a validate-phase fix.
A note on packages changed after a successful build
When a from-scratch build has already succeeded and been captured as a reference, any package added or changed after that point is where unrecorded-but-intentional decisions hide. Before resolving a gate on such a package, review its history since the last good build so you preserve, rather than silently undo, a deliberate choice. A correct-but-unrecorded divergence can sit un-triaged for days precisely because the build was passing.
Where state lives
| Concern | Location |
|---|---|
| Installed-package database | /var/lib/igos/pkm.db |
| Human-readable package manifests | /var/lib/igos/packages/ |
| Per-file ownership and hashes | the files table in pkm.db |
| Configuration-file tracking | the config_files table in pkm.db |
| Operation and transaction log | the append-only history table in pkm.db |
The history table is an append-only log of every install, removal, and supersede. When you need to reconstruct what changed and when, it is the audit trail.
Related pages
Release Notes
InterGenOS is built from source, on purpose, so that you run a machine you understand, can modify, and can trust. These release notes record what each version actually ships, so you can verify the system in front of you against a written record.
How release notes are structured
Each released version gets one section, organized the same way every time:
- Highlights — the headline changes that define the release.
- New components — packages, tools, and subsystems added since the previous version.
- Breaking changes — anything that changes existing behavior, on-disk layout, signing trust, or upgrade path. Read this section before you upgrade.
- Other — fixes, documentation, security hardening, and smaller changes that don’t fit the categories above.
Releases are named R001, R002, … for major releases and R001.1, R001.2, …
for point releases. A major release is produced by a complete from-source rebuild;
a point release rebuilds the changed packages against the proven build substrate
of its major release. Both are published only after the resulting image has been
installed and evaluated on real hardware. The full rules are in
docs/release-policy.md in the
main repository.
The release line
The first public release, R001, was published on 2026-08-16 — the first major release of the release line. The authoritative notes for each release, including the current one, are published beside its installation image at repo.intergenos.org/iso; the current release is also always stated in the main repository README.
The installation image, its checksum and signature, and the release public key are
linked from the same README; the package mirror is repo.intergenos.org. Check
the image against the
published checksum before you install it — Verifying your install
walks the checks you can run afterwards on the running system.
One naming note, so this page matches what your machine prints: an installed
system reports the release its image was built from in /etc/os-release — for
example InterGenOS R001.1 (Revival) from the R001.1 image (2026-08-20).
Systems installed from the original R001 image (2026-08-16) report
InterGenOS 1.0-dev (Revival), that image’s own build identity; upgrading
brings the current string as a reviewable configuration update. Either way,
the release an image came from is stated in the release notes published
beside it.
What the build produces
InterGenOS is assembled by a 21-phase from-source pipeline. The phases run in order:
validate → verify-sources → setup → toolchain → chroot-prep →
chroot-tools → core → config → core-extra → base → kernel →
desktop → extra → compute → ai → bootloader → image → manifest → squashfs →
ukis-verity → iso
A publish step to the binary mirror is optional and runs only on a complete,
signed build.
Packages
Packages are organized into seven tiers: toolchain, core, base, desktop,
extra, compute, and ai. The tree carries over 1,000 package definitions across
those tiers. These counts are derived live from the package set and drift as the
build evolves; treat them as a snapshot, not a fixed figure, and derive the current
numbers from your own installed system with pkm list.
What ships today
- Desktop: GNOME 49 on Wayland.
- Package manager:
pkm, the InterGenOS package manager. - Installer: Forge, the native InterGenOS installer. See the Forge guide.
- Trusted boot: a signed Secure Boot chain, dm-verity integrity over the read-only system image, and Unified Kernel Image (UKI) signing.
- InterGen: a tiered, hardware-detected, offline-first local assistant built on an on-device model. It runs on the machine, with zero telemetry, and selects a model tier based on detected hardware.
- InterGen Sentinel: a pluggable security scanner. The default configuration uses Local-Rules and a Local-Qwen model, fully on-device. Six cloud providers are available strictly opt-in: Claude (Anthropic), Gemini (Google), Copilot (Microsoft), ChatGPT (OpenAI), Grok (xAI), and DeepSeek. Routing a scan to a cloud provider is the “Phone-A-Friend” (Frontier/Cloud Escalation) path, and it never engages unless you choose it.
Planned, not yet shipped
The following are on the roadmap and are not part of the current release. They will appear in release notes only once they ship:
- A KDE/Plasma (Qt6) desktop option and switchable desktops.
- Curated application campaigns covering tools such as Kdenlive, OBS, Krita, Blender, FreeCAD, GnuCash, and Boxes.
Security and supply chain
R001, published 2026-08-16, removed PyPI from the build path for the maturin
and python-cryptography packages in response to a 2026 PyPI supply-chain
attack window. Both build from upstream source tarballs through a reproducible
cargo-vendor pipeline. Vendored Rust crate archives were standardized on the
POSIX pax format to eliminate a class of path-length failures.
How updates reach you
InterGenOS has one supported line: the latest release is the supported release.
Installed systems move forward with pkm upgrade from the package mirror, and the
installation image is refreshed at each point release. There are no maintenance
branches and no backports — a fix reaches you by advancing the line, so every
install runs the package set the project evaluates.
Earlier history
Pre-2026 builds from 2015–2016 are archived under the InterGenOS GitHub organization. They are not covered by these release notes. The 2026 work is a from-scratch rewrite and shares no code with the original builds.
See also
Security Advisories
Security advisories are a first-class deliverable in InterGenOS, not an afterthought. When a vulnerability affects the kernel or packages we ship, we document it in full: what it is, whether InterGenOS was exposed, exactly how it is mitigated, and how you can verify the mitigation on your own machine. This reflects the project’s posture directly.
This page summarizes the published advisories and the format they follow. The canonical advisory documents live in the source tree under docs/security/advisories/.
How to read an advisory
Advisories come in two shapes, and both share the same goal: give you enough detail to understand, audit, and if you choose, change the mitigation yourself. A machine you understand, can modify, and can trust is the whole point.
A typical advisory contains:
- Identification. A CVE number and/or an InterGenOS advisory ID (for example
IGOS-SA-2026-002), the disclosure date, and a CVSS score with its vector string where one is published. - Summary. A plain-language description of the vulnerability and its root cause.
- InterGenOS status. Whether builds were exposed, and the explicit verdict (for example
NOT AFFECTED, orfully vulnerablepre-fix). Advisories state honestly when a built kernel image was vulnerable as compiled, even if no public installation was ever affected. - Mitigation. The concrete fixes applied, named down to the patch file and the script that installs them. InterGenOS favors layered defense: an upstream or backported kernel patch as the primary fix, plus a defense-in-depth measure such as a module blacklist.
- User impact and opt-out. What changes for you, what does not, and how to reverse a default if your workflow needs it. Mitigations that change defaults are always plainly visible and user-editable.
- Verification. Copy-pasteable commands so you can confirm the mitigation is present on your own system rather than taking our word for it.
- Timeline, composition, and sources. Disclosure-to-fix dates, how the advisory relates to other security work, and links to upstream commits and third-party write-ups.
A core principle runs through every advisory: defaults that change behavior for security reasons remain transparent and reversible. If a mitigation blacklists a kernel module, the configuration file is visible on disk, documented, and removable by an administrator who genuinely needs the affected functionality.
Published advisories
CVE-2026-31431 — Copy Fail (algif_aead local privilege escalation)
A logic flaw in the Linux kernel algif_aead subsystem allowed an unprivileged local user to escalate to root. The flaw was introduced upstream in 2017 and affected mainstream Linux distributions shipped since then.
InterGenOS status: NOT AFFECTED. Mitigated on the day of public disclosure (2026-04-29) with two independent layers:
- Kernel patch. The upstream fix is applied as a patch in
packages/core/linux-kernel/patches/, reverting the vulnerable in-place optimization across theaf_algandalgif_*crypto sources. - Module blacklist (defense-in-depth). The
algif_aeadmodule is additionally blacklisted via/etc/modprobe.d/disable-algif.conf, guarding against an unpatched fallback boot, a future regression in the same subsystem, or unintended module loading.
User impact is zero. dm-crypt/LUKS, kTLS, IPsec, OpenSSL/GnuTLS/NSS, SSH, and kernel keyring crypto all use the in-kernel crypto API directly and do not route through AF_ALG. The only affected workloads are userspace applications explicitly configured to use AF_ALG AEAD sockets, which is rare outside embedded crypto-offload scenarios.
To verify the mitigation on your own install, the advisory provides commands to inspect the blacklist file, confirm the module is not loaded, and check the running kernel version. See the full advisory at docs/security/advisories/CVE-2026-31431-copy-fail.md.
IGOS-SA-2026-002 — Dirty Frag + Fragnesia (kernel socket-buffer cluster)
A cluster of three upstream Linux kernel CVEs disclosed in May 2026 (CVE-2026-43284, CVE-2026-43500, and CVE-2026-46300), all local privilege escalation to root. They share a root cause: socket-buffer code paths that fail to set or propagate the marker indicating that paged fragments are externally owned, which can lead to in-place decryption writing into page-cache pages an unprivileged process can observe.
InterGenOS status: the kernel shipped with this release line was vulnerable as built before the mitigation commit. Because no public ISO had been shipped during the exposure window, no public installations were affected. The advisory documents the cluster and the fix in full regardless.
Mitigation again uses two layers:
- In-tree kernel patches. Three patches in
packages/core/linux-kernel/patches/address the cluster. Two apply the upstream mainline commits cleanly; the third (CVE-2026-43500, rxrpc) is an InterGenOS-authored backport, because the upstream patch targets a refactored file layout that does not exist in this release’s pinned kernel. The structurally equivalent fix is applied at the corresponding site in the pinned source, and the patch file header documents the provenance and full reasoning. The release line keeps its pinned kernel version and backports fixes rather than bumping the kernel. - Defense-in-depth module blacklist. A configuration file under
/etc/modprobe.d/refuses to load theesp4,esp6, andrxrpcmodules. This is the explicit lesson of the cluster: a later CVE in the same fragile area proved that patches alone may not cover every related path, so the blacklist holds the line if a similar bug drops before a fresh kernel ships.
User impact is minimal for typical desktop use. Modern consumer VPNs such as WireGuard and OpenVPN do not use the esp4/esp6 modules, and rxrpc is OpenAFS-only. The blacklist file is plainly visible and editable: users who depend on traditional IPsec ESP or OpenAFS can remove the file (or unblock a single module) and reload the module dependency cache, as documented in the advisory’s opt-out section. The kernel patches remain in effect even with the blacklist removed; opting out loses only the defense-in-depth layer.
These mitigations take effect on a kernel rebuild, since the kernel image and the signed boot image both change. See the full advisory at docs/security/advisories/dirty-frag-fragnesia.md.
Where mitigations land in the build
Kernel-level fixes are delivered as patches under packages/core/linux-kernel/patches/ and applied automatically during the kernel build phase; the build applies every patch in the directory in alphabetical order at configure time. Defense-in-depth configuration files (such as module blacklists) are installed during the system’s chroot configuration step. Because a kernel-image change also changes the signed Unified Kernel Image, kernel-level advisories require a kernel rebuild and a new UKI to take full effect. For background on the signed boot chain and integrity model, see Verified Boot & Secure Boot and the Kernel Hardening page.
Reporting a vulnerability
Security reports for InterGenOS go to security@intergenstudios.com.
Related reading
Developer & Contributor Guide
This section is for people who want to work on InterGenOS rather than just run it: build the system from source, understand how the installer and package manager are put together, extend the assistant, or take part in the security process. Every page here describes mechanism — how a piece actually works in the tree — so you can reproduce, modify, and verify it yourself.
- Contributing to InterGenOS — how to propose changes, the sign-off policy, and what the CI content gate checks.
- The Build & Release Pipeline — the candidate → proving-ground → promotion loop that carries a build from source to a signed ISO.
- Self-Hosted Builds — running the full from-source build on your own hardware, and the tooling it needs.
- Packaging & Package Manager Internals — the tier model, the two builders, and how
pkmrecords what it installs. - FORGE Internals — the installer’s phase order, front-end split, and the Secure Boot signing chain.
- AI Assistant Internals — the InterGen daemon, its routing and safety model, and the local model stack.
- How We’re Developing InterGen — the running record of the assistant’s development: the harness, the baselines, the training rounds, what real use changed, and what is next, failures at equal weight.
- ROCm-from-Source Build Pipeline — how the AMD compute stack is built from source and shipped mirror-only.
- Security Review & Advisory Process — how vulnerabilities are triaged, patched, and disclosed.
- Localization & i18n — where translatable strings live and how localization is organized.
Contributing to InterGenOS
InterGenOS is a Linux distribution built entirely from source. It ships a custom package manager (pkm), the Forge installer, a signed boot chain with dm-verity sealing the live image and UKI signing (Secure Boot enforcement is optional: you install with it off in firmware, then turn it back on and complete key enrollment), and a tiered, offline-first local AI assistant (InterGen). Today the desktop is GNOME 49 on Wayland. Contributions of all kinds are welcome.
The guiding principle
Every contribution must serve the project’s core purpose:
InterGenOS exists to put the user in control of their own machine. Every design decision, every default, every included component must serve this purpose: giving people a system they understand, can modify, and can trust.
If a change adds complexity that does not serve the user, it is not welcome, regardless of how conventional it may be. The result we are after is a machine you understand, can modify, and can trust.
The three lenses
Before any development decision is made — a recipe edit, a fix, a build flag, a package choice, a process step — it is run through three lenses, in order. They are the working filter for every choice. An option that fails any one of them is wrong, no matter how convenient, conventional, fast, or precedented it is.
- Security is not first. It is only. We build assuming adversaries have superhuman vulnerability-discovery capability. The question is always whether a change eliminates silent failure and turns an unverified assumption into a checked gate. A masked error, a blanket “ignore failures,” an unverified “known-good” claim, or a degraded-but-shipped feature is exactly what such an adversary exploits. If an option masks rather than verifies, it is wrong.
- The user controls a machine they understand, can modify, and can trust. We reject bespoke complexity that hides how the system works, and prefer the standard, transparent, built-from-source path even when a shortcut would be more convenient. A machine the user cannot trust is a machine they do not control.
- Logic and project intent. Does the choice satisfy everything it is evaluated against — secure, from-source, reproducible — and the actual goal behind the work? A locally clever answer that defeats the project’s stated intent is wrong.
These lenses usually converge on a single answer. When they do, that is the answer.
How to contribute
Reporting issues
- Use GitHub Issues for bug reports and feature requests.
- For build failures, include the package name, version, and build log output.
- Check existing issues before opening a new one.
- For security vulnerabilities, follow the project’s
SECURITY.mdpolicy rather than filing a public issue.
Code contributions
InterGenOS is currently maintained by a single developer. To contribute code:
- Open an issue first to discuss the change.
- Fork the repository and create a branch.
- Follow the existing code style — no surprises.
- Test your changes; the build must remain reproducible.
- Submit a pull request with a clear description.
Package templates
The most impactful contributions are package templates. Each package lives under packages/<tier>/<name>/ and needs two files:
package.yml— metadata: source URL, SHA256, dependencies, and build style.build.sh— bash functionsconfigure(),build(),check(), anddo_install().
Follow the BLFS 13.0 book for build instructions, and install into the staging root the builder provides — make DESTDIR="$DESTDIR" install. Installing straight onto the live filesystem is a deliberate exception used by a handful of recipes, not the default.
Packages are organized into seven tiers — toolchain, core, base, desktop, extra, compute, and ai. The tree carries 1000+ packages across those tiers. These counts drift as the tree evolves, so derive the live numbers from the source tree rather than treating any figure as fixed.
What we value
- Research before implementing. Check the LFS/BLFS book and study how other distributions handle it. A short investigation beats hours of trial and error.
- Simplicity over cleverness. If there is a simpler way, use it.
- Transparency. No hidden behavior, no magic.
- Tested changes. If you cannot verify it works, do not submit it.
Security standards
InterGenOS is built for hostile-network resilience. The project assumes adversaries have superhuman vulnerability-discovery capability and treats every package, configuration, and code change as potentially within their reach. All contributions are reviewed against current best-practice vulnerability-discovery tooling before merging.
Contributions that introduce any of the following will not be accepted:
- Known vulnerabilities — code patterns flagged by static analysis, dependency chains with published CVEs, or configurations that weaken the system’s security posture.
- Supply chain risks — unverified source tarballs, missing or incorrect SHA256 checksums, dependencies fetched from untrusted origins.
- Privilege escalation vectors — improper setuid usage, world-writable files in privileged paths, or unsafe default permissions.
- Feature regressions disguised as fixes — disabling functionality or removing dependencies to work around build failures rather than resolving the root cause.
If review surfaces an issue in your contribution, the maintainer will work with you to resolve it before merging. Security is not negotiable.
Public content audit
All pull requests to master are scanned by an automated public-content audit (.github/workflows/public-content-audit.yml). This check ensures that internal development artifacts — host-specific paths, internal file references, and credential-like strings — do not enter the public repository. If the audit fails on your PR, amend the flagged files and push again. Legitimate public content that happens to match a flagged pattern can be added to scripts/check-public-content.allowlist.
The doctrine: only a clean build counts
A build whose packages all compiled is not a build that is known-good. The expensive failures of a from-source distribution are not compile errors. They are the class of defect that compiles fine, packages fine, and only manifests when the artifact is installed and booted on real hardware: a service unit locked down with no writable path, a directory omitted from a package’s file list, a hardware-detection heuristic wrong for an integrated GPU, a first-boot race. None of these is caught by “all packages built, 0 failures.” Every one is caught by installing the artifact and booting it on real hardware.
Two laws follow:
- Validate on a clean build and install, on hardware that reproduces the bug — never on a hand-patched development box. Nothing is done until the fix lives in the source tree and a clean build reproduces the corrected behavior with zero manual intervention (the signing step is the one sanctioned human action). A fix that only works because of a manual edit on the running target is a note about a fix, not a fix.
- Fixing now is the default for trust-bearing, build-orchestration, and small gaps. An unfixed gap compounds. When immediate repair is genuinely not the right call, that exception is recorded with an explicit expiry condition and a way to measure it, never as a bare line on a list.
Race-class fixes carry two extra requirements: validate on the hardware that actually reproduces the race (the slower, lower-end tier is the honest test), and require several consecutive clean cold boots. A single clean boot does not clear a race, and a warm reboot is not a substitute for a cold power-cycle.
The build lifecycle
InterGenOS is produced as an ordered, reproducible lifecycle. A full from-scratch build runs 21 phases in a fixed order inside an isolated, reproducible build environment:
validate → verify-sources → setup → toolchain → chroot-prep → chroot-tools → core → config → core-extra → base → kernel → desktop → extra → compute → ai → bootloader → image → manifest → squashfs → ukis-verity → iso
An optional publish step pushes the result to the signed package mirror. The stages group into these decision gates:
- Build from source — the proving ground. Every source is pinned and checksum-verified before use; the build is deterministic by construction (full byte-identical reproducibility across independent builders is a 1.x goal). Minting a candidate is deliberately expensive so that what comes out of it has earned trust.
- Handle build issues without cheating. A failure is fixed in the source tree, never worked around. No moving a package to a different tier to dodge a wiring problem, no disabling a feature to bypass a missing dependency, no silently skipping a failed step, no stub functions (“a stub is a lie”). Disabling a package’s test suite is a last resort, not a first response. After a few failed tactical attempts on one problem, the process stops and switches to research-first investigation rather than thrashing.
- Sign the boot chain. The build halts for a hardware-token signing step. One signing covers the bootloader and all of the unified kernel images. Each kernel image’s command line carries the verified-integrity root hash of the read-only system image, so a tampered system image cannot boot under a validly signed kernel. Signing only appends a signature; it never alters the payload.
- Assemble the ISO. The read-only system image is compressed, a dm-verity hash tree is generated over it, and the bootable ISO stages the signed bootloader and kernel images alongside it. Integrity verification — the root hash sealed in the signed kernel command line — is the only boot-time path; a whole-file checksum ships beside it as a media diagnostic. Both artifacts are asserted present and non-empty at build time, and a kernel command line without a sealed root hash refuses to boot rather than falling back.
- Pre-install evaluation. The ISO is booted on real hardware (or a Secure-Boot-capable test VM) and the live environment is examined before any install: the Secure-Boot and integrity chain, the system and user logs, failed units, and the shipped security posture (the system ships locked — no remote access enabled, default-deny firewall). A clean smoke pass does not by itself guarantee a clean install.
- Install and post-install evaluation. The installer writes the system to disk, then the result is examined exhaustively, not as a spot-check. The full installer trace is read end to end, the install-run journals are read, the system is rebooted into the installed target, and the installed logs are read for every boot — confirming zero failed units and a clean boot-chain trust record. Every operator observation and every log anomaly becomes a tracked issue.
- Track issues, then iterate. Findings are grouped into layers applied and validated together, so a regression localizes to its layer. For day-to-day iteration, a single rebuilt package can be slipstreamed into the install set without rebuilding the whole ISO. Every such surgical edit is saved to the source tree and must prove itself on the next from-scratch build; no edit rides un-reproduced.
- Publish to the signed mirror. The index is the signed manifest of the whole repository, so every publish regenerates and re-signs the complete index; clients verify the entire index against one signature. Data transfer is incremental, but the signed index is never partial, and the live repository is promoted by an atomic swap.
- Promote to a stable release. A candidate is promoted to a golden release only when a full from-scratch cycle runs end to end with zero triggers — nothing required a fix. All boot and install legs are validated on representative (lower-end) hardware, with race-class items cleared over several consecutive cold boots. Anything short of that bar is a trigger: fix it in the tree and keep iterating.
The non-negotiables
- Built from source. The standard, transparent, from-source path, not opaque shortcuts.
- No silent failures. Every error surfaces; an unverified assumption becomes a checked gate or it is not trusted.
- No stubs. Placeholder code that pretends to work does not ship.
- Reproducible. Pinned, checksum-verified sources; deterministic builds.
- Only a clean build counts. A fix is done when it lives in the tree and a clean build reproduces the corrected behavior with zero manual steps.
- Signed end to end. A signed Secure-Boot chain, an integrity-verified system image, and a signed package index — verification you can check yourself.
Development setup
The build requires:
- An Ubuntu 24.04 (or equivalent) build host.
- KVM/QEMU with libvirt for VM-based builds.
- Python 3.12 or newer with PyYAML for the build system (the host check currently asserts only a much older floor — treat 3.12 as the real requirement).
- All LFS 13.0 host requirements (run
python3 scripts/host-check.pyto verify).
License and sign-off
InterGenOS is licensed under the GNU General Public License v3.0 or later, the project’s outbound license. Contributions are accepted under this same license (inbound = outbound; there is no separate Contributor License Agreement).
The contributor authorship and right-to-submit attestation is the Developer Certificate of Origin (DCO), revision 1.1. By appending a Signed-off-by: trailer to each commit, you certify the DCO statements; the verbatim text lives in the repository’s DCO.md.
git commit -s
The -s (or --signoff) flag adds the trailer automatically using your user.name and user.email git configuration. Every commit in a pull request must carry the trailer; pull requests whose commits are not all signed off will fail the public-content + DCO audit workflow and cannot merge until the trailer is added.
To add the trailer to existing commits retroactively:
git rebase --signoff master    # all commits on this branch
git commit --amend --signoff   # the latest commit only
Commits made before 2026-05-18 (when the DCO was adopted) are grandfathered under the prior model; the DCO applies from that date forward.
Where to go next
- New to the system? Read the FAQ.
- Installing InterGenOS? See the Forge installer guide.
The Build & Release Pipeline
This page explains how an InterGenOS release goes from unvetted integration work to a stable image you can daily-drive — what a candidate is, what promotion means, and why a full from-scratch build on real hardware is the proving ground. It is written for anyone who wants to understand how the system is built; it describes intent and the shape of the process, not internal commands or machine-specific detail.
Status. The flow below is the release model the project builds against today; R001, the first public release, was produced by it. Concrete candidate numbers advance as the line progresses; the structure — candidate, promotion gate, stable golden — is stable.
Published releases are named in two forms. A major release (R001, R002, …)
is produced by the full from-scratch build described below. A point release
(R001.1, R001.2, …) rebuilds only the changed packages against the proven build
substrate of its major release, and is published only after the resulting image has
been installed and evaluated on real hardware. docs/release-policy.md in the main
repository states the rules for both, including the conditions that require a full
from-scratch rebuild.
A clean build is not a finished release
InterGenOS is built entirely from source, from pinned, checksum-verified inputs, with a deterministic build. But a build in which every package compiled is not the same thing as a build that is known-good. The expensive defects of a from-source distribution are not compile errors — they are the class of problem that compiles fine, packages fine, and only shows up when the image is actually installed and booted on real hardware: a service that writes state a strict sandbox forbids, a directory left out of a package’s file list so a registry initializes empty, a hardware-detection heuristic that picks a path a given GPU cannot drive.
None of those is caught by “everything compiled.” Every one of them is caught by installing the image and booting it on real hardware. That is the single idea the whole pipeline is built around, and it is why a candidate is never trusted on the strength of a clean build alone.
A candidate: honest provenance
While work is still being integrated and has not yet earned that trust, the
artifacts it produces are labelled as candidates, with a -DEV suffix that states
their provenance honestly. A build generated off the integration line can only
attest to integration-line source, so its artifacts wear that label until they are
proven — it is a truthful description, not a placeholder.
One integration build produces two distinct objects, and it helps to keep their roles straight:
- A Release Candidate image (for example
RC001-DEV) — the ISO you install and boot-test. Being “vetted for daily use” is a property this image earns by passing its own install-and-boot validation. - A candidate build substrate (a from-scratch dev candidate) — a large, fully-built environment captured from the same build, kept so that further work can be built on top of it without recompiling everything from scratch. It is unvetted build material, not something you install.
Promotion is the event that earns the name
Promotion is what turns a candidate into a release. A from-scratch,
validation-inclusive build that compiles cleanly and whose Release Candidate
image installs, boots, and validates on real hardware is promoted from the
integration line to the stable line. In the same move it drops the candidate
marking — both the C and the -DEV fall away — and mints a stable golden
substrate: the “built a ton, it works, daily-drive” image
that subsequent, more targeted package work is built against.
A stable golden never carries a -DEV suffix. Once promoted it certifies
stable-line source, so a candidate marking on it would contradict itself. The
candidate labels live only during a candidate’s pre-promotion life.
The whole flow, from in-progress work to a trusted release, is a single loop — a candidate is built, put through the proving ground, and either sent back for a fix or promoted:
flowchart TD
A["Integration work<br/>the in-progress line of changes"] --> B["Build a release candidate<br/>a complete test image — not yet trusted<br/><i>named RC…-DEV while unproven</i>"]
B --> C{"<b><u>THE PROVING GROUND</u></b><br/>Builds cleanly from scratch,<br/>then installs and boots on<br/>real hardware?"}
C -->|" No — a genuine build defect "| D["Fix the cause in the source"]
D --> A
C -->|" Yes — proven "| E["Promote to a stable release<br/><i>the -DEV label is dropped</i>"]
E --> F["The trusted baseline<br/>future targeted updates build on top of it<br/><i>named GB…</i>"]
classDef gate fill:#fde68a,stroke:#b45309,color:#111827;
classDef good fill:#bbf7d0,stroke:#15803d,color:#111827;
class C gate
class E good
class F good
Read it as a story: work in progress becomes a candidate image; the candidate only earns the “stable” name by building cleanly from nothing and then installing and booting on real hardware; anything that fails sends the fix back to the source and the loop repeats; what comes out the far end is the trusted baseline the next round of work builds on.
Why from-scratch is the proving ground
The promotion build is deliberately a full, from-scratch run rather than a quick rebuild of what changed. A targeted rebuild is the right tool for iterating during development — it is fast because it only recompiles what actually changed — but it inherits an already-built environment, so it cannot re-prove that the whole distribution still assembles cleanly from nothing. The from-scratch promotion build does exactly that: it rebuilds every package from pinned source, then the resulting image is installed and booted on real hardware before the release name is granted.
Not every halt disqualifies a candidate. A build can stop for reasons that are about the build scaffolding rather than a defect in the release itself; those are fixed and the build resumes without resetting the candidate’s standing. What blocks promotion is a genuine build defect, or an image that does not install and boot cleanly. When something does fail, the cause is fixed in the source tree and the candidate iterates — never worked around, never masked.
Related
- Building Packages from Source — how an individual package is compiled from pinned source.
- The Transparent Package Manager — how built packages are installed and verified.
- Reproducibility & Verification — how a build’s inputs and outputs are made checkable.
Self-Hosted Builds — InterGenOS Building Itself
A from-source distribution makes a claim every time it ships: these binaries came from this source, through this pipeline. The strongest way to back that claim is to close the loop — run the entire build pipeline on InterGenOS itself, so the system that builds the OS is the OS, verifiable end to end with the same tools it ships to every user. That is what self-hosting means here, and InterGenOS is built to do it.
A development machine hosting the self-hosted build lane — dual AMD Radeon GPUs, mid-compile on the GPU-compute tier.
What the image already carries
Everything the 21-phase pipeline needs ships on the image — not as a special developer edition, but as the standard system:
- The virtualization stack — QEMU (KVM-accelerated), libvirt, virt-manager and virt-viewer, OVMF UEFI firmware (Secure-Boot-capable), swtpm (TPM 2.0 for guests), and virtiofsd for sharing the source tree into a build guest. Builds run inside an isolated guest, never on the live host — the same discipline the project applies everywhere. See Virtualization & Containers.
- The seal-and-sign toolchain — squashfs-tools, xorriso, veritysetup,
sbsign/sbverify, GnuPG, and the smart-card stack (pcsc-lite, ccid, OpenSC) that talks to the hardware signing token. Both operator signing ceremonies — the archive-integrity manifest and the bootloader/UKI signing — run on the InterGenOS host itself. - The build tooling — the compilers, the package tooling, and the orchestrator’s host-precondition check, which verifies every required tool before a build is allowed to start and fails closed on any gap.
Why it matters
Self-hosting is not a stunt; it is a trust property with teeth:
- The toolchain is auditable. When the OS builds itself, the compiler, linker,
and every build tool are the same from-source, pinned, checksummed packages you
can inspect with
pkm— not an opaque third-party build box. - The loop closes. An InterGenOS host, running an InterGenOS-built virtualization stack, boots an InterGenOS build guest, which produces the next InterGenOS image — including a guest with enforced Secure Boot and a TPM, so the product of the build can be validated under its full trust chain without leaving the machine.
- No hidden dependencies. If the pipeline needed something the image does not carry, self-hosting would fail loudly. Keeping the loop closed keeps the dependency claim honest.
The shape of a self-hosted build
- Enable the virtualization stack (
libvirtd) and create a build guest — UEFI/OVMF firmware, the source tree shared in via virtio-fs. - Inside the guest, the orchestrator runs the same fixed 21-phase pipeline documented in The Build & Release Pipeline: validation gates, toolchain, the seven package tiers, kernel, bootloader, image, manifest, squashfs, UKI/verity, ISO.
- The build pauses twice on the host for the operator-only hardware-token ceremonies; signing inputs are re-staged and re-verified around each pause.
- The resulting ISO is validated the way every candidate is validated: booted and installed on real hardware, with the signed chain checked end to end.
Status
The self-hosted path is being validated now, in stages, and this page states only what has been demonstrated:
- Demonstrated: an InterGenOS system hosting its own isolated build environment (KVM guest, OVMF firmware, virtio-fs source sharing), with the builder’s host-precondition check passing green inside that environment, and full package-tier builds running to completion in it.
- In validation: the first complete from-scratch cycle — all 21 phases, both signing ceremonies, ISO, install, and boot validation — performed end to end on InterGenOS-hosted infrastructure. This page will state that milestone as validated only once it has run clean, in keeping with the project’s rule that claims follow verification, never precede it.
Packaging & Package Manager Internals
InterGenOS builds every package from source and ships the results as signed binary archives. This page documents the two halves of that pipeline: igos-build, the factory that compiles source into archives, and pkm, the package manager that installs, removes, queries, and verifies those archives on a running system. It covers the recipe model, the on-disk database, signing and integrity, and the reproducible-builds direction.
This is a developer and contributor reference. For adding a single package end to end, the gates described below mirror the maintainer workflow.
Two components, one pipeline
igos-build is the factory; pkm is the consumer.
igos-buildcompiles source code in an isolated chroot and produces a.igos.tar.gzarchive per package.- During the tracking phase,
igos-buildgenerates the initial file list and content hashes for each archive. - If a build uses
direct_install(deploying straight into the chroot rather than to aDESTDIRstaging tree),igos-buildcallspkminternally to register the resulting files into the package database. - For end users,
pkmis the CLI tool that downloads and installs those.igos.tar.gzarchives from the network repository.
igos-build constructs packages from source in an isolated environment; pkm operates on the live filesystem.
The package recipe model
A package is a directory at packages/<tier>/<name>/:
packages/<tier>/<name>/
├── package.yml      ← required: metadata + verify_paths
├── build.sh         ← required for build_style: custom; optional for autotools/meson
├── <name>.1         ← optional manpage (some packages ship a tracked manpage in-recipe)
└── patches/         ← optional, build.sh-consumed
Tiers
InterGenOS organizes packages into seven tiers. Each tier is built by exactly one builder, and a package’s tier: field determines which one. The live tree carries 1000+ packages across the seven tiers: toolchain, core, base, desktop, extra, compute, and ai. These counts drift as packages land; derive the current numbers from the tree rather than treating any number as fixed.
| Tier | Builder | Where wired |
|---|---|---|
toolchain | bootstrap toolchain phases | build orchestrator |
core | bash static list | scripts/chroot-build-*.sh (one per phase) |
base | bash static list | scripts/chroot-build-base.sh |
desktop | Python topological sort | igos-build.py --tier desktop |
extra | Python topological sort | igos-build.py --tier extra |
compute | Python topological sort | igos-build.py --tier compute |
ai | Python topological sort | igos-build.py --tier ai |
Pick the tier that matches the package: foundational utilities go to core or base; GUI and desktop applications go to desktop; servers, dev tooling, browsers, and system utilities go to extra; the local AI runtime goes to ai.
The two builders are mutually exclusive. The bash static-list builder (tiers core and base) enumerates packages explicitly in run_package lists inside scripts/chroot-build-<phase>.sh. The Python tier-driver (igos-build.py, tiers desktop / extra / ai / compute) walks packages/<tier>/ at build time, computes the topological-sort closure of declared dependencies:, and builds everything reachable. A package must be reachable by exactly one builder; a recipe reachable by neither is an orphan that will never build. The orphan detector at scripts/check-builder-coverage.py is the early-warning system for that class: it prints a reachability summary and exits 0 only when there are no orphans and no tier mismatches — a recipe whose directory and declared tier disagree fails it too.
package.yml
The recipe metadata file declares identity, source, dependencies, and the paths the package is expected to install:
name: <name>
version: "<semver>"
release: 1
description: <one-line description>
license: <SPDX-identifier>
homepage: https://<upstream-homepage>
tier: <core|base|desktop|extra|ai|compute>
build_style: <custom|autotools|cmake|meson|make>
source:
- url: https://<mirror-or-upstream-url>/<name>-<version>.tar.<ext>
  sha256: <expected-sha256-of-tarball>
dependencies:
  build: []      # build-only deps (autoconf, pkgconf, etc.)
  host: []       # host-only tooling (rare)
  runtime:       # runtime deps (libraries linked, interpreters required)
  - <dep1>
verify_paths:
- /usr/bin/<name>
- /usr/lib/lib<name>.so
- /etc/<name>/<name>.conf
The source tarball’s sha256: is pinned in the recipe; a download whose hash does not match is rejected. The discipline is mirror-first: stage the tarball on the InterGenOS source mirror or a file:/// URL inside the chroot. Networked https:// URLs are accepted but are not the default posture.
verify_paths: the install contract
verify_paths: is the package’s declaration of which files prove it landed. Each entry must be an absolute path with at least three segments (for example /usr/bin/x), and a recipe should pick two or three paths that establish identity:
- The primary binary at
/usr/bin/<name>or/usr/sbin/<name>is the strongest identity signal. - The primary library at
/usr/lib/lib<name>.so*for library-only packages. - A canonical directory under
/usr/share/<name>/,/usr/lib/<name>/,/etc/<name>/, or a firmware path for data, firmware, or config packages. - The
site_perlorsite-packagespath for Perl/Python module packages. - For the kernel,
/boot/vmlinuz-<version>plus/usr/lib/modules/<version>.
verify_paths is enforced at two gates. The pre-push hook refuses a new package.yml that declares neither verify_paths: nor pending_acquisition:. At image-build time, the pre-squashfs audit (scripts/pre-squashfs-audit.py) verifies every declared path is actually present in the chroot and halts the build if one is missing. A helper at igos-build/verify_paths_derive.py can auto-derive a fallback when a recipe omits the field, but the human-curated declaration remains the source of truth.
A package that legitimately cannot be acquired yet (blocked on an external dependency such as upstream sponsorship) replaces the verify_paths: block with pending_acquisition: "<reason>". The pre-squashfs audit skips such packages. This is reserved for blocked-on-external cases, not as a workaround for skipping the install contract.
build.sh
For build_style: custom, build.sh defines configure, build, and do_install functions; the orchestrator sources the script in the chroot’s per-package work directory and calls each in sequence. An optional post_install runs after the package is registered, for cache-rebuild work such as ldconfig or systemd presets that depends on the files already being in place. The same post_install runs a second time on the installed system: the installer executes each installed recipe’s hook inside the target during its hooks phase, so cache rebuilds happen against the real root. Files a hook creates are not part of the package’s file list, so anything a package needs to own belongs in do_install(), not in the hook.
#!/bin/bash
configure() {
    set -e
    ./configure --prefix=/usr --sysconfdir=/etc --localstatedir=/var
}
build() {
    set -e
    make -j"$(nproc)"
}
do_install() {
    set -e
    make DESTDIR="${DESTDIR}" install
}
Two recipe rules carry weight here. Stub functions are forbidden: a configure() that is only : and a do_install() that produces nothing is rejected. If the package has source, it must compile. A true metapackage with no source declares source: [] and uses do_install() only to write config files, with a header comment stating the package is intentionally meta. Patches to bundled source are applied by hand inside build.sh from the recipe’s own patches/ dir, not via a package.yml patches: key (that key is auto-applied from the source-staging directory and is for patches that ship alongside a fetched upstream tarball).
The package manager: pkm
pkm manages the state of the installed operating system: installation, removal, querying, and integrity verification of the pre-compiled .igos.tar.gz archives.
Hybrid data model
pkm uses two stores that mirror each other:
- A SQLite database at
/var/lib/igos/pkm.dbis the primary source of truth, used for fast queries and transaction management. - Text manifests at
/var/lib/igos/packages/are human-readable records generated alongside the database for inspection and transparency.
The duality keeps queries fast without giving up auditability: every database fact has a readable text counterpart you can inspect directly.
Database schema
The schema (pkm/database.py) consists of several interconnected tables:
installedtracks active and superseded package metadata:name(unique),version,tier,description,install_date,superseded_by,superseded_at.filesmaps every deployed file to its owning package:package_id(foreign key),path,is_dir,is_config,checksum(SHA-256). Indexed bypathfor fast owner lookups.dependstracks runtime package relationships.availablecaches remote repository metadata, synced viapkm sync.historyis an append-only transaction log of every operation (installs, removals, supersedes) for audit trails.config_filesspecially tracks files in/etc/to manage user modifications.
Installation pipeline
pkm/installer.py follows a strict sequence:
- Staging extraction. The archive is extracted to a temporary staging directory using Python’s tar reader with the hardened
datafilter, which blocks absolute paths,../traversal, escaping links and device nodes, and strips ownership, setuid/setgid bits and non-standard permissions. - Manifest reading. The staged manifest is parsed for the file list,
SUPERSEDESdeclarations, and embedded file hashes. - Invariant checks.
pkmchecks for directory collisions (for example, preventing a package from replacing the/libsymlink with a directory) and verifies that any predecessors named inSUPERSEDESexist and are correctly ordered in the install queue. - Filesystem deploy. The archive is deployed to the root filesystem through the same hardened reader; the setuid/setgid bits it drops are then restored explicitly from the archive’s own header metadata. This deploy is the point of no return: a successful write commits the package to disk before the database transaction that records it.
- Atomic DB transaction. A single
BEGIN/COMMITblock creates theinstalledrecord, registersfileswith their content hashes, transfers overlapping file ownership for anySUPERSEDESpredecessor (marking itsuperseded_by), and appends ahistoryentry. - Text manifest generation. The text manifest at
/var/lib/igos/packages/{name}-{version}is written reflecting the final database state.
Removal
pkm/remover.py processes files cautiously. The file list is read from the database; configuration files under /etc/ are skipped to preserve user data unless --force is supplied. Regular files are unlinked. If a file’s on-disk hash differs from the database hash (it was modified post-install), pkm warns but proceeds. Directories are removed only when they become completely empty. The installed, files, and depends records are then deleted.
Upgrades: the supersede model
pkm handles upgrades through supersede semantics. When package B supersedes package A:
- Files present in both
AandBare overwritten on disk byB; in the database, ownership transfers fromAtoBwith updated SHA-256 hashes. - Files that existed in
Abut notBare left in place, still owned byA’s historical record. A’sinstalledrecord receives asuperseded_bytimestamp pointing toB.
This supports fine-grained package splits (for example util-linux splitting into util-linux-core and util-linux-extra) without orphaning files or breaking dependencies.
Integrity and security
InterGenOS treats verifiability as a core property, not an add-on. The package layer contributes three checks.
Content-hash verification
pkm verify recalculates the SHA-256 hash of every installed file on disk and compares it against the expected hash in the files table. This detects both accidental corruption and unauthorized modification of installed binaries.
Archive verification
Before installation, the cli.py layer exposes an --archive-trust flag. In strict or repo-only modes, the incoming archive’s SHA-256 is computed and checked against the trusted available index synced from the central repository. An archive whose hash is not in the trusted index is rejected.
Config vs. content
pkm tracks is_config state for files under /etc/, and the config_files table stores each file’s original deployed hash. When an upgrade ships a new config file, pkm attempts a safe merge, or leaves a .new file if it detects the user has modified the active configuration on disk. User configuration is preserved by default.
The signed chain around packages
The package archives sit inside a broader signed integrity chain that InterGenOS ships today: a signed Secure Boot chain, dm-verity integrity for the read-only system image, and signed Unified Kernel Images (UKIs). Content-hash verification ties each installed file back to a known-good value. Together these mean the path from “what the repository published” to “what is running on disk” is checkable at every link, not just at download time. The result is a machine you understand, can modify, and can trust.
Reproducible builds
Reproducible builds are a documented goal for InterGenOS and a security primitive: starting from the same source, the same toolchain, and the same documented build environment, two independent builders should produce byte-identical output. That property lets a third party detect silent backdoor insertion or build-environment tampering that signing alone cannot catch. It is the difference between “we signed the binary” and “the binary is independently verifiable from source.”
The current state is partial. Bit-identical output is the documented 1.0 goal but the full toolchain plumbing is still being built out. SOURCE_DATE_EPOCH is partially honored in the manifest-emission path of the build orchestrator, and the cargo-vendor pipeline (scripts/cargo-vendor-gen.sh) already produces reproducible vendor tarballs using the standard recipe:
tar --sort=name --owner=0 --group=0 --numeric-owner \
    --mtime=@${SOURCE_DATE_EPOCH} --format=pax vendor/ | xz -T 1 -9
The archive emitters — pkg_archive in the build orchestrator and the repository-side scripts/emit-package-archives.py — do not yet apply the same normalization. Python’s tarfile defaults embed source mtimes, the builder’s uid/gid, and a gzip header timestamp, all of which vary between builders. The planned fix normalizes each tar member (uid/gid zeroed, owner/group root, mtime pinned to SOURCE_DATE_EPOCH) and writes the gzip layer separately with a zero timestamp. Other identified gaps include exporting SOURCE_DATE_EPOCH into the chroot so compilers honor it, build-path prefix mapping (-ffile-prefix-map / --remap-path-prefix) to keep absolute chroot paths out of binaries, and pinning LC_ALL=C plus TZ=UTC.
The 1.x target is byte-identical .igos.tar.gz per package across two builders, plus an audit harness (scripts/verify-reproducible.sh, planned) that any contributor can run to confirm the property for a given package. Bootstrap-tier (toolchain) reproducibility and full ISO determinism are scoped beyond 1.x. None of the reproducibility plumbing beyond what is described as current should be read as shipping today.
See also
- FORGE Internals — the installer that lays the built image onto a machine.
- Security Review — the signed-chain and integrity posture in depth.
- FORGE Installer Guide — installing the built image.
FORGE Internals
FORGE is the InterGenOS installer. It takes a booted live environment and turns it into a deployed, bootable, user-configured operating system on a target disk. This page covers its architecture and how to contribute to it.
FORGE is distinct from the build system that produces the ISO. The build system (igos-build) compiles every package from source and assembles the signed image; FORGE consumes that image at install time and writes it to the user’s disk. For the build pipeline that creates the ISO itself, see Building the ISO below.
This page describes InterGenOS as it ships. The internals described here reflect what ships today.
Design principles
FORGE is built on three foundations.
- Declarative intent. Frontends collect user choices and emit a serialized YAML state describing the desired system. The backend consumes that YAML, plus the credentials it needs (passwords), and executes the install. The frontend never touches the disk directly.
- Supply-chain integrity. A verification gate runs before any disk write. It checks every package archive against the cryptographically signed release manifest to detect tampering, and halts the install before partitioning on any mismatch. This is the same posture the rest of the system carries: security is not first. It is only.
- Phased execution. The install runs as a linear sequence of phases. A failure halts the pipeline, performs best-effort unmounts, and surfaces the exact point of failure rather than leaving the disk in an unknown state.
Layout
FORGE lives primarily under installer/ and uses a split frontend/backend architecture united by the declarative state model:
installer/frontend/tui.py— the text frontend.installer/frontend/gui/— the graphical frontend.installer/backend/install.py— the backend orchestrator.installer/backend/hooks.py— resource context managers (mounts and similar).installer/init/init.sh— the live boot-time init that activates and verifies the root filesystem.
The two frontends
FORGE ships two user-facing frontends that execute identically against the same backend.
TUI (installer/frontend/tui.py)
A dialog-based text interface. It suits SSH-based installs, headless servers, and keyboard-driven workflows. It emits the declarative install.yaml (written to /var/lib/forge/install.yaml) and, separately, an interactive-state structure (install_io) holding the target disk and credentials, which the backend consumes alongside the YAML.
GUI (installer/frontend/gui/)
A GTK4 / libadwaita application, built as a multi-screen wizard: welcome, keyboard_locale, disk, user, packages, confirm, progress, done. It accumulates selections in installer/frontend/gui/state.py as the user moves through screens.
Security-critical interactions get dedicated handling. integrity_dialog.py disables paste (clipboard, drag-and-drop, and the right-click menu) on the integrity-override-phrase entry. The phrase must be typed in full, ensuring deliberate consent before any integrity-check override is accepted.
The backend pipeline
run_install() in installer/backend/install.py is the backend entry point. It consumes the YAML state and the interactive-state structure, then runs the 13-phase install pipeline (PHASE_ORDER):
- Validate (
PHASE_VALIDATE) — checks the YAML structure and runs deep validations (for example, regex validation of the requested hostname via_validators.py). - Verify (
PHASE_VERIFY) — the core security gate. It computes the SHA-256 of every package archive to be deployed and verifies each againstintergenos-archive-manifest.txt, which is signed by the release keys. A mismatch halts the installer before partitioning, unless the user provides explicit typed confirmation to override. - Partition (
PHASE_PARTITION) — wipes the target disk, writes a new partition table (EFI or BIOS), and formats filesystems. - Mount (
PHASE_MOUNT) — mounts the new root and boot partitions at a staging path (for example/mnt/target). - Virtual FS (
PHASE_VIRTUAL_FS) — bind-mounts the host/dev,/proc, and/sysinto the staging path forchrootoperations. - Packages (
PHASE_PACKAGES) — delegates topkmviapackages.py. Thread-queued execution extracts and registers every package named in the YAMLpackage_groups. Individual package failures are tracked but do not abort the install; FORGE surfaces a partial state instead. - Config (
PHASE_CONFIG) — generates system configuration (/etc/fstab, locale, timezone links) from the YAML intent. - Users (
PHASE_USERS) — sets the root password and creates the initial unprivileged account. - MOK / Secure Boot (
PHASE_MOK) — on an EFI system, generates a Machine Owner Key (MOK) keypair inside the target environment. - Bootloader (
PHASE_BOOTLOADER) — installs GRUB to the target disk. On EFI, GRUB is signed with the MOK keypair generated in the previous phase. - Hooks (
PHASE_HOOKS) — runs package-specific post-install scripts (font-cache updates, gsettings schema compilation, and similar). - Services (
PHASE_SERVICES) — enables the necessarysystemdservices for the target. - Cleanup (
PHASE_CLEANUP) — unmounts virtual filesystems and the target disk, copies the integrity audit log, and reports the result.
Error handling
FORGE prioritizes safe failure modes.
- Context managers. Mounts and similar resource-heavy operations are wrapped in context managers (
installer/backend/hooks.py) so unmounting happens even when an exception is raised. - Phase tracking. The
InstallResultobject tracksphase_completed. On exception, the orchestrator runs a cleanup block (_PHASES_NEEDING_UNMOUNT) scoped to how far the install reached. - User transparency. Non-fatal problems, especially trust-chain ones such as audit-log copy failures, emit warnings to
InstallResult.warnings. These show on the frontend’s final screen so the user always knows the true state of the deployment.
What gets installed
The image FORGE deploys is assembled from packages built across seven tiers: toolchain, core, base, desktop, extra, compute, and ai, with compute a mirror-only, opt-in GPU-compute tier that is not on the default ISO — over 800 packages in total, with the desktop tier the largest (over 400) and ai the smallest (the assistant and its inference engine). The tree carries over 1,000 package definitions; the rest are mirror-only. Counts drift as the system evolves; to derive the live numbers for a given checkout, count the package definitions per tier rather than trusting a static figure.
The desktop that ships today is GNOME 49 on Wayland. The two ai packages are the local assistant InterGen (a tiered, hardware-detected, offline-first local assistant built on an on-device model, with zero telemetry) and llama.cpp, the inference engine it runs on. InterGen bundles a security-scanner subsystem, InterGen Sentinel, that defaults to Local-Rules plus Local-Qwen and offers six opt-in cloud providers (Claude (Anthropic), Gemini (Google), Copilot (Microsoft), ChatGPT (OpenAI), Grok (xAI), and DeepSeek). The cloud-escalation path is called Phone-A-Friend (Frontier/Cloud Escalation) and is opt-in by design.
Building the ISO
The installer is one half of the story; the other is the build system that produces the bootable image. The full build runs 21 phases:
validate -> verify-sources -> setup -> toolchain -> chroot-prep ->
chroot-tools -> core -> config -> core-extra -> base -> kernel ->
desktop -> extra -> compute -> ai -> bootloader -> image -> manifest ->
squashfs -> ukis-verity -> iso
A publish phase is optional. The final stage assembles the hybrid UEFI+BIOS ISO from the signed components.
The canonical ISO entry point is scripts/build-iso.sh, usually invoked by scripts/build-intergenos.sh, which sets its variables from its own phase state. It is env-var-driven rather than flag-driven. A representative manual invocation:
SHIM=/path/to/shimx64.efi.signed \
GRUB=/path/to/grubx64.efi.signed \
UKI_LIVE=/path/to/igos-live.efi.signed \
UKI_INSTALL_GUI=/path/to/igos-install-gui.efi.signed \
UKI_INSTALL_TUI=/path/to/igos-install-tui.efi.signed \
SQUASHFS=/path/to/filesystem.squashfs \
OUTPUT=build/intergenos-example.iso \
SOURCE_DATE_EPOCH=$(date -u +%s) \
bash scripts/build-iso.sh
Set SOURCE_DATE_EPOCH explicitly whenever reproducibility matters: the script otherwise falls back to current time with a warning, and a deliberate value makes the ISO bit-identical across rebuilds.
build-iso.sh runs six internal phases: stage the ESP layout, build the FAT32 ESP image (mkfs.vfat -F 32 ... -n IGOS_ESP), stage the ISO9660 root (dropping filesystem.squashfs, filesystem.verity, and filesystem.sha256 under /live/), invoke xorriso (requires 1.5.6+ for SOURCE_DATE_EPOCH), self-verify the GPT and El Torito structures, and emit a <OUTPUT>.manifest recording input/output SHAs and tool versions.
The trust chain
The signature chain shim -> GRUB -> UKI is covered by Secure Boot, but the root filesystem lives outside the UKI at /live/filesystem.squashfs. Without independent verification an attacker could swap the squashfs and still boot a trusted UKI. InterGenOS closes that gap with two paired checkpoints that must stay in lockstep:
- Primary — dm-verity. The live UKI’s sealed cmdline carries
igos.verity.roothash=<HEX>. The merkle hashtree ships on the media at/live/filesystem.verity;init.shactivates a dm-verity device and the kernel verifies each 4 KiB block as it is read. Because the root hash lives inside the Secure-Boot-signed UKI, the squashfs cannot be swapped without invalidating the chain. - Media diagnostic — whole-file sha256.
/live/filesystem.sha256ships so you can check the media you wrote, and the build asserts it is present and non-empty. It is not a boot-time verification path: if a kernel command line carries noigos.verity.roothash=, init refuses to mount the root filesystem rather than accepting an unverified one. A development boot can override that only by adding an explicitigos.dev.allow_unverified=1marker, which mounts without verification and can never appear on a sealed, signed kernel image.
The build asserts that both filesystem.verity and filesystem.sha256 land non-empty, and fails otherwise. Changing one side of this pairing without the other re-opens the gap. Never remove the build-time assertion on the assumption that boot-time init will catch the problem: that turns a build-VM exit 1 into a kernel-panic-class abort on the user’s machine.
The full ISO build, signing flow, squashfs generation, and test-VM evaluation are documented in the operations topics under docs/operations/.
Contributing
FORGE is meant to be understood and modified. A few orientation points for working on it:
- Start from the phase you are touching. Both the install pipeline (
PHASE_ORDERininstaller/backend/install.py) and the ISO build (scripts/build-iso.sh) are linear and named. Find the phase, read it, change it in isolation. - Keep the two frontends equivalent. The TUI and GUI must produce the same declarative state and execute identically against the backend. A change that touches install behavior belongs in the backend, not in one frontend.
- Never relax the integrity gate quietly. The verify phase and the dm-verity / sha256 pairing are load-bearing for the whole trust model. Changes there need matching changes on the paired side and explicit review.
- Test against a VM before hardware. Build the ISO, boot it under QEMU with Secure Boot enabled, exercise MOK enrollment, and run both install frontends end to end before testing on real disks.
The goal of every change is the same as the goal of the system: a machine you understand, can modify, and can trust.
See also
- FORGE install guide — using the installer.
- Contributing — how to work in the InterGenOS tree.
AI Assistant Internals
This page describes the internals of InterGen, the local AI assistant built into InterGenOS, and InterGen Sentinel, the security layer that guards everything InterGen touches. For the user-facing “what it does and how to set it up” view, start with the FAQ.
InterGen runs entirely on the local machine, with no cloud dependency by default. It is a conversational interface for system administration, configuration, and coding. The design follows the same posture as the rest of the system: a machine you understand, can modify, and can trust.
Design principles
- Local-first. Inference runs on local hardware by default, so your data stays on your machine.
- Hardware-tiered. InterGen detects the host’s GPU and its dedicated video memory and selects an appropriately sized model automatically.
- Security is only. Every proposed action passes through a safety classifier, and destructive or security-bypassing operations are refused outright.
- Predictable routing. Requests flow through a deterministic, priority-ordered chain that resolves common queries cheaply instead of handing every interaction to the model.
InterGen ships in the ai tier of the build, the smallest of the system’s seven package tiers. (The build assembles 1000+ packages across toolchain, core, base, desktop, extra, compute, and ai; these counts drift over time.)
Model catalog and hardware tiers
InterGen scales to the hardware it detects. intergen/hardware.py probes the GPU and its video memory and assigns a tier (system RAM is reported, never an input); intergen/model_manager.py holds the canonical model catalog and downloads, verifies, and selects the model for that tier; intergen/llama_manager.py manages the llama-server subprocess (from llama.cpp) that serves the selected model over a local HTTP API.
The model catalog defines three tiers. All three ship: each model, and each paired vision projector, is SHA-256-pinned in the signed models manifest (intergen/data/models-manifest.json), so each can be downloaded and load-verified. What differs between the tiers is the dispatch lane, not the model — see the lane note below the table.
| Tier | Model | Approx. size | Selected when | Role |
|---|---|---|---|---|
| 1 — Basic (universal floor) | InternVL3.5-2B Q4_K_M | ~1.2 GB | all hardware, including CPU-only machines | semantic matching, system queries, keyword extraction, everyday explanation |
| 2 — Standard (shipping) | Qwen3.5-9B Q4_K_M | ~5.5 GB | a discrete GPU with roughly 7 GB or more of video memory | coding, configuration, reasoning — native dispatch, gated |
| 3 — Advanced (shipping) | Qwen3.5-35B-A3B Q4_K_M (MoE) | ~21 GB | a discrete GPU with roughly 22 GB or more of video memory | deep multi-file analysis — the model ships; the 35B native lane does not |
System RAM is detected and reported but is deliberately not a tier input — a machine without a discrete GPU serves the smallest model regardless of RAM.
SHIPPED_LOGIC_LANES (intergen/dispatch_policy.py) is the source of truth for which native tool-calling lanes ship; it currently holds Tier 2 alone. The daemon resolves the model first and derives the lane from it: ModelManager.resolve_for_detected returns the model the detector recommends, and resolve_dispatch_for_model then reads that model’s tier. A model whose tier is in SHIPPED_LOGIC_LANES runs native; every other resolved model runs the locked-down floor posture. So a 9B-capable box runs the 9B natively; a 35B-capable box serves the 35B with the locked-down floor posture, because no native lane ships at Tier 3 and this function does not substitute a smaller one; and every lower-end or CPU-only box runs the locked-down 2B floor. A separate resolve_dispatch in the same module does walk a detected tier down to the largest shipped lane, but it is not the path the daemon takes. A small embedding model (nomic-embed-text, Apache-2.0) ships alongside to power the router’s semantic-matching layer. The assistant collects zero telemetry.
The priority router
intergen/router.py is a priority-ordered routing chain. Rather than sending every prompt straight to the model, the router tries to satisfy each request with the cheapest, most predictable method first and escalates only when it has to.
- Priority 0 — Decomposition. Detects compound requests (“update the system, then restart the web server”), splits the prompt into sub-tasks, and routes each one in turn.
- Priority 1 — Keyword/regex match. Fast pattern matches for common system commands (“what’s my IP?”, “check disk space”) dispatch directly to a built-in tool without invoking the model.
- Priority 2 — Semantic embedding match. Lightweight embedding search against a pre-computed catalog of capabilities; a high-confidence match dispatches to the corresponding tool.
- Priority 3 — LLM tool calling (gated). The query goes to the model with a schema of available system tools, the model selecting a tool and arguments for the router to execute. On the 2B floor this path is disabled by policy (
intergen/dispatch_policy.py): tool dispatch is code-owned — the deterministic Priority 1/2 matchers pick the tool and extract arguments, and the model never decides a tool call. On the shipped 9B tier native tool-calling unlocks, and the model decides tool calls under the safety classifier and Sentinel gates; the 2B floor stays code-owned. - Priority 4 — LLM free response. The fallback: the model answers conversationally from its own knowledge and the conversation context.
Safety classification
Every action the router proposes passes through the classifier in intergen/safety.py, which sorts the operation into one of three tiers:
AUTO— Read-only or harmless operations (ls,grep,systemctl status). Executed immediately, without a prompt.CONFIRM— State-changing operations (systemctl restart,pkm install, editing a config file). The assistant pauses and asks you to approve before it runs.BLOCKED— Destructive or security-bypassing operations (rm -rf /, reformatting the root partition). Refused outright, with an explanation.
This classification is what keeps the user in control: nothing that changes the system runs without explicit approval, and the most dangerous commands cannot run at all.
Desktop and tool integration
InterGen exposes its capabilities to the GNOME 49 / Wayland desktop through a D-Bus service (intergen/dbus_daemon.py), so other applications can request completion, summarization, or semantic search over IPC. The D-Bus surface is deliberately narrow: only a small set of vetted interfaces is exposed, which prevents a local unprivileged application from driving arbitrary code execution through dbus-send.
InterGen is also a Model Context Protocol (MCP) client (intergen/mcp_client.py). It can connect to local MCP servers to acquire new capabilities or query data sources, while preserving the boundary between the assistant’s core runtime and the tool-execution environment.
Conversational context is split between intergen/memory.py — a user-controlled store of persistent facts plus a rolling window of recent turns — and intergen/state_cache.py, which caches recent query results so identical prompts are not recomputed. Facts are added and removed by explicit request, stored data is fully inspectable, and all of it is serialized and persisted locally.
InterGen Sentinel — the security layer
InterGen Sentinel is the security scanner that guards InterGen’s interactions with the outside world. It defends both the user and the machine whenever the assistant crosses a trust boundary: an MCP server, a web fetch, a file write, or an outbound request to a frontier model. Sentinel has four cooperating parts.
1. A pluggable scanner engine
The scanner (intergen/scanner/) inspects one piece of content travelling one direction across a trust boundary and returns a verdict. The core interface lives in intergen/interfaces/scanner.py:
ScanDirection—EGRESS(arguments leaving the machine; exfiltration risk) orINGRESS(content arriving before it re-enters the model context; injection risk).ScanDisposition—ALLOW/FLAG/BLOCK, severity-ordered.FLAGmeans “suspicious, hold for human review”;BLOCKmeans “high-confidence malicious, hard refuse.” When multiple verdicts merge, the most severe wins (default-deny).ScanContextandScanVerdictcarry the surface, direction, and tool name alongside a reason, confidence score, and originating scanner.
ScannerPolicy (intergen/scanner/policy.py) composes an always-on deterministic floor with an optional deeper scanner:
LocalRulesScanneralways runs first as the deterministic floor.- A
BLOCKfrom the floor short-circuits without spending the deeper scan. ALLOWat baseline depth passes through.- A
FLAG, or any scan configured at deep depth, escalates to the configured deeper scanner. - Most-severe disposition wins. A scanner that errors fails closed to
FLAG— never a silentALLOW.
The three scanners:
| Scanner | Local? | Role |
|---|---|---|
LocalRulesScanner | yes | always-on deterministic floor: pattern/heuristic rules, no model, no network |
LocalQwenScanner | yes | on-device llama.cpp Qwen classifier; the default deeper scanner, still no network |
CloudScanner | no | opt-in deep tier wrapping a vendor-neutral cloud adapter; off unless you opt in |
The default configuration scans entirely on-device with the rules floor plus the local classifier model. The deep cloud tier is opt-in and backed by six built-in providers — Claude (Anthropic), Gemini (Google), Copilot (Microsoft), ChatGPT (OpenAI), Grok (xAI), DeepSeek — plus a user-configured endpoint of your own. No cloud provider is configured by default.
2. A single dispatch chokepoint
Every tool call and MCP interaction is dispatched through ToolRegistry.execute (intergen/tool_registry.py), where Sentinel wires in the ScannerPolicy. Scanning is therefore structural, not per-call opt-in: arguments are egress-scanned before they leave toward a surface, returned content is ingress-scanned before it re-enters the model context, a BLOCK refuses or withholds, and a FLAG is raised to a human review modal. The scan composes with the existing provenance gate and spotlight at the same chokepoint, so three defenses layer on the one path everything must traverse.
Turning scanning off requires the human-authenticated path, and the scan policy sits in the protected configuration set that the assistant itself can never edit.
3. Phone-A-Friend (Frontier/Cloud Escalation)
EscalationManager (intergen/escalation.py) implements Phone-A-Friend (Frontier/Cloud Escalation), the consent-first path for handing a request to a more capable frontier model when the local assistant cannot satisfy it. It is distinct from the quality fallback in llm.py (which auto-escalates after the local model fails twice): Phone-A-Friend recognizes that a task is multi-step, sensitive, or slightly outside scope and offers to reach your configured frontier model, sending nothing without explicit consent.
- Modes (config
escalation.mode, defaultASK):NEVER(offline; never offer or send) ·FALLBACK(auto-escalate only on local quality-gate failure) ·ASK(offer on recognition; consent before any send) ·AUTO(decide by confidence, no prompt). - Hybrid recognition. A heuristic considers local confidence, multi-step signals, and query type; a user-invoked affordance (a GUI button with CLI parity) bypasses the heuristic, since the user already asked.
- Show-before-send. The consent modal (
intergen/consent_modal.py) displays the full outbound payload before any send, so consent is informed. - Scan-on-derivation. The initial egress you explicitly authorized is trusted at source; every subsequent derived egress is egress-scanned through the same
ScannerPolicy, so aBLOCKkeeps secrets from shipping to the cloud. - No default provider. With none configured, escalation cannot run and offers degrade to a “configure a provider” note. InterGen ships local-only and ready.
The same six built-in providers, plus a user-configured endpoint of your own, are available here, with API keys stored in the system keyring rather than in plain configuration.
4. The destructive-policy never-list
An OpenPGP-signed manifest (intergen/data/destructive-policy-manifest.json, installed to /usr/share/intergen/ alongside its detached .asc signature) enumerates the paths InterGen’s AI may never perform a destructive operation on. What protects the manifest on an installed system is that signature and root file ownership: the loader verifies the detached signature against the shipped operator keyring over the exact bytes it read and refuses to trust a manifest that does not verify, and the file itself is root-owned, so the unprivileged assistant cannot rewrite it. It is not held read-only by dm-verity there — dm-verity covers the live ISO image, while Forge installs a conventional writable root. There is no config option to widen the list, ever: this is anti-self-tamper plus system-survival and credential/boot integrity. Anything not on the list and not otherwise protected is fair game under per-capability opt-in and per-action human consent. The manifest’s system_ai category also covers InterGen’s own config and state directories, so the same enforcement protects the Sentinel, escalation, and provider settings the assistant cannot edit.
Three composing pieces:
- The pure matcher (
intergen/destructive_policy.py) — given a loaded manifest, decides whether a candidate path is protected. No I/O, no signature logic. - The signature-verifying loader — verifies the detached signature against the operator key over the exact bytes read (closing a verify-then-parse race) before trusting the JSON. A manifest that does not verify to the pinned operator key is not trusted; the loader fails closed to an interim floor.
- The chokepoint enforcement — consults the matcher inside the file-write classifier, with a canonicalized immutable-prefix floor as defense-in-depth.
Match semantics resolve symlinks and .. before comparing, so a symlink or path-traversal detour cannot smuggle a write past a prefix entry, and a candidate that cannot be normalized is treated as protected (fail closed).
The vendor-neutral cloud substrate
intergen/cloud/ is the raw-HTTP substrate the CloudScanner and Phone-A-Friend both ride on. It is vendor-neutral and SDK-free: six built-in providers (anthropic, openai, google, microsoft, deepseek, xai) plus a custom adapter for any OpenAI-compatible endpoint, all sharing a raw-HTTPS base with no vendor SDKs (a supply-chain posture that bans third-party packages from the package index). API keys are read from the keyring per call and never cached in process, and a request over a non-TLS transport is refused.
Code map
| Concern | Location |
|---|---|
| Hardware probe and tier selection | intergen/hardware.py |
| Model catalog, download, verify | intergen/model_manager.py |
| llama-server lifecycle | intergen/llama_manager.py |
| Priority router | intergen/router.py |
| Safety classifier | intergen/safety.py |
| D-Bus service | intergen/dbus_daemon.py |
| MCP client | intergen/mcp_client.py |
| Memory and state | intergen/memory.py, intergen/state_cache.py |
| Scanner interface (ABC, types) | intergen/interfaces/scanner.py |
| Scanner engine (3 scanners + policy) | intergen/scanner/ |
| Chokepoint scan-wiring | intergen/tool_registry.py |
| Phone-A-Friend escalation | intergen/escalation.py |
| Consent modal | intergen/consent_modal.py |
| Cloud substrate | intergen/cloud/ |
| Destructive-policy matcher + loader | intergen/destructive_policy.py |
| Signed never-list manifest | intergen/data/destructive-policy-manifest.json |
How We’re Developing InterGen
This page is a running record of how InterGen — the assistant that ships inside InterGenOS — is being developed: what we built first, what it measured, where it was wrong, what three days of real use changed, and what we’re doing now. It is written in the order things happened, and the failures are recorded with the same weight as the successes, because a write-up that shows only the clean path teaches no one.
Every measured result here comes from a recorded run. Static package, catalog, and corpus facts come from the cited source tree; where a run is a sealed capture that is not published, the page says so rather than pretending the number is unsourced. Nothing here describes a thing as done that is not done.
The one-paragraph version
We started the way most people would: we imagined the questions a user would ask a system assistant, wrote several hundred of them, built a harness to run them against the assistant and grade the answers, and developed against that. It worked well enough to get a first release out the door, and it was wrong in ways we couldn’t see from the inside. In the three days of outside use that followed the first point release, one relative’s ordinary use — recipes, chickens, Medicare, the weather in her town — showed us a set of conversation shapes our corpus had never contained, and a set of failures our grading had never asked about. We had built the loop, but we had been using it as a gate on our own guesses, not as a loop on real use.
1. Where we started
1.1 What InterGen is, in one line
InterGen is an assistant built around a local language model, run by a daemon on the user’s own machine. Around the model sit a small set of tools it can call (package management, service control, web search) and two things the code answers itself: the clock and date, and retrieval from the system’s own wiki. The catalog holds three model sizes — a 2-billion-parameter model that every machine can run, a 9-billion model offered at roughly 7 GiB of discrete graphics memory, and a 35-billion model offered at roughly 22 GB — and setup lets the user pick among the sizes the hardware can hold rather than picking for them. Inference stays on the machine; assistant content leaves it only through an explicit network feature: a web search, or a request to a user-configured outside model that the user reviews and approves before it is sent. The mechanism is described in AI Assistant Internals.
1.2 Observability first: the assistant records its own turns
The earliest decision that mattered later was to make the assistant observable as a
product feature, not a debug switch. By default, served D-Bus and web turns emit routing,
assembled-prompt, model-output, timing, and final-delivery events to a per-user trace file
(glass.jsonl) — sequenced and phase-tagged, size-capped and rotated. It can be turned off
only loudly (an explicit environment setting), and a failure to write the trace never
fails the request. The code is intergen/glass.py in the source tree.
Why this matters: the field-use findings in part 2 came from Glass. Corpus, package, and training measurements come from their respective source counts and run artifacts. When the first outside user’s laptop told us what had gone wrong, it told us through this file, with no instrumentation added after the fact.
1.3 The scenario harness: our picture of a user
We wrote a corpus of scenarios — a user’s message, what the correct routing is, what the
answer must and must not contain — in thirteen families: conversational, device and
peripheral questions, first-boot top-up, how-to teaching, personal memory, invariant
classes, refusals, seeking information, software management, troubleshooting, web search,
writing help, and a reconciliation set (intergen/tests/scenario/corpus/). Around it we
built:
- a runner that drives the real assistant over its real D-Bus interface by default (an in-process transport and a mock exist for the harness’s own self-tests);
- a grader for the deterministic checks (did the right tool get called, is the forbidden string absent);
- a judge from a different model family than the one under test — the harness refuses a judge whose language backbone is the family being graded, so the assistant never grades itself — for the questions a pattern cannot answer (is this coherent, is it truthful, did it actually answer);
- a comparator for before/after runs; and
- a ratcheted coverage backlog that records known uncovered capability-inventory cells, so “what do we not test” is a list, not a feeling.
The corpus holds 610 scenarios as of 2026-08-25, counted by the harness’s own loader.
What we got right: running against the real interface, keeping the judge in a different model family, and treating coverage as an object. What we got wrong is the subject of part 2: the scenarios were predominantly single-turn, topic-driven, and written from a developer’s picture of a user. A developer asks “install htop”. A person says “yes, please” to an offer the assistant made a turn ago.
1.4 Baselines before training, and a grading rubric
Before any training touched a weight we ran the corpus against all three tiers on the hardware each tier is meant for, and sealed the results. The per-tier table from 2026-08-07 (140 conversations per tier; the run captures are sealed but not published):
| Tier | Conversations pass / mixed / fail (of 140) | Routing clean | Quality clean |
|---|---|---|---|
| 2B | 107 / 24 / 9 | 131/140 | 112/140 |
| 9B | 120 / 15 / 5 | 135/140 | 123/140 |
| 35B | 119 / 12 / 9 | 131/140 | 125/140 |
Two things fell out of that table that we would never have guessed. Routing failures were almost tier-independent: the same five conversations failed on every model size — four of them terse or casual phrasings (“disk”, “GPU”, “get me htop”), the fifth a two-turn request to be taught how to update the system. A bigger model was never going to fix those; only the routing layer was. And the 9B tied or beat the 35B on conversations passed with roughly a quarter of the model-weight footprint (5.7 GB against 22 GB).
Reading that table produced the grading order we use since: was the question understood; was it answered; if a refusal was right, was it refused; was the answer coherent, correct, truthful; and only then, was the right tool called. Our first corpus had that upside down — tool routing was the only thing that could fail a conversation, and a non-linguistic garbage answer had passed every scripted check because the tool call was right.
1.5 Training: three rounds, one adapter shipped
We fine-tune with LoRA adapters on a from-source stack packaged in the distribution’s
ai tier, not a separate environment. The training packages are available from the
package repository but excluded from the installation image (as of 2026-08-25: unsloth
2026.7.4, peft 0.19.1, trl 0.24.0, transformers 5.5.0, bitsandbytes 0.49.2, torchao
0.16.0; serving through llama.cpp build b8796). Three
rounds ran between 2026-08-11 and 2026-08-14. The short version:
- Rounds 1 and 2 were invalidated — not by the training, by the serving. The laptop we measured the 2B tier on was serving through an integrated-GPU Vulkan path that intermittently corrupted generations. Re-measuring the same stock model on the CPU moved the baseline from 95 to 108 passes with zero training. The “47% baseline” our first round had been scoped against was substantially a backend artifact. A serving-corruption canary now exists because of this.
- Round 3 trained all three tiers on a corrected pipeline. The earlier rounds’ training data was malformed in three measured ways: the correctly structured tool-call rows were skipped by the trainer and taught nothing; the rows that did carry a call taught a call form the product’s own template forbids; and the call arguments were stored in a form that template renders as a call with no arguments. The corrected pipeline’s raw emission — the complete product-form call with every argument — sits in the sealed exports beside the earlier form. Each trained model was then run three times against its own three stock baseline runs, and the difference was judged against the measured noise floor of the instrument — how much two identical stock runs disagree with each other on the same day (18 of 204 cells on the 2B, 24 on the 9B).
- Verdicts (2026-08-14): the 2B adapter was rejected — its movement was
indistinguishable from the measured noise floor. The 35B adapter was rejected — no
measurable effect, net zero cells. The
9B adapter shipped: discordance well above the floor, net +9 conversations, ten cells
cured from 0-of-3 to 3-of-3, with two named regressions carried openly on the record (one
deterministic dropped argument on package removal; one literal-mindedness about a service
name). The first release ships the 2B and 35B models stock and the 9B model trained; the
shipped 9B file is pinned by hash in
intergen/data/models-manifest.json.
One out of three is the honest score, and the noise-floor method is the part worth copying: without three runs a side and a measured floor, ordinary run-to-run movement in both rejected adapters would have been easy to overinterpret.
2. What real use did to that
2.1 The first outside user
The first point release went to family and friends on 2026-08-22. One relative, on a laptop with a small NVIDIA card, used the assistant the way a person uses a thing: eight conversations, about sixty questions over three days — recipes, gardening, pets, Medicare, weather and events in her town, a car noise, a sewing machine. She asked for one system task all week: a package update on the first day. With her consent we read the assistant’s traces on 2026-08-25. Those traces are not published; the shapes they showed are.
2.2 What the traces showed
Five shapes of failure, none of which our six hundred scenarios contained:
- The consent turn lost the question. The assistant staged five live-data offers — “I can look that up on the web — want me to?” — and she accepted four of them (“yes”, “please do”, a yes that restated the request); each time the next turn answered “I don’t know your location” (she had named her town in the accepting sentence itself) or answered from memory. No accepted offer ever ran a search: in three days exactly one search ran at all, the one time she used the literal phrase “search the web for”. Our corpus had no scenario in which the user’s whole message is a one-word reply to something the assistant said.
- A live-data question routed to the clock. “What time will the sun set today” was answered with the current time. The intent classifier saw “what time” and stopped.
- “wha?” replayed the previous answer verbatim. No clarification handling at all.
- The embedding server failed on any input over 512 tokens (HTTP 500, four times), timed out twenty times across five daemon starts, and once raised a health alarm reading “sustained semantic-corruption flags (0 in the recent five-generation window)” — an alarm contradicting itself. With embeddings down, documentation retrieval fell back to keyword matching, silently.
- The graphics card was unused by design of that release, and the status said the
opposite: the tier logic assigned zero layers to the card while the vision model used
it, and the status report read
fully_offloaded: truewithoffloaded_layers: 0.
And a sixth, which is not a bug we can fix in code: the 2B model states wrong facts with confidence (“a chicken lays 2–3 eggs a day”, a Social Security milestone at “age 64”), and answers direct questions with a “To determine X, follow these steps: 1. Understand the Basics” template. Our user documentation had said the assistant “tells you rather than guessing”. That sentence was false and has been removed.
2.3 What that says about the corpus
None of these is exotic. They are the shapes of ordinary conversation: an offer followed by a one-word acceptance; a question whose answer depends on the previous turn; two intents that look alike on the surface; an elliptical reply; a question about the world right now. We had written six hundred scenarios about topics and almost none about shapes. The harness could run what we asked of it; the picture of the user it was fed was ours.
2.4 Where the instrument was wrong
The failures above are the model’s or the router’s. These are ours, and they cost more:
- The serving backend corrupted two rounds of measurement (part 1.5). We scoped a training round against numbers that were largely artifact. The fix was to re-measure stock on honest serving before believing any delta — and to build a canary.
- Post-training batteries launched against the wrong model. On 2026-08-12 the batteries meant to grade a trained model were started without the established preparation. A live-daemon single-instance guard stopped the in-process runner; an unpinned override then fell silently back to stock; and even a pinned text-only override would have disabled vision relative to the baseline. Caught at collection before any result was sealed; the dead-end logs are sealed instead.
- A false “evidence destroyed” claim. The same day, a report stated that two rounds’ logs had been deleted. They were in the designated archive the whole time; the author had searched two other places first. Retracted the same hour; the rule that came out of it — an absence claim requires searching the designated archive first — is now written down.
- The 35B took seven launches to train at all: four failed attempts (two out of memory, two structural) on a two-card workstation, one launch against the wrong tree, and one failed smoke test before a researched placement worked. It then trained cleanly, exported, served, and produced six measured runs — three stock, three trained — and the adapter added nothing. The null result is this round’s recipe on that model, not the machine.
- Smaller ones, kept because the pattern is the lesson: a run aborted by a timeout in a boundary reset; an identical prompt reused across runs so a real fix read as “not confirmed”; a listening-socket tool that returned an empty table on a machine with a live session; a case-sensitive glob that “proved” a package absent when its directory existed under a capital letter.
The through-line: in this arc we found the instrument broken at least as often as the model.
3. Where we are (2026-08-25)
- Shipped: the first release (R001, 2026-08-16) and a point release (R001.1, 2026-08-20): three tiers in the catalog, the 9B trained, observability on by default, a signed boot chain, and the harness documented in the tree.
- Fixed on the development branch inside a day of reading the traces: the consent turn now carries the pending question and the named place into the web search; the sunset question can no longer route to the clock; both proven red-first with her exact sentences as fixtures on the real router path. The embedding server now starts with room for its whole context, shortens an oversized input on token boundaries and says so, sends bounded requests, and is asked nothing until it reports itself ready; its health alarm states the count that fired it. Automatic requested-layer planning now uses detected graphics memory and model/projector fit when those inputs are readable, rather than the tier table; achieved offload on her laptop is where it will be measured. The model-quality floor of the 2B tier is what it is; the documentation now says so.
- The harness is being turned around. Rather than paraphrasing more topics, the next step is branch coverage per conversation shape — offer-then-consent, prior-turn context, look-alike intents, elliptical replies, live-data questions — ten to twenty variants each, generated in code. Her three days of traces are the holdout set: nothing from them becomes training data or a scenario; they are what the shapes are tested against. A fix must show red on that holdout before and green after, or the shape is not covered. This work is planned, not landed, as of this page’s date.
- The gate on a release now includes a signed record of the installed-system checks, verified against the release key before anything else is read. That is not an InterGen change; it is the same lesson applied to the release process — trust a measurement only when its provenance is checked.
4. Where we’re going
- Field data as the loop, not the gate. Every future scenario family starts from a recorded conversation shape, not from a guess. The people using the release keep producing the shapes; the harness keeps growing branch coverage over them; the traces from each release are the next release’s holdout.
- The next training round runs against the reshaped corpus, with the same rule: three runs a side, a measured noise floor, and a verdict only above it. We expect the 2B tier to stay stock under the current recipe, and to be replaced rather than trained when a better small model fits the same hardware.
- A different model for the workstation tier. The 35B model is a mixture-of-experts with about 3 billion parameters active per token, and it measured in the 2B band on system tasks. The planned candidate to replace it is a dense 27-billion-parameter model — fewer parameters in total, but every one of them works on every token. It replaces nothing until it passes its gates (native vision, license, serving support, measured speed on the same hardware, and trainability); the workstation that trained the 9B is the only machine here that can train it.
- Everything measured on real hardware, reported with what it does not prove. Each change in this project states its proven surface and its unproven residue in the same breath. This page will do the same as it grows: each section dated, each number pointing at a recorded run.
Closing, from the project’s primary maintainer
We started with our best educated guesses regarding how we thought people would interact with InterGen — how they would phrase requests, what types of things they would ask, how he would answer them. A week’s worth of real-world use and interactions later has shown us we missed half of what we were aiming for. So, this document now lives to keep the records — where we started, where we are now and how we got here, and more importantly — with measured data and known failures in hand — where we’re going. This is going to be quite the ride :)
ROCm-from-Source Build Pipeline
This is the contributor-facing companion to the user page ROCm for AMD. It describes how automated ROCm-from-source enablement is meant to be built and maintained so that it fits the rest of the distribution. The compute tier it describes is built and shipping; this page states the design constraints it is held to, and where a concrete version, package name, or build flag is not yet fixed it is flagged rather than invented.
Status. The local inference engine that ships today is built with a Vulkan GPU compute backend and an AVX2-class CPU fallback (non-native codegen so the binary runs on every supported target rather than only on the build host): on a machine with a supported GPU it accelerates through Vulkan, and it falls back to the CPU otherwise. The ROCm/HIP compute tier ships today as a mirror-only, opt-in tier (
packages/compute/, ROCm 7.2.4,llama-cpp-hipb8796;iso_include=false), while Vulkan (llama.cpp,aitier) remains the vendor-neutral ISO default. Alongside that compute tier, the graphics and diagnostics stack for AMD hardware ships in the base image and theextratier: theamdgpukernel driver and AMD firmware in the base image, Mesa’sradeonsiandradvdrivers, and anamdgpudiagnostics meta-package in theextratier. Everything below describes the rules the compute pipeline is built and maintained under.
Why this follows the same rules as everything else
InterGenOS is built from source, with pinned, checksum-verified inputs and a deterministic build. A GPU compute stack is one of the largest and most interdependent things a distribution can compile, and it is exactly the class of component where a clean compile can still be wrong at runtime: a backend that links but selects a device the hardware cannot actually drive, a runtime library omitted from a package’s file list, or a hardware-detection heuristic that picks an accelerator path on a GPU that does not support it. None of those is a compile error. Each shows up only when the artifact is installed and the engine is run on real hardware.
So a ROCm-from-source pipeline is held to the same doctrine as the rest of the build: it is not trusted on the strength of a clean compile. It earns trust by being installed and exercised on real AMD hardware, with the detection path validated on the lower-end tier that actually reproduces the awkward cases (integrated GPUs, older compute architectures). When a compute component fails to build, the cause is fixed in the source tree, not worked around: no disabling a feature to dodge a missing dependency, no stub that pretends to work, no package quietly moved to another tier to sidestep a wiring problem. See Build from Source and Contributing to InterGenOS for the broader process.
Where it sits in the lifecycle
InterGenOS is produced as a fixed, ordered build of 21 phases: validate,
verify-sources, setup, toolchain, chroot-prep, chroot-tools, core, config,
core-extra, base, kernel, desktop, extra, compute, ai, bootloader, image,
manifest, squashfs, ukis-verity, iso (with an optional publish step). GPU compute
support lives in the dedicated compute tier, built after extra and before ai.
That placement matters in two ways: the compute stack must be present before the
engine that links against it is built, and both must be in the read-only system
image before the squashfs and ukis-verity phases seal it. A backend slipped in
after the image is sealed would not be covered by the signed integrity chain.
What a from-source ROCm pipeline has to do
A correct pipeline is described by the requirements it must satisfy:
- Pinned, verified inputs. Every source component is pinned to an immutable revision and checksum-verified before use, the same as any other package. Compute stacks pull many interlocking repositories; each one is pinned independently, and a build number a tool reports is never substituted for the revision that actually produced it.
- Built into the system image, then sealed. The runtime libraries, the
device-support files, and anything the engine loads at runtime are installed
before
squashfs/ukis-verity, so they are covered by the same verified- integrity chain as the rest of the system. - Runtime libraries asserted, not assumed. The pipeline asserts that every
shared library the engine dynamically links against is actually installed and in
the right place. The present-but-unloadable defect class — the binary exists,
its libraries do not — passes a binary-only check and fails at first run, so the
package’s verify paths assert the libraries land too. (The shipped CPU engine
already does this, asserting its own
libllama/libggmlshared objects.) - Honest hardware detection. The engine selects a GPU compute path only on hardware that can run it, and falls back to the CPU build otherwise. This is validated on the hardware that reproduces the hard cases, not asserted from a capable development box.
- No silent degradation. If the GPU path is unavailable, the system says so and runs on CPU; it does not quietly ship a broken accelerator path or mask the failure. A masked failure is exactly what the security posture forbids.
The specific source repositories, revisions, and build flags are the recipes under
packages/compute/ (pinned URLs and SHAs per package).
How package counts and tiers are read
Tier contents and package counts drift between builds. The tree spans seven tiers (toolchain, core, base, desktop, extra, compute, ai) and carries over 1,000 package definitions; only two ai-tier packages ship on the ISO, with the rest of that tier mirror-only. Derive the live counts from the package tree rather than trusting a fixed number, and check the release notes for the authoritative state.
How it is maintained
When the pipeline lands, it is maintained the way the rest of the build is. A fix to a compute component is made in the source tree, never as a manual edit on a running target, and it is not done until a clean from-scratch build reproduces the corrected behavior with no manual steps. A rebuilt package can be slipstreamed onto an already-booted image for fast diagnosis, but that surgical edit must be saved to the tree and prove itself on the next from-scratch build before it counts. Because GPU and graphics paths are timing- and firmware-sensitive, detection and first-run behavior are cleared over several consecutive cold boots on representative hardware, not a single warm reboot.
How this relates to the local assistant
The accelerator exists to serve the on-device assistant. InterGen is the
tiered, hardware-detected, offline-first local assistant; it runs entirely on the
machine, sizes the model it loads to the hardware it finds, and reports no
telemetry. The opt-in llama-cpp-hip compute variant lets InterGen run larger
models faster on capable AMD hardware, beyond what the shipped Vulkan backend
already provides, while still falling back cleanly to the CPU everywhere else. The opt-in frontier-model escalation path,
Phone-A-Friend (Frontier/Cloud Escalation), is unrelated to local
acceleration; nothing about a GPU backend changes the offline-first, telemetry-
free posture of the local assistant. The same holds for the security scanner,
InterGen Sentinel: its default backends are local (Local-Rules and
Local-Qwen), with cloud providers as an explicit opt-in. Local acceleration serves
the local default; it introduces no network dependency.
Principles that govern this work
A machine you understand, can modify, and can trust is the goal, and a GPU compute stack — large, opaque, and easy to ship in a degraded state — is precisely where that is tested. The pipeline is built from source, sealed inside the integrity chain, verified on real hardware, and honest about when the accelerator is and is not available. Until those properties hold on a clean build, the GPU path does not ship, and this page does not claim it has.
See also
- ROCm for AMD (user page)
- GPU Compute overview and backend selection
- Vulkan (default, vendor-neutral backend)
- Build from Source
- Contributing to InterGenOS
- FAQ
Security Review & Advisory Process
This page describes how InterGenOS receives vulnerability reports, triages them, fixes them, and publishes advisories. It is written for contributors and for users who want to understand the discipline behind the trust chain.
Every decision below exists to give you a machine you understand, can modify, and can trust.
Project status. The first public release, R001, was published 2026-08-16; for the current release, see the main repository README. The reporting and response process described here applies to all InterGenOS code and infrastructure. Advisories published before 2026-08-16 document vulnerabilities mitigated while no public installation existed; advisories published from R001 onward state which released images and packages are affected and how to move to a fixed one.
Where the canonical policy lives
The authoritative, version-controlled policy is SECURITY.md at the repository root. This page summarizes that policy and the day-to-day process around it. When the two disagree, SECURITY.md wins. Users looking for the human-readable advisory list should also see the Security Advisories release-notes page; the broader hardening posture is covered in the Security Handbook.
Reporting a vulnerability
There are two intake channels:
- Primary: email
security@intergenstudios.com. - Alternative: open a private security advisory on the project’s GitHub repository.
Machine-readable contact information is published per RFC 9116 at https://intergenstudios.com/.well-known/security.txt.
Anonymous reports are accepted. Good-faith reporters are never retaliated against. Encrypted submissions are fully supported and encouraged; the canonical PGP fingerprint for the project’s release and encryption keys is published in the repository’s signing-key documentation, alongside the armored public key.
There is no bug bounty program at this time. Researchers are credited publicly (see Reporter credit below), but monetary rewards are not offered. This may change as the project grows.
Scope
What this policy covers:
- InterGenOS core packages and distribution artifacts
- The
pkmpackage manager and repository infrastructure - Signing keys and related trust infrastructure
intergenstudios.comweb properties
What it does not cover:
- Upstream projects InterGenOS packages (report to them directly; the project coordinates — see Upstream coordination)
- Third-party software a user installs after install
Two response tracks
Reports route into one of two tracks depending on what is at stake. The first is the ordinary software-vulnerability track. The second is reserved for the foundation of the trust chain: a signing-key compromise.
Track 1 — Software vulnerability response
Acknowledgment. Within 48 hours of receipt, the report is confirmed and triage begins.
Triage. Triage assigns a severity, which sets the fix target. Severities and their targets:
| Severity | Examples | Target (from triage) |
|---|---|---|
| Critical | remote code execution, authentication bypass, Secure Boot chain break | 14 days |
| High | local privilege escalation, cryptographic weakness | 30 days |
| Medium | denial of service, information disclosure | 60 days |
| Low | defense-in-depth gaps | 90 days, or with the following release |
Public disclosure. At fix release or 90 days from acknowledgment, whichever comes first. The 90-day cap is a deliberate safety net: unresolved vulnerabilities are not sat on indefinitely.
Track 2 — Trust-anchor compromise
A signing-key compromise is not a bug. It is a break in the foundation of trust, and the ordinary framework above does not apply. This track is dedicated and aggressive. The key-custody architecture that defends against compromise, and the user-side recovery procedure, are documented in the repository’s signing-procedure, signing-key-ceremony, and repository-trust documents.
What counts as confirmed. A confirmed compromise requires evidence, not a claim:
- (a) Direct evidence — exposure of private-key material, a device-tampering indicator, or a credential leak, or
- (b) Anomalous signature — a valid signature observed in the wild that the project did not authorize.
Mere claims route back to the standard 48-hour triage and are likely closed without action.
Response on confirmed compromise:
| Timing | Action |
|---|---|
| Immediate | Acknowledgment |
| Within 12 hours | Revocation published, new keyring package available |
| Simultaneous with revocation | Public disclosure — no embargo, no delay |
The target is that users who run pkm sync within 24 hours of the incident receive the new keyring and revoke trust in the compromised key.
Trust-anchor compromises are never embargoed. The update path is the attack when a signing key is compromised, so revocation cannot wait on convenience. If there is any doubt about key integrity, the key is revoked; re-issuing unnecessarily is preferable to leaving users exposed.
Upstream coordination
When a vulnerability lives in upstream code (kernel, systemd, glibc, and so on), the project coordinates with the upstream embargo. InterGenOS users receive the fix on the same timeline as upstream users, never later.
In practice this is the common case, because InterGenOS is built from source across seven tiers (toolchain, core, base, desktop, extra, compute, ai). The package set is large and drifts as the build evolves; derive the live count from the build manifest rather than treating any single number as permanent.
How a kernel fix actually lands
Both published advisories to date are upstream kernel issues, and they illustrate the standard pattern: a primary in-tree patch plus a defense-in-depth layer.
- In-tree kernel patch. Patches live in
packages/core/linux-kernel/patches/. The kernel package’sbuild.shapplies every*.patchin alphabetical order at configure time, so any future build picks up the fix automatically — no manual step beyond rebuilding the kernel (and the UKI, since the kernel image changed). - Defense-in-depth. Where a subsystem is rarely needed on a desktop, the affected modules are additionally blacklisted via a file under
/etc/modprobe.d/. This holds even if a patch regresses or a fallback boots an unpatched kernel. - User control is preserved. Blacklist files are plainly visible and user-editable. A user who needs the affected functionality can remove the file or load the module manually. The trade-off — convenience for a few against security for everyone — is resolved in favor of security, consistent with the security-only posture.
Mitigations take effect on the next kernel rebuild and ISO rebuild; they are not retroactively active on already-built artifacts.
Advisory content
Published software advisories include:
- CVE number (assigned via MITRE)
- CVSS score
- Affected versions
- Mitigation steps
- Patch commit reference
- Timeline (reported / triaged / fixed / disclosed)
- Reporter credit
Trust-anchor advisories instead include the fingerprint of the compromised key, the first known compromised-signature timestamp (if determinable), downstream artifacts suspected tampered, the replacement key fingerprint, verification instructions, and the incident timeline.
Where advisories are stored
Advisory source files live under docs/security/advisories/ in the repository; SECURITY.md carries a summary table of published advisories. Two advisories are published as of this writing:
- CVE-2026-31431 — “Copy Fail” (
algif_aeadlocal privilege escalation). CVSS 7.8 HIGH. Disclosed 2026-04-29; mitigated the same day. Layer 1 is the upstream kernel patch reverting the vulnerable in-place optimization in thecrypto/af_alg.cfamily; layer 2 blacklists thealgif_aeadmodule. Verified to have zero impact on dm-crypt/LUKS, kTLS/IPsec/XFRM, OpenSSL/GnuTLS/NSS, SSH, or kernel-keyring crypto, since those use the in-kernel crypto API directly rather thanAF_ALG. - IGOS-SA-2026-002 — “Dirty Frag + Fragnesia” (CVE-2026-43284, CVE-2026-43500, CVE-2026-46300). A cluster of local-privilege-escalation bugs in the kernel
sk_buffshared-fragment path, disclosed between 2026-05-07 and 2026-05-13. Mitigated with three in-tree patches plus amodprobe.dblacklist ofesp4,esp6, andrxrpc. TheCVE-2026-43500fix is an InterGenOS-authored backport, because the upstream mainline commit targets file locations that do not exist in the pinned kernel; the structurally equivalent site was located and patched innet/rxrpc/io_thread.c. The kernel version pin is binding for the R001.x release line, so the chosen path is to backport fixes rather than bump the kernel.
The second advisory is the clearest argument for the defense-in-depth layer: Fragnesia was itself proof that the first Dirty Frag patches missed a related code path. The module blacklist blocks the affected modules regardless of patch state, which is exactly the failure mode the extra layer pays for.
Reporter credit
Accepted reports are credited in the advisory and on the project’s Hall of Fame page, unless anonymity is requested. Rejected reports default to anonymity; a reporter who wants public credit for a rejected or duplicate report may request it.
See also
- Security Advisories — the user-facing advisory list
- Security Handbook — the hardening baseline and posture
- Verified Boot & Secure Boot — the signed boot chain, dm-verity, and UKI signing that the trust-anchor track defends
- Contributing to InterGenOS — how to get involved with the source tree
Localization & i18n
InterGenOS is built entirely from source, and that extends to how the system handles language, region, and translation. This page describes how localization works in the current release and how contributors can help expand it.
Today the desktop is GNOME 49 on Wayland, which carries its own mature internationalization stack. The notes below distinguish what ships today from what is open for contribution.
How localization works today
Localization in InterGenOS rides on the standard components that the from-source toolchain produces and the desktop consumes:
- Locale data comes from the C library’s locale definitions, generated at build time. Region, date, number, and currency formatting all derive from the active locale.
- The desktop environment is GNOME 49, which uses gettext message catalogs for its translations. Most user-visible GNOME strings are already translated upstream by the GNOME translation community.
- Per-application translations ship with each application package, in the catalogs that upstream provides.
Because the system is assembled package by package, the set of available languages reflects what the included packages carry. As the package set grows across the seven tiers (toolchain, core, base, desktop, extra, compute, and ai), so does the breadth of available translations.
The image ships the full set of locale definitions (several hundred under
/usr/share/i18n/locales) while only a small default set is compiled
out of the box. The installer’s keyboard-and-locale screen offers the full
definition set, writes the chosen locale to /etc/locale.conf, and compiles it
on the installed system — so a non-default locale selected at install time works
without any manual generation step.
InterGenOS-authored components
A few components are written for InterGenOS rather than pulled from upstream. These are where project-specific localization matters most:
- pkm — the package manager
- Forge — the installer
- InterGen — the tiered, hardware-detected, offline-first local assistant (built on an on-device model, with zero telemetry)
- InterGen Sentinel — the pluggable security scanner, which defaults to Local-Rules plus Local-Qwen and offers six built-in opt-in cloud providers plus a user-configured endpoint, including the Phone-A-Friend (Frontier/Cloud Escalation) path
User-facing text in these components is the highest-value target for translation work, because it is unique to the project and not covered by any upstream translation community.
Today none of the project-authored components externalize their strings — there are no gettext catalogs or message files in the package manager, the installer, or the assistant. That makes string externalization itself the first task of any translation effort for these components: the highest-value contribution is wiring a catalog mechanism in, not translating strings that are still embedded in code.
Contributing translations
There is no separate translation submission process. Translation contributions follow the same path as any other code contribution, and the general workflow from the project’s contributing guidelines applies.
- Open an issue first to discuss the language or component you want to work on. InterGenOS is maintained by a single developer, so coordinating up front avoids duplicated effort.
- Fork the repository and create a branch.
- Follow the existing code style. No surprises, no restructuring beyond the change at hand.
- Test your changes. If you cannot verify that a translation renders correctly, do not submit it. The build must remain reproducible.
- Submit a pull request with a clear description of what you translated and how you verified it.
Every commit must carry a Signed-off-by: trailer certifying the Developer
Certificate of Origin (DCO) 1.1. Add it with:
git commit -s
Pull requests whose commits are not all signed off will fail the audit workflow and cannot merge.
Translations and packages
For applications pulled from upstream, translations live with the package and
are updated when the package is updated. Package templates are the most
impactful contribution to the project, and each one lives under
packages/<tier>/<name>/ with two files:
package.yml— metadata: source URL, SHA256, dependencies, and build stylebuild.sh— the bash functionsconfigure(),build(),check(), anddo_install()
If a package’s upstream catalogs are out of date or missing a language, the right fix is usually upstream. Coordinate through an issue before changing how a package handles its own translations, so the build stays reproducible and the package stays close to its source.
The recipe format exposes no locale- or translation-specific keys — a package’s locale data is whatever its own upstream build installs. Selecting or stripping message catalogs per package would be new recipe-schema work, not an existing option.
The public-content audit
Every pull request to master is scanned by an automated public-content audit.
Translation contributions are no exception: keep host-specific paths, internal
file references, and credential-like strings out of message catalogs and commit
messages. If the audit flags a file, amend it and push again. Legitimate public
content that happens to match a flagged pattern can be added to the audit
allowlist.
What we value
The same standards that govern all contributions govern translations:
- Transparency — no hidden behavior, no surprising defaults.
- Simplicity over cleverness — if there is a simpler way to handle a string or a locale, use it.
- Tested changes — verify that text renders correctly before you submit.
These standards exist because the project’s purpose is a machine you understand, can modify, and can trust. In that posture, security is not first. It is only: translation work must never weaken the system’s integrity, and the audit and review gates apply to localized strings exactly as they apply to code.
See also
Community Notes (unverified tier)
This section holds the community-notes tier of the InterGenOS wiki. The pages here are written and maintained by the wider community rather than drawn directly from the project’s source tree, build system, or maintainer documentation. They are clearly labeled as a separate, lighter-bar tier so you always know which kind of content you are reading.
This tier still goes through review. “Lighter bar” does not mean “no bar.” It means the standard of proof is different from the verified documentation, and the distinction is made explicit on every page.
Two tiers, one wiki
InterGenOS documentation comes in two tiers:
-
Verified documentation — the rest of this wiki. These pages describe what the system actually does today, checked against the source tree, the build phases, package metadata, and the shipped behavior of the current release. When a verified page makes a concrete claim, that claim is meant to be reproducible from the system itself.
-
Community notes (this tier, unverified) — tips, walkthroughs, workarounds, hardware reports, and field experience contributed by users. These pages are useful and welcome, but they are not held to the same line-by-line ground-truth standard as the verified documentation, and they may describe a setup, version, or hardware combination that differs from yours.
The reason for the split is the project’s guiding principle: a machine you understand, can modify, and can trust. Trust depends on knowing where a statement came from. Mixing maintainer-verified facts with community experience under a single label would blur that line, so the two are kept apart and clearly marked.
What “unverified” means here
A page in this tier has been reviewed for accuracy, safety, and fit with the project’s goals, but it has not necessarily been verified against the source tree the way the core documentation is. In practice:
- The advice may be correct for the contributor’s setup and not for yours.
- A note may lag behind the current release. Package counts, defaults, and behavior drift as releases advance.
- Commands, package names, and file paths in a community note should be treated as starting points to confirm, not as guaranteed-current reference. When in doubt, cross-check against the verified documentation and the system in front of you.
Security-relevant claims get extra scrutiny. Any community note that would weaken the security posture of the system, suggest disabling integrity protections, or work around a build failure by removing functionality is rejected, the same way such a change would be rejected in code.
What belongs in the community tier
Good candidates for a community note include:
- Hardware compatibility reports and field notes (what worked, what did not, on a specific machine).
- Step-by-step walkthroughs for tasks that sit on top of the verified documentation rather than replacing it.
- Configuration recipes and customizations that respect the system’s defaults and security chain.
- Troubleshooting experience and workarounds, clearly dated and scoped to a build or hardware combination.
Content that belongs in the verified documentation instead — because it
describes core system behavior — includes the build pipeline, the package manager
(pkm), the Forge installer, the signed Secure Boot chain, dm-verity integrity,
UKI signing, and the local AI assistant. If your note is really a correction or
addition to how one of those works, it should go through the standard contribution
path so it can be verified.
What does not belong here
- Anything that weakens the security posture of the system.
- Workarounds that disable a feature or drop a dependency to dodge a build failure, instead of fixing the root cause.
- Unverified source tarballs, missing or incorrect checksums, or instructions that fetch software from untrusted origins.
- Internal development artifacts: host-specific paths, machine names, or credential-like strings. All contributions to the public repository are scanned by an automated public-content audit, and the same standard applies to wiki notes.
Current system at a glance
So community notes are read in the right context, here is what the project ships today:
- Desktop: GNOME 49 on Wayland. KDE/Plasma and switchable desktops are planned, not shipped. A community note that assumes a different desktop is describing a setup InterGenOS does not currently provide.
- Packages: the build is organized into seven tiers (toolchain, core, base, desktop, extra, compute, ai), 1000+ packages as of this writing. These counts drift between builds; derive the live number from the system rather than trusting a fixed figure in a note.
- AI: “InterGen” is a tiered, hardware-detected, offline-first local assistant built on an on-device model, with zero telemetry. “InterGen Sentinel” is a pluggable security scanner that defaults to Local-Rules plus Local-Qwen, with six built-in opt-in cloud providers (Claude (Anthropic), Gemini (Google), Copilot (Microsoft), ChatGPT (OpenAI), Grok (xAI), DeepSeek) plus a user-configured endpoint of your own. The cloud escalation path is called Phone-A-Friend (Frontier/Cloud Escalation) and is opt-in. A community note should never present any cloud provider as on-by-default.
How to contribute a note
Community notes follow the same project values as code contributions: research before writing, simplicity over cleverness, transparency with no hidden behavior, and only submitting what you can actually verify on your own machine. Contributions to the project are made under the GNU General Public License v3.0 or later, and code commits carry a Developer Certificate of Origin sign-off.
If you are not sure whether something belongs in the community tier or the verified documentation, open an issue and ask first.
Where to send a note
Two channels work today:
- Open a GitHub issue at
github.com/InterGenJLU/intergenos/issues.
Start the title with
[community-note], put the note itself in the body (Markdown is welcome), and include the hardware and InterGenOS version it applies to. Review happens in the open, and accepted notes are published here with credit to you. - Email contact@intergenos.org with the same content, if you would rather not use GitHub.
There is no direct wiki editing: every note passes the review described above before it appears. If you are not sure a note belongs here, the same two channels are the right place to ask first.
See also
InterGenOS Artwork
The visual identity of InterGenOS is built around one idea: a single blue pulse
crossing a black field. It is an ECG trace — a heartbeat — rendered in
#0099FF on black, and it recurs everywhere from the app icon to the first-boot
animation. This page collects the project’s marks, wordmarks, and wallpapers in
one place.
Using these: the logo, icon, and wordmark are the InterGenOS project’s identity — please don’t alter them or use them to imply endorsement. The wallpapers are here for InterGenOS users to enjoy on their own machines.
Logo & Icon
The icon is the pulse on a rounded-square field; the logo stretches the same pulse into a horizontal lockup. Each ships in three variants — solid (black field), transparent, and white (for dark surfaces).
App icon — full

Variants: transparent · white

App icon — simple

Variant: transparent

Logo lockup
Variants: transparent · white
Alternate logo (perspective)
Wordmark
The wordmark sets the project name in the brand type, with and without the tagline.
The pulse-and-tagline lockup — the heartbeat crossing into the wordmark over “Security is not first. It is only” — shown across the brand’s surface treatments.
Wallpapers
Brand and concept wallpaper treatments explored during the visual-identity
work. The wallpaper the installed desktop uses by default is
InterGenOS_Wallpaper_ItIsOnly.png; the image also ships Helix, Overwatch and
Pulse variants in /usr/share/backgrounds/intergenos/.
Brand wallpaper

Logo wallpaper
Pulse wallpaper

Hero

Concepts



Brand Elements
The pulse motif on its own, and the artwork that fronts the site’s 404 page.

Privacy Policy
Effective August 19, 2026 — this policy covers the InterGenOS websites (intergenos.org, wiki.intergenos.org, repo.intergenos.org) and the InterGenOS operating system together with the software we ship in it (the InterGen assistant, the Forge installer, the pkm package manager).
The short version
InterGenOS exists to put you in control of your own machine. That extends to your data: we do not collect it. The operating system contains no telemetry, no analytics, no accounts, and no tracking of any kind. Our websites use no analytics and no tracking cookies. The only data we ever see is the ordinary, short-lived server log any web server produces when you visit a page or download a file. Everything else described below happens on your machine, under your control, and never passes through a server we operate.
Our websites
When you visit intergenos.org, wiki.intergenos.org, or repo.intergenos.org, our web server records a standard access log: your IP address, the page or file requested, the time, and your browser’s user-agent string. We use these logs only to operate the sites, to investigate abuse, and to understand, in aggregate, how much the project is being used; they are routinely rotated and deleted. The sites set no tracking cookies, run no analytics or advertising scripts, embed no third-party trackers, and offer no accounts. There is nothing to opt out of, because nothing is collected beyond the logs described here.
The operating system
InterGenOS never phones home. There is no telemetry, no usage reporting, no crash uploading, no unique device identifier, and no registration. When you install software or check for updates, the pkm package manager contacts our package mirror (repo.intergenos.org) over HTTPS; the mirror sees the same standard server log as any website visit — your IP address and the files requested — and nothing more. Package downloads are verified on your machine against cryptographic signatures; no information about your system is sent to us.
Some optional proprietary applications (for example, a web browser or editor from another vendor) are provided through download helpers. These fetch the software directly from the vendor over your connection; the vendor’s own privacy policy governs that download and the software itself. We are not in that path.
The InterGen assistant
InterGen, the built-in AI assistant, runs locally on your hardware. Your conversations, files, and the assistant’s memory stay on your machine. Two features can reach the network, and both are visible and under your control:
- Web search. When you ask InterGen to search the web, your search query is sent to DuckDuckGo (html.duckduckgo.com) to retrieve results. Only the query text is sent, only when a search is actually performed, and DuckDuckGo’s privacy policy governs its handling. No search goes through any InterGenOS server.
- Optional cloud AI providers. You may connect your own API key for a third-party AI provider (such as Anthropic, OpenAI, Google, Microsoft, DeepSeek, xAI, or a self-hosted endpoint you specify). This is entirely opt-in. Your key is stored in your system keyring (GNOME Keyring via libsecret) — never in configuration files or logs — and is read only at the moment a request is made. When you use a cloud provider, the content you send it goes directly from your machine to that provider under that provider’s terms and privacy policy. We never see, relay, or store it.
What we never do
We do not sell data. We do not share data (we have essentially none to share). We do not profile you, serve ads, fingerprint devices, or buy or trade information about you. If a court order ever compelled us to produce user data, the honest answer for nearly everything described above is that the data exists only on your machine, and we cannot produce what we do not have.
Data retention
Web-server access logs (the only data we hold) are rotated automatically: logs are archived monthly and each archive is deleted after 60 days, so no access log is retained on the server longer than about three months, and most are deleted sooner. Logs pulled for analysis are destroyed after processing; what we retain long-term is aggregate statistics and records of hostile activity, not visitor logs. Nothing else is retained because nothing else is collected.
Children
Our sites and software collect no personal data from anyone, including children.
Changes to this policy
If this policy changes, the new version will be posted at this address with an updated effective date. Because the project’s design principle is no data collection, changes are expected to be rare and narrowing rather than broadening.
Contact
Privacy questions: privacy@intergenos.org. General contact: contact@intergenos.org. Or open an issue at github.com/InterGenJLU/intergenos.
InterGenOS is free software (GPL-3.0-or-later). You can read every line of what your system does — including everything this policy describes — at our source repositories.