Installing in a Virtual Machine
A virtual machine is the fastest way to try InterGenOS — to see the boot chain, the FORGE installer, and the desktop — without touching your hardware. The install is the same verified FORGE flow you would run on bare metal: the integrity gate still checks every package against the signed release manifest before anything is written to the virtual disk. A VM changes where the disk lives, not whether the system is trustable.
InterGenOS is a built-from-source Linux distribution where security is not first. It is only. That holds in a VM exactly as it does on metal — a machine you understand, can modify, and can trust.
The one setting people miss: InterGenOS is UEFI-only. It boots through a signed
systemd-stubUnified Kernel Image, and there is no legacy-BIOS path. You must enable EFI in the VM’s firmware settings or it will not boot. The per-hypervisor sections below call out exactly where.
This guide covers QEMU/KVM, VirtualBox, and VMware. QEMU/KVM is the path that can give the guest the complete trust chain — enforced Secure Boot (via OVMF firmware) and a TPM for measured boot (via swtpm) — which VirtualBox and VMware do not provide by default; a full FORGE install is verified on all three.
QEMU/KVM (libvirt / virt-manager)
On a Linux host, QEMU/KVM driven through libvirt and virt-manager is the recommended way to exercise InterGenOS’s full boot chain in a VM. Unlike the desktop hypervisors below, a libvirt guest can be given both UEFI Secure Boot (via OVMF, the EDK2 UEFI firmware) and an emulated TPM 2.0 (via swtpm) — so you can enroll a MOK, enforce Secure Boot, and see measured boot end to end, exactly as on bare metal.
Create the VM
In virt-manager → New VM, install from the InterGenOS ISO, then before finishing tick “Customize configuration before install” and set:
- Firmware — UEFI is required. Choose an OVMF Secure-Boot firmware image (for example
OVMF_CODE.secboot.fd). InterGenOS is UEFI-only; there is no legacy-BIOS path. - TPM: add a TPM 2.0 device backed by swtpm (emulated, CRB or TIS). This is what makes measured boot testable. (TPM2-sealed disk encryption is not offered by the installer in this release — see Disk Encryption & LUKS.)
- Memory: at least 4 GB; 8 GB recommended.
- CPUs: 2 or more; leave the CPU model as host-passthrough for KVM acceleration.
- Disk: 35 GB or larger. The installer requires at least 32 GiB and refuses to partition a smaller disk. (For reference, the live squashfs is about 12.8 GB and the ISO about 19.3 GB.)
- Display: the default virtio-gpu display works and auto-resizes to the viewer window.
Secure Boot and measured boot
With an OVMF Secure-Boot firmware and a swtpm TPM attached, the guest runs the same one-time MOK enrollment at first boot as bare metal (walked through in Verified Boot & Secure Boot), then boots under enforced Secure Boot through the signed shim → GRUB → UKI chain. The guest also has a TPM available for measured boot, which is what the emulated device provides; the LUKS-with-TPM2 unlock path is not offered by the installer in this release (see Disk Encryption & LUKS). This is the only one of the three hypervisors here that gives the guest both Secure Boot and a TPM by default.
The other direction — InterGenOS as the host
InterGenOS also ships this stack — QEMU, libvirt, virt-manager, OVMF, and swtpm — so an installed system can host its own VMs, including the kind of build environment InterGenOS is itself assembled in. Running VMs on an installed InterGenOS is covered in Virtualization & Containers.
VirtualBox
Verified on VirtualBox 7.x. The InterGenOS live ISO boots, the graphical FORGE installer renders, and a full install completes out of the box with the settings below.
Create the VM
In the VirtualBox New wizard and the machine’s Settings:
- Type / Version: Linux / Other Linux (64-bit).
- Firmware — EFI is required. Open Settings → System → Motherboard and tick Enable EFI (special OSes only). InterGenOS will not boot in legacy BIOS/CSM mode — the boot chain is a signed UKI with no BIOS fallback.
- Memory: at least 4 GB; 8 GB recommended for a comfortable live GNOME session and installer.
- Processors: 2 cores or more.
- Disk: a 35 GB or larger VDI. The installer floor is 32 GiB; below it, Forge will not partition. (The live squashfs is about 12.8 GB.) A SATA-attached disk works fine.
- Optical drive: attach the InterGenOS ISO as the virtual optical drive, and set the boot order optical first so the installer media boots.
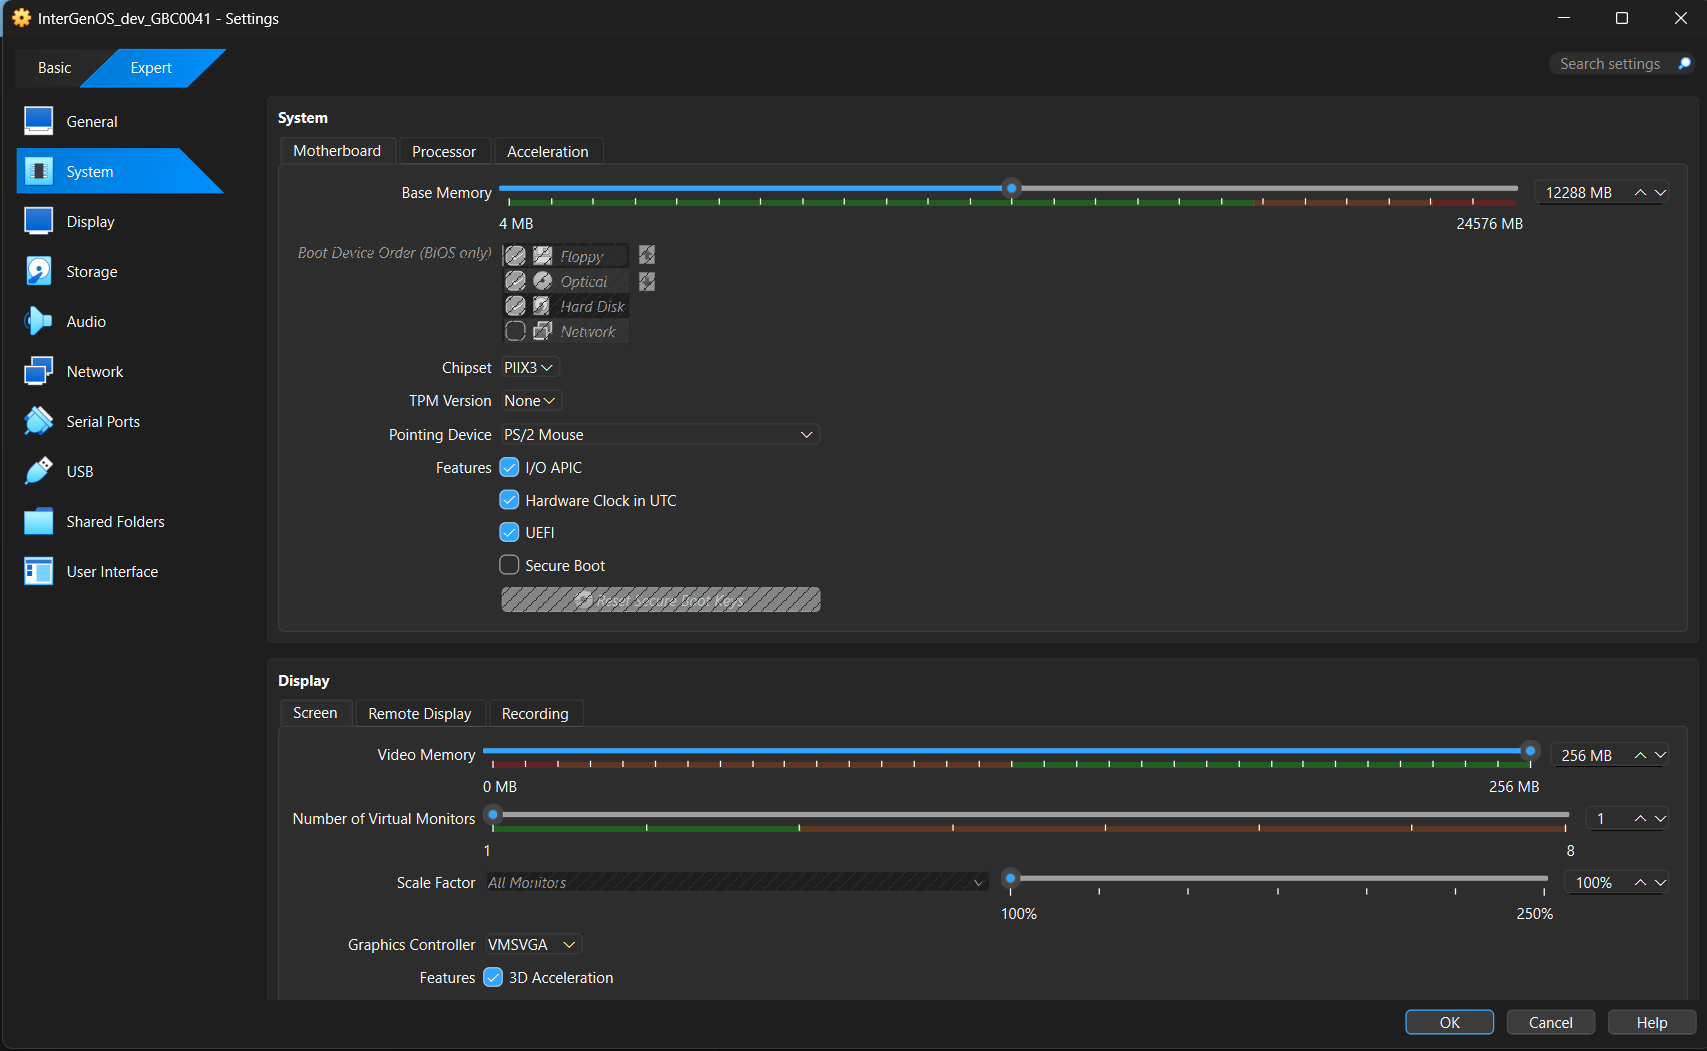
A known-good VirtualBox display configuration — System → Motherboard: UEFI enabled (Secure Boot off); Display → Screen: VMSVGA controller, 256 MB video memory, 3D Acceleration on. This is the VMSVGA alternative; for the native auto-resizing path, pick the VBoxSVGA controller instead — see Graphics, below.
Graphics — important
VirtualBox offers two display controllers, and InterGenOS now ships in-tree kernel drivers for both. Pick one of these:
- VBoxSVGA +
vboxvideo— the native path. InterGenOS compiles VirtualBox’s own native display drivervboxvideo(CONFIG_DRM_VBOXVIDEO=y) directly into the kernel. Select the VBoxSVGA graphics controller under Settings → Display → Screen and the guest bindsvboxvideo: it exposes a proper EDID and auto-resizes to the VirtualBox window with no manual resolution step — and with nothing out-of-tree. This is the native VirtualBox path; if you want resize-to-window behaviour, use it. - VMSVGA +
vmwgfx— the alternative. VirtualBox’s default controller is VMSVGA, which the kernel’svmwgfxdriver binds. That combination works — the installer and desktop render — butvmwgfxis VMware’s driver, not VirtualBox’s: on VirtualBox it produces journal noise and does not auto-resize (on a 4K host the guest can render at full 4K, so the window shows only the top-left corner). If you stay on VMSVGA, configure it deliberately:- Video Memory: raise VRAM to at least 128 MB (256 MB on a 4K host) under Settings → Display → Screen. The 16 MB default is too low.
- 3D Acceleration: turn it ON — it cuts the
vmwgfxlog noise by roughly two orders of magnitude and gives a smoother session. - Set the resolution in the guest: because VMSVGA does not auto-resize, after first boot open GNOME Settings → Displays and pick a fixed resolution such as 1920×1080. The choice persists per user, and it avoids the oversized-render / clipped-window effect on a 4K monitor.
Known issue on the
vboxvideopath: a compositor mode transition — locking the screen, logging out — can occasionally leave the display frozen on a sheared, partially-drawn frame, withgnome-shell: Cursor update failed: drmModeAtomicCommit: Invalid argumentas the only journal error. The system underneath is fully alive; this is a display-commit wedge, not a hang. Recovery is a VT switch and back — press Ctrl+Alt+F3, then Ctrl+Alt+F2 — which forces a fresh modeset and restores the session completely, with nothing lost. The trigger is not yet fully isolated; the recovery has been reliable every time it has been needed.
Do not install Oracle’s VirtualBox Guest Additions. They are a proprietary vendor blob that builds out-of-tree kernel modules, and InterGenOS’s locked-down kernel enforces module signatures — it rejects unsigned out-of-tree modules by design. You do not need them: the in-tree drivers — vboxvideo (display), plus vboxguest and vboxsf (shared folders), all compiled in — provide guest integration with nothing out-of-tree.
(The settings screenshot under “Create the VM,” above, shows the VMSVGA alternative — VMSVGA, 256 MB, 3D Acceleration on. For the native path, simply pick the VBoxSVGA controller instead; vboxvideo handles auto-resize.)
Secure Boot in VirtualBox
VirtualBox’s EFI firmware boots InterGenOS with Secure Boot disabled (Setup Mode) out of the box, and the install works fully without it — kernel integrity lockdown stays engaged regardless of Secure Boot state, so you are not running an unprotected kernel.
The full signed-boot chain (shim → GRUB → UKI) is provisioned at install regardless of the firmware’s Secure Boot state. Turning Secure Boot enforcement on is a one-time Machine Owner Key (MOK) enrollment performed at first boot — that flow is now validated end to end and walked through in Verified Boot & Secure Boot. It is not required for a working install, and measured boot additionally relies on a TPM, which VirtualBox does not provide by default.
Networking
The VirtualBox default NAT adapter works out of the box. The live installer and pkm have outbound network access — DNS resolution and a default route are present with no extra configuration. You do not need to change networking to install.
What you see when it boots
- The themed GRUB boot menu appears — Try InterGenOS, Install InterGenOS (Graphical), Install InterGenOS (Text), and Advanced options.
- The default entry boots the graphical FORGE installer: a GNOME greeter, then the FORGE wizard (Identity, Region, Disk, packages, and so on).
- You reach the “Review your choices” screen before anything is committed. Nothing is written to the virtual disk until you click Install.

The boot menu is identical in a VM. Select “Install InterGenOS (Graphical)” to follow the installer guide.
From here, the wizard is the same screen-by-screen flow documented in the FORGE Installation Guide — follow it through to first login.
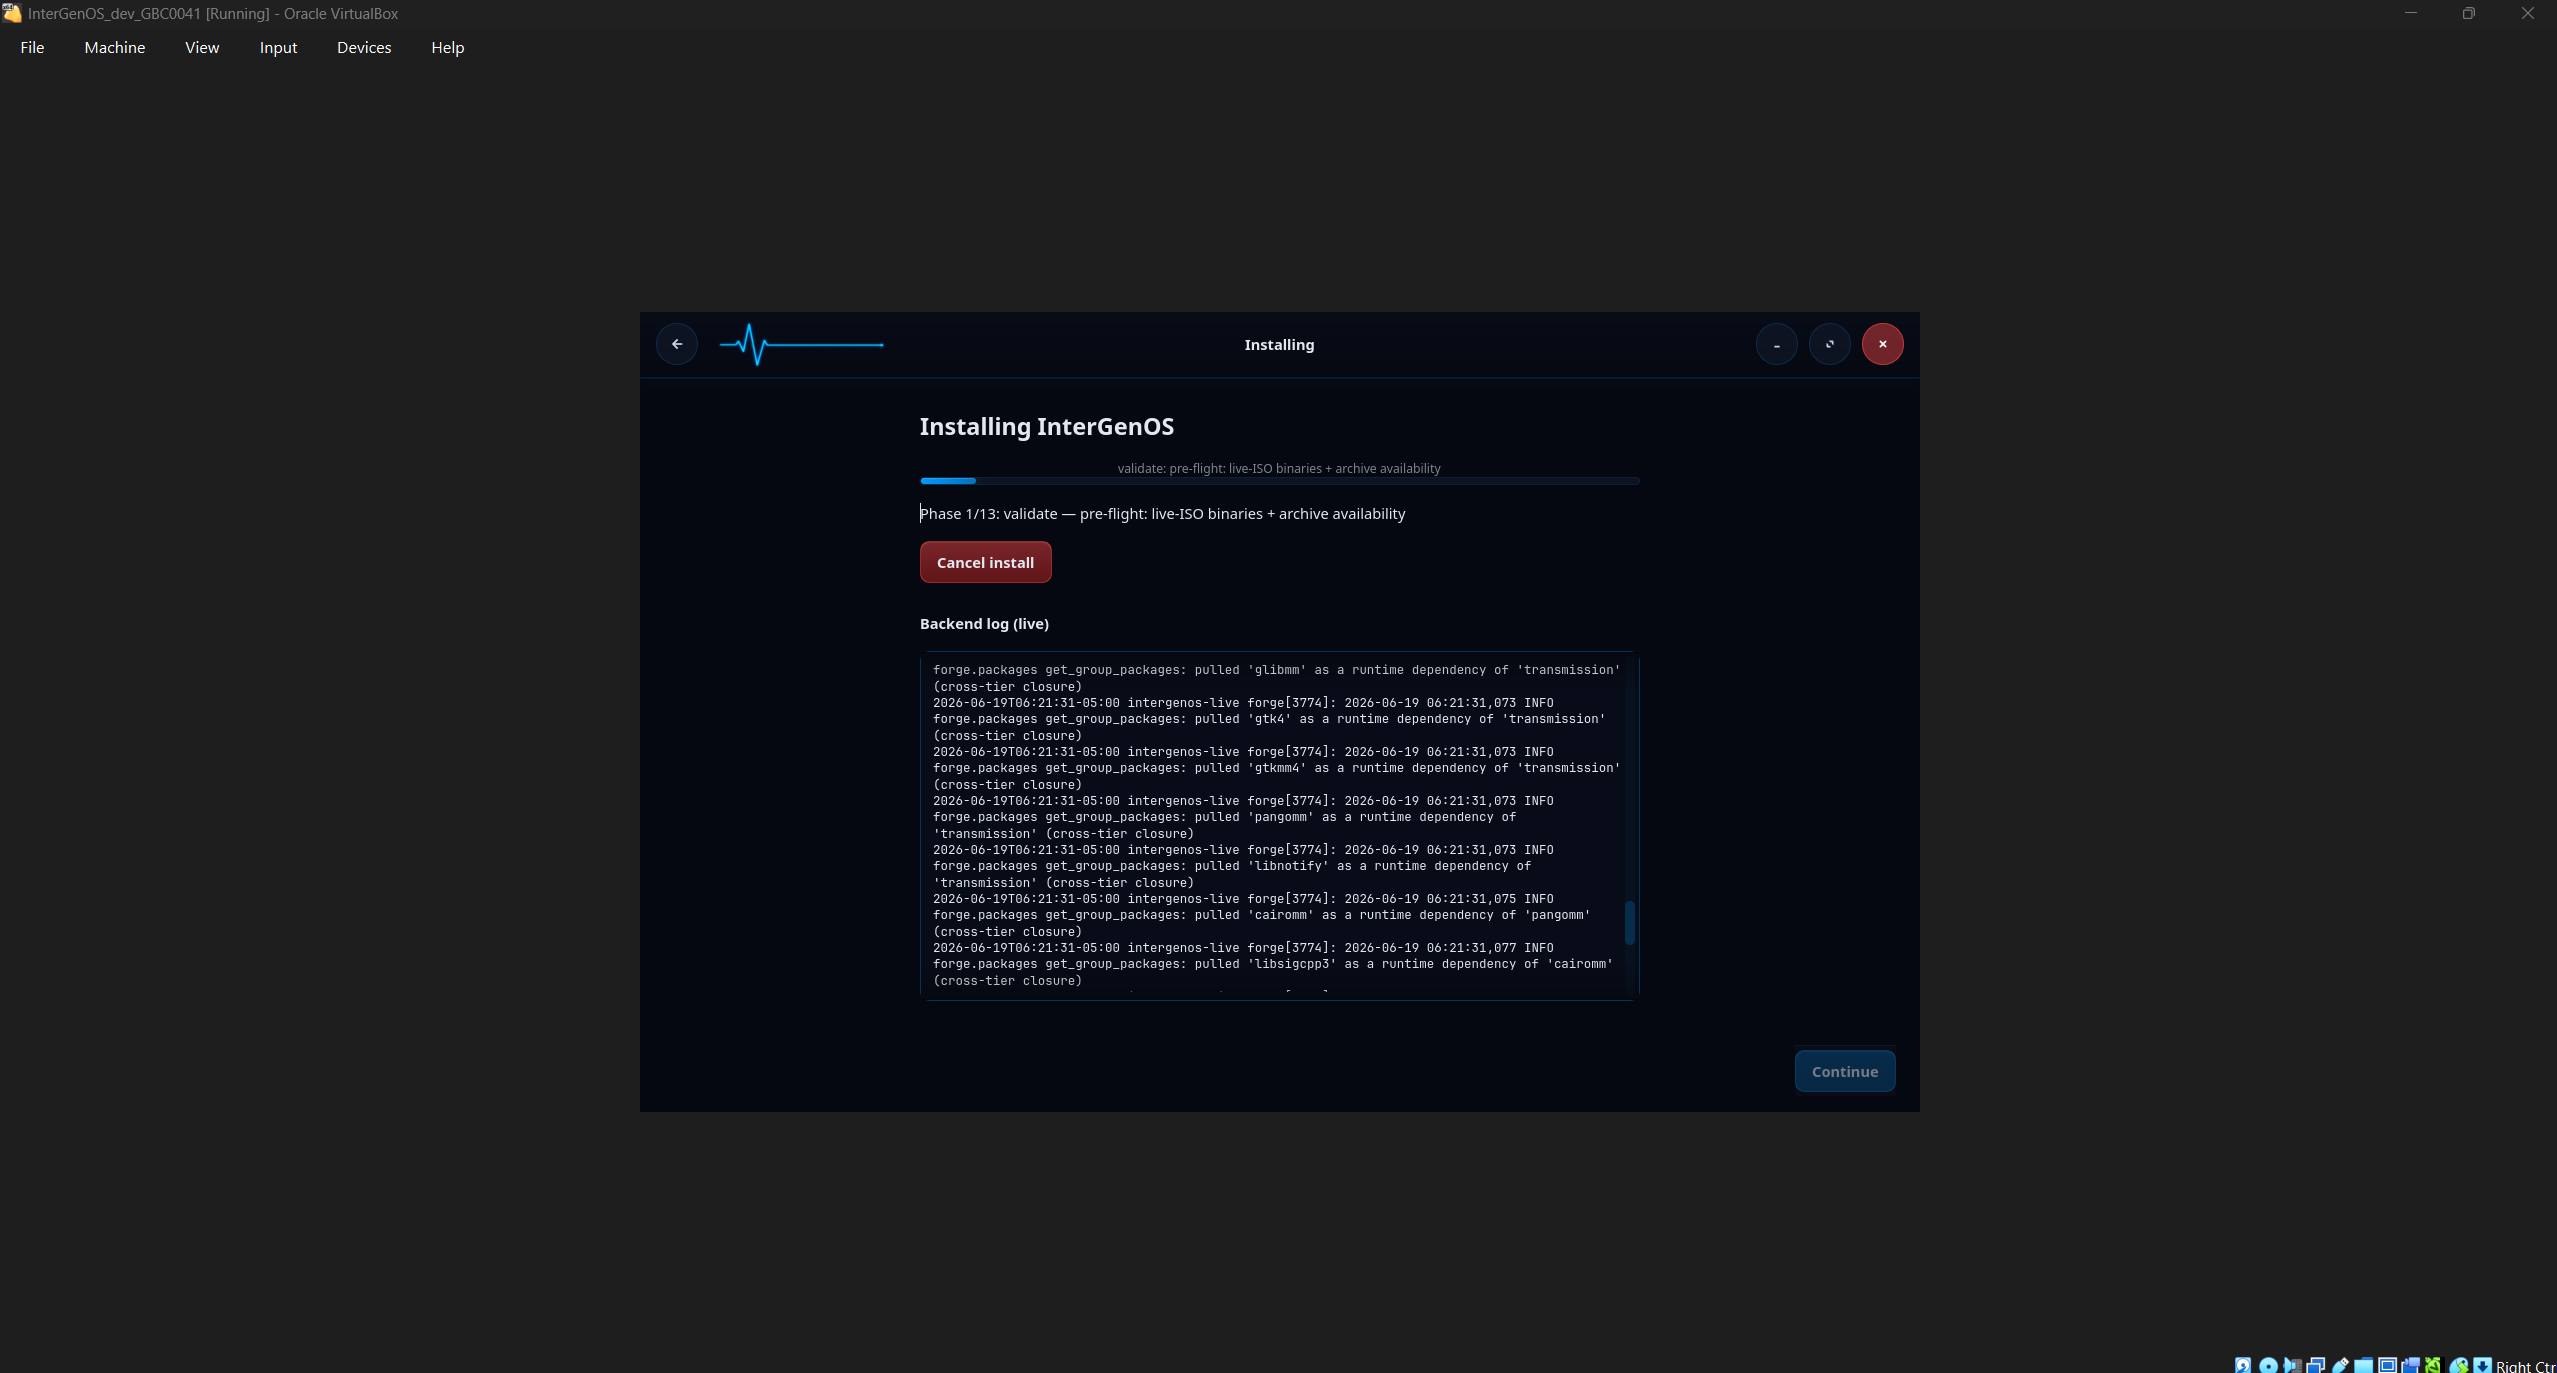
FORGE running inside VirtualBox — the VirtualBox window frame is visible around it. Here it is at Phase 1 of 13 (validate), the configuration and pre-flight phase; the SHA-256 integrity gate that checks every package against the signed manifest runs next, as Phase 2 (verify), before any disk write.
A note on journal warnings
In a VM’s live (“Try InterGenOS”) session, vmwgfx can flood the system journal with a cosmetic framebuffer error — failed to create vmw_framebuffer: -22. The display works regardless — the desktop renders fully; this is log noise, not a boot or display failure. It appears in the live session on both VirtualBox and VMware (it is not specific to either), and it has not been observed on an installed system — even when the installed desktop is driven to 4K. The trigger of the live-session flood is still being investigated; the display is unaffected either way. On VirtualBox you may also see “unsupported hypervisor” messages — those are VirtualBox-specific, because vmwgfx is VMware’s driver and VirtualBox’s SVGA emulation is not its native target. Enabling 3D Acceleration reduces the VirtualBox volume, and the in-tree vboxvideo driver — now shipping; select the VBoxSVGA controller — removes it on VirtualBox entirely (it does not use vmwgfx).
VMware
InterGenOS ships the VMware paravirtual guest drivers built into the kernel — vmwgfx (display), VMWARE_PVSCSI (paravirtual disk), and VMXNET3 (paravirtual network), all compiled in (=y). A full FORGE install on VMware Workstation Pro is verified end to end: InterGenOS boots, the graphical installer deploys every package, the signed boot chain is provisioned (MOK-signed UKI, shim/GRUB, UEFI boot entry), and you reach a healthy GNOME desktop with the local assistant running. Create the VM with EFI firmware enabled, the VMware SVGA display, and a NAT network adapter. (VMware Workstation Pro is the current product and is free for personal use; the older Workstation Player has been discontinued.)
Secure Boot has been validated end to end: with the MOK enrolled, InterGenOS boots under enforced Secure Boot through the signed shim → GRUB → UKI chain, with the kernel in integrity lockdown and refusing unsigned modules — the single-frame proof is on the Security Verification page. The installed GRUB now carries the SBAT record the signed shim requires, so the chain Secure-Boots natively — the earlier 0x1A Security Violation when enabling Secure Boot is resolved. Enabling enforcement is a one-time Machine Owner Key (MOK) enrollment at first boot (walked through in Verified Boot & Secure Boot); it is not required for a working install, and measured boot additionally relies on a TPM, which VMware does not provide by default.
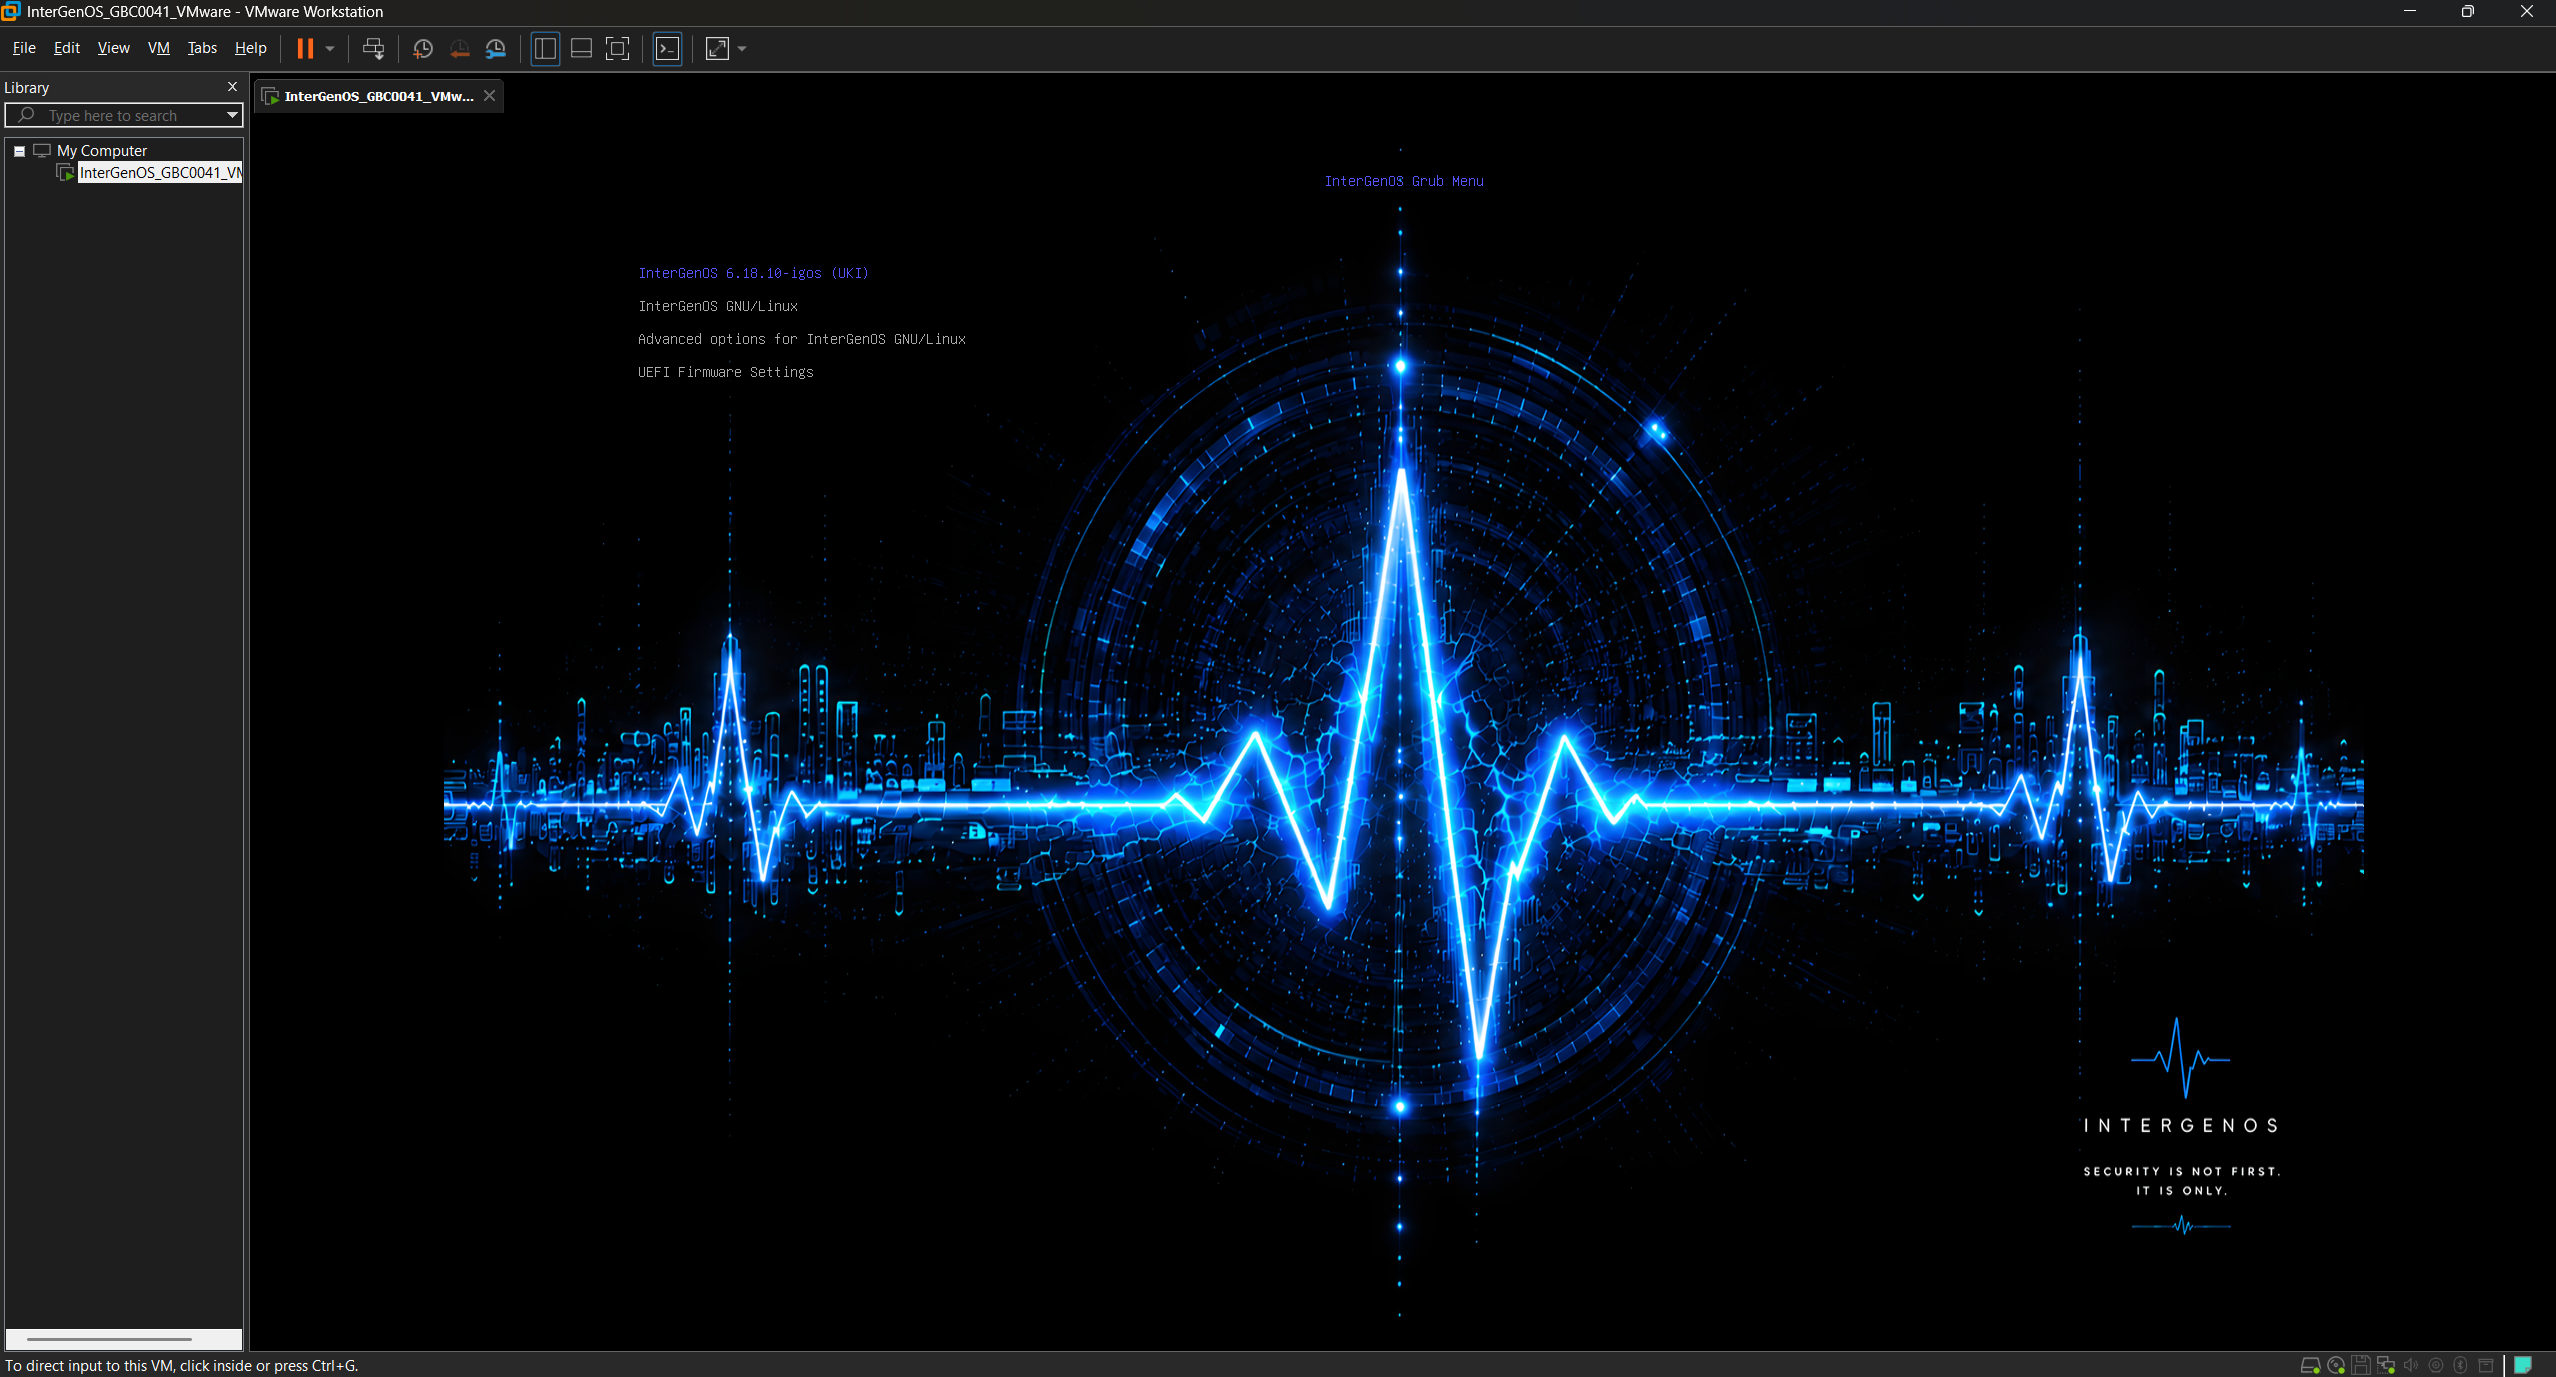
The branded boot menu inside VMware Workstation Pro — the VMware window frame confirms it is running as a guest.
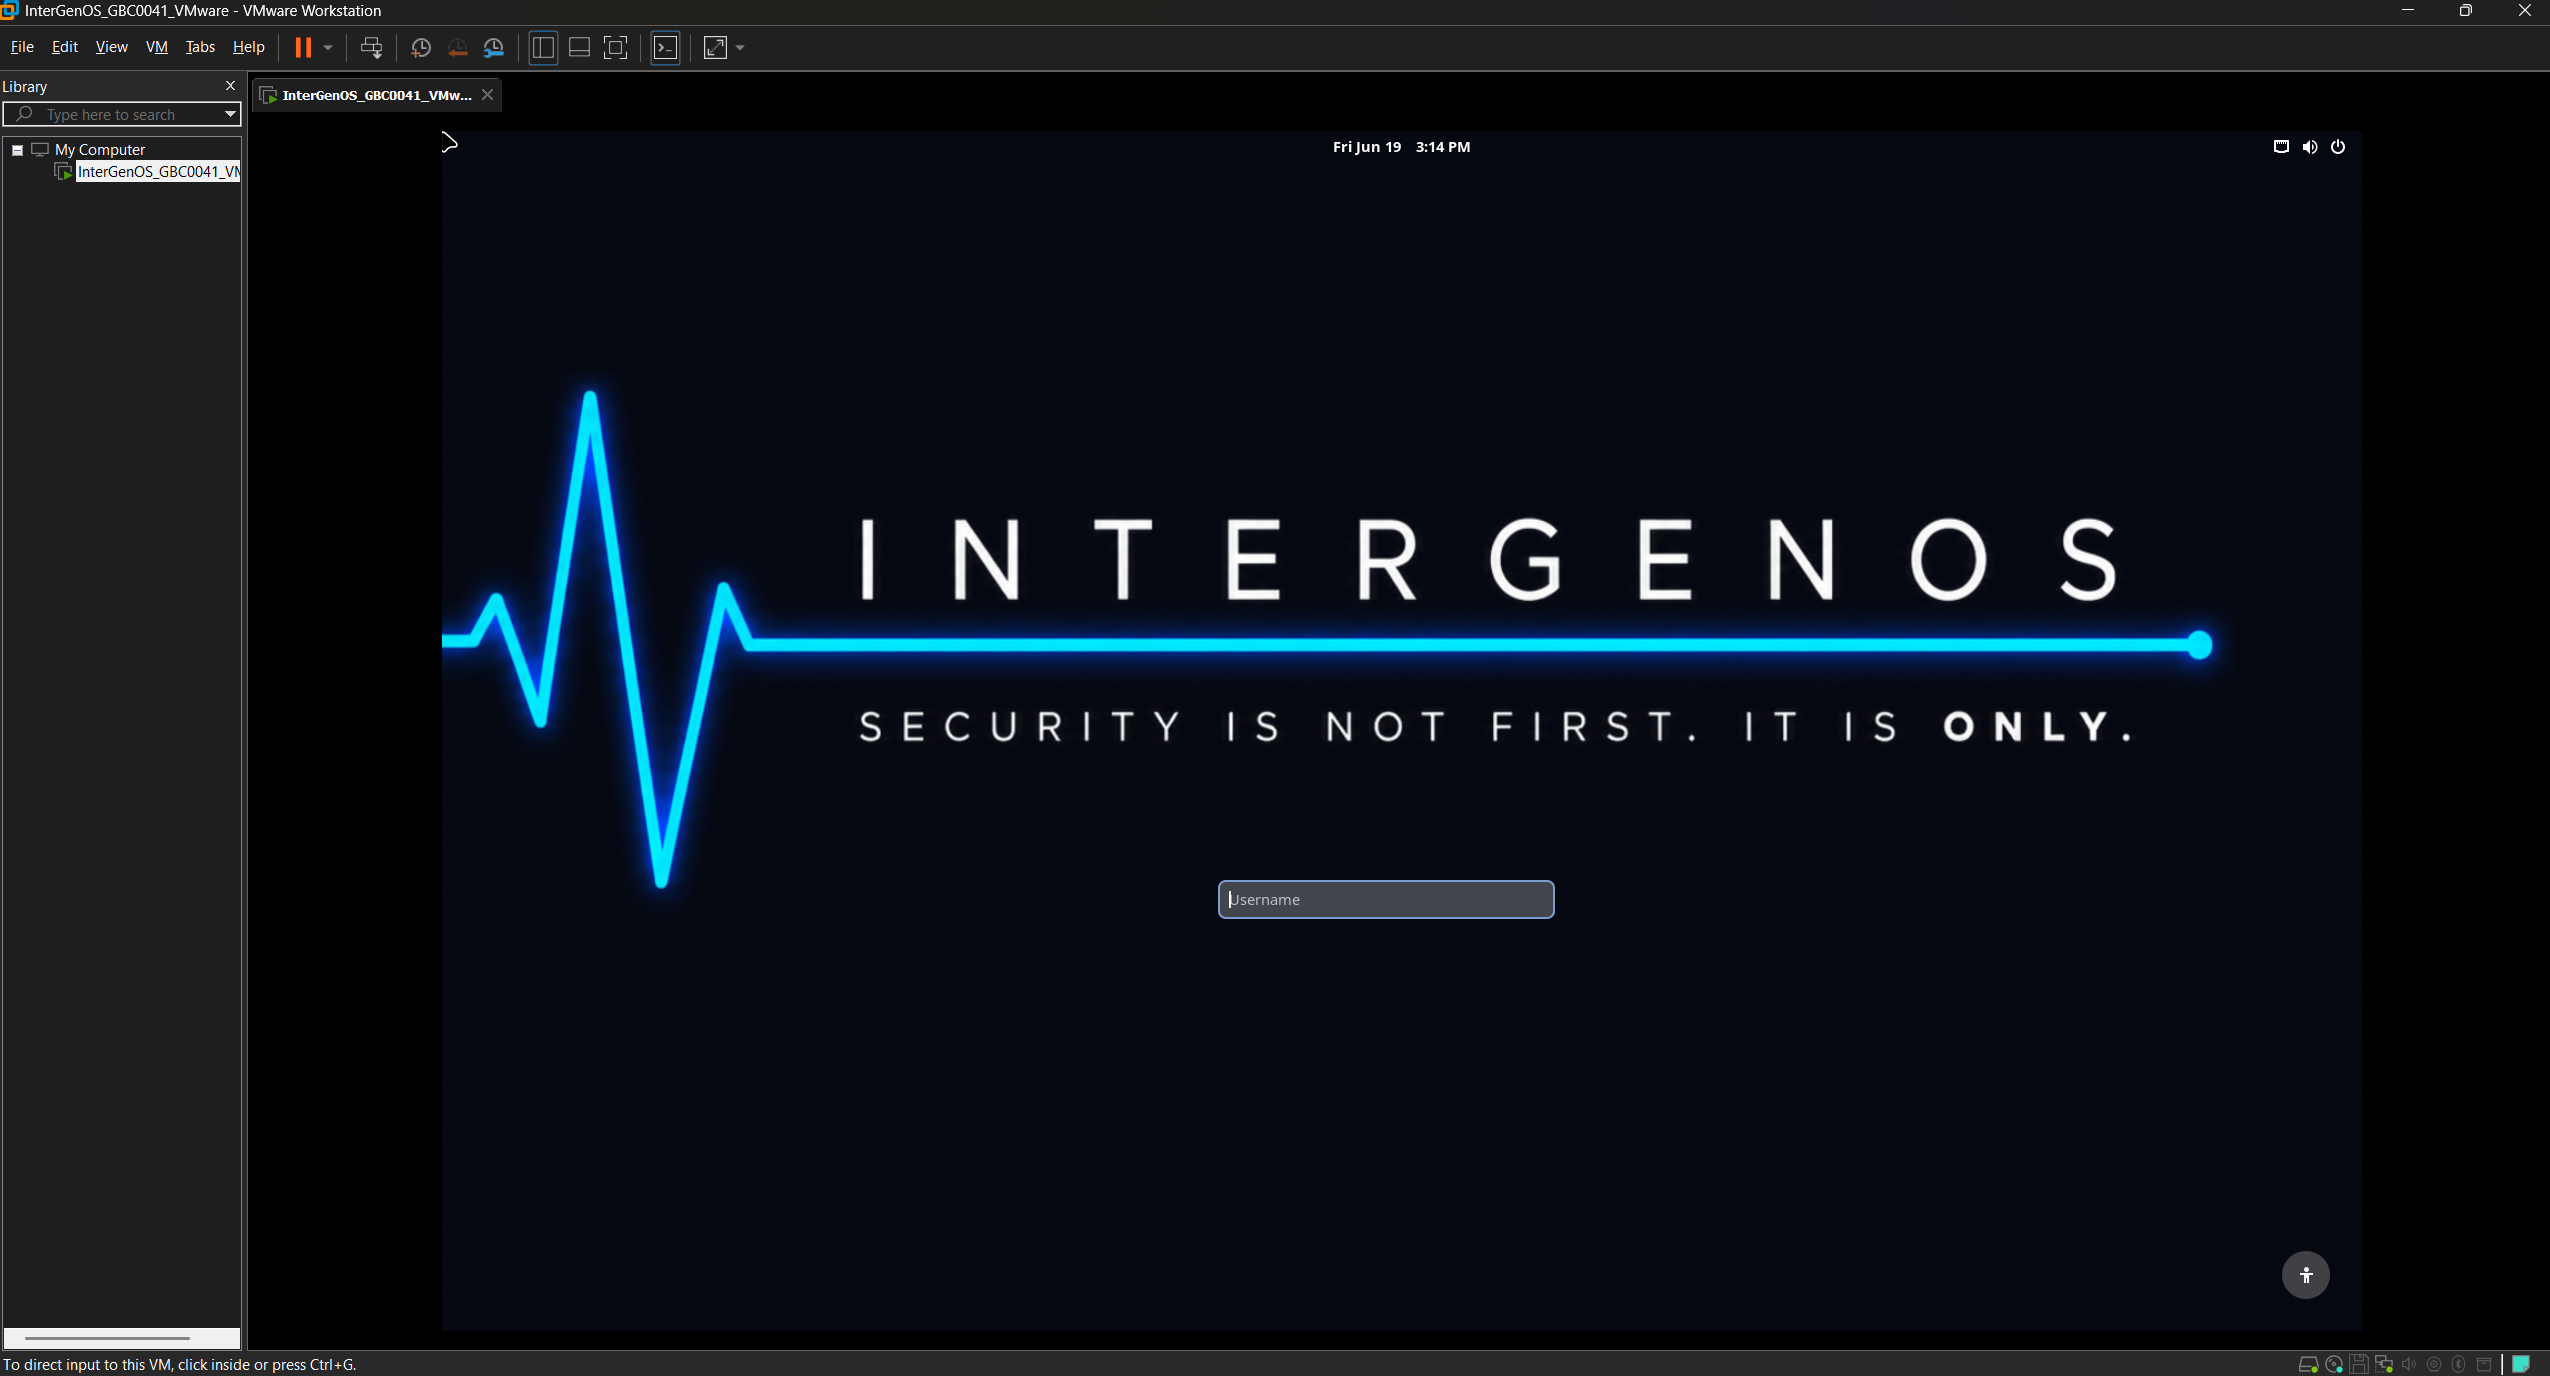
The greeter inside VMware, correctly scaled out of the box. VMware’s SVGA exposes a proper EDID, so GNOME derives the display DPI and scales the session on its own — no manual resolution step, unlike the VirtualBox case above.
For guest integration (dynamic resize, time sync, graceful shutdown), the InterGenOS path is open-vm-tools — the open-source VMware guest tools (vmtoolsd), built from source — not the bundled “VMware Tools” installer. That bundled installer is a vendor package that builds out-of-tree modules the locked-down kernel rejects (the VMware analog of VirtualBox’s Guest Additions).
On the display log, see the note above: the cosmetic vmwgfx -22 flood appears in the live session (on both hypervisors), was not observed on the installed system, and does not affect the display.
See also
- FORGE Installation Guide — the screen-by-screen installer walkthrough the VM boots into.
- Verified Boot & Secure Boot — the MOK and signed-boot model, including enrolling Secure Boot.
- Per-Device Install Notes — bare-metal hardware guidance.
- Troubleshooting: Boot & Graphical Issues — if the VM does not reach the installer.